
Cleaning under your refrigerator can feel like a big chore, especially if you’re not sure where to start. Many people wonder about How to Clean Under the Refrigerator Without Moving It because it seems tricky to reach. You might worry about dirt and dust bunnies gathering there, but don’t stress!
We’ll walk through simple steps to get it sparkling clean without the hassle of moving the heavy appliance. Get ready to make that space fresh and tidy with this easy guide.
Tackling the Underside: Why It Matters
Keeping the area beneath your refrigerator clean is important for a few good reasons. It’s a spot that often gets overlooked, but dust, pet hair, and even food bits can accumulate there. This build-up can affect how well your fridge runs and even lead to unpleasant smells.
Plus, a clean under-fridge space contributes to better air quality in your kitchen. This section will explain why this often-ignored area needs attention and the benefits of keeping it clean, even when moving the fridge is a challenge.
The Hidden Dust Bunnies
Dust bunnies are fluffy collections of dust, hair, and fibers that love to hide in hard-to-reach places. Underneath the refrigerator is a prime nesting ground for them. These bunnies are not just unsightly; they can clog air vents and reduce the efficiency of your fridge’s cooling system.
Over time, this can make your appliance work harder, use more energy, and potentially shorten its lifespan. Regular cleaning helps prevent this build-up from becoming a bigger problem.
- Airflow Obstruction: Dust and debris can block the vents underneath your refrigerator. This makes it harder for air to circulate properly. The fridge has to work more to cool, which uses more electricity.
- Pest Attraction: Crumbs and spilled food can attract insects or rodents to the area under your fridge. This is unsanitary and can lead to bigger pest problems in your kitchen.
- Odor Trapping: Spills or mold can grow in the dark, often damp environment under the fridge. These can cause bad smells that spread throughout your kitchen.
Efficiency Boost
A clean refrigerator works better. When the coils and vents underneath are free of dust and debris, the fridge can cool more effectively. This means it doesn’t have to run as often or as hard to maintain the desired temperature.
An efficient refrigerator uses less electricity, saving you money on your energy bills. It also helps the appliance last longer by reducing strain on its components. So, a little cleaning effort can have a big impact on performance and cost.
Keeping It Fresh
Nobody wants their kitchen to smell like old food or dust. The area under the refrigerator can trap odors from spills or accumulated grime. Cleaning it regularly helps eliminate these smells, keeping your kitchen smelling fresh and clean.
It’s a simple way to improve the overall atmosphere of your home. A clean space also feels more pleasant and hygienic, which is always a good thing.
Getting Started: Tools and Prep
Before you begin cleaning, gathering the right tools will make the job much easier. You don’t need fancy equipment, just a few common household items. Having everything ready beforehand means you can tackle the task without interruption.
This part of the guide will cover what you need and how to prepare your cleaning area safely.
Essential Cleaning Supplies
You will need a few simple things to get the job done. A broom or vacuum cleaner with a crevice tool is good for initial dust removal. You’ll also want a damp cloth or sponge and a mild all-purpose cleaner.
For tougher spots, a long, flat tool like a paint scraper or a thin cutting board can help. Don’t forget some trash bags for any debris you find. Having gloves can also be helpful to keep your hands clean.
- Vacuum Cleaner with Crevice Tool: This is great for sucking up loose dust, pet hair, and small debris. The crevice tool helps reach into tight spots.
- Broom and Dustpan: A stiff broom can help sweep out larger debris, and a dustpan will catch it. This is a good first step before vacuuming.
- Damp Cloth or Sponge: For wiping down surfaces and removing stuck-on grime. Make sure it’s not too wet to avoid water damage.
- All-Purpose Cleaner: A gentle cleaner will help disinfect and remove stains. Avoid harsh chemicals that could damage refrigerator parts.
- Long, Flat Tool: Something like a thin ruler, a stiff piece of cardboard, or a plastic spatula can be used to gently scrape or push debris out from under the fridge.
- Gloves: To protect your hands from dirt and cleaning solutions.
- Trash Bags: To easily dispose of all the collected dirt and debris.
Safety First!
Safety is key when cleaning around any appliance, especially one that uses electricity. Always unplug the refrigerator before you start cleaning. This prevents any electrical hazards.
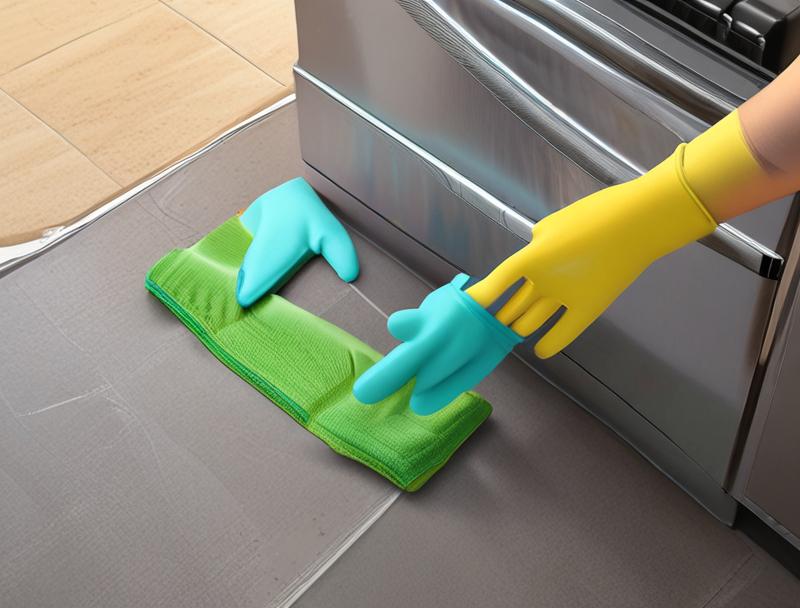
Also, be mindful of the power cord. Make sure it doesn’t get damaged during the cleaning process. Wear gloves to protect your skin and consider wearing a mask if there’s a lot of dust.
Avoid using too much water, as excess moisture can be harmful to the appliance’s electrical components.
- Unplug the Appliance: This is the most crucial safety step. Locate the power cord and unplug it from the wall outlet before you begin any cleaning.
- Protect the Power Cord: Be careful not to snag, cut, or damage the power cord while cleaning. Ensure it remains in good condition.
- Ventilation: If using cleaning sprays, make sure the area is well-ventilated. Open a window or turn on a fan to circulate fresh air.
- Handle Cleaning Solutions Carefully: Read the labels on your cleaning products and follow any safety instructions. Keep them out of reach of children and pets.
The Step-by-Step Cleaning Process
Now that you have your tools and have prepared safely, it’s time to clean! This process breaks down how to effectively clean under your refrigerator without needing to move it. We’ll cover different methods for different levels of dirt and grime, ensuring you can achieve a sparkling result with simple steps.
Step 1: Remove Anything Stored Underneath
Some refrigerators have drawers or even just space underneath where people store things. Before you start cleaning, take out anything that’s currently under there. This might include spare water filters, cleaning supplies, or even just boxes of food.
Having this space clear will give you better access to the floor underneath. It also allows you to clean those items themselves if they’re dusty.
This is also a good time to check the condition of any items you find. If anything looks old, expired, or damaged, dispose of it properly. Make sure you have a designated spot to place these items temporarily so they don’t get in the way while you’re cleaning the floor.
This simple first step makes all the difference for efficient cleaning.
Step 2: Initial Dust and Debris Removal
Start by using your broom or vacuum cleaner with the crevice tool. Gently sweep or vacuum the accessible areas under the fridge. Focus on getting as much of the loose dust, hair, and crumbs as possible.
If you have a shop vac, that can be very effective for sucking up larger amounts of debris. Be careful not to push too much dust further back where it will be harder to reach.
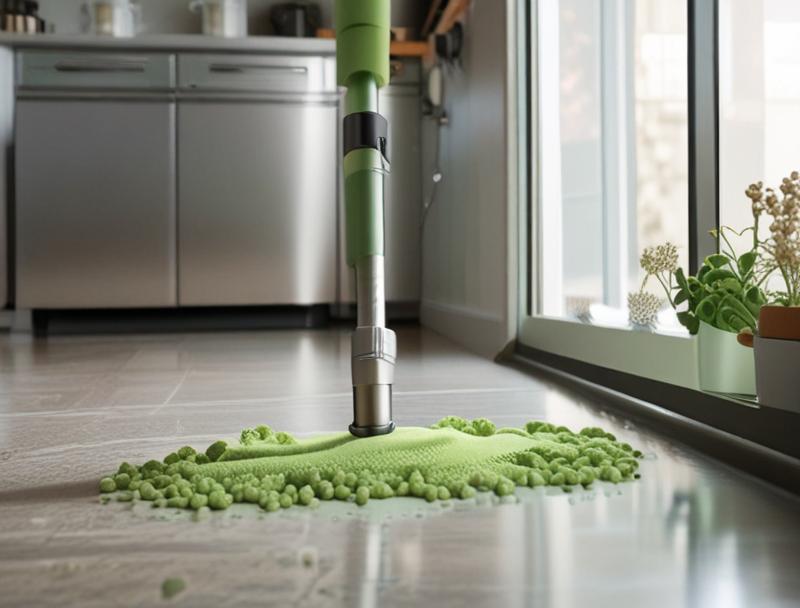
For areas where the vacuum or broom can’t quite reach, you can use your long, flat tool. Gently slide it under the fridge and try to coax any visible clumps of dust or debris towards an area where you can vacuum them up. Think of it as herding the dust bunnies into a corner for easier removal.
Step 3: Wiping Down the Floor and Undercarriage
Once the loose debris is gone, it’s time for a more thorough clean. Dampen your cloth or sponge with your all-purpose cleaner. Gently wipe down the floor directly under the refrigerator.
If there are any sticky spots or dried spills, use a little more pressure or let the cleaner sit for a moment before wiping. You can also use the damp cloth to wipe down any visible parts of the refrigerator’s undercarriage that are exposed.
For stubborn grime that won’t come off with a simple wipe, you can use the long, flat tool again. Wrap the damp, soapy cloth around the end of the tool. This allows you to reach further and apply a little more scrubbing power without getting your hand dirty or directly reaching into tight spaces.
Always wipe in a way that pulls the debris out, rather than pushing it further in.
Step 4: Dealing with Stubborn Grime and Hidden Spots
Sometimes, there are really tough spots or areas that are extremely hard to reach. If you find dried food or sticky residue, you might need a bit more effort. You can try gently scraping these areas with your flat tool, making sure not to scratch the floor or the appliance.
Another trick is to use an old toothbrush with some cleaning solution for tight corners.
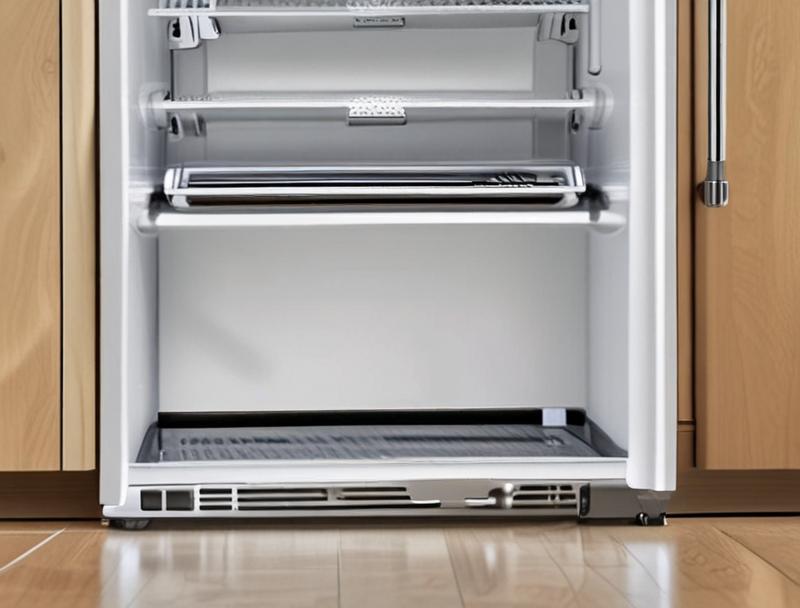
For very dusty coils, if they are accessible, you might want to use a soft brush attachment on your vacuum. Be very gentle with the coils. Over time, dust build-up on refrigerator coils can significantly impact its efficiency.
This is one of the most beneficial cleaning tasks you can perform for your appliance’s health. If the coils are very hard to reach without moving the fridge, focus on the accessible areas and consider professional cleaning if it becomes a major concern.
Step 5: Final Sweep and Reassembly
After you’ve wiped and scrubbed, do one final sweep or vacuum of the area to catch any remaining dust or debris. Make sure the floor is dry. If you used a lot of water, you might want to dry it with a clean, dry cloth.
Once everything is clean and dry, you can put back any items you removed from underneath. Plug the refrigerator back into the power outlet. You’ve successfully cleaned under your refrigerator without moving it!
Maintaining a Clean Space: Easy Habits
Keeping the area under your refrigerator clean doesn’t have to be a big, occasional task. By adopting a few simple habits, you can prevent major build-up and keep things tidy year-round. This section will offer tips and tricks for easy maintenance that requires minimal effort but yields great results.
Regular Check-Ins
Try to do a quick visual check under your refrigerator once a month. You don’t need to do a full clean every time. Just a quick look can help you spot any new dust bunnies or spills before they become a problem.
If you see a small amount of dust, a quick vacuum with the crevice tool is usually all that’s needed.
- Monthly Dusting: Even a quick pass with a vacuum cleaner’s hose attachment can make a huge difference.
- Immediate Spill Cleanup: If you notice any spills on the floor near the fridge, wipe them up right away. This prevents them from seeping underneath.
- Pet Hair Management: If you have pets, vacuuming the kitchen floor regularly will help reduce the amount of hair that gets under the fridge.
Using Mats or Liners
Consider using a refrigerator mat or liner underneath your appliance. These mats are designed to catch spills and dust, making cleanup much easier. They also protect your floor from any leaks or condensation.
When it’s time to clean, you can often just remove the mat, wash it, and put it back. This is a great way to keep the actual floor underneath cleaner for longer.
Some liners are made of durable plastic, while others are made of absorbent material. Choose one that fits your needs and the space under your fridge. Make sure the liner doesn’t block any necessary air vents.
This simple addition can save you a lot of effort in the long run.
When to Consider a Deeper Clean
Even with regular maintenance, there might be times when a deeper clean is necessary. If you notice your refrigerator starting to make strange noises, running less efficiently, or if you detect odors, it might be time for a more thorough cleaning session. This is especially true if you have pets or live in a dusty environment.
A deep clean every six months to a year can help ensure your appliance runs smoothly.
A deep clean would involve the more detailed steps outlined earlier, ensuring all accessible areas are thoroughly cleaned. It’s about being proactive rather than waiting for a problem to arise. Think of it as a tune-up for your kitchen appliance.
Frequently Asked Questions
Question: Do I really need to unplug my refrigerator?
Answer: Yes, absolutely. Unplugging the refrigerator is a critical safety step. It prevents any risk of electric shock while you are cleaning around the appliance and its electrical components.
Question: What if the dirt is really packed under there?
Answer: If the dirt is very packed, you can use a long, flat tool like a ruler or a thin spatula to gently loosen it. Then, use a vacuum cleaner or broom to sweep it out. For very tough spots, you can wrap a damp cloth around the tool.
Question: How often should I clean under my refrigerator?
Answer: It’s good to do a quick check once a month. A more thorough cleaning, like the one described, can be done every six months to a year, or more often if you have pets or notice a lot of dust build-up.
Question: Can I use a strong chemical cleaner?
Answer: It’s best to use a mild, all-purpose cleaner. Strong chemicals could potentially damage the refrigerator’s components or leave behind fumes that could get into your food. Always follow product instructions.
Question: What if I can’t reach certain spots?
Answer: If you truly cannot reach certain areas without moving the fridge, focus on cleaning what you can access safely. For very difficult spots, consider professional cleaning services or consult your refrigerator’s manual for advice.
Wrap Up
You’ve learned simple, effective ways to clean under your refrigerator without the heavy lifting. By using common household items and following a few easy steps, you can tackle dust and grime. Keep up with regular quick checks to maintain a fresh, healthy kitchen space.
Your appliance will thank you for it!