
Grease on kitchen walls can feel like a tough puzzle, especially for those just starting out in their own homes. Splatters from cooking can build up over time, making it hard to see the nice paint underneath. Many people wonder about the Best Way to Clean Grease Off Kitchen Walls without making a bigger mess or damaging their surfaces.
Don’t worry, it’s not as tricky as it sounds! We’ll walk through a simple, step-by-step plan to get those walls looking fresh again. Stick around to see how easy it can be.
Making Kitchen Walls Shine: The Best Way to Clean Grease Off Kitchen Walls
Keeping your kitchen walls clean from grease splatters is a common goal for many homeowners and renters. Over time, cooking activities like frying, sautéing, and baking can release tiny oil particles into the air. These particles settle on surfaces, including your kitchen walls, creating a sticky, often dull film.
For beginners, tackling this greasy buildup can feel overwhelming. They might worry about using the wrong cleaning product, which could damage paint, or making the grease spread even further. This guide aims to simplify the process, offering clear, easy-to-follow steps and practical advice to restore your kitchen walls to their former glory without stress or special tools.
Why Grease Sticks to Kitchen Walls
Grease is made up of fats and oils. When you cook, especially at high temperatures, these oils atomize, meaning they break down into tiny droplets that become airborne. These microscopic droplets then travel through the air in your kitchen and land on surfaces.
Because oil and water don’t mix well, this airborne grease tends to stick to walls rather than just evaporating. Over time, these layers build up, trapping dust and dirt, which makes the walls feel sticky and look grimy. The heat from cooking also helps the grease bond more firmly to the wall surface, making it harder to remove with just water.
-
Oil composition: Grease contains fatty acids and other lipid compounds that are inherently sticky. These molecules have a natural affinity for bonding with many common wall finishes.
-
Heat activation: Cooking processes, particularly those involving high heat like frying or searing, can slightly soften and vaporize oils. This makes them more prone to aerosolizing and spreading throughout the kitchen environment.
-
Surface adhesion: Once airborne, these fine oil droplets land on wall surfaces. The combination of their sticky nature and the slight tackiness that develops on the wall creates a durable bond, especially when layers accumulate over time.
Understanding Different Wall Finishes
Not all kitchen walls are the same, and knowing your wall’s finish is key to cleaning it properly. The most common finishes are latex paint (often called latex or acrylic) and oil-based paint. Latex paint is water-soluble and flexible, making it generally easier to clean.
However, it can be sensitive to harsh scrubbing or strong chemicals. Oil-based paint is more durable and resistant to stains and scrubbing, but it can yellow over time and requires different types of cleaners. Other finishes like wallpaper or special textured paints need even more delicate handling.
Using the wrong cleaner or too much force on the wrong finish can lead to peeling paint, color fading, or permanent marks, which is why identifying your wall type is the first important step.
-
Latex paint: This is a water-based paint that is popular for its ease of use and cleanup. It’s also more flexible, which means it’s less likely to crack. However, it can be susceptible to damage from abrasive cleaners or excessive rubbing, potentially leading to a dull finish or color loss.
-
Oil-based paint: This type of paint is known for its hard, durable finish that resists stains and can withstand more rigorous cleaning. It’s often used in high-traffic areas. The downside is that it can take longer to dry, has stronger fumes, and may require mineral spirits for cleanup, which can be harsher.
-
Other finishes: Some kitchens might have wallpaper, which can be delicate and easily damaged by moisture or harsh cleaners. Textured walls or specialized finishes also require specific care to avoid altering their appearance or integrity.
Simple Solutions for a Greasy Kitchen: The Best Way to Clean Grease Off Kitchen Walls
Finding the Best Way to Clean Grease Off Kitchen Walls often comes down to using common household items that are effective yet gentle. Many people mistakenly think they need strong, specialized chemicals, but often, everyday ingredients can do the job beautifully. The goal is to break down the grease without stripping the paint or leaving streaks.
This section will guide you through easy-to-find cleaning agents and the right techniques to apply them. We’ll cover everything from preparing your workspace to the actual cleaning process, ensuring you achieve a sparkling finish with minimal effort and common supplies.
Gentle Cleaning Agents That Work
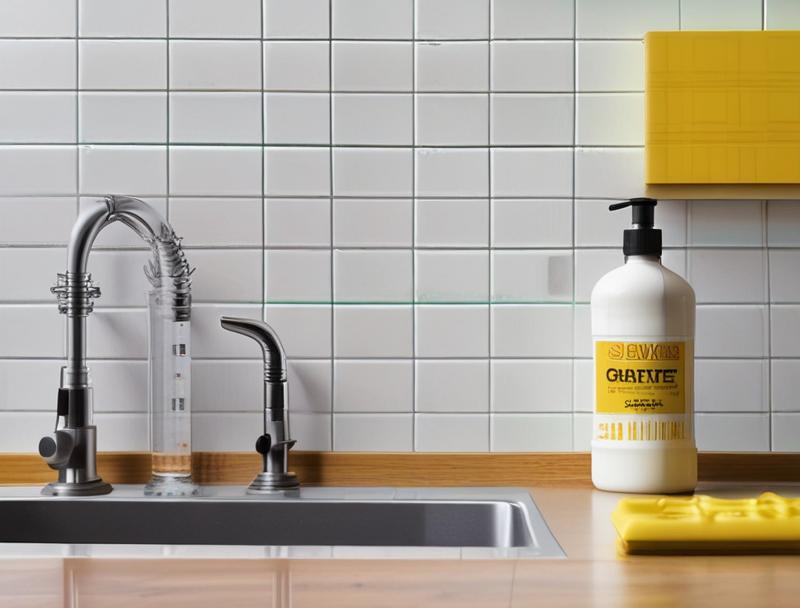
For most kitchen walls, especially those painted with latex paint, gentle cleaning agents are the safest bet. One of the most effective and readily available options is dish soap. Yes, the same soap you use to wash your dishes is designed to cut through grease.
A few drops in warm water create a powerful yet mild cleaning solution. Another excellent choice is baking soda. When made into a paste with water, it acts as a mild abrasive that can lift stubborn grease without scratching surfaces.
White vinegar, diluted with water, is also a fantastic degreaser and disinfectant. Its acidity helps to break down oily residues. These common kitchen staples are not only effective but also much safer for your family and the environment compared to harsh chemical cleaners.
-
Dish soap: Liquid dish soap is formulated to emulsify grease, meaning it breaks it down into smaller particles that can be easily rinsed away. It’s mild enough for most painted surfaces and readily available in almost every home.
-
Baking soda: This is a natural mineral that has a slightly gritty texture. When mixed with water to form a paste, it can gently scrub away grime and grease without scratching the paint, acting as a very light abrasive.
-
White vinegar: This common household item is acidic, which helps it to cut through grease and grime effectively. It also has natural disinfectant properties and can help deodorize your kitchen.
The Step-by-Step Cleaning Process
Getting started is simple. First, gather your supplies: warm water, a few drops of dish soap, a soft sponge or cloth, and a clean towel. If you’re dealing with really tough spots, you might also want baking soda or diluted white vinegar.
Before you start cleaning the walls, it’s a good idea to protect your countertops and floor. You can do this by laying down old towels or newspapers. This way, any drips won’t cause problems.
Taking these small steps ensures a tidier cleaning experience and prevents accidental messes on other parts of your kitchen.
-
Prepare the cleaning solution. Mix a few drops of mild dish soap into a bucket of warm water. Stir gently to create some suds, but avoid making it too bubbly.
-
Test the solution. Dip a small corner of your sponge or cloth into the soapy water and gently wipe a small, inconspicuous area of the wall. Wait a few minutes to check for any adverse reactions like color lifting or paint damage.
-
Clean in sections. Using your damp sponge or cloth, gently wipe down small sections of the wall. Work from the bottom up to avoid creating streaks from dirty water running down.
For tougher grease spots, you can make a paste of baking soda and water and gently rub it on the area with your finger or a soft cloth.
-
Rinse the walls. After cleaning a section, use a clean cloth dampened with plain water to wipe away any soap residue. This step is important to prevent the soap from drying on the wall and leaving streaks.
-
Dry the walls. Immediately after rinsing, use a clean, dry towel to gently dry the walls. This helps to prevent water spots and ensures a smooth, clean finish.
Dealing with Stubborn Grease Stains
Sometimes, a simple wash with soapy water isn’t enough for really baked-on grease. For these tougher spots, baking soda is a fantastic ally. Mix baking soda with a little bit of water to create a thick paste.
Apply this paste directly to the greasy stain and let it sit for about 10-15 minutes. The paste will help to lift and loosen the grease. After it has had time to work, gently wipe away the paste with a damp cloth.
You might need to repeat this process for very stubborn areas. If even baking soda isn’t cutting it, a diluted white vinegar solution can be your next step. Remember to always test these methods on a small, hidden area first to ensure they don’t harm your paint.
-
Baking soda paste: This gentle abrasive paste is made by mixing baking soda with just enough water to form a thick consistency. It’s ideal for spot-treating tougher grease marks without being too harsh on the paint.
-
Vinegar solution: A mixture of equal parts white vinegar and water can be applied with a cloth to stubborn areas. The acidity of the vinegar helps to break down oily residues effectively. Ensure good ventilation when using vinegar.
-
Gentle scrubbing: Always use a soft cloth or sponge for scrubbing. Avoid abrasive pads or brushes, as these can easily scratch or dull the paint finish, leaving visible marks behind.
Maintaining a Grease-Free Kitchen Environment
Preventing grease buildup is often easier than cleaning it, and it’s a key part of keeping your kitchen looking its best. Simple habits can make a big difference in how often you need to deep clean your walls. Think of it as making your cleaning tasks much lighter in the long run.
This section will explore practical tips and tricks to minimize grease splatters and airborne oil particles in your kitchen. By adopting these preventative measures, you can significantly reduce the effort required for cleaning and enjoy a fresher-looking kitchen for longer periods, truly mastering the Best Way to Clean Grease Off Kitchen Walls by addressing the source.
Everyday Prevention Strategies
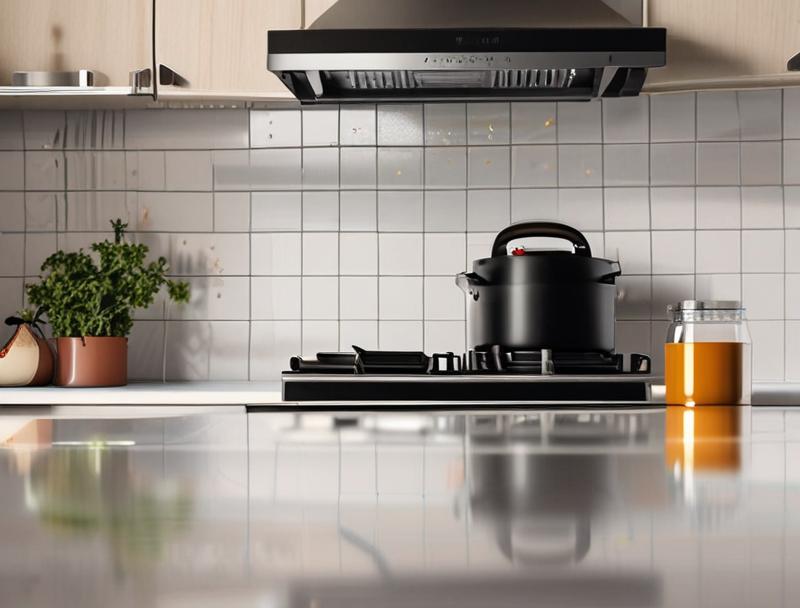
One of the most effective ways to prevent grease buildup is to use your range hood or exhaust fan every time you cook, especially when frying or searing. These fans pull airborne grease particles away from your cooking area and vent them outside. Wiping down your stovetop and the walls closest to it immediately after cooking, while the grease is still warm and less stubborn, also helps a lot.
Keep a microfiber cloth handy for quick wipes. Another tip is to cover pots and pans when possible. This traps steam and grease splatters inside the pot, preventing them from escaping into your kitchen air and landing on your walls.
Simple actions taken right after cooking can save you a lot of scrubbing later on.
-
Use the exhaust fan: Always turn on your range hood or exhaust fan when cooking, especially with high-heat methods like frying. This vent system captures airborne grease particles and removes them from your kitchen.
-
Wipe spills immediately: Make it a habit to quickly wipe up any splashes or splatters on the stovetop and nearby walls as soon as they happen. Warm grease is much easier to remove than hardened, old grease.
-
Cover cooking pans: Using lids on pots and pans while cooking helps to contain steam and grease splatters within the cookware, reducing the amount that escapes and settles on your walls.
Choosing the Right Paint Finish for Durability
When it comes to kitchen walls, the type of paint finish you choose plays a significant role in how easy they are to clean and how well they resist grease. For kitchens, satin or semi-gloss finishes are often recommended. These finishes are more durable and easier to wipe down than flat or matte finishes.
The smoother surface of satin and semi-gloss paints means grease has a harder time adhering to them in the first place, and when it does, it can be wiped away more easily without damaging the paint. While flat paints hide imperfections well, they tend to absorb grease and are much harder to clean without leaving marks. If you’re planning a repaint, selecting a washable, durable finish is a smart preventative measure.
-
Satin finish: Satin paint offers a lovely, soft sheen that is more durable and washable than flat paint. It’s a good balance, as it resists grease buildup and is easier to clean without significant damage to the paint’s appearance.
-
Semi-gloss finish: This finish is highly reflective and very durable, making it excellent for kitchens. It’s highly resistant to moisture and stains, and grease can typically be wiped off with ease. It’s ideal for areas prone to heavy splattering, like behind the stove.
-
Flat or matte finish: While these finishes provide a soft, non-reflective look that hides wall imperfections well, they are the least durable and hardest to clean. Grease can easily soak into the porous surface, making it difficult to remove without leaving a mark.
The Role of Air Purifiers and Ventilation
Good ventilation is incredibly important for managing grease in your kitchen. Beyond using your range hood, consider opening windows during and after cooking to allow fresh air to circulate and carry away airborne grease particles. If your kitchen doesn’t get much natural airflow, an air purifier can be a valuable tool.
Many air purifiers come with activated carbon filters specifically designed to capture odors and airborne grease particles. Running an air purifier in your kitchen, especially during and after cooking, can significantly reduce the amount of grease that settles on your walls and other surfaces. This not only helps keep your walls cleaner but also improves the overall air quality in your home.
-
Natural ventilation: Opening windows and doors while cooking or shortly after can help to physically push greasy air out of the kitchen and bring in fresh air. This is a simple yet effective way to reduce airborne particle density.
-
Air purifiers with carbon filters: These devices are designed to actively trap small particles and odors from the air. Activated carbon is particularly effective at absorbing grease and cooking smells, preventing them from settling on surfaces.
-
Regular fan use: Even when not actively cooking, running a ceiling fan or a portable fan on a low setting can help keep air circulating, preventing stagnant pockets where grease particles might accumulate more heavily.
Advanced Cleaning Tips and What to Avoid
While simple household cleaners are usually sufficient, sometimes you might encounter particularly stubborn grease. In such cases, there are a few more advanced, yet still safe, methods you can try. More importantly, knowing what not to do is just as crucial to avoid damaging your walls.
This section will offer additional tips for tough situations and highlight common mistakes that beginners often make when trying to find the Best Way to Clean Grease Off Kitchen Walls. Understanding these finer points will help you achieve professional-looking results without any unintended consequences.
When to Consider Stronger Degreasers
If the baking soda paste and diluted vinegar methods don’t quite cut it, there are commercial degreasers designed for kitchen use. When choosing one, look for products that are specifically labeled as safe for painted surfaces. Always read the product label carefully and follow the instructions precisely.
Some degreasers can be quite potent and might require you to wear gloves and ensure good ventilation. It’s also wise to test any new degreaser on an inconspicuous spot first, just as you would with any other cleaning solution. These stronger cleaners can break down very tough, sticky grease effectively, but they should be used sparingly and with caution.
-
Specialized kitchen degreasers: These products are formulated to tackle tough grease and grime found in cooking environments. Always opt for those marked as safe for painted walls.
-
Proper ventilation and protection: When using stronger cleaners, ensure the area is well-ventilated by opening windows or using an exhaust fan. Wear rubber gloves to protect your skin from irritation.
-
Spot testing is vital: Before applying any new cleaner to a large area, test it on a small, hidden section of the wall. This helps confirm it won’t cause discoloration, paint damage, or an undesirable finish.
Common Mistakes to Avoid
One of the biggest mistakes people make is using abrasive scrubbers or harsh chemicals. Steel wool, scouring pads, or strong all-purpose cleaners not meant for kitchens can scratch your paint, remove its sheen, or even take off the paint entirely. Another common error is using too much water.
Excess water can seep into drywall or damage paint, especially around baseboards. Always use a damp, not soaking wet, cloth or sponge. Also, avoid scrubbing too vigorously.
Gentle, repeated wiping is usually more effective and much safer for your walls than aggressive scrubbing. Finally, never mix cleaning products, especially bleach with ammonia, as this can create dangerous fumes.
-
Using abrasive materials: Avoid using harsh scrub brushes, scouring pads, or steel wool. These can scratch the paint surface, leaving permanent marks and dulling the finish.
-
Over-saturating surfaces: Do not soak your walls with water or cleaning solutions. Excessive moisture can damage drywall, loosen paint, and lead to mold or mildew growth.
-
Excessive scrubbing force: Gentle, consistent wiping is more effective than forceful scrubbing. Aggressive scrubbing can wear away paint, especially in high-traffic areas, and create uneven patches.
-
Mixing incompatible cleaners: Never combine different cleaning products, particularly bleach with ammonia-based cleaners, as this can produce toxic gases and create a hazardous environment.
When to Call a Professional
While most kitchen wall grease can be tackled with common household items and a bit of elbow grease, there are times when calling a professional might be the wisest choice. If your walls are painted with a very delicate finish, such as a specialty paint or historic mural, or if they are covered in vintage wallpaper, you might risk causing irreparable damage by trying to clean them yourself. Also, if the grease has been left for an extremely long time and has bonded deeply with the surface, or if you have large areas affected by heavy cooking fumes, a professional cleaner may have access to specialized equipment and solutions.
They can assess the situation and clean your walls effectively without causing harm, saving you potential headaches and costly repairs.
-
Delicate or specialty finishes: If your kitchen walls have unique paint finishes, textured coatings, or historic wallpaper, it’s safer to consult a professional who understands how to clean these materials without damage.
-
Extremely stubborn or widespread grease: For very old, deeply set grease stains or when a significant portion of your kitchen walls is affected by heavy grease accumulation, professional cleaning services have stronger, safer methods.
-
Lack of time or confidence: If you’re short on time or feel unsure about tackling the cleaning yourself, hiring a professional ensures the job is done correctly and efficiently, giving you peace of mind.
Frequently Asked Questions
Question: What is the easiest way to remove grease from kitchen walls?
Answer: The easiest way involves using warm water mixed with a few drops of mild dish soap. Apply with a soft sponge and wipe gently. Rinse with a clean, damp cloth and dry with a soft towel.
Question: Can I use bleach to clean grease off my kitchen walls?
Answer: While bleach can be a strong cleaner, it’s generally not recommended for painted kitchen walls as it can discolor or damage the paint. Mild dish soap or diluted vinegar are safer alternatives.
Question: How often should I clean grease off my kitchen walls?
Answer: It’s best to wipe down visible splatters as they happen. A more thorough cleaning of the entire wall area can be done every few months, or as needed, to prevent heavy buildup.
Question: Will vinegar damage my paint?
Answer: Diluted white vinegar is usually safe for most painted surfaces. Always test it on a small, inconspicuous area first to be sure. Avoid using it on unpainted or porous surfaces.
Question: What is the best way to clean grease off a painted kitchen backsplash?
Answer: For a backsplash, start with warm, soapy water. If that’s not enough, try a baking soda paste. If the backsplash is tile with grout, you might need a slightly stronger grout cleaner for those areas, but be gentle on the paint.
Final Thoughts
Cleaning grease off kitchen walls is totally doable with simple supplies. You learned that dish soap, baking soda, and vinegar are your best friends here. Remember to always test your cleaner first and use a soft cloth.
Keeping up with quick wipes after cooking makes a huge difference. With these easy steps, your kitchen walls will look much better!