
Dealing with burnt food stuck to your stove top can feel like a big chore, especially if you’re new to cooking or cleaning. It’s a common problem because sometimes food just splatters and burns before you can even catch it. But don’t worry!
It’s not as hard as it looks, and we have a simple way to get your stove top looking clean again. Get ready to see how easy it can be to fix this common kitchen mess.
Easy Ways for How to Remove Burnt Food from Stove Tops
This section will guide you through the basics of tackling burnt-on food. We’ll cover why it happens and what makes some messes tougher than others. You’ll learn the gentle yet effective methods that work best for different stove top types.
Our aim is to give you the confidence to handle these common kitchen mishaps without stress. We’ll explore simple tools and common household items you can use to get your stove looking its best again.
Understanding Different Stove Top Materials
Stove tops come in various materials, and knowing yours is the first step. This helps you pick the right cleaning method and avoid damage. Each material reacts differently to heat and cleaning agents.
Some are quite delicate, while others are more durable. Understanding these differences means you won’t scratch or dull your stove while trying to clean it.
Glass and ceramic stove tops are very popular for their sleek look. They can show burnt food very clearly. However, they can also scratch easily if you use the wrong tools or cleaners.
Gentle scraping and non-abrasive cleaners are key here. For example, using a razor blade scraper at a shallow angle is often recommended for tough spots on glass. Always ensure the surface is cool before you start.
Stainless steel stove tops are known for their durability and professional appearance. They can handle a bit more vigorous cleaning. However, harsh chemicals or abrasive scrubbers can leave scratches or discolor the metal.
It’s best to wipe with the grain of the stainless steel to avoid visible marks. Mild dish soap and a soft cloth usually do the trick for regular messes.
Coil electric stove tops have heating elements that lift off the surface. The drip pans underneath them often catch spills and can get heavily burnt. These drip pans are usually removable and can often be soaked or scrubbed more aggressively.
The enamel coating on the stove itself is quite tough, but still, avoid overly harsh cleaners that could chip the finish.
Gas stove tops have grates and burner caps that get dirty. The surface underneath is often enamel or stainless steel. The grates themselves can be made of cast iron or coated metal.
Burnt food can get baked onto these parts. Removing the grates for a deeper clean is usually the best approach. Soaking them in hot, soapy water is a common first step.
Knowing your stove top material helps you avoid turning a simple cleaning job into a costly repair. Always check your appliance manual if you are unsure about what material your stove top is made of. It will often have specific cleaning instructions.
Common Causes of Burnt Food
Burnt food happens to everyone, but understanding why can help prevent it. Often, it’s simply a matter of forgetting about something on the stove. This can occur when you get distracted by a phone call or a child.
Distractions are a big reason why pots and pans are left unattended for too long.
Another common cause is cooking at too high a heat. When the heat is too intense, food can scorch very quickly, especially sugary sauces or dairy products. It’s easy to turn the knob too far when you’re in a hurry.
Learning the right heat levels for different foods is important for preventing burn-ups.
Using the wrong type of pot or pan can also lead to burning. For example, thin-bottomed pans heat up unevenly, creating hot spots where food can burn. Pans that are too small for the amount of food being cooked can also cause issues.
The food might get crowded and cook unevenly, leading to some parts burning before others are done.
Sometimes, the issue is with the stove itself. An old stove might have uneven heating elements or burners that are no longer accurate. If your stove is not level, oil or liquids can pool in one area, making it more likely to burn.
Regular maintenance of your stove can help prevent these problems.
- Distractions: Life happens, and it’s easy to get pulled away from the kitchen. A simple moment of distraction can lead to food burning. This is particularly true for foods that cook quickly or require constant stirring. Even a few minutes too long on the heat can turn a good meal into a messy clean-up job.
- High Heat: Cooking with too much heat is a frequent culprit. Recipes often suggest medium heat for a reason. Turning it up too high can caramelize sugars too quickly or scorch fats, creating those stubborn burnt marks. Learning to control your stove’s heat is a key cooking skill that also helps with cleaning.
- Wrong Cookware: The type of pots and pans you use matters a lot. Heavy, even-heating pans are best. Thin pans can warp and create hot spots, leading to burnt patches. Using cookware that matches your stove type, like induction-compatible pans for an induction stove, also ensures even heating.
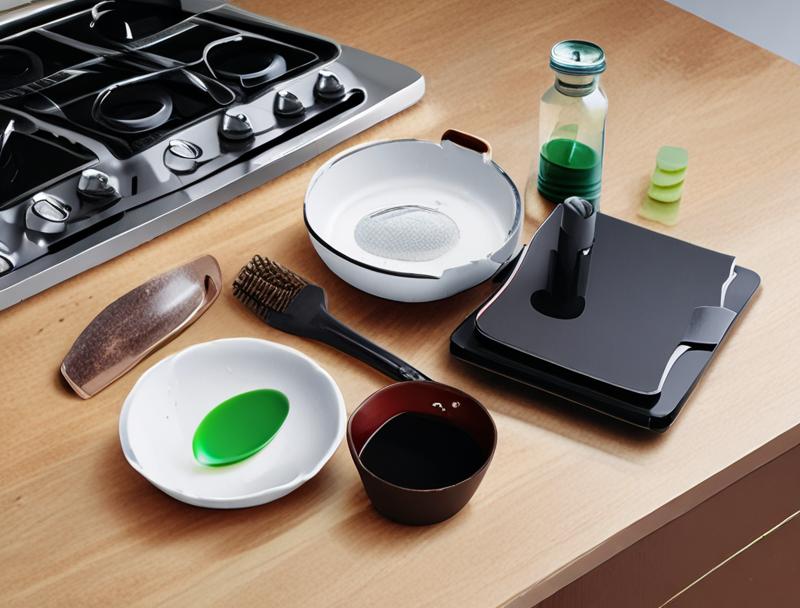
Essential Cleaning Tools and Supplies
Before you start cleaning, gather what you need. Having the right tools makes the job much easier and faster. You don’t need fancy gadgets; most are common household items.
The key is to choose tools that clean effectively without damaging your stove top.
A good starter kit includes soft cloths, paper towels, and sponges. For tougher spots, you might need a non-scratch scrub pad. For glass or ceramic tops, a special scraper with a razor blade is often a must-have.
Make sure it’s designed for stove tops to avoid scratches. Baking soda is a fantastic natural cleaner that’s gentle but effective.
Dish soap is your friend for general greasiness. White vinegar is another great household staple that can help cut through grease and grime. Sometimes, specialized stove top cleaners are necessary, especially for very stubborn, baked-on messes.
Always read the labels on these cleaners to make sure they are safe for your stove type.
- Soft Cloths and Sponges: These are your everyday heroes. Use them for wiping up spills and applying cleaning solutions. Microfiber cloths are excellent for polishing and preventing streaks on glass tops. Soft sponges are good for general scrubbing without being too harsh.
- Non-Scratch Scrub Pads: When a soft sponge isn’t enough, a non-scratch scrub pad comes in handy. These are designed to lift stuck-on food without scratching delicate surfaces like glass or certain types of enamel. Look for ones labeled “safe for non-stick” or “gentle scrub.”
- Baking Soda: This is a miracle worker for burnt food. It’s a mild abrasive that can lift tough grime without scratching. Mixed with water, it forms a paste that can be applied to burnt areas. It also helps neutralize odors.
- White Vinegar: A natural degreaser and disinfectant. It’s great for loosening burnt food and shining up surfaces. Mixing vinegar with baking soda creates a fizzing reaction that can help lift stubborn messes.
- Stove Top Scraper: For glass and ceramic stove tops, a scraper with a razor blade is often essential for removing thick, baked-on residue. Use it carefully at a low angle to avoid scratching the glass. It’s especially useful for burnt sugar or melted plastic.
How to Remove Burnt Food from Stove Tops: A Step-by-Step Guide
This section is your main guide to actually cleaning the burnt food. We’ll break down the process into simple, easy-to-follow steps. You’ll learn how to tackle different kinds of burnt messes, from light scorching to heavily caked-on food.
We’ll also share tips for making the job easier and ensuring your stove top stays in great shape after cleaning. This is where you’ll find the practical solutions you’ve been looking for.
Cleaning Glass and Ceramic Stove Tops
Glass and ceramic stove tops look great but need careful cleaning. The key is to be gentle to avoid scratches. Let’s go through how to make them shine again.
First, make sure the stove top is completely cool. You don’t want to risk burns or cracking the glass. Wipe away any loose crumbs or debris with a soft cloth.
For light burnt spots, a paste of baking soda and water is often enough. Mix about half a cup of baking soda with a few tablespoons of water to create a thick paste. Spread this paste over the burnt areas.
Let it sit for about 15-30 minutes. This allows the baking soda to soften the burnt food.
After the paste has sat, use a damp, soft cloth or a non-scratch scrub pad to gently rub the burnt spots. Work in a circular motion. You should see the burnt food start to lift away.
Rinse your cloth frequently.
If the baking soda paste isn’t cutting it, it’s time for a scraper. For heavily burnt-on food, a special stove top scraper with a razor blade is very effective. Hold the scraper at a very low angle (almost flat) against the glass.
Carefully push the blade under the burnt food to lift it off. Don’t dig into the glass. This is best for thick, hardened bits.
After scraping or scrubbing, wipe the entire stove top with a clean, damp cloth to remove any remaining residue. Then, use a dry, soft cloth to buff the surface and make it shine. For extra shine, you can use a small amount of white vinegar on a cloth, then buff dry.
If you have very stubborn stains, a dedicated glass stove top cleaner can be used. Follow the product instructions carefully. Always test a small, inconspicuous area first to ensure it doesn’t damage your stove.
A common mistake is using abrasive cleaners like steel wool or scouring powders. These will definitely scratch your glass or ceramic top, ruining its appearance. Always opt for non-abrasive methods.
Another mistake is trying to clean a hot stove top; wait for it to cool completely.
Here’s a quick rundown:
- Cool Down: Ensure the stove top is completely cool before starting.
- Gentle Wipe: Remove loose debris with a soft cloth.
- Baking Soda Paste: Mix baking soda and water, apply to burnt areas, and let sit for 15-30 minutes.
- Scrub Gently: Use a damp cloth or non-scratch pad to remove softened food.
- Scrape if Needed: For tough spots, use a stove top scraper at a low angle.
- Rinse and Dry: Wipe with a damp cloth, then buff with a dry cloth for shine.
A scenario for glass tops:
- You accidentally let some sugary syrup boil over and it baked onto your glass stove top.
- After the stove cooled, you applied a baking soda paste and let it sit for an hour.
- You then used a plastic scraper (since you didn’t have a razor blade one yet) and a damp cloth to gently lift the sticky, hardened syrup.
- A final wipe with a microfiber cloth left the area clean and shiny.
Cleaning Stainless Steel Stove Tops
Stainless steel offers a sleek, modern look, but it can show every smudge and burnt-on spot. Cleaning it right means keeping that shine without scratches.
Start by making sure the stove top is cool. Wipe away any loose bits. For greasy messes and light burnt spots, a simple solution of warm water and a few drops of mild dish soap is very effective.
Use a soft cloth or sponge to apply the soapy water. Wipe in the direction of the stainless steel grain. You’ll usually see lines in the metal; follow these lines for the best results and to avoid visible streaks.
If there are more stubborn burnt-on bits, a paste of baking soda and water can help here too. Apply the paste to the burnt areas and let it sit for about 20-30 minutes. Then, gently scrub with a soft cloth or a non-scratch sponge, again, following the grain of the steel.
For very tough, caked-on food, you might need a bit more power. A gentle scrubbing pad designed for stainless steel can be used. Be cautious and always start with the least abrasive method first.
After scrubbing, wipe the entire surface with a clean, damp cloth to remove all soap and baking soda residue. Immediately dry the stove top thoroughly with a clean, dry microfiber cloth. This is crucial for preventing water spots and maintaining the shine.
Sometimes, after cleaning, you might notice dullness. A small amount of olive oil or a specialized stainless steel polish can restore the shine. Apply a tiny amount to a clean cloth and buff it onto the surface, following the grain.
Avoid using abrasive cleaners, steel wool, or harsh chemicals like bleach. These can permanently scratch or discolor your stainless steel. Also, avoid letting acidic foods like tomato sauce or vinegar sit on the surface for too long, as they can etch the metal.
Here’s a look at the steps:
- Cool Down: Let the stove top cool completely.
- Initial Wipe: Clean off any loose debris.
- Soapy Water: Use mild dish soap and warm water with a soft cloth, wiping with the grain.
- Baking Soda Paste: For tougher spots, apply a paste and let it sit, then scrub gently.
- Rinse and Dry: Wipe with a damp cloth and immediately dry with a clean, dry cloth.
- Polish (Optional): Use a little oil or polish for extra shine.
A cleaning scenario:
- You burnt some onions on your stainless steel stove top, leaving dark, sticky residue.
- After cooling, you made a baking soda paste and applied it to the burnt spots, letting it sit for 30 minutes.
- You then gently scrubbed with a non-scratch sponge, moving with the grain of the steel.
- The residue came off, and after rinsing and drying, the stove top looked almost new.
Cleaning Electric Coil Stove Tops
Electric coil stove tops are known for their durability, but the drip pans beneath the coils can be a nightmare when food burns onto them.
First, ensure the stove is cool and unplugged if possible, or at least that the coils themselves are cool to the touch. Remove the heating coils by gently lifting them up and out of their sockets. Then, remove the drip pans underneath.
The drip pans often have a shiny, porcelain-like coating. For general cleaning, warm soapy water is usually sufficient. If they are heavily soiled, you can soak them in hot, soapy water for a few hours or overnight.
This helps to loosen the baked-on food.
For tougher burnt-on messes on the drip pans, a paste of baking soda and water can be very effective. Apply the paste, let it sit for 30 minutes to an hour, and then scrub with a non-scratch sponge or a soft brush. You might need to repeat this process for very stubborn stains.
Sometimes, the burnt-on food on the drip pans is so severe that it has bonded to the coating. In these cases, you might need a specialized oven cleaner, but be sure to use it in a well-ventilated area and wear gloves. Follow the product instructions very carefully, as oven cleaners are harsh.
After cleaning the drip pans, rinse them thoroughly and dry them completely. Make sure no moisture is trapped before putting them back. You can often find replacement drip pans at appliance stores if yours are beyond saving.
The stove top surface itself, beneath the coils and drip pans, is usually made of enamel. This can also be cleaned with warm, soapy water. For burnt-on spills on the enamel surface, a baking soda paste can be used.
Avoid using abrasive scrubbers on the enamel, as it can chip or scratch.
Reassemble the stove by carefully placing the drip pans back and then reinserting the heating coils into their sockets. Ensure they are securely in place before using the stove.
A word of caution: Never immerse the electric coils themselves in water. They are electrical components and should only be wiped down with a damp cloth if necessary, once they are completely cool.
Here are the steps for electric coil stoves:
- Cool and Disassemble: Ensure the stove is cool, then remove coils and drip pans.
- Soak Drip Pans: For heavy messes, soak drip pans in hot, soapy water.
- Baking Soda Paste: Apply paste to stubborn burnt spots on pans or enamel, let sit, then scrub gently.
- Harsh Cleaners (Use with Care): For extreme cases on drip pans, consider oven cleaner in a well-ventilated area.
- Rinse and Dry: Thoroughly rinse and dry all parts before reassembly.
- Reassemble: Carefully put coils and drip pans back in place.
A practical example:
- Your bacon grease splattered and burnt onto the drip pans of your electric stove.
- After letting them cool, you removed the pans and soaked them in hot water with a good amount of dish soap for a couple of hours.
- Most of the burnt grease came off with a gentle scrub.
- For a few stubborn spots, you applied a baking soda paste, let it sit, and then scrubbed them clean.
- After rinsing and drying, the pans looked much better.
Cleaning Gas Stove Tops
Gas stoves have grates, burner caps, and the stove top surface itself, which can be made of enamel or stainless steel. Each part needs a little attention.
First, make sure the stove is completely cool. Remove the grates and burner caps. These are usually the parts that get the dirtiest.
For the grates, especially if they are cast iron, soaking them in hot, soapy water is a great first step. For heavily burnt-on food, you can make a paste of baking soda and water and apply it to the grates. Let it sit for at least 30 minutes, then scrub with a stiff brush or a non-scratch scrub pad.
If the grates are very greasy, a degreaser might be needed.
The burner caps sit on top of the burners and can also get quite dirty. Clean them with warm, soapy water. If there’s burnt food, a baking soda paste can help.
Make sure the gas ports (the small holes where the gas comes out) are clear. You can use a toothpick or a small needle to gently clear any blockages after cleaning.
The stove top surface underneath the burners can be enamel or stainless steel. Treat it according to the material, as discussed in previous sections. For enamel, warm soapy water and baking soda paste are good choices.
For stainless steel, follow the grain with a soft cloth and mild soap, or use baking soda paste for tougher spots.
After cleaning all the parts, rinse them thoroughly. Make sure the burner caps and grates are completely dry before putting them back. This is important for proper burner function and to prevent rust, especially on cast iron grates.
When reassembling, ensure the burner caps are seated correctly on the burners. Misaligned caps can lead to uneven flames or issues with ignition. Then, place the grates back securely over the burners.
A common mistake is using too much water around the gas burners, which can affect ignition. Always ensure these parts are dry. Also, avoid harsh chemicals on painted or coated surfaces, as they can damage the finish.
Let’s outline the process for gas stoves:
- Cool and Disassemble: Ensure the stove is cool, then remove grates and burner caps.
- Clean Grates: Soak grates in hot, soapy water; use baking soda paste for tough spots, then scrub.
- Clean Burner Caps: Wash with soapy water and baking soda paste. Clear gas ports gently.
- Clean Stove Top Surface: Clean according to material (enamel or stainless steel).
- Rinse and Dry: Thoroughly rinse all parts and ensure they are completely dry.
- Reassemble: Carefully place burner caps and grates back in their correct positions.
An example scenario:
- You were stir-frying, and some sauce splattered and burnt onto the grates and surface of your gas stove.
- After the stove cooled, you removed the cast iron grates and burner caps.
- You soaked the grates in hot, soapy water and scrubbed them with a brush.
- You cleaned the burner caps and the stainless steel surface with a baking soda paste and a soft cloth.
- After rinsing and thoroughly drying all parts, you put everything back, and your stove looked clean again.
Tips for Preventing Future Burnt Food
Prevention is always better than cure, as they say. Keeping your stove top clean is much easier if you prevent food from burning onto it in the first place. These tips are simple but make a big difference in how often you’ll need to do deep cleaning.
The most important thing is to stay attentive while cooking. If you’re simmering a sauce or frying something that might splatter, try to stay in the kitchen. Keep an eye on things, especially when using higher heat.
Set timers for foods that require precise cooking times.
Learn your stove’s heat settings. What is medium heat on one stove might be high on another. Get to know how your stove heats up and cools down.
This helps you choose the right temperature for different cooking tasks and avoid overheating.
Clean up spills as soon as they happen, provided it’s safe to do so. If something boils over, carefully wipe it up while the stove is still warm (but not hot enough to burn you). This stops liquids and food from drying and hardening into tough-to-remove burnt marks.
A quick wipe can save you a lot of scrubbing later.
Using the right cookware also plays a big role. As mentioned before, heavy-bottomed pans distribute heat more evenly. This reduces the chance of hot spots where food can burn quickly.
Make sure your pots and pans are the right size for the burner you are using.
For glass and ceramic tops, consider using pan protectors. These are heat-resistant mats that you can place between your cookware and the stove top. They can help prevent scratches and absorb minor spills before they burn on.
- Stay Present: The best way to prevent burnt food is to pay attention when you are cooking. Avoid multitasking too much when food is on the stove. Keep an eye on your pots and pans, especially if they contain sugars or dairy, which burn easily.
- Master Your Heat: Understand your stove’s controls. Different foods require different heat levels. Learning to use medium or low heat effectively can prevent most scorching and burning. It’s better to cook something a little slower than to burn it and have to clean.
- Immediate Cleanup: Wipe up spills the moment they occur, if it’s safe. A quick wipe with a damp cloth when the stove is still warm can prevent food from hardening and becoming burnt-on. This is especially true for sugary or acidic spills.
- Correct Cookware: Use pots and pans with even heat distribution. Avoid thin, warped pans that create hot spots. Ensure your cookware is the appropriate size for the burner. This promotes even cooking and reduces the risk of burning.
- Protective Measures: For delicate stove tops like glass or ceramic, consider using pan protectors. These can shield the surface from scratches and absorb minor spills, making cleanup easier and preventing direct contact that leads to burning.
Dealing with Stubborn, Burnt-On Messes
Sometimes, despite your best efforts, you’re left with a truly stubborn burnt-on mess. These are the situations that require a little extra patience and a stronger approach. Don’t despair; there are ways to tackle even the toughest burnt food.
For any stove top, a longer soaking time can make a big difference. If a baking soda paste or soapy water hasn’t worked, try applying it generously and letting it sit for several hours, or even overnight. Covering the paste with plastic wrap can help keep it moist and active.
Another powerful, yet still relatively gentle, cleaner is Bar Keepers Friend. It’s often recommended for stainless steel and can be very effective on stubborn burnt-on food. Always follow the product instructions and test in an inconspicuous area first.
It contains oxalic acid, which helps break down rust and tough stains. For glass tops, look for their specialized soft cleanser.
For extremely hardened food on glass or ceramic tops, the razor blade scraper is your best friend. Remember to hold it at a very low angle. Work slowly and carefully, lifting the burnt material bit by bit.
Patience is key here; trying to rush can lead to scratches.
Sometimes, heat can help. For very tough residue on stainless steel or enamel surfaces (not glass), you can try heating the area slightly with a hair dryer. This can sometimes soften the burnt-on food, making it easier to scrape or wipe away.
Be cautious not to overheat the surface.
On electric coils, if the drip pans are extremely burnt, you might consider specialized stove top cleaning kits. These often contain stronger cleaning pastes or solutions. Again, always ensure good ventilation and wear gloves.
If you’re dealing with melted plastic on a glass top, act quickly once it cools enough to handle. You might be able to carefully chip away at it with a scraper. If it’s fused on, sometimes a specialized plastic remover is needed, but use with extreme caution and ensure it’s safe for your stove type.
It’s worth noting that if a stain is deeply etched into the surface, it might be impossible to remove completely without professional refinishing. However, for most common burnt-on food, the methods described should be effective.
Here are some advanced techniques:
- Extended Soaking: For really tough jobs, allow your cleaning paste or solution to sit for many hours or overnight. Keeping it moist with plastic wrap helps it work better.
- Specialized Cleaners: Products like Bar Keepers Friend can tackle tough stains on stainless steel and other surfaces. Always read instructions carefully and test first.
- Scraper Mastery: For glass tops, practice using a razor blade scraper at a very low angle. Patience and a light touch are crucial to avoid scratching.
- Gentle Heat: On some surfaces (not glass), a hair dryer can soften burnt food, making it easier to remove. Use sparingly and with caution.
A scenario with a very stubborn mess:
- You left a pot of sugar-free jam on the stove too long, and it created a black, rock-hard layer on your glass stove top.
- After trying baking soda paste, which softened it only slightly, you used a razor blade scraper.
- Holding the scraper at a very low angle, you patiently worked to lift the burnt sugar bit by bit, taking nearly an hour.
- Once the bulk of the burnt sugar was gone, you cleaned the remaining residue with a glass stove top cleaner and buffed it to a shine.
Frequently Asked Questions
Question: What is the quickest way to remove burnt food from a stove top?
Answer: For light burnt spots, a paste of baking soda and water left to sit for 15-30 minutes, followed by gentle scrubbing with a damp cloth, is usually the quickest and most effective method. For tougher spots on glass tops, a razor blade scraper used carefully can also be fast.
Question: Can I use vinegar and baking soda together to remove burnt food?
Answer: Yes, vinegar and baking soda are a classic cleaning combination. When mixed, they create a fizzing reaction that can help lift stuck-on food. You can apply a baking soda paste first, then spray vinegar over it, let it fizz, and then scrub.
Question: How do I remove burnt sugar from my stove top?
Answer: Burnt sugar is very sticky and hard. For glass or ceramic tops, a baking soda paste and then a razor blade scraper used at a low angle is often needed. For other surfaces, a longer soak in hot, soapy water or a baking soda paste can help.
Question: Is it safe to use steel wool on my stove top?
Answer: Generally, no. Steel wool is too abrasive and can easily scratch and damage most stove top surfaces, especially glass, ceramic, and stainless steel. Always use non-scratch scrubbers or soft cloths.
Question: My stove top has deep scratches. Can I fix them?
Answer: Minor surface scratches on some stainless steel might be buffed out with specialized polishes. However, deep scratches on glass, ceramic, or enamel stove tops are usually permanent and cannot be fixed. Prevention is the best approach.
Summary
You’ve learned practical methods for How to Remove Burnt Food from Stove Tops. From understanding your stove’s material to using simple household items like baking soda and vinegar, you can tackle those tough messes. Gentle scrubbing, patient scraping, and timely cleanup are key.
Keep these tips handy, and your stove top will look great.