

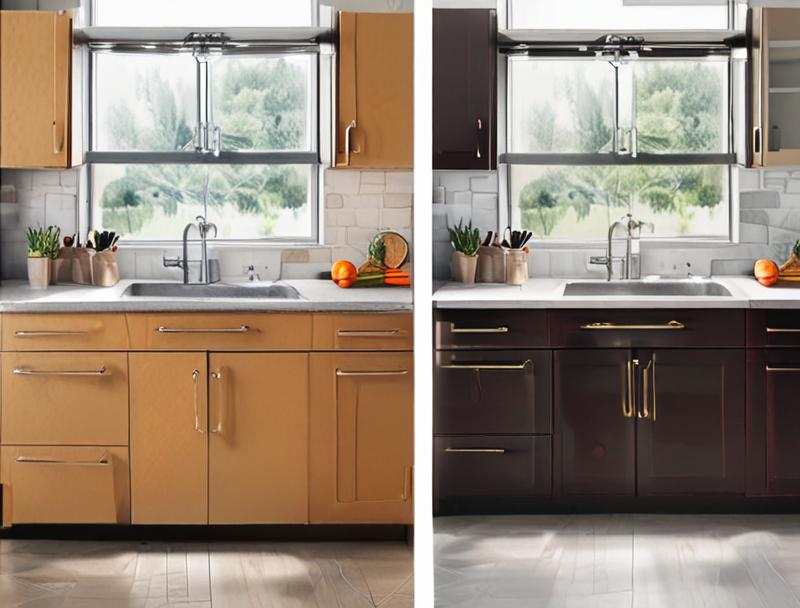
Cleaning kitchen doors can be a sticky situation, especially when old grease builds up. Many people find this task tricky because the grease can be stubborn and leave marks. It can feel like a battle you’re not sure how to win.
But don’t worry, it’s simpler than you think! We’ll walk you through easy steps to make your kitchen doors shine again. Get ready to see how simple it can be to tackle this common mess.
Getting Rid of Stubborn Grease on Kitchen Doors
This section focuses on the core challenge of tackling aged grease buildup on kitchen cabinet doors. We’ll explore why this grease sticks around and what makes it hard to remove, especially for those new to cleaning. Understanding the “why” helps us find the best “how.” We will break down the process into easy, manageable steps, making sure you have all the knowledge to achieve a spotless finish.
Prepare for a clear guide that leaves no question unanswered.
Why Grease Builds Up on Kitchen Doors
Grease is a common byproduct of cooking. When you fry, sauté, or bake, tiny droplets of fat become airborne. These invisible particles then float around your kitchen.
They can land on any surface, but they tend to stick to walls, cabinets, and especially kitchen doors.
Over time, these airborne grease particles combine with dust and other kitchen grime. This mixture creates a sticky, dull film. The heat from cooking can also bake this grease onto the surface, making it harder to remove.
Imagine leaving a greasy pan out; the grease hardens. The same thing happens on your doors, but more slowly.
Certain types of cooking produce more grease than others. Deep frying and searing meats release a lot of fat into the air. Even boiling foods can create steam that carries grease.
The longer these deposits sit undisturbed, the more they bond with the surface of your doors, becoming a real cleaning challenge. This is why addressing it promptly is helpful, but this guide covers what to do when it’s already a problem.
The Nature of Old Kitchen Grease
Old grease is different from fresh grease. Fresh grease might wipe away with a damp cloth. But old, hardened grease forms a tough layer.
This layer is often sticky and can have a yellowish or brownish tint. It’s this stubbornness that makes many beginners feel defeated when they first try to clean it.
Think of it like old paint or dried-on food. It doesn’t just dissolve easily. It needs a bit more effort and the right tools or cleaners.
The longer the grease has been there, the more it has bonded with the door’s finish. This chemical bond can be strong, requiring a cleaner that can break it down effectively.
Furthermore, the type of finish on your kitchen doors can affect how grease adheres. Some finishes are more porous, meaning grease can seep into tiny holes. Others are very smooth, which might seem easier to clean, but the grease can still form a solid film on top.
This guide will help you figure out what you’re dealing with and how to overcome it, no matter the finish.
Common Beginner Mistakes to Avoid
When tackling old grease, beginners often make a few common errors. One is using too much force. Scrubbing too hard with abrasive cleaners or pads can scratch or damage the door’s finish.
This can make the problem worse by creating permanent marks or dull spots.
Another mistake is using the wrong cleaning products. Harsh chemicals might seem like a good idea, but they can strip paint, discolor wood, or ruin laminate surfaces. Always test a cleaner in an inconspicuous spot first.
This way, you can see how it affects the material before cleaning the whole door.
Not preparing the area is also a common slip-up. Not covering countertops or floors can lead to grease and cleaning solution drips. This just creates more mess to clean later.
Proper preparation saves time and effort in the long run.
- Using Abrasive Materials: Many people grab a steel wool pad or a very stiff brush thinking it will cut through grease faster. However, these can leave permanent scratches. Even a rough sponge can be too much for some finishes. The goal is to dissolve the grease, not to scrape it off.
- Applying Harsh Chemicals Directly: Spritzing strong degreasers or bleach directly onto the door surface without testing is risky. Some finishes, especially painted ones or those with a faux wood grain, can be damaged. The chemicals can eat away at the finish, leaving faded or sticky spots. Always dilute and test.
- Ignoring the Need for Rinsing: Some cleaners leave a residue if not properly rinsed away. This residue can attract more dirt and grease, making your doors look dirty again quickly. It’s crucial to wipe down the cleaned areas with a damp cloth to remove any leftover cleaner.
Choosing the Right Cleaning Solutions
Selecting the right cleaner is key to successfully removing old grease without harming your kitchen doors. The effectiveness of a cleaner depends on the type of grease and the material of your doors. We will explore a variety of options, from everyday household items to specialized degreasers, explaining what makes them work and when to use them.
The goal is to break down the sticky bonds of the grease. Different ingredients achieve this in different ways. Some use alkaline properties to emulsify the grease, making it easier to wipe away.
Others use solvents to dissolve it. We will also touch upon gentler methods for more delicate finishes and how to ensure safety.
This understanding will empower you to pick the best solution for your specific needs. You’ll learn to read labels and make informed choices, avoiding cleaners that could cause damage. Get ready to discover the power of everyday items and specialized products in your fight against greasy doors.
Gentle, Everyday Household Cleaners
Sometimes, the best solutions are already in your pantry. For lighter grease buildup or more sensitive door finishes, simple household items can be surprisingly effective. They are also budget-friendly and readily available.
One of the most versatile cleaners is dish soap. Many dish soaps are designed to cut through grease on dishes. This power extends to kitchen cabinets.
A few drops of dish soap mixed with warm water create a mild degreasing solution. This is gentle enough for most surfaces, including painted doors and laminate.
Vinegar is another common household item that works well. White vinegar is acidic, and its acidity helps break down grease and grime. Mix equal parts white vinegar and water in a spray bottle.
This solution can effectively cut through sticky residue. However, it’s best to use vinegar on non-porous surfaces and to rinse well afterward to avoid any lingering smell.
- Dish Soap Solution: This is your go-to for general cleaning. Mix about a teaspoon of mild dish soap into a bowl of warm water. Dip a soft cloth or sponge into the solution, wring it out well, and wipe the doors. This works by emulsifying the grease, surrounding the grease particles so they can be lifted off the surface. It’s a safe bet for most finishes.
- Warm Water: For very light grease or as a first step, sometimes just warm water can do the trick. The warmth helps to soften the grease slightly. It’s the most gentle option and can be used on virtually any surface without risk of damage. It is best used in conjunction with another cleaning agent.
- Baking Soda Paste: For slightly tougher spots, baking soda can be mixed with water to form a paste. Baking soda is mildly abrasive but generally safe for most surfaces when used gently. Apply the paste, let it sit for a few minutes, and then gently wipe away. It’s effective at lifting grime and deodorizing.
Specialized Degreasers
When household cleaners aren’t enough, specialized degreasers are the next step. These products are formulated specifically to tackle tough grease and grime. They often contain stronger agents that can break down hardened grease more quickly.
When choosing a commercial degreaser, it’s important to read the product label carefully. Look for degreasers that are safe for kitchen cabinets or multi-surface use. Some degreasers are very powerful and might be too harsh for certain finishes, like unsealed wood or delicate laminates.
Always check if the product is suitable for your specific cabinet material.
Many commercial degreasers work by using surfactants and solvents. Surfactants help to lower the surface tension of water, allowing it to penetrate and lift grease. Solvents can dissolve grease.
Always follow the instructions on the product, as they often recommend dilution ratios and contact times for best results and safety.
- All-Purpose Kitchen Degreasers: These are readily available in most supermarkets. They are designed to be effective on a variety of kitchen surfaces. They typically contain a blend of surfactants and mild alkaline builders to break down grease. They are usually safe for most sealed finishes but still require testing.
- Heavy-Duty Degreasers: For extremely stubborn, baked-on grease, a heavy-duty degreaser might be necessary. These often contain stronger solvents or higher concentrations of alkaline cleaners. Use these with extreme caution, ensure good ventilation, and always test in a hidden area first, as they can damage finishes if used improperly or left on too long.
- Citrus-Based Degreasers: These are a popular eco-friendly option. They use natural citrus oils (like d-limonene) to break down grease. They often have a pleasant scent and are generally less harsh than many synthetic chemical degreasers, making them a good choice for many situations where you want effective cleaning without strong chemicals.
Understanding Ingredients and Safety
Knowing what’s in your cleaning products is important for both effectiveness and safety. Common ingredients in degreasers include surfactants, alkaline builders (like sodium hydroxide or potassium hydroxide), and sometimes solvents. Surfactants help lift and suspend grease in water, allowing it to be wiped away.
Alkaline builders are effective at breaking down fatty acids in grease. Solvents can dissolve grease more directly. However, stronger alkaline builders and certain solvents can damage finishes if not used carefully.
For example, high concentrations of lye (a strong alkaline) can strip paint.
Safety precautions are paramount. Always ensure good ventilation when using cleaning products, especially commercial ones. Wear gloves to protect your skin from harsh chemicals.
If a product has a strong odor or is known to be aggressive, consider wearing eye protection. Always read and follow the instructions on the product label.
Testing Cleaners on an Inconspicuous Area
Before applying any cleaning solution to your entire kitchen doors, it’s vital to perform a patch test. This means applying the cleaner to a small, hidden area of the door. This could be the inside edge of a door, the underside of a cabinet, or a corner that’s not easily visible.
Apply the cleaner as you would normally. Let it sit for the recommended time, then wipe it away. Observe the area closely for any signs of damage.
Look for discoloration, dulling of the finish, peeling, or any other adverse reactions. If the area looks fine after testing, you can proceed with cleaning the rest of the doors with more confidence.
This simple step can save you a lot of trouble and expense. It ensures that the cleaner you choose is compatible with your cabinet material and finish. If the test area shows any negative effects, you’ll know to try a different, gentler cleaner or method.
It’s a small effort that offers big protection.
Step-by-Step Guide: How to Remove Old Grease from Kitchen Doors
Now that you have a better understanding of cleaning solutions, let’s get to the actual process of cleaning your kitchen doors. This section provides a clear, step-by-step approach to effectively remove old grease. We’ll cover preparation, the cleaning itself, and the finishing touches to ensure a streak-free shine.
Following these steps will make the task manageable and rewarding.
We will break down the process into simple actions. Each step is designed to be easy to follow, even if you’re new to cleaning. The aim is to remove the grease without damaging your cabinets.
By the end, your kitchen doors will look clean and refreshed.
Prepare to transform your kitchen with this practical guide. You’ll feel a sense of accomplishment as you see the results of your effort. Let’s begin with the first crucial stage: preparation.
Preparation and Gathering Supplies
Before you start cleaning, it’s important to gather all your supplies. This saves you from stopping mid-task to search for something. Having everything ready makes the cleaning process much smoother.
You will need several items. These include your chosen cleaning solution (whether it’s a homemade mixture or a commercial product), soft cloths or microfiber towels, a bowl for your cleaning solution if not using a spray bottle, and warm water for rinsing. You might also want a soft-bristled brush for stubborn spots and gloves to protect your hands.
Protecting your countertops and floor is also part of preparation. Lay down old towels, newspapers, or a drop cloth. This will catch any drips or splatters of cleaning solution or grease, preventing a mess on your work surfaces and floor.
Make sure the kitchen is well-ventilated by opening a window or turning on the exhaust fan.
- Gather Your Cleaning Arsenal: Collect your chosen cleaner (dish soap and water, vinegar solution, or commercial degreaser), several clean, soft cloths or microfiber towels (you’ll need some for cleaning and some for drying/buffing), a bucket or bowl for water, and gloves.
- Protect Your Work Area: Place old towels or a plastic drop cloth on your countertops and floor directly below the cabinet doors you’ll be cleaning. This is crucial to prevent drips from damaging surfaces or making extra work for you later.
- Ventilate the Space: Open a window or turn on your kitchen’s exhaust fan. This is especially important if you’re using commercial cleaning products that might have strong fumes. Good airflow makes the cleaning process more comfortable and safer.
Cleaning the Grease Away
Once everything is prepared, you can begin the cleaning process. Start with the least aggressive cleaning solution you have and work your way up if needed. This ensures you use the gentlest method that effectively removes the grease.
Dip a soft cloth or sponge into your cleaning solution. Wring it out so it’s damp, not soaking wet. Gently wipe the surface of the cabinet doors.
Focus on areas with the most grease buildup. You should start to see the grease lifting off the surface.
For very stubborn spots, you might need to let the cleaner sit for a few minutes. You can also use a soft-bristled brush or an old toothbrush to gently scrub the tough areas. Remember to apply minimal pressure to avoid scratching.
Work in small sections, cleaning and rinsing as you go.
- Apply the Cleaner: Lightly dampen a soft cloth or sponge with your chosen cleaning solution. For spray cleaners, spray directly onto the cloth, not the cabinet, to avoid overspray and potential damage to hinges or electronics.
- Wipe in Sections: Begin wiping the cabinet doors. Use gentle, overlapping strokes. Work from the top of the door downwards. As the cloth picks up grease, rinse it out thoroughly in your cleaning solution or with clean water.
- Tackle Stubborn Spots: If some areas still have thick grease, apply a little more cleaner directly to that spot with your cloth. Let it sit for 2-3 minutes. You can then use a soft-bristled brush or an old toothbrush to gently work on the area.
- Rinse Thoroughly: After cleaning a section or an entire door, use a clean cloth dampened with plain warm water to wipe away any cleaning solution residue. This step is vital to prevent the cleaner from attracting more dirt later.
Drying and Polishing for a Shine
After you have cleaned and rinsed the cabinet doors, it’s time to dry them. Allowing them to air dry can sometimes leave water spots or streaks. Using a clean, dry microfiber cloth will give you the best results.
Gently wipe down each door until it is completely dry. This step not only removes moisture but also helps to buff the surface, bringing back its natural sheen. If you notice any smudges or missed spots, you can re-address them with a dry cloth or a bit of appropriate polish.
For an extra shine, especially on finished wood or laminate, you can use a furniture polish specifically designed for kitchen cabinets. Apply a small amount to a clean cloth and buff the doors. Always follow the polish manufacturer’s instructions.
This final touch will make your doors look like new.
- Pat Dry with Microfiber: Use a clean, dry microfiber cloth to gently pat and wipe the doors dry. Microfiber is excellent because it absorbs moisture effectively and doesn’t leave lint behind, helping to prevent streaks.
- Buff for Shine: Once dry, use the same cloth or a second clean, dry one to buff the surface of the doors. This action brings out the natural shine of the material and removes any faint water marks.
- Optional: Apply Polish: If your doors have a finish that can be polished (like wood or some laminates), you can apply a small amount of cabinet polish. Use a clean cloth, apply the polish sparingly, and buff it in gently. Always choose a polish appropriate for your cabinet type.
Dealing with Different Door Materials
Kitchen doors are made from a variety of materials, and each might require a slightly different approach. Understanding your door material helps you choose the safest and most effective cleaning method. For example, wood, laminate, and painted surfaces all have unique cleaning needs.
Wood doors, especially those with natural finishes, can be sensitive to moisture and harsh chemicals. Over-wetting can cause the wood to swell or warp. Strong solvents can strip away the finish, leaving the wood exposed and dull.
Gentle cleaners are usually best for wood.
Laminate doors are generally durable and resistant to moisture. However, the edges and seams can be more vulnerable. Avoid soaking them, and be cautious with abrasive cleaners that could scratch the laminate surface.
Painted doors can range from very durable to quite delicate, depending on the type of paint and finish.
- For Painted Doors: Use mild dish soap and water. Avoid abrasive scrubbers and harsh chemicals like ammonia or bleach, as they can dull or strip the paint. If there’s a very stubborn spot, try a baking soda paste gently applied. Always rinse and dry thoroughly.
- For Wood Doors: Use a pH-neutral cleaner or a solution of mild dish soap and water. Avoid excessive water, as it can damage the wood. For waxed or oiled finishes, use products specifically designed for wood care. Test any cleaner in an inconspicuous area first.
- For Laminate Doors: Mild dish soap and water or a diluted vinegar solution works well. Wipe with a damp cloth and dry immediately. Avoid soaking the seams, as water can get underneath and cause damage. Do not use abrasive pads or strong solvents.
- For Stainless Steel Doors: Use a cleaner specifically designed for stainless steel or a mixture of water and vinegar. Always wipe in the direction of the grain to avoid streaks. Buff dry with a clean microfiber cloth.
Preventing Future Grease Buildup
Once you’ve successfully cleaned your kitchen doors, the next logical step is to prevent them from becoming greasy again. Prevention is always easier than cure, and a few simple habits can keep your kitchen looking fresh with less effort in the long run.
This involves consistent, light cleaning and addressing grease as soon as it appears. We’ll cover easy maintenance tips that don’t take much time but make a big difference. You’ll learn how to keep that shine going without having to do a deep clean too often.
Think of these as easy upgrades to your cleaning routine. They are designed to be simple and effective, helping you enjoy a cleaner kitchen for longer. Let’s explore how you can keep your kitchen doors looking their best with minimal fuss.
Regular Wipe-Downs
The most effective way to prevent grease buildup is through regular, quick wipe-downs. Instead of waiting for grease to accumulate and harden, a few minutes of cleaning every week or two can make a huge difference.
After cooking, especially if you’ve fried or grilled something, take a moment to wipe down your cabinet doors. Use a soft cloth dampened with warm water or a mild all-purpose cleaner. This removes fresh grease before it has a chance to stick and harden.
Make it a habit to do this as part of your kitchen cleanup routine. Perhaps after dinner, you can quickly wipe down the doors nearest the stove. This small effort will save you from having to deal with tough, old grease later on.
It keeps your kitchen looking consistently clean and tidy.
- Daily Quick Clean: After cooking, especially if you’ve been frying, take a damp microfiber cloth and quickly wipe down the cabinet fronts near your cooking area. This removes fresh grease before it cools and sticks.
- Weekly Spruce-Up: Dedicate a few minutes each week to wipe down all your kitchen doors with a mild cleaner. This prevents any minor grease spots from becoming major problems and keeps the overall finish looking good.
- Spot Cleaning: If you notice a spill or a greasy fingerprint at any time, wipe it away immediately. Don’t let it sit. Small, quick cleanups are far easier than tackling baked-on grease.
Using Kitchen Ventilation
Your kitchen’s ventilation system plays a crucial role in preventing grease from spreading throughout your home. The exhaust fan above your stove is designed to capture airborne grease and steam and vent them outside.
Make sure you use your exhaust fan every time you cook, especially when dealing with greasy foods. Running it during cooking and for a few minutes afterward can significantly reduce the amount of grease that settles on your kitchen doors and other surfaces.
Keep your exhaust fan filters clean as well. Over time, filters can become clogged with grease, reducing their effectiveness. Regularly cleaning or replacing these filters ensures your fan is working at its best.
A clean filter means cleaner air and, consequently, less grease settling on your cabinets.
- Engage Your Hood Fan: Turn on your range hood fan every time you cook, particularly when frying, sautéing, or broiling. This pulls airborne grease particles away from your cabinets and into the filter.
- Run it Post-Cooking: Let the fan run for at least 5-10 minutes after you finish cooking. This helps clear out any lingering grease particles and steam from the air.
- Maintain the Filters: Clean your range hood filters regularly according to the manufacturer’s instructions. Clogged filters are less effective at capturing grease, so keeping them clean is vital for maximum efficiency.
Maintaining Door Finishes
The finish on your kitchen doors is designed to protect the material underneath and provide a certain look. Keeping this finish in good condition is key to preventing grease from clinging and making cleaning easier.
Avoid using abrasive cleaners or tools, as these can scratch, dull, or remove the protective coating. Always use soft cloths and mild cleaning solutions. If your doors have a particular finish, like a matte paint or a high-gloss lacquer, research the best way to care for it.
For wooden doors, using a wood polish or conditioner periodically can help maintain the finish and make it more resistant to stains and grease. For laminate, keeping it free from deep scratches will prevent grease from getting into potential damage points. A well-maintained finish repels grease more effectively.
- Choose Gentle Cleaners: Always opt for mild soaps, water-based cleaners, or specialized cabinet cleaners. Harsh chemicals can strip finishes and make surfaces more porous and prone to staining.
- Avoid Abrasives: Never use steel wool, abrasive scouring pads, or powders. These can scratch the surface and damage the protective coating, making it harder to clean in the future.
- Regular Conditioning (for Wood): If you have wooden cabinets, a light application of a quality wood polish or conditioner every few months can help maintain the finish and add a protective layer against moisture and grease.
Troubleshooting Common Kitchen Door Issues
Even with the best cleaning efforts, you might encounter specific challenges when dealing with kitchen doors. This section addresses some of those common issues, offering solutions for sticky residue, discoloration, and minor damage.
Sometimes, after cleaning, a slight stickiness might remain. This can happen if the cleaner wasn’t fully rinsed off or if the grease was particularly thick. We’ll cover how to tackle this.
Discoloration is another issue that can arise, especially on older cabinets or if harsh cleaners were used previously.
We will also touch upon what to do if you accidentally scratch or damage a door during cleaning. The goal here is to provide quick fixes and preventative advice for these occasional problems, ensuring your kitchen doors look their best.
Dealing with Sticky Residue
If your doors feel sticky after cleaning, it’s usually due to leftover cleaner or partially removed grease. The best way to fix this is usually with a thorough rinse and a good drying process.
Take a clean cloth and dampen it with plain warm water. Wipe down the sticky areas thoroughly. You might need to rinse and wring out the cloth multiple times to ensure all residue is gone.
Make sure to go over the entire surface.
After rinsing, dry the doors completely with a clean, dry microfiber cloth. Buffing the surface can help remove any remaining tackiness and restore the shine. If the stickiness persists, it might indicate that the cleaner you used wasn’t fully removed or wasn’t the right type.
You may need to try a slightly different approach, perhaps with a cleaner specifically designed for residue removal.
- Rinse and Repeat: Often, stickiness is just leftover cleaner. Use a clean, damp cloth with plain water and wipe down the entire door surface. Rinse your cloth frequently and repeat until the surface no longer feels tacky.
- Baking Soda Solution: For persistent stickiness, a very mild baking soda solution (1 tablespoon baking soda to 1 quart of water) can help break down the residue. Apply with a soft cloth, wipe gently, and then rinse thoroughly with plain water.
- Alcohol Wipe: A very light application of rubbing alcohol on a cloth can dissolve sticky residues. Test this in an inconspicuous spot first, as alcohol can sometimes affect certain finishes. Wipe the area and then follow with a clean, damp cloth and dry thoroughly.
Addressing Fading or Discoloration
Fading or discoloration on kitchen doors can be caused by a few things: prolonged exposure to sunlight, heat from appliances, or past use of harsh cleaning chemicals. Unfortunately, significant discoloration can be difficult to reverse.
For minor fading caused by light exposure, sometimes a good cleaning and polishing can help restore some luster. However, if the color has been truly leached out, you might be looking at a refinishing job. If discoloration is due to cleaning product residue, thoroughly cleaning and rinsing the area might help remove the offending substance.
It’s important to identify the cause if possible. If sunlight is the culprit, consider using curtains or blinds to protect the doors. If it’s chemical damage, you’ll need to be much more careful with cleaning products in the future and focus on preventative care.
- Sunlight Damage: If doors facing windows are faded, this is likely from UV exposure. Protective films or blinds can prevent further fading. Addressing existing fading may require refinishing or painting.
- Heat Damage: Doors near ovens or other heat sources can sometimes discolor or warp. Ensure good ventilation around appliances. For minor discoloration, a gentle cleaner might help, but severe damage often needs professional attention.
- Chemical Stains: If you suspect a cleaner caused discoloration, try a targeted cleaning of that area with a mild solution and rinse thoroughly. If it’s a stain, it may be permanent and require touch-up paint or refinishing.
Minor Scratches and Dents
Accidental scratches or small dents can happen during cleaning or general use. For minor surface scratches, especially on wood or painted surfaces, there are a few things you can try.
For light scratches on wood, you might be able to use a wood repair crayon or a wax stick that matches the color of your doors. Gently rub it into the scratch. For painted surfaces, a small touch-up paint kit can be very effective.
Match the paint color as closely as possible.
For very minor dents on wood, sometimes gently steaming the area can cause the wood fibers to swell and lift the dent slightly. Place a damp cloth over the dent and carefully apply a warm iron over the cloth for a few seconds. Be very careful not to scorch the wood.
Deeper dents or gouges usually require wood filler and refinishing.
- Wood Scratch Repair: For shallow scratches on wood, colored wax sticks or furniture repair crayons are available. Select a color that matches your cabinets and rub it into the scratch to disguise it.
- Paint Touch-Ups: If your cabinets are painted, keep a small amount of the original paint for touch-ups. For scratches, gently clean the area, then carefully apply a thin layer of touch-up paint with a fine brush.
- Minor Dent Treatment: For small dents in wood, try the steam method: place a damp cloth over the dent and gently press with a warm iron for a few seconds. This can help the wood fibers swell. For deeper dents, wood filler is the best solution.
Frequently Asked Questions
Question: How often should I clean my kitchen doors for grease?
Answer: It’s best to do a quick wipe-down of your kitchen doors at least weekly, especially those near the stove. A more thorough cleaning to remove old grease can be done every 2-3 months or as needed if you notice buildup.
Question: Can I use a magic eraser on my kitchen doors?
Answer: Magic Erasers are very effective but also abrasive. They can sometimes remove or dull the finish on cabinets, especially painted or high-gloss ones. It’s best to test in an inconspicuous spot first or use them very gently only on tough spots.
Question: What is the best way to clean greasy cabinet knobs and handles?
Answer: Cabinet knobs and handles can usually be cleaned with the same solutions you use for your doors. For metal hardware, a quick wipe with dish soap and water or a specialized metal cleaner often works well. Remember to dry them completely to prevent water spots.
Question: My kitchen doors have a matte finish, what should I use?
Answer: Matte finishes can be tricky. Use very mild cleaners like dish soap and water, and avoid anything that could leave a shine or streak. Always test your cleaner in a hidden spot.
Rinse well and dry with a soft cloth to maintain the matte look.
Question: Is it okay to use an all-purpose cleaner on my kitchen cabinets?
Answer: Many all-purpose cleaners can work, but it’s crucial to check the label for compatibility with your cabinet material. Some all-purpose cleaners can be too harsh. Always test in an inconspicuous area first to ensure it won’t damage the finish.
Final Thoughts
Tackling old grease on kitchen doors is much easier with the right approach. By using simple, effective cleaners and following a step-by-step method, you can restore your cabinets’ appearance. Regular maintenance and using your kitchen’s ventilation are key to keeping grease at bay.
Enjoy your newly cleaned and fresh-looking kitchen doors!