
Cleaning your kitchen exhaust fan can seem like a tricky job, especially if you’re new to kitchen maintenance. Grease builds up over time, making it sticky and sometimes hard to get rid of. But don’t worry!
We’re going to show you a super simple way to tackle this task. We’ll walk you through each step so your fan looks and works great again. Get ready to see how easy it is to make a big difference in your kitchen.
Why Cleaning Your Kitchen Exhaust Fan is Important
Keeping your kitchen exhaust fan clean is more than just about looks; it’s vital for your home’s safety and air quality. Over time, the fan filters and housing collect airborne grease, dust, and other cooking byproducts. This buildup can become a fire hazard, as grease is highly flammable.
A clogged fan also works less efficiently, meaning it can’t effectively remove smoke, odors, and steam from your kitchen. This leads to a stuffy environment and can even cause mold and mildew to grow in your kitchen and surrounding areas. Regular cleaning ensures your fan runs smoothly, keeps your air fresh, and reduces the risk of accidents.
The Dangers of Neglecting Fan Cleaning
When you don’t clean your exhaust fan, grease can accumulate in thick layers. This isn’t just unsightly; it’s dangerous. A kitchen fire can start easily when grease is present near heat sources.
The fan itself can also break down if it’s forced to work too hard due to clogged filters.
-
Fire Risk: Grease buildup on fan blades and filters is extremely flammable. A sudden spark or high heat can ignite this grease, leading to a serious kitchen fire that can spread quickly through your home. This is the most critical reason to keep your fan clean.
Imagine a small flame from your stovetop suddenly flaring up and catching onto the accumulated grease above it – it’s a scenario no one wants.
-
Reduced Air Quality: Your exhaust fan’s job is to pull smoky, steamy, and odor-filled air out of your kitchen. When it’s clogged, it can’t do this job well. This leaves lingering cooking smells, makes your kitchen feel damp, and can even contribute to respiratory issues for people sensitive to airborne particles.
Think about walking into a kitchen that still smells strongly of last night’s fish dinner; this is the result of a fan that isn’t clearing the air properly.
-
Equipment Damage: A fan motor has to work much harder when its filters are blocked and its blades are covered in grease. This extra strain can lead to the motor overheating, wearing out faster, and eventually failing. Replacing an exhaust fan can be a costly repair, so preventative cleaning can save you money in the long run.
It’s like making your car work overtime without an oil change; eventually, something will break down.
How to Remove Grease from Kitchen Exhaust Fan Components
The process for cleaning your kitchen exhaust fan involves a few key components: the filters, the fan blades, and the exterior housing. Each part needs specific attention. We’ll break down the steps to make it easy to follow.
This section will guide you through getting each piece sparkling clean.
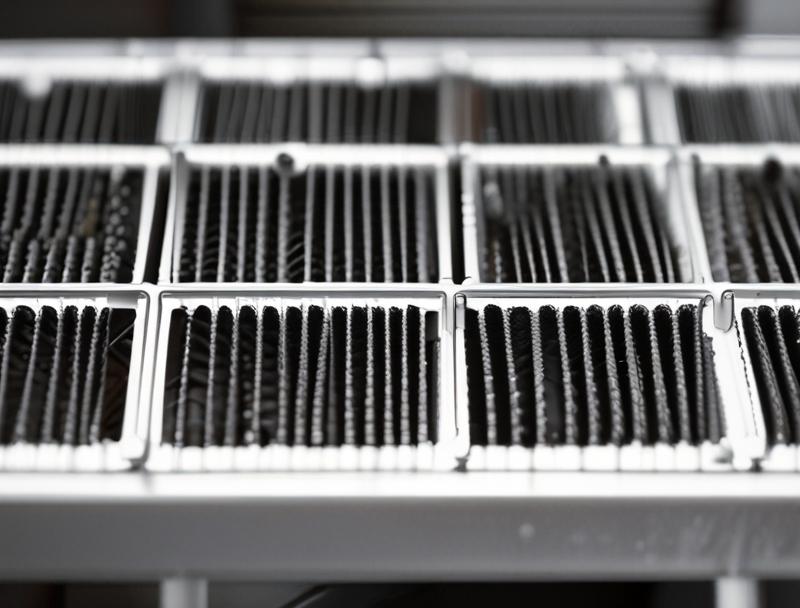
Cleaning the Exhaust Fan Filters
The filters are usually the dirtiest part of your exhaust fan because they catch most of the grease and particles. They often come out easily, and cleaning them can make a huge difference. Most filters are either metal mesh or charcoal.
Metal filters can typically be washed, while charcoal filters usually need to be replaced. We will focus on cleaning the washable metal filters here.
Metal mesh filters are designed to be cleaned and reused. The grease builds up within the mesh, making them less effective at filtering air. Letting them get too dirty can lead to grease dripping back into your cooking area, which is neither pleasant nor hygienic.
The goal is to dissolve this stubborn, sticky grease so the filter can do its job effectively again. This process might seem a bit messy, but the results are very rewarding.
Here’s how to get those filters clean:
-
Remove the Filters: Most kitchen exhaust fans have filters that can be pulled out. Look for latches or tabs on the underside of the fan housing. Gently push or slide these to release the filters.
Some might slide out sideways, while others pull straight down. Be sure to handle them carefully, as they can be coated in grease.
-
Soak the Filters: Fill your sink or a large basin with hot water. Add a good amount of dish soap, especially a grease-cutting formula. Submerge the filters in the soapy water and let them soak for at least 15-30 minutes.
This initial soak helps to loosen up the hardened grease, making the scrubbing easier.
-
Scrub the Filters: After soaking, use a soft brush or an old toothbrush to gently scrub away the loosened grease. Work in the direction of the mesh if possible. For very stubborn spots, you might need to apply a little more elbow grease.
Rinse the filters thoroughly under hot running water to remove all soap and grease residue.
-
Dry Thoroughly: It’s important to let the filters dry completely before putting them back. You can pat them dry with a clean towel or let them air dry on a rack. Make sure they are fully dry to prevent any moisture from getting back into the fan.
Placing them in a sunny spot can help speed up the drying process.
In some cases, especially with very old and caked-on grease, a simple soak might not be enough. For these tough situations, you might consider using a degreaser spray specifically designed for kitchen use. Always follow the product’s instructions and ensure good ventilation when using such cleaners.
Test the degreaser on an inconspicuous spot first to make sure it doesn’t damage the filter material.
A study by the National Fire Protection Association (NFPA) found that cooking equipment is involved in almost half of all reported home fires. A significant portion of these fires involve grease buildup in ventilation systems. This statistic highlights the importance of regularly cleaning exhaust fan filters to prevent such incidents.
Keeping your kitchen safe starts with simple maintenance tasks like this one.
Cleaning the Exhaust Fan Blades
The fan blades are harder to reach, but they also accumulate grease. They are located deeper inside the fan housing. Cleaning them ensures the fan operates efficiently and quietly.
If the blades are covered in grease, they might make a slight humming noise or vibrations. Removing this grease helps the fan spin more smoothly and freely.
This part can be a bit more delicate. You’ll want to be careful not to damage the motor or other internal parts of the fan. The goal is to gently remove the grease without forcing anything or using harsh chemicals that could harm the fan’s components.
A bit of patience and the right tools will make this task manageable and effective.
Here’s a step-by-step approach for the fan blades:
-
Safety First: Before you start, always unplug the exhaust fan from the power source. This is a critical safety step to prevent any accidental startups while you’re working. Make sure the power switch is also in the ‘off’ position.
-
Access the Blades: Depending on your fan model, you might need to remove a cover or guard to access the fan blades. This often involves unscrewing a few small screws or releasing clips. Keep track of any screws you remove so you can put them back correctly.
-
Gentle Cleaning: Dampen a clean cloth with a mixture of warm water and a little dish soap. Gently wipe down the fan blades. For hard-to-reach spots, you can use a cotton swab or an old toothbrush dipped in the soapy solution.
Work slowly and carefully, trying not to let excess liquid drip into the motor area.
-
Stubborn Grease: If you encounter very stubborn grease, you can use a mild degreaser spray. Spray a small amount onto a cloth, not directly onto the blades or motor. Then, wipe the blades with the dampened cloth.
Afterward, wipe the blades again with a clean cloth dampened only with water to remove any degreaser residue.
-
Dry and Reassemble: Once the blades are clean, use a dry cloth to wipe them down thoroughly. Ensure they are completely dry before reassembling any covers or guards you removed. Double-check that all screws are back in place and the fan is securely put back together.
It’s important to use cleaning solutions sparingly around the fan motor. Excessive moisture can damage electrical components. If your fan has a light fixture, it’s often a good idea to remove the light cover and clean the bulb area as well, as grease can accumulate there too.
Some fans also have a grease trap or cup that needs to be emptied and washed separately; check your fan’s manual for specifics.
Cleaning the Exterior of the Exhaust Fan
The outside of your exhaust fan, the part you see most often, can also get greasy and grimy from cooking. Cleaning this part is straightforward and makes your kitchen look much tidier. This involves wiping down the hood and any visible panels.
A clean exterior makes your whole kitchen feel fresher. It shows attention to detail and helps maintain a pleasant cooking environment. This part is usually the easiest to clean, often requiring just a quick wipe down with the right solution.
We’ll focus on the most common materials found on exhaust hoods.
Here’s how to clean the exterior:
-
Prepare Your Cleaning Solution: Mix warm water with a few drops of dish soap. For tougher grease spots on stainless steel, a bit of baking soda paste (baking soda mixed with water to form a paste) can be effective. For painted surfaces, stick to mild soap and water.
-
Wipe Down the Surface: Dampen a soft cloth with your cleaning solution and wipe down the exterior surfaces of the exhaust fan hood. Work from top to bottom. For stainless steel, wipe in the direction of the grain to avoid scratching.
-
Address Tough Spots: If you have stubborn grease splatters, apply the baking soda paste to the area and let it sit for a few minutes. Then, gently scrub with a soft cloth or sponge. Rinse the area by wiping with a cloth dampened with plain water.
-
Dry and Polish: After cleaning, use a clean, dry cloth to wipe down the exterior. For stainless steel, a final polish with a specialized stainless steel cleaner or a bit of olive oil on a cloth can make it shine and help resist fingerprints.
Always check the manufacturer’s instructions for your specific exhaust fan model. Some materials might require special care. For instance, brushed aluminum or certain types of plastic might be sensitive to harsh cleaners.
Using a microfiber cloth can help prevent scratches and streaks, leaving a professional-looking finish.
Understanding Different Types of Kitchen Exhaust Fans
Not all kitchen exhaust fans are the same. They come in various types, and knowing which one you have can help you understand the best way to clean and maintain it. The main differences lie in how they vent air and their physical design.
Each type has its own set of considerations when it comes to grease removal and overall upkeep. This knowledge helps you address specific cleaning challenges and ensures you’re using the most effective methods for your particular setup.
Under-Cabinet Fans
These are perhaps the most common type of kitchen exhaust fan. They are installed directly under your kitchen cabinets, above the stovetop. They are designed to capture smoke, steam, and grease.
Their accessibility makes them relatively easy to clean. The filters are usually located on the underside, making them simple to remove and wash.
Under-cabinet fans are a popular choice because they are cost-effective and easy to install. They often have a blower that either recirculates the air (after filtering it through charcoal and mesh filters) or vents it directly outside through ductwork. The efficiency of grease removal largely depends on the quality and maintenance of the filters.
A well-maintained under-cabinet fan is a workhorse in keeping your kitchen air clear.
Key features and cleaning points:
-
Accessibility: Filters are usually easy to reach and remove from the bottom of the unit. This makes regular cleaning straightforward, as you can quickly pop them out for a wash.
-
Recirculating vs. Vented: Some models simply filter the air and blow it back into the kitchen. Others are ducted to vent air outside.
Ducted systems are generally more effective at removing grease and odors completely, but both types still require regular filter cleaning.
-
Filter Types: Typically use metal mesh filters, which are washable. Some may also include charcoal filters if they are recirculating models, which need to be replaced periodically.
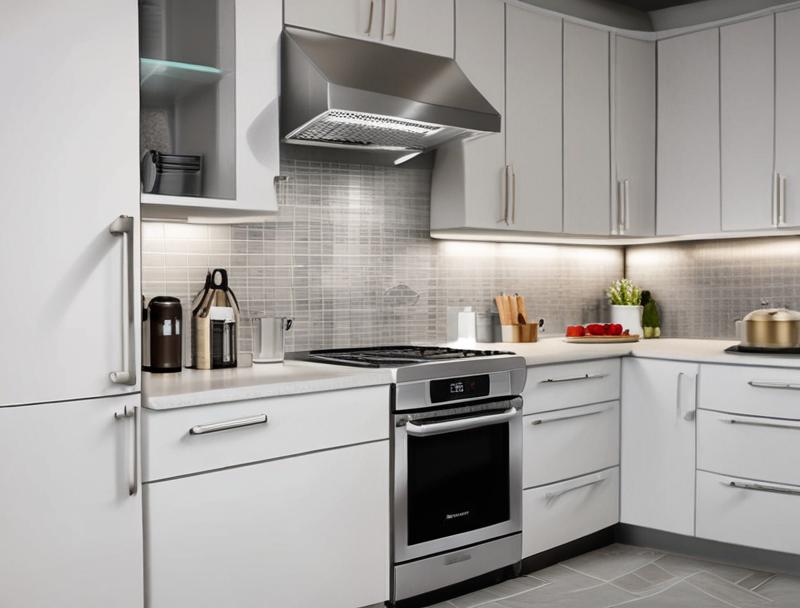
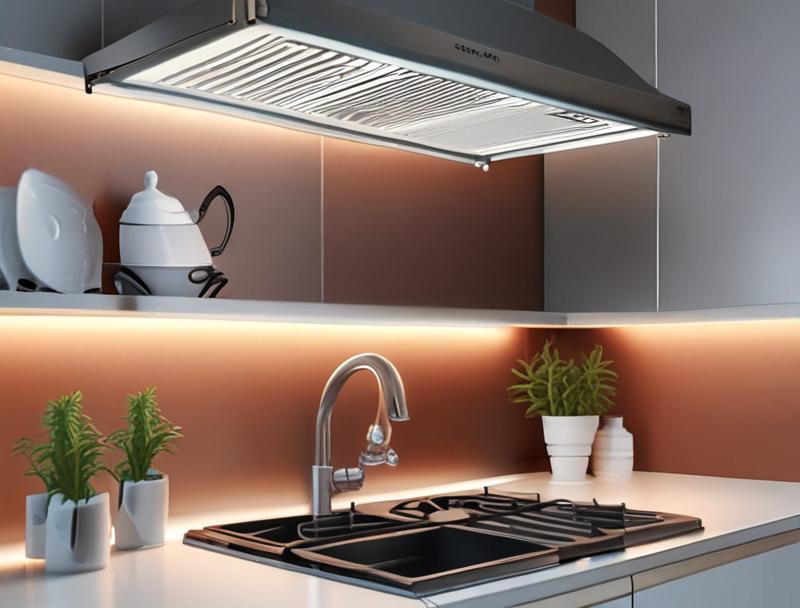
Wall-Mounted Range Hoods
These fans are mounted directly onto the wall above your stove, often standing out as a design element in the kitchen. They are typically larger and more powerful than under-cabinet models. Because they are often more prominent, their exterior cleaning is also very important for the overall look of the kitchen.
Wall-mounted hoods can be ducted to vent outside or designed as ductless (recirculating) units. Their larger size means they have more surface area to collect grease, both on the filters and the hood itself. Cleaning them might involve a few more steps, especially if they have decorative elements or multiple parts that need attention.
Ensuring all parts are clean contributes to their aesthetic appeal and functional efficiency.
Key features and cleaning points:
-
Size and Power: Generally more robust and powerful, offering better ventilation for larger kitchens or high-heat cooking. This also means more surface area for grease to accumulate.
-
Design: Often a focal point of the kitchen. Their visible parts, including the chimney or canopy, need regular cleaning to maintain their appearance.
-
Ducting: Can be ducted to the outside or ductless. Ducted versions require cleaning of ductwork periodically, though the primary focus for grease removal remains the filters and hood.
Island Range Hoods
Designed for kitchens with an island cooktop, these hoods are mounted on the ceiling above the island. They are often a significant design statement and need to be visually appealing from all angles. Their position in the center of the kitchen means they are exposed to cooking fumes from all sides.
Cleaning an island range hood can be more challenging due to their height and the need for safety while working at a distance from the counter. The larger surface area and often more complex designs mean more components to clean. However, their central placement makes them highly effective at capturing airborne grease and odors before they spread throughout the kitchen.
Regular cleaning is essential not just for function but also for maintaining the kitchen’s aesthetic.
Key features and cleaning points:
-
Central Location: Positioned above a kitchen island, they capture grease and fumes from all directions. This means they can get dirty quickly on all sides.
-
Aesthetic Importance: Often a stylish centerpiece, so exterior cleaning is crucial for the kitchen’s overall look. They can have elaborate designs.
-
Height and Access: Cleaning can be more difficult due to their height. Using a stable step stool or ladder is often necessary. Some models may have features to lower the hood for easier cleaning.
Downdraft Ventilation Systems
These systems are integrated into the cooktop or the countertop behind it. They rise up when needed to capture smoke and grease. When not in use, they are nearly invisible.
They are a good option for kitchens where a traditional overhead hood might obstruct the view or interfere with kitchen design.
Downdraft systems require careful cleaning, as the vents and any accompanying filters can be subject to grease buildup. The mechanism that raises and lowers them also needs to be kept clear of debris. Because they are integrated, cleaning might involve more attention to detail to ensure the moving parts function correctly.
Grease can clog the vents and impede the fan’s ability to draw air downwards effectively.
Key features and cleaning points:
-
Integrated Design: Built into the cooktop or counter, offering a sleek, minimalist look. They appear only when in use.
-
Grease Capture: Designed to pull air downwards. Grease can accumulate in the vents and the fan mechanism, requiring careful cleaning.
-
Maintenance: Cleaning can be more involved due to the integrated nature and moving parts. Accessing all areas might require disassembling certain components, so checking the manual is key.
Choosing the Right Cleaning Tools and Supplies
Having the right tools and supplies makes the job of removing grease from your kitchen exhaust fan much easier and more effective. You don’t need a lot of fancy equipment; most items can be found in your kitchen or a local store. Using the correct supplies will help you cut through the grease without damaging your fan.
The key is to use products that are effective against grease but gentle enough for your fan’s materials. For example, harsh abrasives can scratch stainless steel, and strong chemicals might damage plastic parts. Choosing wisely means you get the best cleaning results while keeping your appliance in good condition for years to come.
Let’s look at what you’ll need.
Essential Cleaning Agents
The right cleaning agents are crucial for breaking down tough grease. The goal is to use something that dissolves grease without leaving behind harmful residue or damaging surfaces.
-
Dish Soap: A good quality, grease-cutting dish soap is your best friend. It’s gentle enough for most surfaces and effective at loosening everyday grease. It’s the go-to for soaking filters and general wiping.
-
Baking Soda: This natural abrasive is excellent for scrubbing away stubborn, baked-on grease. When mixed with water to form a paste, it can tackle tough spots on metal and other durable surfaces without scratching. It also helps to deodorize.
-
Vinegar: White vinegar is a natural degreaser and disinfectant. It can be mixed with water for a cleaning solution or used to wipe down surfaces to remove residue. Its acidic nature helps to break down grease effectively.
Be cautious on certain surfaces like natural stone, as acid can etch them.
-
Commercial Degreaser: For extremely tough, old grease, a dedicated kitchen degreaser spray can be very helpful. Always choose a product that is safe for kitchen surfaces and follow the instructions carefully. Ensure good ventilation when using these products.
When using any cleaning product, always test it on a small, inconspicuous area first to ensure it doesn’t cause discoloration or damage. This is especially important for painted surfaces or finishes on your exhaust fan.
Helpful Cleaning Tools
Beyond cleaning agents, the right tools make the physical act of cleaning much more efficient and less of a chore. They help you reach different areas and apply the cleaning solutions effectively.
-
Soft Cloths and Sponges: Microfiber cloths are excellent for wiping and polishing without scratching. Soft sponges are good for scrubbing without being too abrasive. Have plenty on hand for different tasks.
-
Scrub Brushes: A set of brushes with varying bristle stiffness can be very useful. An old toothbrush is perfect for tight spots like mesh filters or around fan blades. A larger, soft-bristled brush can help with scrubbing larger surfaces.
-
Gloves: Protect your hands from grease and cleaning chemicals by wearing rubber or latex gloves. This is especially important if you have sensitive skin or are using stronger cleaning agents.
-
Bucket or Basin: You’ll need a container to hold your cleaning solutions for soaking filters or dipping cloths and sponges. A sink can also serve this purpose.
-
Paper Towels: Useful for drying, wiping up spills, and for jobs where you don’t want to reuse a cloth immediately.
Consider having a separate set of cleaning tools just for your kitchen appliances to avoid cross-contamination with bathroom or other household cleaning tools. This ensures hygiene and prevents the transfer of unwanted germs.
Preventing Future Grease Buildup
Once you’ve successfully cleaned your kitchen exhaust fan, you’ll want to keep it that way. Preventing grease from building up in the first place makes future cleaning much easier. It’s all about forming good habits and understanding how grease accumulates.
The best defense is a good offense. By taking a few simple steps after cooking, you can significantly reduce the amount of grease that sticks to your fan. This not only saves you time and effort on deep cleaning but also helps your fan function optimally and keeps your kitchen air cleaner on a daily basis.
Let’s explore some effective strategies for prevention.
Regular Maintenance Habits
Making cleaning a routine task is key. Little and often is much better than a big, daunting cleanup job later on. Consistency is your ally in keeping the grease at bay.
-
Wipe Down After Cooking: After each cooking session, take a moment to wipe down the stovetop and the immediate area around it, including the exterior of the fan hood if there are any visible splatters. A quick wipe with a damp cloth can prevent grease from setting.
-
Clean Filters Frequently: Aim to clean your exhaust fan filters at least once a month, or more often if you cook a lot of greasy foods. Removing the filters to soak them in hot, soapy water is a quick task that prevents major buildup.
-
Check for Grease Traps: If your fan has a removable grease trap or cup, empty and wash it regularly. These are designed to catch the bulk of the grease, so keeping them clean ensures they work as intended.
These simple habits, when followed consistently, can make a world of difference. You’ll notice your fan stays cleaner for longer, and the deep cleaning sessions become much less frequent and less intense.
Optimizing Fan Usage
How you use your exhaust fan also plays a role in its effectiveness. Using it correctly can maximize its grease-capturing ability.
-
Turn it on Before You Cook: Start your exhaust fan a few minutes before you begin cooking, especially if you’re frying or searing. This creates an airflow that helps capture grease and smoke as soon as they are produced.
-
Keep it Running During and After: Let the fan run while you’re cooking and for at least 5-10 minutes after you’ve finished. This ensures all lingering smoke, steam, and grease particles are pulled out of the kitchen air.
-
Use the Right Fan Speed: For everyday cooking, a lower setting might be sufficient. However, for high-heat cooking like frying, use the highest setting to ensure maximum airflow and effective grease capture. Don’t be afraid to crank it up when needed.
By integrating these usage tips into your cooking routine, you help your exhaust fan perform at its best. This proactive approach means less grease buildup and a fresher kitchen environment. It’s about working smarter, not harder, to keep your kitchen clean and safe.
Frequently Asked Questions
Question: How often should I clean my kitchen exhaust fan filters?
Answer: It’s a good idea to clean your exhaust fan filters at least once a month. If you cook with a lot of grease, like frying or bacon, you might need to clean them more often, perhaps every two weeks.
Question: Can I use oven cleaner on my exhaust fan filters?
Answer: While oven cleaner is powerful, it can be too harsh for many exhaust fan filters and might damage them. It’s usually best to stick to dish soap and hot water, or a dedicated kitchen degreaser if needed, and always check your fan’s manual.
Question: My exhaust fan is making a loud noise. What could be wrong?
Answer: A loud noise often means the fan blades are covered in grease and are out of balance, or the motor might be struggling. Cleaning the blades thoroughly should help. If the noise continues, there might be a mechanical issue that needs professional attention.
Question: What is the best way to clean stainless steel exhaust hoods without scratching?
Answer: For stainless steel, always wipe in the direction of the grain using a soft cloth or sponge and a mild dish soap solution. A baking soda paste can be used for tough spots, but scrub gently. Avoid abrasive pads or cleaners.
You can use a stainless steel polish afterward for shine.
Question: Do I need to clean the ductwork of my exhaust fan?
Answer: Yes, ducted exhaust fans do benefit from occasional duct cleaning to remove grease buildup and maintain airflow efficiency. This is a more involved process and might require a professional cleaning service, especially if the ductwork is extensive or hard to reach.
Summary
Cleaning your kitchen exhaust fan is a vital task for both safety and air quality. By following these simple steps, you can easily remove grease from filters, blades, and the exterior. Regular maintenance and smart usage habits will keep your fan working well and your kitchen fresh.
You’ve got this!