
It’s frustrating when you notice those stubborn burn marks on your favorite stainless steel pots and pans. Many home cooks wonder how to remove burn marks from stainless steel cookware because these marks can look tough. But don’t worry!
It’s usually not as hard as it seems. We’ll walk you through simple steps to get your cookware looking shiny and new again. Stick around to see how easy it can be.
Getting Burn Marks Off Stainless Steel Pans
This section covers the most common and effective ways to tackle those unsightly burn marks on your stainless steel cookware. We’ll explore different cleaning agents and techniques that are safe for your pans and generally easy to use. You’ll learn why certain methods work better than others and how to choose the right approach for the severity of the burn.
By the end, you’ll have a clear plan to restore your pots and pans.
Everyday Burn Marks: The Baking Soda Method
For lighter burn marks, baking soda is a fantastic go-to. It’s a gentle abrasive that can lift stains without scratching your cookware. This method is super simple and uses common household items.
-
What You’ll Need: Gather some baking soda, warm water, and a soft sponge or cloth. You’ll also want a bit of elbow grease!
Baking soda is a mild alkali, which means it can help break down burnt-on food particles. It’s also a physical abrasive, meaning its tiny particles help scrub away stains. When mixed with water, it forms a paste that is effective yet gentle enough not to damage the protective layer of stainless steel.
It’s a smart choice because it’s safe for food surfaces and readily available.
-
How to Do It: Sprinkle a good amount of baking soda into the burned part of the pan. Add just enough warm water to make a thick paste. Let it sit for about 15-30 minutes.
The paste needs time to work its magic. Letting it sit allows the baking soda to soften the burnt residue. This makes the scrubbing part much easier and less likely to require harsh chemicals or excessive force.
Think of it as letting a stain remover soak in before you try to wipe it away.
-
Scrub and Rinse: Gently scrub the paste around with your sponge or cloth. You should start to see the burn marks lifting away. Once the marks are gone, rinse the pan thoroughly with warm water and dry it.
The scrubbing action combined with the baking soda paste breaks down and removes the burnt material. Gentle scrubbing is key to avoid scratching the shiny surface of your stainless steel. If some spots remain, you can reapply the paste and try again.
A final rinse ensures all baking soda residue is removed, leaving your pan clean.
Tougher Stains: Vinegar and Baking Soda Power
When baking soda alone isn’t quite enough, adding vinegar can boost the cleaning power. The reaction between vinegar and baking soda creates a fizzing action that can help lift stubborn burns.
- The Science Behind It: Vinegar is acidic, and baking soda is alkaline. When mixed, they react to produce carbon dioxide gas, which causes bubbling. This fizzing action can help loosen tough, burnt-on food. The combination is like a gentle, natural scouring agent.
-
Steps for Stubborn Burns: First, try the baking soda paste method described above. If that doesn’t fully remove the marks, pour a cup of white vinegar into the pan, enough to cover the burned area.
White vinegar is a common household item known for its cleaning properties. Its acetic acid can help dissolve mineral deposits and food residue. Using it in conjunction with baking soda creates a dynamic cleaning duo.
This approach targets both greasy and carbonized burnt bits effectively.
-
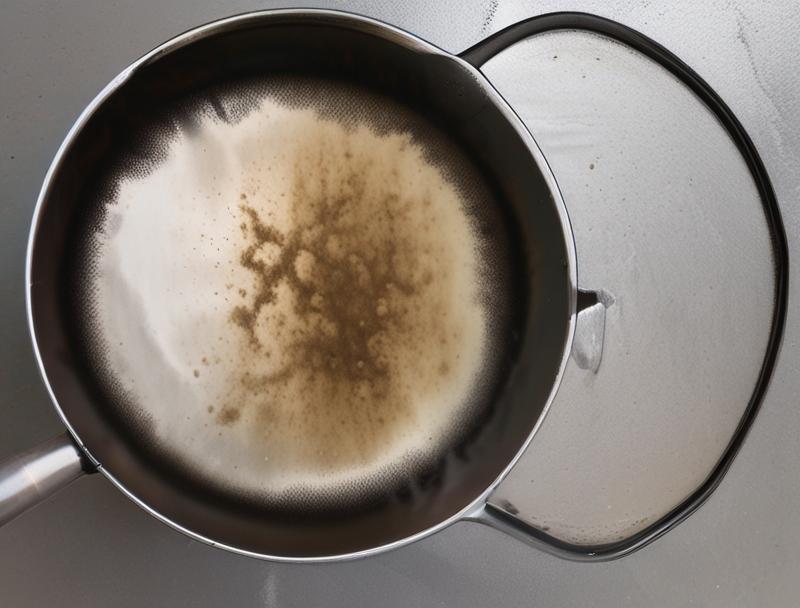
Simmer and Scrub: Place the pan on the stove and heat the vinegar gently for about 5-10 minutes. Do not boil it vigorously, just a gentle simmer. Remove from heat, let it cool slightly, then add a few tablespoons of baking soda to the vinegar. It will fizz up.
Heating the vinegar helps to loosen the burnt-on food particles. The gentle simmer allows the acid to break down the tough bits without damaging the pan. The subsequent addition of baking soda creates the fizzing reaction.
This reaction is not just for show; it actively helps to lift the loosened debris from the surface of the stainless steel.
-
Final Cleaning: Once the fizzing stops, use a non-abrasive sponge or cloth to scrub the pan. The burnt marks should come off much more easily now. Rinse well and dry.
The combination of the acidic vinegar and the abrasive baking soda paste, along with the gentle heat, should have significantly loosened the burn marks. The final scrubbing step removes the remaining residue. Always use a soft cloth or sponge to protect the finish of your stainless steel cookware.
Thorough rinsing prevents any leftover cleaning solution from affecting the taste of your next meal.
The Cream of Tartar Trick
Cream of tartar is another effective, yet gentle, cleaning agent for stainless steel. It’s a mild acid that can help brighten and clean your cookware.
- What is Cream of Tartar?: Cream of tartar, also known as potassium bitartrate, is a byproduct of winemaking. It’s a fine white powder that is slightly acidic. It’s often used in baking for its leavening properties but also works wonders as a cleaning agent.
-
Making the Paste: Mix 2 tablespoons of cream of tartar with a few drops of water to form a paste. Apply this paste directly to the burn marks.
The paste consistency ensures that the cleaning agent stays in contact with the stained area, giving it time to work. A little water is all that’s needed to create a spreadable consistency. This avoids wasting the product and makes sure the paste adheres to the burnt spots.
-
Let it Sit and Scrub: Let the paste sit on the burn marks for about 15-20 minutes. Then, gently scrub the area with a soft cloth or sponge. Rinse the pan thoroughly afterward.
Similar to the baking soda paste, allowing the cream of tartar paste to sit helps it break down the burnt residue. The mild acidity of the cream of tartar works to dissolve and lift the stains. Gentle scrubbing removes the loosened debris without damaging the cookware’s surface.
A good rinse ensures a clean finish.
When to Consider a Bar Keepers Friend Approach
For very stubborn, deeply set burn marks that other methods can’t touch, specialized cleaners like Bar Keepers Friend can be very effective. This product contains oxalic acid, which is great at removing rust, tarnish, and burnt-on food.
-
Understanding Bar Keepers Friend: Bar Keepers Friend is a powdered cleanser that contains oxalic acid. Oxalic acid is a chemical compound that is particularly good at dissolving metal oxides, making it excellent for cleaning stainless steel, brass, and porcelain. It works by chemically reacting with the stains.
It’s important to use it as directed because it’s a stronger cleaner than baking soda or vinegar. Always test it on an inconspicuous area first if you’re unsure about your cookware’s finish. It’s designed to tackle tough jobs, so a little goes a long way.
-
How to Use It Safely: Make a paste with Bar Keepers Friend and a small amount of water. Apply the paste to the burned areas.
Mixing the powder with water creates a paste that adheres to the burnt spots. This controlled application ensures that the cleaner is concentrated where it’s needed most. It also helps to prevent it from drying out too quickly.
-
Gentle Scrubbing is Key: Let the paste sit for a minute or two, then gently scrub with a damp sponge or soft cloth. Avoid using abrasive scouring pads, as these can scratch the stainless steel. Rinse thoroughly and dry.
The oxalic acid in Bar Keepers Friend works quickly. A short contact time is usually sufficient. Gentle scrubbing is critical here to avoid scratching.
The rinsing step is vital to remove all traces of the cleaner, as leftover residue can sometimes dull the finish.
Preventing Future Burn Marks
The best way to deal with burn marks is to avoid them in the first place. A few simple habits can keep your stainless steel cookware looking its best.
-
Control Your Heat: Stainless steel heats up quickly and retains heat well. Using medium heat is often sufficient for most cooking. High heat can lead to rapid burning of food and sugars.
Understanding how your stove and cookware interact is key. Stainless steel doesn’t have a non-stick coating, so food can stick and burn if the heat is too high. Letting the pan preheat properly on medium heat ensures even cooking and reduces the risk of hot spots that cause burning.
-
Use Enough Fat: A little oil or butter can prevent food from sticking directly to the pan. This creates a barrier between the food and the hot metal.
Fats like oil or butter not only help with non-stick properties but also conduct heat evenly. This prevents direct contact between the food and the hot surface, which is a primary cause of sticking and subsequent burning. It makes your cooking smoother and cleaning much easier.
-
Don’t Leave Food Unattended: Keep an eye on your cooking, especially when dealing with sauces, sugars, or delicate ingredients. Stir frequently.
Constant vigilance is your best defense against burnt-on messes. Many burn marks happen when ingredients caramelize too quickly or when food begins to stick and char because it’s left unattended. Stirring distributes heat and prevents any single spot from overheating and burning.
-
Preheat Properly: Allow your pan to heat up before adding food. This helps create a slight barrier and prevents food from sticking immediately.
A properly preheated pan creates a surface that is ready for cooking. Adding food to a cold pan or a pan that is too hot can both cause issues. A gentle, even preheat on medium heat is ideal for most stainless steel cookware.
It ensures that food cooks evenly and doesn’t seize up and burn on contact.
Restoring Shine: Beyond Burn Marks
Once you’ve tackled the burn marks, you might want to restore the original shine to your stainless steel cookware. This section will guide you through simple polishing techniques that can make your pots and pans look as good as new. We’ll cover methods that enhance the aesthetic appeal and maintain the quality of your kitchen tools.
The Power of Gentle Polishing
Keeping stainless steel shiny involves more than just cleaning. Polishing removes minor scratches and restores luster.
-
Microfiber Cloth Magic: After cleaning and drying your cookware, use a clean microfiber cloth to buff the surface. Wipe in the direction of the stainless steel grain.
Microfiber cloths are excellent for polishing because they are very fine and soft. They can pick up microscopic dirt and oil without scratching the surface. Buffing with the grain helps to create a uniform shine, making light scratches less noticeable.
-
Vinegar for Extra Sparkle: For an extra boost of shine, lightly dampen a microfiber cloth with white vinegar and wipe down the cookware. Then, buff dry with a clean, dry cloth.
Vinegar’s mild acidity helps to cut through any grease residue that might be dulling the shine. It also helps to remove water spots that can form after washing. The key is to use just a light amount and buff it off well to avoid streaks.
-
Stainless Steel Polish: Commercial stainless steel polishes are also available. Follow the product instructions carefully for best results.
These polishes are specifically formulated to clean, shine, and protect stainless steel surfaces. They often contain oils that create a protective barrier, making the surface more resistant to fingerprints and smudges. Always ensure the polish is food-safe if you plan to use the cookware for cooking soon after.
Dealing with Discoloration
Sometimes, stainless steel can develop rainbow-like or bluish discoloration, often from overheating or mineral deposits in water.
-
What Causes Discoloration: This common issue, often called heat tint or heat staining, happens when the stainless steel is exposed to high heat. It’s a chemical reaction on the surface that changes its color. It’s not a sign of damage, but it can be unsightly.
The surface of stainless steel has a thin layer of chromium oxide that protects it from corrosion. High heat can alter this layer, causing the iridescent colors. It’s a purely cosmetic change and doesn’t affect the integrity or safety of the cookware.
-
Using Mild Acids to Restore Color: A paste made from baking soda and water, or a vinegar-based solution, can often remove this discoloration. Gently rub the affected area and rinse well.
The mild acidity helps to break down the altered oxide layer, allowing the original, clear layer to form again. It’s like gently sanding and polishing to reveal the true surface underneath. Patience is key, and you might need to repeat the process.
-
Bar Keepers Friend for Tougher Tints: For more persistent discoloration, Bar Keepers Friend can be very effective. Apply a paste, let it sit for a minute, then gently scrub and rinse.
As mentioned before, Bar Keepers Friend’s oxalic acid is excellent at tackling stubborn stains and discoloration. It works chemically to lift the colored layer. Always remember to be gentle with your scrubbing to avoid scratching the metal.
Advanced Techniques and When to Seek Professional Help
While most burn marks can be handled with home remedies, some situations might call for more advanced approaches or even professional intervention. This section briefly touches on these scenarios to provide a complete picture of cookware care.
Deeply Ingrained Stains
Some burns are so severe they seem impossible to remove. They might be thick layers of carbonized food that resist all gentle methods.
-
Multiple Applications: For extremely tough stains, you might need to repeat your chosen cleaning method several times. Let the cleaning agent sit for longer periods.
Persistence pays off. If a single application doesn’t work, try it again. You can also try combining methods.
For instance, start with a vinegar soak, then move to a baking soda paste. This layered approach can tackle stubborn residue from different angles.
-
Oven Cleaner Caution: While oven cleaners are very strong and can remove burnt-on messes, they are generally NOT recommended for cookware.
Oven cleaners contain harsh chemicals like lye, which can damage the protective layer of your stainless steel, potentially causing pitting or permanent discoloration. They are also difficult to rinse off completely, posing a risk if food comes into contact with them. Always prioritize food-safe cleaning methods for your cookware.
When to Consider Replacement
In rare cases, severe damage might mean it’s time for a new pan.
-
Deep Pitting: If the burn has caused deep pits or holes in the metal, the structural integrity of the pan may be compromised.
Pitting means the metal itself has been damaged. This can affect how the pan heats and can create areas where food can easily stick and burn. A pitted pan is also harder to clean thoroughly, posing hygiene concerns.
-
Warping: If the pan has warped due to extreme heat, it will not sit flat on the stovetop, leading to uneven cooking.
A warped pan is a sign of significant heat stress. This means the metal has been permanently deformed. It will wobble on the burner, and heat distribution will be poor, making cooking difficult and frustrating.
Comparison of Cleaning Methods
To help you decide which method to try first, here’s a quick look at some common cleaning agents and their effectiveness. This table offers a simplified view of how different options stack up.
| Cleaning Agent | Effectiveness for Light Burns | Effectiveness for Stubborn Burns | Abrasiveness | Availability |
|---|---|---|---|---|
| Baking Soda | High | Medium | Low | High (Household Item) |
| White Vinegar | Medium | High (when combined with baking soda) | Very Low | High (Household Item) |
| Cream of Tartar | High | Medium | Low | Medium (Grocery/Baking Aisle) |
| Bar Keepers Friend | Very High | Very High | Medium (powder form) | High (Cleaning Aisle) |
How to Remove Burn Marks from Stainless Steel Cookware: A Summary
As you can see, getting rid of burn marks from stainless steel cookware is quite achievable. We’ve explored simple, effective methods using common household items like baking soda and vinegar, and touched on stronger options for tougher jobs. The key is gentle scrubbing and patience.
Frequently Asked Questions
Question: Can I use steel wool to clean burn marks?
Answer: It’s best to avoid steel wool on stainless steel cookware. While it might seem effective for tough stains, it can cause deep scratches that are difficult to remove and can damage the protective layer of your cookware, making it more prone to future staining and rust.
Question: How long should I let cleaning pastes sit on the burn marks?
Answer: For most pastes like baking soda or cream of tartar, letting them sit for 15-30 minutes is usually sufficient. For tougher stains with products like Bar Keepers Friend, a shorter time of 1-2 minutes is often all that’s needed, as it’s a stronger cleaner.
Question: Will these methods damage my non-stick coating if my pan has one?
Answer: These methods are specifically for stainless steel. If your pan has a non-stick coating, you should not use abrasive cleaners, strong acids like vinegar or Bar Keepers Friend, or harsh scrubbing as they will damage the non-stick surface. For non-stick pans, it’s best to consult the manufacturer’s care instructions.
Question: What if the burn mark is on the outside of the pan?
Answer: The same principles generally apply. You can use baking soda paste, vinegar, or Bar Keepers Friend on the exterior. Just be sure to rinse thoroughly and buff dry to restore the shine.
For very stubborn exterior marks, you might need to use slightly more elbow grease.
Question: How often should I clean my stainless steel cookware to prevent burns?
Answer: It’s ideal to clean your stainless steel cookware after each use. This prevents food residue from hardening and becoming a burn risk for the next time you cook. Quick washes with soap and water, followed by drying, are usually enough to keep them in good condition.
Final Thoughts
Getting rid of burn marks from stainless steel cookware is straightforward. You have simple, effective solutions using common items. With a little care and the right approach, your pans will look great again.
Enjoy cooking with confidence!