

Getting your kitchen cabinets looking fresh again after years of built-up grease can seem like a big job, especially if you’re new to cleaning. Those stubborn, sticky layers make it tough to know where to start. But don’t worry!
We’ve got a super simple, step-by-step plan to get them sparkling clean. First, we’ll gather what you need, then tackle the grease with easy methods, and finally make them shine. Let’s get your kitchen looking its best!
Getting Started: What You Need to Know About How to Clean Kitchen Cabinets After Years of Grease
Tackling kitchen cabinets that have collected grease over many years requires a clear plan and the right tools. This isn’t just about wiping; it’s about lifting that sticky, often invisible, film that cooking leaves behind. For beginners, the challenge lies in not knowing which cleaning agents are safe for different cabinet finishes or how much elbow grease is actually needed.
You might worry about damaging the wood or paint. The good news is, with common household items and a little patience, you can achieve fantastic results. This section will cover why this cleaning task is so common and what to expect, setting you up for success without any confusion.
We’ll make sure you feel confident tackling this project.
Why Grease Builds Up on Cabinets
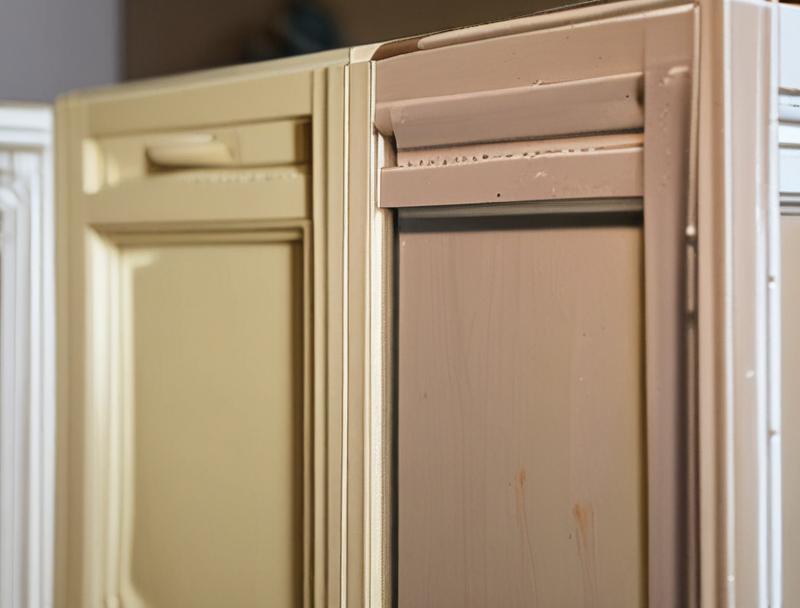
Grease is a common byproduct of cooking. When you fry, sauté, or even bake, tiny droplets of oil become airborne. These microscopic particles then float through the air in your kitchen.
Over time, they land on every surface, including your cabinets. Because grease is naturally sticky, it traps dust and dirt particles that are also in the air. This combination of grease, dust, and dirt creates a stubborn film that hardens and becomes more difficult to remove the longer it sits.
This build-up is especially noticeable on cabinets around the stove and oven, as these are the areas where most cooking activity happens. Even if you don’t fry food often, the general cooking process releases enough oils to cause this issue over extended periods.
- Heat and Oil: Cooking methods like frying and sautéing release hot oil vapors. These vapors are light and spread easily.
- Air Circulation and Settling: Kitchens have air movement from cooking, ventilation, and even opening doors.
- Dust and Dirt Adhesion: The sticky nature of grease acts like glue for airborne dust and grime.
When you cook with oil, it doesn’t just stay in the pan. The heat causes some of the oil to turn into a fine mist or vapor. This vapor rises and mixes with the air in your kitchen.
As this oily air circulates, it eventually settles on surfaces. Kitchen cabinets, being close to the cooking area, are prime targets for this oily mist. The effect is cumulative, meaning that even small amounts over a long time can lead to a noticeable build-up.
Think of your kitchen as a mini ecosystem. When you cook, especially with the stove fan on, you create air currents. These currents carry the grease particles throughout the room.
Even without a fan, heat from cooking naturally causes air to rise and move. This air movement helps to distribute the oily particles widely, ensuring they have a chance to land on all surfaces, including the often-overlooked nooks and crannies of your cabinets. This widespread dispersal is why entire kitchen cabinet fronts can end up coated in a greasy film, not just the ones directly next to the stove.
Once the oil has settled on your cabinets, it creates a slightly tacky surface. This tackiness makes it incredibly easy for regular household dust, pollen, and other airborne particles to stick to it. It’s like applying a thin layer of invisible double-sided tape.
Over months and years, this trapped dust builds up, becoming thicker and harder to remove than the original grease layer. This is why what might have started as a light sheen can turn into a thick, dark, and sticky grime that requires more than just a damp cloth to clean.
Common Misconceptions About Cabinet Cleaning
Many people think that strong, harsh chemicals are the only way to cut through tough grease. This often leads beginners to reach for industrial-strength cleaners. However, these potent solutions can sometimes damage the finish of your cabinets, causing discoloration or dullness.
Another common idea is that you need to scrub relentlessly for hours. While some scrubbing is necessary, using the right technique and cleaning solutions can significantly reduce the effort and time needed. People also often overlook the importance of protecting their hands and eyes, thinking it’s just a simple wipe-down.
Proper preparation is key to a safe and effective cleaning session.
The Best Ways to Tackle Years of Kitchen Grease on Cabinets
When your kitchen cabinets have seen years of cooking, a layer of stubborn grease is almost inevitable. This section focuses on the most effective, yet gentle, methods to break down and remove that sticky residue. We’ll explore various cleaning solutions, from simple homemade concoctions to readily available kitchen cleaners, and discuss how to apply them without harming your cabinet’s finish.
The goal is to lift the grime effectively, leaving your cabinets looking clean and refreshed. We’ll also touch on how to identify your cabinet’s material to ensure you’re using the safest and most efficient cleaning approach.
Homemade Cleaning Solutions That Work
You don’t need fancy cleaners to get amazing results. Many effective grease-cutting solutions can be made with items you likely already have in your pantry. These are often gentler on your cabinets and easier on your wallet.
The key is understanding how different ingredients work to break down grease. For example, the acidity in vinegar helps dissolve greasy films, while baking soda acts as a mild abrasive to lift stuck-on grime. Dish soap, designed to cut through grease on dishes, is also excellent for cabinets.
- Vinegar and Water: A classic and effective mix for general grease.
- Baking Soda Paste: For stubborn, caked-on grease spots.
- Dish Soap and Warm Water: A gentle yet powerful degreaser.
A simple solution of equal parts white vinegar and warm water is a go-to for many cleaning tasks. Vinegar’s acidity helps to break down the sticky bond of grease. It’s also a natural disinfectant.
To use, mix them in a spray bottle. Lightly spray the cabinet surface, let it sit for a minute or two to allow the vinegar to work, then wipe clean with a soft cloth. Always test this in an inconspicuous spot first to ensure it doesn’t affect your cabinet’s finish.
For tougher spots, you might need to let it sit a bit longer or use a slightly higher concentration of vinegar, but always start with the 1:1 ratio.
When grease is really built up and feels hard, a paste made from baking soda and water can be very helpful. Baking soda is a mild abrasive, meaning it can gently scrub away grime without scratching most surfaces. Mix baking soda with just enough water to create a thick paste, like toothpaste.
Apply this paste directly to the greasy areas. Let it sit for about 10-15 minutes. Then, gently scrub with a soft cloth or sponge.
Rinse the area thoroughly with a damp cloth to remove all baking soda residue. This method is particularly good for those dark spots that seem impossible to remove.
Dish soap is specifically formulated to break down grease on contact, making it a fantastic cleaner for kitchen cabinets. Mix a few drops of mild dish soap into a bowl of warm water. Dip a soft cloth into the soapy water, wring it out well so it’s damp, not dripping wet, and then wipe down the cabinet surfaces.
The soap will begin to lift the grease. Follow up by wiping with a clean, damp cloth to rinse away the soap and loosened grease. Finally, dry the cabinets with a clean, dry towel to prevent water spots and streaks.
Commercial Cleaning Products for Tough Grease
While homemade solutions are great, sometimes you need a product specifically designed for tough jobs. Many kitchen degreasers are available that can quickly cut through layers of baked-on grease. When choosing a commercial cleaner, look for products labeled as “degreaser” or “kitchen cleaner.” Always check the product label to ensure it’s safe for your cabinet material, whether it’s wood, laminate, or painted.
It’s wise to test any new cleaner on a small, hidden area first. This way, you can see how the cabinet material reacts before cleaning the entire cabinet.
- Kitchen Degreasers: Powerful solutions designed for oily messes.
- All-Purpose Cleaners with Degreasing Power: A convenient option for moderate grease.
Specialized kitchen degreasers are formulated with strong surfactants and solvents that excel at breaking down tough grease. These products can be very effective when faced with years of build-up. When using them, it’s crucial to follow the instructions on the bottle precisely.
Many require good ventilation, so open windows and turn on your kitchen fan. Apply the degreaser to a cloth rather than directly spraying onto the cabinets, especially if you have delicate finishes. This allows for more controlled application and prevents overspray onto other surfaces or hardware.
Some all-purpose cleaners are strong enough to handle moderate grease build-up. These are a good choice if your cabinets aren’t heavily coated but still need a good cleaning. They offer the convenience of being versatile for other kitchen cleaning tasks as well.
Look for ones that specifically mention degreasing abilities on their label. They are often less harsh than dedicated degreasers, making them a safer bet for frequent use or on more sensitive cabinet surfaces. Always ensure good ventilation when using any cleaning product.
Steps to Clean Kitchen Cabinets: A Practical Guide
Let’s walk through the actual process of cleaning those grimy cabinets. It’s not complicated, but doing it in steps makes it much easier and more effective. We’ll start with preparation, then move to cleaning, and finally rinsing and drying.
Following these steps will help you achieve a streak-free shine without damaging your cabinets.
- Clear the Cabinets: Remove everything from inside and on top of your cabinets.
- Dust and Debris Removal: Wipe away loose dust and cobwebs.
- Test Your Cleaner: Apply a small amount of your chosen cleaner to an inconspicuous spot.
- Apply the Cleaner: Spray solution onto a cloth, not directly onto the cabinet.
- Clean in Sections: Work on one cabinet door or drawer at a time.
- Wipe Away Grease: Gently rub the surface to lift the grease.
- Rinse Thoroughly: Use a clean, damp cloth to remove all cleaner residue.
- Dry and Buff: Use a soft, dry towel to dry the cabinets completely.
Before you start cleaning the outside, it’s important to clear the decks. Take all items out of your cabinets. This gives you unobstructed access to the cabinet doors and frames.
It also prevents any cleaning solutions or grime from getting onto your dishes, food, or pantry items. If you have items stored on top of your cabinets, remove those too. This allows you to clean the entire exterior surface without any hindrances.
Having a clear workspace makes the job much faster and more efficient.
Use a dry cloth or a soft-bristle brush to gently wipe away any loose dust, crumbs, or cobwebs from the cabinet surfaces. This initial dusting step is important because it prevents dry dust from turning into muddy streaks when you start using cleaning solutions. It’s a simple step that makes the subsequent wet cleaning much more effective and less messy.
Pay attention to the edges and corners where dust tends to accumulate.
This is a crucial step to prevent accidental damage. Find a hidden area of your cabinet, like the inside of a door or a spot at the bottom of a cabinet frame. Apply a small amount of your cleaning solution there and let it sit for a few minutes.
Then, wipe it off and let the area dry completely. Check for any discoloration, dullness, or damage to the finish. If the spot looks fine, you can proceed with cleaning the rest of your cabinets.
For most cleaning solutions, especially stronger ones, it’s best to spray the cleaner onto your cleaning cloth or sponge. This prevents excess liquid from seeping into the cabinet seams or getting onto hardware. It also gives you more control over how much cleaner you use.
Dampen the cloth well but ensure it’s not dripping wet. This controlled application helps protect the cabinet material and prevents streaks.
Divide your cabinets into manageable sections. For instance, focus on cleaning one cabinet door or one drawer front completely before moving to the next. This approach ensures that the cleaner doesn’t dry on the surface before you have a chance to wipe it off.
It helps you maintain a consistent cleaning process and allows you to focus your efforts effectively. As you finish cleaning a section, proceed to rinse and dry it before moving on.
With your dampened cloth, gently rub the cabinet surface in the direction of the wood grain, if applicable. You should start to see the grease lifting and transferring onto your cloth. Don’t scrub too hard, as this could damage the finish.
If the grease is particularly stubborn, you might need to reapply the cleaner and let it sit for a minute or two longer. Change to a clean part of the cloth as it becomes soiled with grease.
Once you’ve cleaned a section, it’s essential to rinse away all traces of the cleaning solution and the loosened grease. Use a fresh, clean cloth dampened with plain water. Wipe down the area you just cleaned.
This step removes any leftover soap or cleaner, which can leave streaks or dull the finish if not removed. Make sure to rinse the cloth frequently in clean water as you go, so you’re not just spreading residue around.
The final step is to dry the cabinets thoroughly. Use a clean, soft, and dry towel, like a microfiber towel, to gently dry the surfaces. This prevents water spots and streaks from forming as the water evaporates.
For an extra shine, you can lightly buff the dry cabinets with the towel. This also helps to bring out the natural sheen of your cabinet finish. Ensure all edges and hardware areas are completely dry.
Dealing with Different Cabinet Materials
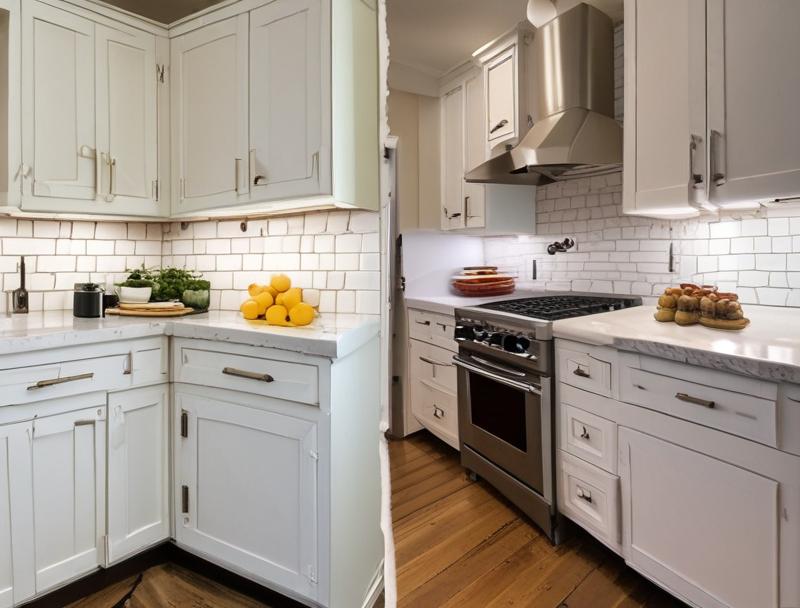
Kitchen cabinets come in various materials, each with its own cleaning needs. Knowing what your cabinets are made of will help you choose the right cleaning approach and avoid damage. Most kitchen cabinets are made of wood (hardwood or softwood), or engineered wood products like particleboard or MDF, which are then often covered with a laminate or veneer.
Painted cabinets are also very common. Stainless steel or thermofoil are other possibilities. Understanding the surface helps determine if it can handle more abrasive cleaners or acidic solutions.
Wood Cabinets
Wood cabinets are beautiful but can be sensitive. Solid wood cabinets, like oak or maple, are durable but can be damaged by excessive moisture or harsh chemicals. Varnished or sealed wood is more protected than unfinished wood.
For greased wooden cabinets, start with the mildest solutions like dish soap and water. If that doesn’t work, move to a diluted vinegar solution. Always wipe with the grain and dry immediately.
Avoid abrasive scrubbers.
Laminate and Thermofoil Cabinets
Laminate and thermofoil cabinets have a protective plastic or vinyl layer over an engineered wood core. These surfaces are generally quite durable and easy to clean. Most mild household cleaners work well.
Dish soap and water or an all-purpose cleaner are usually sufficient. Be cautious with very hot water or steam, as it can cause the laminate or foil to peel or bubble. Avoid abrasive cleaners that could scratch the surface.
Painted Cabinets
Painted cabinets can be tricky. The paint finish can range from durable enamel to more delicate matte finishes. For painted cabinets, it’s best to use the gentlest cleaning methods first.
A mild dish soap and water solution is usually a safe bet. If you need something stronger, test it carefully. Harsh chemicals or scrubbing can chip or remove the paint.
Always work gently and rinse thoroughly. Some specialized cabinet cleaners are designed for painted surfaces.
Tips for Maintaining Clean Cabinets
Once you’ve put in the effort to clean your kitchen cabinets, you’ll want to keep them looking good. Regular, light cleaning is the key to preventing heavy grease build-up in the future. Small efforts over time prevent the need for major scrubbing later on.
The goal is to wipe away grease and grime as soon as you notice it, rather than letting it accumulate for months or years.
- Wipe Down After Cooking: A quick wipe can save a lot of work later.
- Use a Splatter Screen: Reduce the amount of grease in the air.
- Regular Dusting: Keep dust from sticking to potential grease.
After you finish cooking, especially if you’ve fried or sautéed food, take a moment to wipe down your cabinet fronts, particularly those nearest the stove. A damp microfiber cloth is usually all you need for this. This simple habit removes fresh grease before it has a chance to set and attract dust.
It’s much easier to wipe away fresh oil than to scrub away hardened grease. This preventative measure is one of the most effective ways to keep cabinets clean.
A splatter screen is a simple tool that fits over your frying pan. It has small holes that allow steam to escape but prevent hot oil from splashing out. Using a splatter screen significantly reduces the amount of grease that becomes airborne in your kitchen.
This means less grease will settle on your cabinets, countertops, and walls, making your overall kitchen cleaning tasks much easier and less frequent. It’s a small investment that pays off in cleanliness.
Regularly dusting your cabinets, even when they don’t look dirty, helps prevent dust from accumulating. When dust lands on surfaces that already have a slight film of grease, it sticks and combines with it. By dusting frequently with a dry microfiber cloth, you remove this initial layer of dust, making it harder for grease to build up into a thick, sticky mess.
This also makes future deep cleans much quicker.
Making Your Kitchen Cabinets Shine After Grease Removal
After all that hard work getting rid of the years of grease, you want your cabinets to look their best. This part is all about the finishing touches that bring out the shine and protect your newly cleaned surfaces. We’ll look at how to make them gleam, how to address any lingering dullness, and some easy ways to keep them looking great for longer.
It’s about achieving that fresh, clean look that makes your whole kitchen feel brighter.
Restoring the Shine
Once the grease is gone, your cabinets might look clean but still a little dull. This is normal, as the cleaning process can sometimes remove the natural sheen along with the grime. The good news is, restoring that beautiful shine is usually quite simple.
It often involves just a few extra steps with the right products.
- Buffing with Microfiber Cloths: The final polish.
- Using Cabinet Polish or Beeswax: For added protection and shine.
After drying your cabinets completely, grab a clean, dry microfiber cloth. Gently buff the surface of each cabinet door and drawer front. Move the cloth in a circular motion or with the grain of the wood.
This buffing action helps to polish the surface, bringing back its natural luster and removing any faint water marks or smudges left from the cleaning process. It makes a noticeable difference in how bright and clean your cabinets appear.
For wood cabinets, a good quality cabinet polish or a beeswax-based product can work wonders. These products not only add a beautiful shine but also provide a protective layer that can help repel future grease and dust. Apply the polish or wax according to the product’s instructions, usually by applying a small amount to a clean cloth and then buffing it into the cabinet surface.
Always choose a product designed for your specific cabinet finish to avoid any adverse reactions.
Protecting Your Cabinets Going Forward
Keeping your cabinets clean is an ongoing process, and the best defense is a good offense. By incorporating a few simple habits into your kitchen routine, you can prevent grease from building up again. This makes future cleaning much less of a chore.
Think of it as consistent maintenance rather than deep cleaning.
- Regular Wiping: Make it a habit after cooking.
- Ventilation is Key: Use your range hood.
As mentioned before, a quick wipe-down after cooking is incredibly effective. Use a damp cloth or a specialized kitchen cleaning wipe. This removes fresh grease particles before they have a chance to harden and attract dust.
It takes only a minute or two but can save you hours of scrubbing down the line. This habit is the cornerstone of maintaining cabinets that look freshly cleaned.
Always use your range hood when cooking, especially when frying or searing. The hood is designed to capture grease fumes and vent them outside, significantly reducing the amount of oily particles that escape into your kitchen air and land on your cabinets. Make sure your range hood is clean and filters are replaced or cleaned regularly so it functions at its best.
Good ventilation is your first line of defense against grease build-up.
When to Call a Professional
While most grease build-up on kitchen cabinets can be handled with DIY methods, there are times when calling a professional might be a good idea. If your cabinets are made of a very delicate material, or if they have a high-end finish that you’re afraid of damaging, a professional cleaner might have specialized tools and knowledge. Also, if the grease build-up is extremely heavy and has been there for decades, it might be too much for typical home cleaning methods.
Professionals can often achieve results that are difficult for the average homeowner, especially on antique or custom cabinetry.
Frequently Asked Questions
Question: How often should I clean my kitchen cabinets?
Answer: For general maintenance, a quick wipe-down of frequently used cabinet fronts after cooking can prevent build-up. A more thorough cleaning, similar to what we’ve discussed for tough grease, might be needed every 6-12 months, depending on your cooking habits and how quickly grease appears.
Question: Can I use abrasive scrubbers on my cabinets?
Answer: It is generally not recommended to use abrasive scrubbers like steel wool or harsh scouring pads on kitchen cabinets. These can scratch, dull, or damage the finish, especially on wood, painted, or laminate surfaces. Stick to soft cloths, sponges, or microfiber towels.
Question: What should I do if I accidentally get cleaner on my cabinet hardware?
Answer: If you get cleaning solution on your cabinet hardware (like knobs or pulls), wipe it off immediately with a clean, damp cloth. Some hardware finishes can be sensitive to certain chemicals, so it’s best to remove any cleaner residue quickly to prevent discoloration or damage.
Question: My cabinets have a dark, sticky film that won’t come off. What’s the best approach?
Answer: This sounds like a classic case of built-up grease and grime. Start with a solution of warm water and dish soap applied with a soft cloth. If that doesn’t fully work, try a diluted vinegar solution or a baking soda paste for tougher spots.
Always test in an inconspicuous area first and work gently.
Question: Can I use baby wipes to clean my cabinets?
Answer: Baby wipes can be effective for light cleaning and minor spots, especially for painted or laminate cabinets. However, they may not be strong enough to tackle years of heavy grease build-up. For tough grease, you’ll likely need a more specialized degreasing solution.
Summary
Getting rid of years of grease on kitchen cabinets is totally doable. With simple household cleaners like vinegar, dish soap, and baking soda, you can cut through that sticky film. Always test your cleaner first, work in small sections, and dry thoroughly to avoid streaks.
Regular quick wipes after cooking will help keep them looking great. Your cabinets will look cleaner and brighter!