
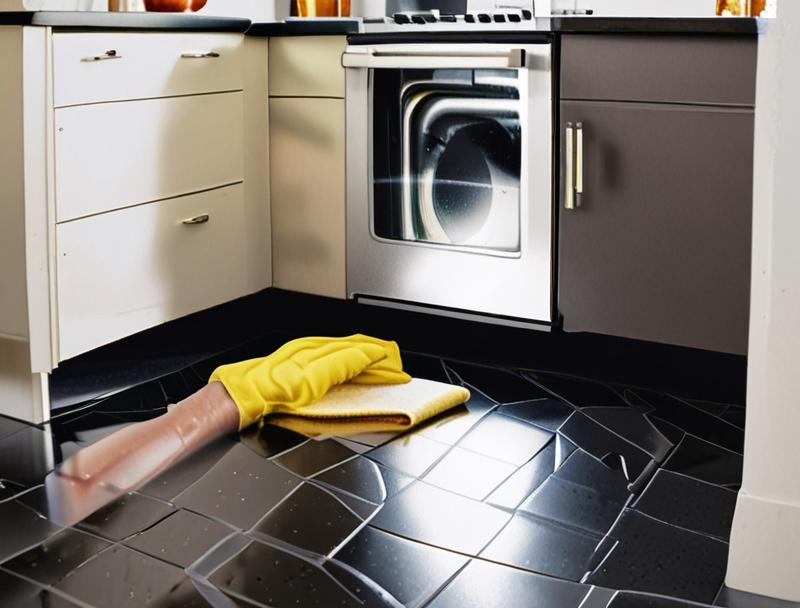
Tile floors look great, but sometimes accidents happen. Spills, cooking splatters, or even certain cleaning products can leave behind a sticky, oily mess. For beginners, tackling this can seem a bit tricky, leaving you wondering what to do.
Don’t worry! We’re here to show you a simple, step-by-step way to get your tile floors clean again. First, we’ll look at why these messes happen and what supplies you’ll need.
Why Tile Floors Get Sticky
Sticky oil on tile floors is a common problem that can surprise many homeowners, especially those new to maintaining their living spaces. This stickiness often results from everyday activities like cooking, where grease from pans can easily splatter onto the floor. Other culprits include oily residue left behind by certain cleaning products or even pet accidents.
When oil isn’t cleaned up quickly, it starts to attract dust and dirt particles from the air and foot traffic, creating a tacky layer that’s hard to remove with just a quick sweep or mop. This build-up can make your floors look dull and feel unpleasant underfoot. Understanding why this happens is the first step in effective cleaning.
Common Sources of Oily Residue
Many things around the house can contribute to oily spots on your tile. Cooking is a big one. When you fry food or even sauté vegetables, tiny droplets of oil can escape the pan and land on the floor.
These tiny specks might not seem like much, but they stick to the tile. Over time, more oil splatters and dust land on these spots, making them bigger and stickier. Even just walking around with oily feet can transfer residue.
Some floor waxes or polishes, if not used correctly or if they are the wrong type for your tile, can also leave a greasy film. Pet owners might also find that pet food or pet-related accidents can leave behind oily marks that need cleaning.
-
Cooking Splatters: During meal preparation, especially when frying or sautéing, hot oil can easily pop out of pans and land on the floor. These small droplets, when left unattended, begin to form a sticky film.
-
Residue from Cleaning Products: Some cleaning solutions, particularly those that are oil-based or designed for polishing, can leave a slight residue if not fully rinsed away. This can build up and contribute to a sticky feel over time.
-
Accidental Spills: Dropping food or drinks that contain oil, like salad dressing or fatty sauces, can create immediate sticky spots. The faster you clean these, the less of a problem they become.
-
Pet Activities: Food bowls for pets can sometimes leak or spill, leaving oily residues. Additionally, pets themselves can track oils from outside or from grooming products onto the floor.
Why Beginners Find It Challenging
For someone new to cleaning, sticky oil on tile floors presents a unique challenge. Often, a regular mop and water just spread the oil around, making the problem worse. Beginners might try using too much water, which can dilute the oil but not lift it, or they might use the wrong cleaning product that actually sets the stain.
They might not know that some cleaning agents can damage tile grout or finishes. The fear of making the floor even stickier or causing damage can be a big worry. Without the right knowledge, it’s easy to feel stuck and unsure of the best approach.
Gathering Your Cleaning Supplies
Before you start cleaning, having the right tools makes all the difference. You don’t need a lot of fancy equipment. Most of what you’ll need can be found around your house or is easy to pick up at a local store.
Having everything ready means you can tackle the sticky spots as soon as you’re prepared, stopping them from becoming a bigger issue. This section will cover the simple items that will help you get your tile floors looking clean and feeling smooth again.
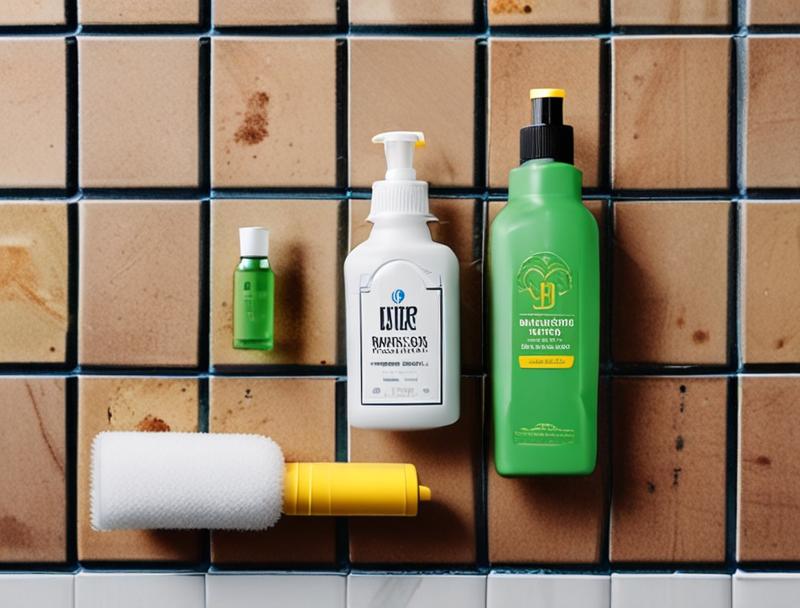
Essential Cleaning Agents
When dealing with sticky oil, you need cleaning agents that can break down grease and lift it from the tile surface. Water alone often isn’t enough because oil and water don’t mix well. You need something that acts as a solvent or emulsifier, helping to dissolve or break apart the oil so it can be washed away.
Many common household items can do this effectively. The key is to choose something that is tough on grease but gentle enough not to harm your tile or grout. We’ll explore a few great options that are safe and effective for this purpose.
-
Dish Soap: This is a fantastic degreaser. Dish soap is designed to cut through grease on dishes, making it perfect for oily messes on floors. It’s mild, inexpensive, and readily available in most kitchens.
-
White Vinegar: A natural cleaner and disinfectant, white vinegar is acidic. This acidity helps to break down oily residues and can also help remove grime that has become stuck to the oil. It’s also great for shining up tiles.
-
Baking Soda: This is a mild abrasive and a natural deodorizer. When mixed with water or vinegar, it can create a paste that helps lift stubborn, stuck-on oily spots. It gently scrubs without scratching.
-
Rubbing Alcohol (Isopropyl Alcohol): For very tough or dried-on oil spots, rubbing alcohol can be a good choice. It’s a strong solvent that evaporates quickly and can effectively break down greasy films.
When using any of these, it’s a good idea to test them in an inconspicuous spot first. This way, you can be sure they won’t discolor or damage your tile or grout. Most tile types, like ceramic and porcelain, are quite durable, but it’s always better to be safe.
For natural stone tiles, you might need to be more cautious and stick to milder options like dish soap or a specialized stone cleaner.
Tools for the Job
Beyond the cleaning agents, you’ll need some basic tools to apply them and remove the loosened oil. Having the right tools makes the cleaning process much smoother and more effective. You don’t need professional equipment; common household items will work perfectly.
Let’s look at what you’ll want to have on hand to get the job done right.
-
Soft Cloths or Sponges: You’ll need these to apply your cleaning solution and to wipe away the loosened oil. Microfiber cloths are excellent because they are absorbent and don’t leave lint behind. Soft sponges can also work well.
-
Bucket: A bucket is essential for mixing your cleaning solution, whether it’s a simple dish soap and water mix or a vinegar solution. You’ll use it to dip your cloths or mops into.
-
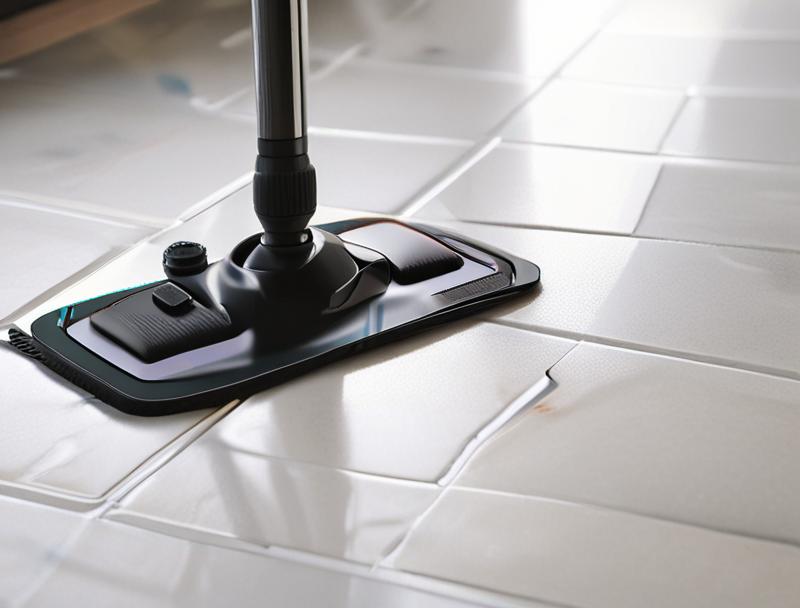
Mop (Optional but Recommended): For larger areas, a mop can be very helpful. A sponge mop or a microfiber flat mop is ideal. Avoid traditional string mops if they tend to leave too much water, as excessive moisture can sometimes be an issue for grout.
-
Old Toothbrush or Small Brush: This is perfect for scrubbing stubborn spots, especially in grout lines or around fixtures. The bristles can get into tight spaces where cloths or sponges can’t reach effectively.
-
Paper Towels or Dry Cloths: You’ll need these for drying the floor thoroughly after cleaning to prevent water spots and to ensure all the oily residue is gone.
Having these items ready will ensure you can effectively lift and remove the sticky oil without making extra work for yourself. A well-prepared cleaning session is always a successful one.
How to Remove Sticky Oil from Tile Floors: Step-by-Step
Now that you have your supplies, it’s time to get down to business. Following these steps will help you tackle sticky oil on your tile floors effectively. We’ll start with the gentlest methods and move to stronger ones if needed.
The goal is to lift the oil without damaging your floors. These simple actions will guide you to a clean, non-sticky surface, leaving your tiles looking their best.
Step 1: Initial Wipe-Down
Before you apply any cleaning solutions, it’s a good idea to remove any loose debris. Use a dry broom or a vacuum cleaner with a brush attachment to sweep up any dirt, crumbs, or hair. This prevents you from just pushing dirt around when you start cleaning.
For very fresh spills, you can also try blotting up as much of the oil as possible with paper towels. Press down firmly but avoid rubbing, which can spread the oil and push it deeper into any porous grout.
This initial step might seem small, but it’s important for efficient cleaning. It clears the path for your cleaning solutions to work directly on the oil itself, rather than having to deal with a mix of dirt and oil. A clean surface allows the degreasers to penetrate the oily layer more effectively, making the subsequent steps much easier and faster.
Step 2: Applying a Gentle Degreaser
For most everyday oily messes, a simple solution of warm water and a few drops of dish soap is your best first line of defense. Mix these together in your bucket. Dip your soft cloth or sponge into the solution, wring it out so it’s damp but not dripping wet, and start wiping the affected areas.
Work in small sections, applying gentle pressure. You should start to see the oily film lifting away.
If you’re using a mop, make sure it’s also damp and not soaking wet. Mop the oily areas, rinsing the mop head in the bucket frequently. This helps ensure you’re not just spreading the diluted oil around.
The dish soap’s grease-cutting power will emulsify the oil, breaking it down into smaller particles that can be rinsed away. Pay attention to the grout lines as well, as oil can seep into them.
Step 3: Tackling Stubborn Spots
Sometimes, the oil can be a bit more stubborn, especially if it’s dried or has been there for a while. For these tougher spots, you can try a paste made from baking soda and a little water or white vinegar. Apply this paste directly to the oily spot and let it sit for about 5-10 minutes.
The baking soda will gently lift and absorb the oil.
After letting the paste sit, use your old toothbrush or small brush to gently scrub the area. Work in small circles. The mild abrasive action of the baking soda will help to break up the sticky residue.
Once you’ve scrubbed, wipe away the paste with a damp cloth. You might need to repeat this process a couple of times for very stubborn areas.
Another effective option for tough spots is using white vinegar. You can pour a small amount of undiluted white vinegar directly onto the oily patch or mix it with warm water in a spray bottle. Let it sit for a few minutes to break down the oil, then scrub with your brush and wipe clean with a damp cloth.
The acidity of the vinegar is excellent for cutting through greasy build-up.
Step 4: Rinsing and Drying
After you’ve worked on the oily spots, it’s crucial to rinse the area thoroughly. This removes any remaining cleaning solution and loosened oil residue. Use a clean cloth or sponge dipped in plain water to wipe down the cleaned areas.
If you used a mop, go over the floor again with a mop that has been rinsed in clean water. Make sure you get all the soap or vinegar residue off, as this can attract dirt later.
Once rinsed, it’s time to dry the floor completely. Use clean, dry paper towels or soft cloths to buff the tiles dry. Proper drying is important to prevent water spots and streaks.
It also ensures that no residual moisture is left behind, which could potentially lead to issues with grout over time or make the floor feel sticky again. A thoroughly dry floor will feel smooth and clean.
Advanced Techniques for Tough Stains
While the basic steps usually do the trick, some oil stains can be incredibly persistent. These might be old, deeply set stains, or they might come from particularly greasy substances. For these situations, you might need to step up your cleaning game.
We will explore methods that are a bit more powerful, but still safe for most tile floors when used correctly. These techniques are designed for those moments when the everyday solutions just aren’t enough.
Using Rubbing Alcohol for Deep Cleaning
Rubbing alcohol, also known as isopropyl alcohol, is a powerful solvent that can effectively break down tough, sticky oil residues. It’s particularly useful for dried-on grease or spots where other cleaners haven’t quite done the job. Its advantage is that it evaporates quickly, leaving little to no residue itself.
When using rubbing alcohol, always ensure the area is well-ventilated by opening windows or using a fan.
To use it, dampen a clean cloth or cotton ball with rubbing alcohol. Gently rub the oily stain with the alcohol-dampened cloth. You should see the oil start to lift and dissolve.
For very stubborn patches, you might need to let the alcohol sit on the spot for a minute or two before rubbing. After the stain has been lifted, wipe the area with a clean, damp cloth to remove any remaining alcohol and then dry the tile thoroughly with a soft cloth.
It’s important to note that while rubbing alcohol is generally safe for most tile types, it’s always a good idea to test it on an inconspicuous area first, especially if you have natural stone tiles or a specialty finish. This ensures that it doesn’t cause any discoloration or damage to the surface. The concentration of rubbing alcohol typically used is 70% or 91% isopropyl alcohol, both of which are readily available in pharmacies and supermarkets.
The Power of Commercial Degreasers
If homemade solutions and rubbing alcohol don’t fully solve the problem, you might consider a commercial degreaser specifically designed for tile floors. These products are formulated with stronger chemicals that are very effective at breaking down tough grease and oil. When choosing a commercial cleaner, look for one that is safe for your specific type of tile.
Many products will specify if they are suitable for ceramic, porcelain, or natural stone.
Always follow the instructions on the product label very carefully. Most commercial degreasers will instruct you to dilute them with water in a bucket or to apply them directly to the stain. Allow the cleaner to sit for the recommended time to work on the oil.
Then, scrub the area gently with a brush or sponge. After cleaning, you must rinse the floor thoroughly with clean water to remove all traces of the chemical cleaner. This is vital to prevent residue build-up and to ensure the floor is safe for bare feet or pets.
Ventilate the area well while using these products.
Using a commercial degreaser is often a last resort for extremely stubborn, old, or extensive oily messes. For instance, if a large amount of cooking oil spilled during a party and wasn’t cleaned immediately, a commercial product might be necessary to restore the floor’s cleanliness and prevent a permanent sticky feel.
Dealing with Grout Lines
Grout lines are porous and can easily absorb oily substances, making them look discolored and feel sticky. To clean oil from grout, you can use the baking soda paste method described earlier. Apply the paste directly into the grout lines and let it sit.
Use an old toothbrush or a grout brush to scrub the paste into the grout, working out the oily residue. Rinse thoroughly with a damp cloth and dry. White vinegar can also be very effective when applied to grout lines.
Spray it directly onto the grout, let it sit for about 10-15 minutes, then scrub and wipe clean.
For very stained grout, a commercial grout cleaner might be needed. Always choose a cleaner that is safe for your grout type (sanded or unsanded). Apply it according to the product instructions, scrub, and rinse thoroughly.
Ensuring the grout is properly sealed after cleaning can also help prevent future staining and stickiness.
A common scenario involves a cooking accident where oil seeps into the grout. If not addressed promptly, this oil can harden, making it difficult to remove. A good strategy is to immediately blot up excess oil, then apply a strong degreaser like dish soap mixed with hot water, letting it soak into the grout before scrubbing with a stiff brush.
Repeat rinsing with clean water until the sticky residue is gone.
Preventing Future Sticky Oil Build-Up
Keeping your tile floors clean and free from sticky oil isn’t just about cleaning; it’s also about preventing it from happening in the first place. A few simple habits can make a big difference. By taking small steps regularly, you can avoid major cleaning battles down the line.
This section offers practical tips to keep your floors looking great and feeling smooth day after day.
Regular Cleaning Habits
The best way to prevent sticky oil build-up is through consistent, regular cleaning. Don’t let spills and splatters sit on the floor for too long. Wipe up any oily drips or spills immediately with a paper towel or a damp cloth.
This simple action prevents the oil from drying and attracting dirt.
A quick sweep or vacuum of your floors daily or every other day will remove loose dirt and debris that can mix with any slight oily residue, making it harder to clean. Follow this up with a light mopping once a week using a mild cleaner like dish soap and warm water. This routine keeps the overall floor surface clean and prevents a sticky film from forming.
The key is consistency; small, regular efforts are far more effective than infrequent, deep cleaning sessions.
Using Mats and Runners
Placing mats or runners in high-traffic areas and near the kitchen sink or stove can significantly reduce the amount of oil and grease that reaches your tile floors. A good quality mat can catch splatters from cooking and absorb spills before they spread. In the kitchen, a mat in front of the sink and stove can catch drips from dishes and splashes from cooking.
This acts as a first line of defense.
Mats also help protect your floors from general wear and tear, and they can make cleaning up much easier. Instead of cleaning the entire floor, you might only need to clean the mat. Make sure to choose mats that are easy to clean themselves and are suitable for use on tile.
Some mats are made of materials that can be wiped down or even thrown in the washing machine, making maintenance simple. This proactive approach saves a lot of effort in the long run.
Sealing Grout
As mentioned earlier, grout is porous and can absorb oil, leading to stubborn stains and stickiness. Sealing your grout can create a protective barrier that prevents liquids, including oil, from penetrating the surface. This makes cleaning much easier and less frequent.
Grout sealing typically needs to be done periodically, depending on the type of sealant used and the traffic in the area. After cleaning your grout thoroughly, apply a good quality grout sealer according to the manufacturer’s instructions. This process is usually straightforward and can be done with a small brush or applicator.
Once sealed, the grout will repel liquids, making spills easier to wipe away and preventing the dreaded sticky feeling in the grout lines. This proactive step is one of the most effective ways to maintain clean grout long-term.
Frequently Asked Questions
Question: How often should I deep clean my tile floors for oil?
Answer: For most homes, a weekly light mopping with a degreasing cleaner is sufficient. Deep cleaning for stubborn oil spots is only needed when you notice a sticky build-up, which might be monthly or only a few times a year, depending on your cooking and cleaning habits.
Question: Can I use bleach to remove oil from tile floors?
Answer: While bleach can disinfect, it’s not the best for cutting through oil. It might even react with some oily residues. Dish soap or vinegar are much more effective at breaking down grease without the harsh fumes or potential damage that bleach can cause.
Question: What if the oil stain is old and dried?
Answer: Old, dried oil stains may require more effort. Try making a paste of baking soda and water or vinegar and let it sit on the stain for an hour or two before scrubbing gently. A commercial degreaser might also be necessary.
Question: Can I use steam cleaners on tile floors with oil?
Answer: Yes, steam cleaners can be effective at loosening and lifting oily residues from tile floors. The heat and moisture can break down the grease, and the steam action helps to lift it. Be sure to follow up with a dry cloth to remove all moisture.
Question: What’s the best way to clean oily footprints on tile?
Answer: Oily footprints are usually fresh. The best approach is to clean them immediately with a damp cloth and a little dish soap. If they’ve dried, use the baking soda paste or white vinegar method to lift the residue.
Final Thoughts
Getting rid of sticky oil on tile floors is manageable. Simple methods like dish soap and water, or a vinegar solution, often work wonders. For tougher spots, baking soda paste or rubbing alcohol can help.
Remember to always rinse and dry your floors well. With regular care and quick clean-ups of spills, you can keep your tile floors looking great and feeling smooth, free from any sticky messes.