

Ever wonder why your kitchen sometimes smells like last night’s dinner even after you’ve cleaned up? It’s a common puzzle for many home cooks, and figuring out Why Kitchen Exhaust Smells and How to Clean It can feel a little tricky at first. But don’t worry!
We’ll break it down simply.
This guide will show you the easy steps to stop those lingering smells and keep your kitchen fresh. Let’s explore what causes the smells and how to fix them, so you can enjoy a clean-smelling kitchen every day.
Understanding Kitchen Exhaust Smells
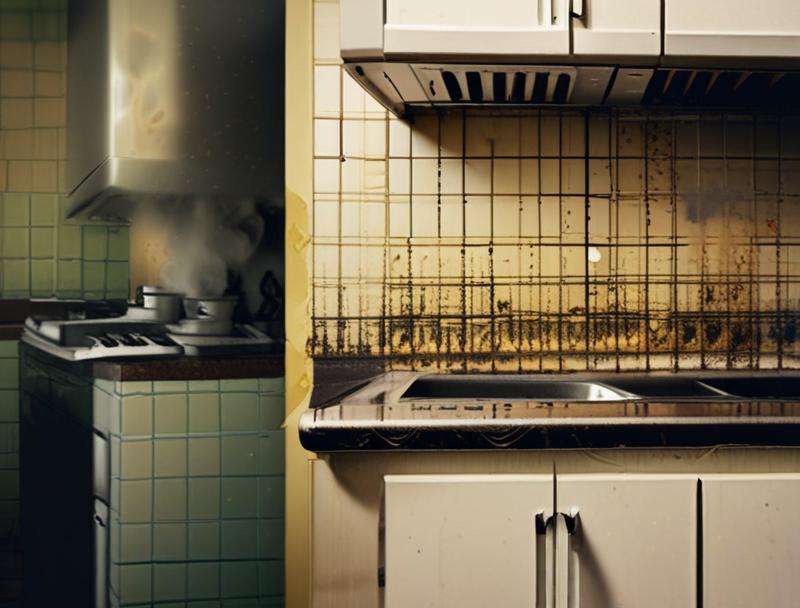
Kitchen exhaust systems are designed to pull smoke, grease, and cooking odors away from your cooking area and out of your home. They are vital for good air quality in the kitchen, preventing the buildup of unhealthy particles and unpleasant smells. However, over time, these systems can become clogged with grease and food particles.
This buildup is the primary reason why kitchen exhaust smells can linger and become a problem.
When grease and food bits stick to the inside of your hood, ductwork, and filters, they start to break down. This decomposition process releases odors. These odors can then be recirculated back into your kitchen or even seep into other parts of your home, creating that unwanted smell.
Regular cleaning is key to preventing this, but many people aren’t sure where to start. This section will explore the main culprits behind these smells and the science behind them.
The Science Behind Lingering Odors
Cooking involves a complex process where heat breaks down food molecules. This process releases volatile organic compounds (VOCs). VOCs are tiny particles that carry smells.
When you fry, sauté, or roast, these VOCs are released into the air. Your kitchen exhaust fan is supposed to capture these.
However, the fan and its parts, like filters and ducts, also capture grease and food particles. Grease is essentially fat that has been heated. When grease mixes with food bits and sits in the exhaust system, it becomes a breeding ground for bacteria.
These bacteria feed on the organic matter and produce waste products. These waste products are also VOCs, but they often have a stronger, more unpleasant smell than the original cooking odors.
Think of it like a dirty sponge. A little bit of moisture and food on a sponge can start to smell bad quickly. Your exhaust system works similarly, but on a much larger scale and with hotter cooking residues.
The constant exposure to heat and moisture from cooking makes the grease and food particles stickier and harder to remove.
The types of cooking you do also play a big role. High-heat cooking, like searing meats or deep-frying, produces more grease and smoke. These particles are more likely to stick to the exhaust system.
Foods with strong natural odors, such as fish, certain spices, or strong cheeses, can also leave behind more persistent smells. These odors can be harder to completely eliminate once they’ve settled into the system.
Grease Buildup
Grease is a sticky substance. When it’s hot from cooking, it’s liquid. As it cools inside your exhaust hood and ductwork, it solidifies.
This solidified grease forms a thick layer. This layer traps other food particles and odor-causing compounds.
Over time, this layer of grease can become quite substantial. It’s not just a small film; it can be a thick, waxy buildup. This buildup acts like a sponge, absorbing all the smells from your cooking.
Even after you’ve cleaned your stovetop and counters, the grease in the exhaust system continues to release odors.
The heat from your stove can sometimes reactivate the old grease. When this happens, the trapped smells are released back into your kitchen. This is why you might notice smells hours or even days after you’ve finished cooking.
The grease essentially holds onto the odors and releases them gradually.
Food Particle Accumulation
Besides grease, small bits of food also get pulled into the exhaust system. These can be tiny fragments from chopping vegetables, marinades, or sauces. These food particles stick to the greasy surfaces.
Once stuck, they begin to decompose. Bacteria and mold can grow on these food particles. This decomposition and growth process creates new, often more unpleasant, odors.
These odors are different from the original cooking smells. They are the smells of decay and microbial activity.
The humid environment in a kitchen, especially around the stove, helps these processes along. Moisture from steaming foods or even just the general humidity of cooking provides the perfect conditions for bacteria and mold to thrive on the accumulated food debris. This is why regular cleaning is so important.
Airflow Restriction
When grease and food particles build up, they start to block the airflow. The exhaust fan has to work harder to pull air through the clogged system. This reduced airflow means that fewer odors and particles are actually being removed from your kitchen.
A restricted airflow also means that the system is less effective at its main job. The smoke and smells that are not being pushed out effectively can linger in your kitchen for much longer. This can make your kitchen feel stuffy and consistently smell of cooked food.
Imagine trying to breathe through a clogged straw. It’s difficult, and not much air gets through. The same principle applies to your kitchen exhaust system.
The more it’s clogged, the less efficient it becomes. This inefficiency directly contributes to the problem of persistent kitchen smells.
How to Clean Your Kitchen Exhaust System
Cleaning your kitchen exhaust system might sound like a big job, but it can be broken down into manageable steps. The key is to tackle different parts of the system regularly. This prevents the heavy buildup that leads to strong odors.
We’ll cover cleaning the hood, filters, and even the less-talked-about ductwork.
Most of the cleaning can be done with common household items. The goal is to remove the accumulated grease and food particles. This will not only eliminate smells but also improve the efficiency of your exhaust fan.
Let’s get started on making your kitchen smell fresh again.
Cleaning the Range Hood Exterior and Interior
The range hood is the part you see most often. It’s the cover above your stove. It collects grease and steam.
The outside and inside of the hood can get greasy and dirty.
For the exterior, use a degreaser spray. Apply it to a soft cloth. Wipe down the hood.
For stainless steel, wipe with the grain to avoid scratches. Rinse the cloth and wipe again to remove any cleaner residue.
The interior of the hood, especially the area around the fan and lights, also collects grease. You might need to remove a cover panel to reach these parts. Use a degreaser and a brush or cloth.
Be careful around electrical components like the fan motor and lights.
A good practice is to wipe down the exterior of your hood after each cooking session, or at least a few times a week. This prevents heavy buildup. A deeper clean of the interior can be done monthly.
Materials Needed
To clean your range hood, you’ll need a few simple things.
- Degreaser spray: This is a strong cleaner designed to cut through grease.
- Warm water: Used for rinsing and diluting cleaners if needed.
- Soft cloths or sponges: For wiping and scrubbing. Avoid abrasive pads that can scratch surfaces.
- Gloves: To protect your hands from grease and cleaning chemicals.
- Bucket: For warm water or cleaning solutions.
- Old toothbrush or small scrub brush: Useful for getting into tight spots.
Cleaning Steps
Follow these steps for a clean range hood:
- Turn off the power to the range hood at the breaker box. This is an important safety step.
- Spray the exterior and accessible interior surfaces with a good degreaser. Let it sit for a few minutes to break down the grease.
- Wipe down all surfaces with a damp cloth or sponge. For stubborn grease, use a soft brush or an old toothbrush.
- Rinse your cloth frequently in warm water. Wipe again to remove all cleaner and grease residue.
- Dry the hood with a clean, dry cloth. This prevents water spots, especially on stainless steel.
- If you removed any panels or covers, reattach them securely.
- Turn the power back on at the breaker box.
Cleaning and Replacing Filters
The filters in your range hood are the first line of defense against grease entering the ductwork. They are designed to trap grease particles. Over time, these filters become saturated with grease and clogged with food debris, significantly reducing airflow and causing smells.
There are typically two types of filters: mesh filters and charcoal filters. Mesh filters are usually made of metal and can be cleaned. Charcoal filters are often found in recirculating hoods and are designed to absorb odors; these usually need to be replaced, not cleaned.
It’s crucial to identify your filter type before attempting to clean.
Cleaning mesh filters regularly is one of the most effective ways to combat kitchen exhaust smells. If your hood doesn’t have a filter, or it has a filter that cannot be cleaned, consider upgrading to one that can. This is a simple yet impactful step.
Mesh Filters (Washable)
Most common range hoods have metal mesh filters. These are designed to be cleaned and reused.
- Carefully remove the filter from the hood. There’s usually a latch or clip to release it.
- Soak the filter in a sink or large basin filled with hot water and a strong degreasing dish soap. Let it soak for at least 30 minutes, or longer for heavily soiled filters.
- After soaking, use a soft brush or an old toothbrush to scrub away any remaining grease. Pay attention to the edges and corners.
- Rinse the filter thoroughly with hot water. Ensure all soap and grease are gone.
- Let the filter air dry completely before putting it back. You can also pat it dry with a clean towel.
A good rule of thumb is to clean your mesh filters at least once a month. If you do a lot of frying or high-heat cooking, you might need to clean them more often.
Charcoal Filters (Replaceable)
Some range hoods, especially those that recirculate air rather than venting it outside, use charcoal filters. These filters absorb odors. They cannot be washed.
- These filters have a limited lifespan. Once they become saturated with odors, they are no longer effective.
- Check your range hood’s manual to find the correct replacement filter size and type.
- Remove the old charcoal filter. It might be clipped or slid into place.
- Install the new charcoal filter.
- Dispose of the old filter properly.
Charcoal filters typically need to be replaced every 3 to 6 months, depending on your cooking habits and the manufacturer’s recommendations. Replacing them on schedule is key to odor control.
Cleaning the Ductwork
The ductwork is the pathway that carries the air from your range hood to the outside of your home. This is where the most stubborn grease and odor buildup can occur, as it’s often out of sight and hard to reach. Cleaning the ductwork is crucial for complete odor elimination and fire safety, as grease buildup is a fire hazard.
Cleaning the ductwork is more involved than cleaning the hood or filters. For most homeowners, it’s best to hire a professional duct cleaning service. Professionals have specialized tools and equipment, like powerful vacuums and rotating brushes, to thoroughly clean the inside of the ducts.
They can also inspect the ducts for any damage or blockages.
However, if your ductwork has accessible clean-out points, or if you are comfortable with a more involved DIY approach, some cleaning can be done. This usually involves using long brushes and degreasing solutions. It’s important to be aware of the risks, including potential damage to the ducts or dislodging significant debris that could cause further issues.
Professional Cleaning
Hiring professionals is the safest and most effective way to clean your kitchen exhaust ductwork.
- Professionals have specialized tools. These include high-powered vacuums and long, flexible brushes that can reach deep into the ducts.
- They use industrial-strength degreasers. These break down heavy grease buildup that household cleaners can’t handle.
- They ensure all debris is properly removed. This prevents it from falling back into your kitchen or creating clogs elsewhere.
- Professional cleaning also improves the overall airflow of your ventilation system. This makes your fan more efficient.
- It’s also a critical step in preventing kitchen fires. Grease buildup is highly flammable.
The frequency of professional duct cleaning depends on your cooking habits. If you cook frequently, especially with high heat or a lot of frying, you might need it done every 1 to 3 years. For lighter cooking, every 3 to 5 years may be sufficient.
DIY Duct Cleaning (Limited Scope)
For DIY enthusiasts with accessible ductwork, some limited cleaning is possible.
- Locate any clean-out panels. These are usually small doors or panels in the ductwork.
- Use a long, flexible brush designed for ducts. You can find these at hardware stores.
- Spray a degreaser solution into the ductwork. Work the brush back and forth to dislodge grease and debris.
- Vacuum out the loosened debris. A shop vacuum is best for this.
- Wipe down any accessible areas with a degreaser.
This DIY method is best for light buildup in easily reachable sections. It is not a substitute for professional cleaning of the entire system, especially longer or more complex duct runs. Always prioritize safety and disconnect power before attempting any DIY cleaning.
Natural Cleaning Solutions
If you prefer to avoid harsh chemicals, natural cleaning solutions can be very effective against kitchen grease. These methods use common household ingredients to break down and lift grease. They are generally safer for your health and the environment.
The effectiveness of natural cleaners often relies on a bit more elbow grease and longer soaking times. However, they can be surprisingly powerful. They are an excellent choice for regular maintenance cleaning of your range hood and filters.
Here are some popular and effective natural cleaning solutions for your kitchen exhaust system.
Baking Soda Paste
Baking soda is a mild abrasive and a natural deodorizer. When mixed with water, it forms a paste that can scrub away grease.
- Mix baking soda with a little water to create a thick paste.
- Apply the paste to greasy areas on your range hood or filters.
- Let the paste sit for 15-30 minutes to allow it to work on the grease.
- Scrub gently with a soft brush or sponge.
- Wipe away the paste and grease with a damp cloth. Rinse thoroughly with warm water.
This method is great for cleaning the exterior of your hood and for the metal mesh filters. It’s less aggressive than chemical degreasers, making it ideal for regular use.
Vinegar Solution
White vinegar is acidic, which makes it excellent at cutting through grease and grime. Its strong smell dissipates quickly once dry.
- Mix equal parts white vinegar and warm water in a spray bottle.
- Spray the solution onto greasy surfaces.
- Let it sit for 5-10 minutes.
- Wipe clean with a damp cloth. For tough spots, you might need to scrub gently.
- Rinse with clean water and dry the surface.
Vinegar is particularly good for cleaning the interior surfaces of the range hood and for wiping down the exterior. It can also help neutralize lingering odors.
Hot Water and Dish Soap
Sometimes, the simplest method is the most effective. A good quality dish soap designed to cut grease, combined with very hot water, can tackle most everyday grease buildup.
- Fill a basin or your sink with very hot water.
- Add a generous amount of grease-cutting dish soap.
- Soak your filters in this solution for at least 30 minutes.
- For the hood, use a cloth dipped in the hot, soapy water to wipe down surfaces.
- Scrub any persistent spots with a soft brush.
- Rinse all components thoroughly with clean hot water.
- Ensure everything is completely dry before reassembly.
This is the go-to method for cleaning washable filters and for light cleaning of the hood. It’s safe, readily available, and effective for routine maintenance.
Preventing Future Smells
Once you’ve gotten your kitchen exhaust system clean, the next step is to keep it that way and prevent those unpleasant smells from returning. Prevention is always easier than deep cleaning. This involves developing good cooking habits and performing regular, light maintenance.
By incorporating simple routines into your kitchen workflow, you can significantly reduce the amount of grease and odor particles that enter your exhaust system. This not only keeps your kitchen smelling fresh but also extends the life of your appliance and improves its efficiency. Let’s look at some easy ways to keep your kitchen smelling great.
Regular Maintenance Habits
The best way to avoid strong odors is through consistent upkeep. Small efforts performed regularly make a big difference.
- Wipe down the range hood exterior after cooking. A quick wipe with a damp cloth can remove fresh grease before it hardens.
- Clean mesh filters weekly or bi-weekly. The frequency depends on how often you cook. This is perhaps the most important step for preventing odor buildup.
- Address spills and splatters immediately. Don’t let food particles sit on the stovetop or in the hood area.
- Use your exhaust fan every time you cook. Even for quick tasks, running the fan helps capture airborne grease and odors.
- Ensure your fan is set to an appropriate speed. Higher speeds are better for heavy cooking.
These habits are simple to integrate into your daily or weekly cleaning routine. They target the problem areas before they become significant issues.
Proper Cooking Techniques
How you cook can impact how much grease and odor your exhaust system has to deal with. Making small adjustments can help.
- Cover pots and pans when possible. This reduces splattering and steam, which carry grease and odors.
- Avoid overheating oils. When oil smokes, it’s producing a lot of odor and grease particles.
- Consider the type of cooking. Frying and high-heat searing produce more grease than boiling or steaming. If you frequently do these types of cooking, be extra diligent with cleaning.
- Cook strong-smelling foods in well-ventilated areas. Using the fan at its highest setting is recommended for foods with potent aromas.
- Clean cookware right after use. Food residues on pans can continue to emit odors.
These techniques help minimize the amount of greasy vapor and strong smells that are generated in the first place.
When to Call a Professional
While much of the cleaning can be done at home, there are times when professional help is necessary. Knowing when to call in the experts can save you time, effort, and potential damage.
- If your ductwork is very long or has many bends and turns, DIY cleaning might not be effective. Professionals have the right tools for these complex systems.
- If you suspect significant grease buildup deep within the ducts, it’s a fire hazard. Professionals can assess and clean this safely.
- If you are uncomfortable with heights or working with tools, especially around electrical components, it’s best to let a professional handle the job.
- If you’ve tried cleaning yourself and the odors persist, it may indicate a deeper issue that requires professional attention.
- For a thorough inspection and cleaning of your entire ventilation system, including the fan motor and ductwork, a professional service is ideal.
Professional cleaning ensures that your entire exhaust system is functioning optimally and safely. They can provide a deep clean that manual methods cannot achieve.
Case Studies: Smelly Kitchens Solved
Seeing how others have tackled kitchen exhaust smells can be encouraging. Here are a couple of examples of common problems and their solutions. These stories show the real impact of proper cleaning and maintenance.
These scenarios highlight how a persistent smell, once a nuisance, can be completely resolved with the right approach. They also emphasize the importance of identifying the source of the smell.
Scenario 1: The Persistent Fish Smell
Maria loves cooking fish, but her kitchen would smell of fish for days afterward, no matter how well she cleaned. She noticed the smell was strongest when she turned on her exhaust fan, even when cooking something else.
She decided to tackle her exhaust system. First, she removed her metal mesh filters. They were incredibly greasy.
She soaked them in hot water with a strong degreaser. After scrubbing, they looked much better.
Next, she wiped down the interior and exterior of her range hood with a vinegar and water solution. She noticed some residue behind the light covers.
After cleaning the filters and hood, the fish smell was significantly reduced. However, a faint odor still lingered when she cooked. She realized the smell was likely deep in the ductwork.
Maria decided to call a professional duct cleaning service. The technician confirmed heavy grease buildup in the ducts. After the professional cleaning, the persistent fish smell vanished completely.
Maria now cleans her filters every two weeks.
Scenario 2: The Grease-Laden Vent Hood
John rarely cleaned his kitchen exhaust fan. He thought a quick wipe of the stovetop was enough. One day, he noticed a thick, yellow film on his stainless steel hood.
When he cooked, a greasy smell filled his kitchen.
He removed his mesh filters, which were so clogged with grease that air could barely pass through. He soaked them in hot, soapy water for an hour, followed by scrubbing with baking soda paste. They came out looking like new.
He then used a degreaser spray on the hood’s exterior and interior. The grease was tough, so he had to scrub a bit. He noticed the fan itself had a lot of accumulated grease.
He carefully cleaned around the fan blades with a cloth and degreaser.
After this deep clean, the greasy smell was gone. John committed to wiping down his hood and cleaning the filters monthly. He found that regular maintenance prevented the grease from building up again.
Frequently Asked Questions
Question: How often should I clean my kitchen exhaust filters?
Answer: For most households, cleaning metal mesh filters once a month is sufficient. If you cook a lot, especially with frying or high-heat methods, cleaning them every two weeks is recommended to prevent odor buildup and maintain good airflow.
Question: Can I wash charcoal filters in my range hood?
Answer: No, charcoal filters are designed to absorb odors and are not washable. They need to be replaced according to the manufacturer’s recommendations, usually every 3 to 6 months.
Question: Is it dangerous to have a greasy exhaust system?
Answer: Yes, a heavily greased exhaust system is a significant fire hazard. The accumulated grease is highly flammable and can easily ignite from the heat of your stovetop.
Question: What should I do if my exhaust fan is making a loud noise?
Answer: A loud noise can indicate a few things, such as a worn-out motor, a loose fan blade, or debris caught in the fan. It’s a good idea to inspect the fan for obvious blockages and consider calling a professional if the noise persists after basic cleaning.
Question: How can I get rid of a persistent burnt smell from my exhaust?
Answer: A burnt smell usually means there’s been a cooking mishap that caused residue to enter the exhaust system. You’ll need to clean the hood and filters thoroughly. If the smell remains, it might be in the ductwork, requiring professional cleaning or repeated use of vinegar-based solutions.
Wrap Up
Your kitchen exhaust system is key to a fresh-smelling kitchen. By understanding why smells happen and following simple cleaning steps for your hood, filters, and ducts, you can tackle those lingering odors. Regular maintenance prevents future problems and keeps your cooking space pleasant.