
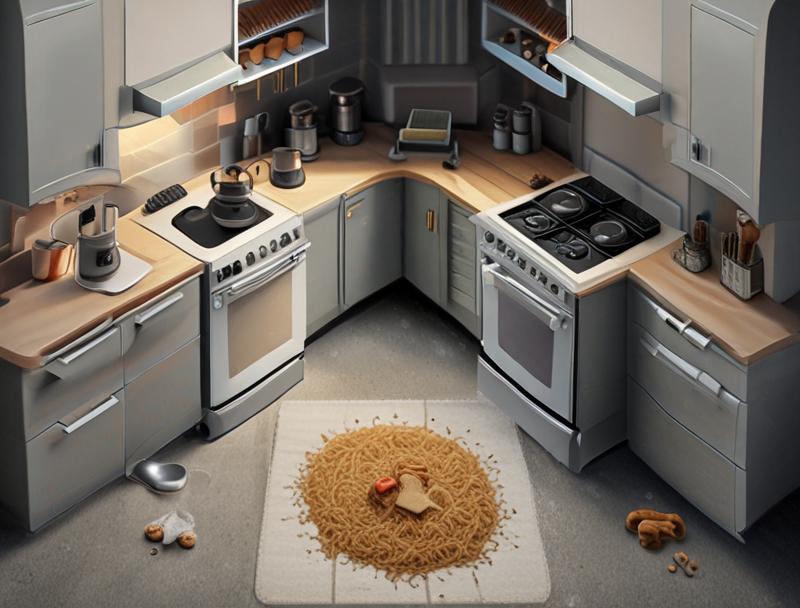
Many people wonder How to Clean Under Kitchen Appliances Properly. It might seem like a big job, especially if you’ve never done it before. Food bits, dust bunnies, and maybe even a lost toy can hide back there.
It’s easy to put off because it feels awkward or hard to reach. But don’t worry! We’ll show you a simple, step-by-step way to get this job done.
First, let’s talk about why cleaning under these appliances is important and what tools you’ll need to make it easy.
Why Cleaning Under Kitchen Appliances Matters
Cleaning beneath your kitchen appliances is more than just a tidiness task; it’s a key part of maintaining a healthy and functional kitchen. Over time, dust, food crumbs, grease splatters, and even spilled liquids can accumulate in these often-ignored spaces. This buildup can become a breeding ground for bacteria and pests, posing a risk to food safety and overall hygiene.
Beyond health concerns, this debris can interfere with the proper functioning of your appliances, potentially leading to overheating or reduced efficiency. Regularly cleaning these areas ensures a more sanitary cooking environment, helps your appliances run better, and can even prevent unpleasant odors from developing.
The Hidden Dangers of Neglect
When the space under your refrigerator or stove is left untouched, a variety of issues can arise. Food particles can attract insects like ants and cockroaches, and in worse cases, rodents. This is particularly concerning in a food preparation area.
Grease that splatters from cooking can also build up, becoming sticky and attracting more dirt. This greasy film can become a fire hazard, especially around hot surfaces like the back of a stove or the motor of a refrigerator. Additionally, dust and lint can clog vents and fans, making appliances work harder, consume more energy, and potentially shorten their lifespan.
Imagine your refrigerator fan struggling to push air through a thick blanket of dust – it’s less efficient and more prone to breaking down.
- Health Risks: Accumulated food debris and grease can harbor bacteria like Salmonella or E. coli, which can contaminate food. Pests attracted to this mess can carry diseases. A clean under-appliance space means a safer kitchen for your family.
- Appliance Longevity: Clogged vents and motors from dust and debris force appliances to work harder. This leads to increased energy use and can cause premature wear and tear on components, meaning you might need repairs or replacements sooner than expected.
- Fire Prevention: Grease and dust buildup near heating elements or electrical components can ignite. Regular cleaning removes these potential fire starters, making your kitchen a safer place.
- Odor Control: Spilled liquids or decaying food particles can create foul odors that are hard to get rid of. Cleaning these areas eliminates the source of these smells, keeping your kitchen smelling fresh.
Essential Tools for the Job
To effectively clean under your kitchen appliances, you’ll need a few simple tools. Having the right equipment makes the task much easier and more thorough. You don’t need anything fancy, just some common household items that can reach into tight spaces and handle grease and grime.
Think about what you might use for other cleaning jobs, but adapted for these hard-to-reach areas. Having everything ready before you start will save you time and frustration.
- Gloves: To protect your hands from dirt, grease, and cleaning solutions.
- Dustpan and Brush: A long-handled dustpan and a stiff-bristled brush are great for sweeping out loose debris.
- Vacuum Cleaner with Attachments: A crevice tool is essential for getting into narrow spaces. A hose attachment also helps you reach further back.
- Mop or Sponge: For wiping down floors and appliance undersides.
- All-Purpose Cleaner: A gentle cleaner that can cut through grease.
- Old Towels or Rags: For drying and wiping up spills.
- Flat, Stiff Object: Like a ruler, a thin cutting board, or a paint scraper, to help dislodge stubborn gunk.
How to Clean Under Your Refrigerator Properly
Cleaning under the refrigerator is crucial for its efficiency and your home’s hygiene. This area is often a hotspot for dust, pet hair, and dropped food particles that can clog the condenser coils. These coils are vital for your fridge’s cooling system.
When they’re covered in debris, the refrigerator has to work harder to stay cool, using more energy and potentially shortening its lifespan. Following a simple process ensures you can reach these parts and clear them out effectively, making your appliance run smoother and saving you money on your electricity bill. We’ll walk you through each step to make sure no dust bunny is left behind.
Preparing Your Refrigerator for Cleaning
Before you start cleaning, it’s important to prepare your refrigerator. This involves unplugging it to ensure safety and making sure you have enough space to work. If your refrigerator has a water line for an ice maker or dispenser, you’ll need to turn off the water supply to prevent leaks.
Emptying the refrigerator isn’t usually necessary for cleaning under it, but it’s a good idea to pull out any shelves or drawers that might be in the way or that you want to clean separately. This preparation step ensures a smooth cleaning process.
- Unplug the Appliance: Always disconnect the power cord from the wall outlet before you begin cleaning. This prevents any electrical accidents and ensures your safety.
- Turn Off Water Supply (If Applicable): Locate the shut-off valve for the water line connected to your refrigerator’s ice maker or water dispenser. Turn it to the off position to stop the flow of water.
- Pull the Refrigerator Out: Gently pull the refrigerator away from the wall. You might need a helper for this, as refrigerators can be quite heavy. Be careful not to scratch your flooring; you can place old towels or cardboard under the front feet as you pull.
- Remove Drip Pan (Optional but Recommended): Some refrigerators have a removable drip pan underneath that collects condensation. If yours does, slide it out carefully. It might contain dirty water, so be prepared to empty and clean it separately.
The Step-by-Step Cleaning Process
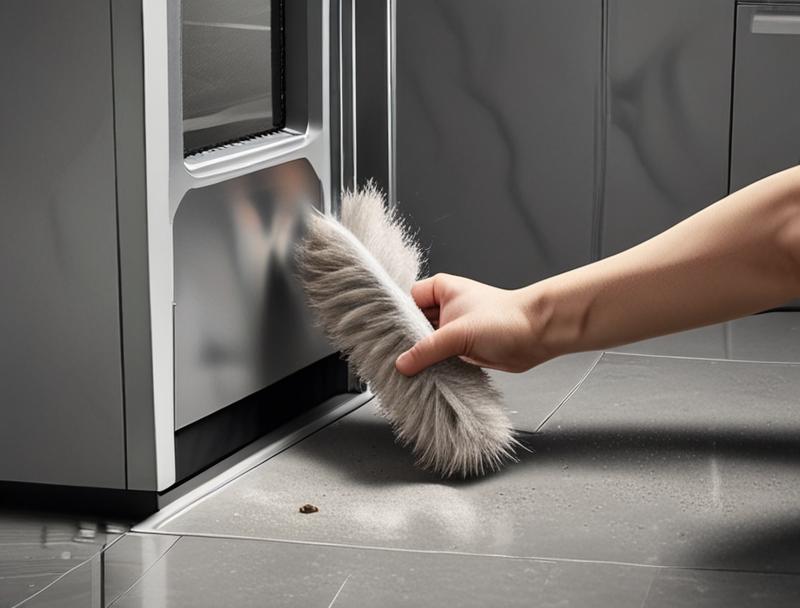
Once your refrigerator is prepped, it’s time to get cleaning. Start by removing any loose debris. Use a broom or a vacuum cleaner with a crevice tool to suck up dust, hair, and crumbs from the floor and the undersides of the appliance.
Pay close attention to the area around the condenser coils, as this is where most of the buildup occurs. After removing the dry debris, you can tackle any sticky spots or dried-up spills with a damp cloth and a mild cleaner. Make sure to dry everything thoroughly afterward to prevent moisture issues.
- Clear Visible Debris: Use a broom or a vacuum cleaner with a crevice attachment to remove all loose dust, dirt, hair, and food particles from under the refrigerator and around its base. Get into every nook and cranny you can reach.
- Clean Condenser Coils: If your refrigerator has exposed condenser coils (often located at the back or bottom), gently brush or vacuum them to remove accumulated dust. This is a critical step for efficiency. Be careful not to bend the delicate fins.
- Wipe Down the Underside: Use a damp cloth or sponge with a little all-purpose cleaner to wipe down the floor and any accessible parts of the refrigerator’s underside. This will remove any grime or sticky residue.
- Clean the Drip Pan: If you removed a drip pan, wash it with warm, soapy water. Rinse it well and dry it completely before putting it back. Ensure it’s placed correctly to catch condensation.
- Dry Everything Thoroughly: Use a clean, dry towel to wipe down all the areas you cleaned. Moisture left behind can lead to mold or mildew.
- Push Refrigerator Back: Carefully slide the refrigerator back into its place, making sure not to kink any hoses or cords.
- Reconnect and Turn On: Plug the refrigerator back into the outlet and turn the water supply back on if you turned it off. Wait a few hours for it to reach its proper temperature before restocking food.
Dealing with Stubborn Grime
Sometimes, the gunk under the refrigerator can be really stuck on. For these tough spots, you might need a little extra effort. A flat, stiff object like a plastic scraper or even a ruler can help gently dislodge dried-on food or sticky spills.
Work slowly and carefully so you don’t damage the flooring or any parts of the appliance. For greasy buildup, a degreasing cleaner can be very effective. Just be sure to wipe away any residue with a clean, damp cloth afterward.
Here’s a common scenario: you pull out the fridge and find a sticky, sugary spill that has dried hard. A simple damp cloth won’t cut it. You can try spraying a bit of all-purpose cleaner on the spot and letting it sit for a few minutes to soften.
Then, use your plastic scraper to gently lift it. If that doesn’t work, you might need a specialized degreaser. Always test any cleaner on an inconspicuous area first to make sure it doesn’t damage your floor.
How to Clean Under Your Stove or Oven Properly
Cleaning under your stove or oven presents its own unique challenges, often involving grease and food splatters. Unlike refrigerators, stoves are directly exposed to cooking heat and spills. The area underneath can accumulate baked-on grease, food particles, and dust, making it a less-than-ideal spot in your kitchen.
Tackling this requires specific methods to break down grease and ensure a hygienic surface. Getting this area clean not only looks better but also helps prevent attracting pests and reduces the risk of grease fires.
Accessing the Area Under Your Stove
The method for accessing the space under your stove depends on the type of stove you have. Many freestanding electric or gas ranges have a storage drawer or a broiler drawer at the very bottom. This drawer can usually be pulled out completely, providing access to the area underneath.
If your stove is a slide-in model, you might have a lower panel that can be removed. For built-in ovens, you generally don’t clean under them in the same way, as they are sealed into cabinetry. Always unplug electric stoves and turn off the gas supply for gas stoves before attempting to remove any panels or drawers.
- Identify Your Stove Type: Is it a freestanding range, a slide-in, or a built-in oven? This determines how you’ll access the underside.
- Remove Storage/Broiler Drawer: Most freestanding ranges have a pull-out drawer. To remove it, you might need to lift it slightly at the back and slide it out, or there might be small clips or stops to disengage.
- Remove Lower Panel (Slide-in Ranges): Some slide-in models have a kick plate or a decorative panel at the very bottom that can be unscrewed or unclipped to reveal the space beneath.
- Check Your Manual: If you’re unsure how to access the area, consult your appliance’s user manual. It will provide specific instructions for your model.
Tackling Grease and Food Buildup
Grease is the primary enemy when cleaning under stoves. It can become baked on and very difficult to remove. Start by scraping away any loose food particles.
Then, use a strong degreaser. You can buy commercial degreasers or make your own by mixing baking soda with water to form a paste, or by using a solution of hot water and dish soap. Apply the cleaner generously to the greasy areas and let it sit for a while – sometimes 15-30 minutes – to work its magic.
Afterward, use a scrub brush or a non-abrasive sponge to remove the loosened grime.
A common issue is encountering tough, burnt-on grease. For this, a paste made from baking soda and water is very effective. Apply it to the greasy spots and let it sit.
The mild abrasive quality of baking soda helps lift the grease without scratching surfaces. For very stubborn spots, you might need to let the paste sit for an hour or even overnight. Then, scrub with a brush and wipe clean with a damp cloth.
| Type of Mess | Best Cleaning Solution | How to Apply |
|---|---|---|
| Loose Crumbs & Dust | Vacuum with Crevice Tool | Use attachments to reach all corners. |
| Light Grease Splatters | Dish Soap & Hot Water | Apply with a sponge, let sit briefly, then wipe. |
| Baked-on Grease | Baking Soda Paste | Apply thickly, let sit (30 mins to overnight), then scrub. |
| Sticky Spills | All-Purpose Cleaner or Degreaser | Spray on, let sit, then wipe with a damp cloth. |
Cleaning the Stove’s Underside Components
Once the main area is clean, pay attention to specific components you can access. If you removed a storage drawer, wash it thoroughly in your sink with warm, soapy water. Make sure to dry it completely before putting it back.
For gas stoves, ensure the gas burner ports are clean and dry; never spray liquids directly onto them. For electric stoves, check that the heating elements and their connections are free of debris. It’s always a good idea to let everything air dry completely before reassembling or replacing parts.
- Wash Removable Drawers: If you pulled out a storage or broiler drawer, wash it thoroughly in the sink with hot, soapy water. Rinse well and dry completely before reinserting.
- Wipe Accessible Panels: Use a damp cloth with a mild cleaner to wipe down any accessible panels or the underside of the stove itself.
- Check Vents and Openings: Ensure that any vents or openings are clear of debris that could impede airflow or become a hazard.
- Dry All Surfaces: Before putting anything back or plugging the stove back in, ensure all cleaned areas are completely dry. This prevents rust or electrical issues.
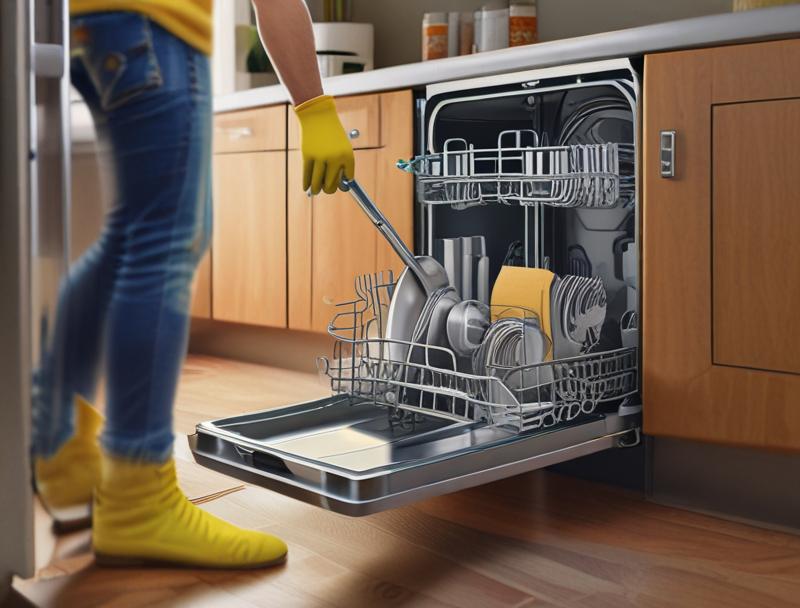
How to Clean Under Your Dishwasher Properly
Cleaning under your dishwasher is less common but still important, especially if you notice any unusual noises, leaks, or unpleasant odors. While the dishwasher itself is designed to handle water, the area beneath it can accumulate moisture, dust, and even small debris that might escape. Left unchecked, this can lead to mold or mildew growth, or even minor water damage over time.
It’s a task that doesn’t need doing frequently, but knowing how to do it can save you from bigger problems down the line. We’ll guide you through this often-overlooked cleaning chore.
Assessing the Need for Cleaning
You might not need to clean under your dishwasher very often, but there are signs that indicate it’s time. If you notice water pooling around the base of the dishwasher, especially after a cycle, or if you detect a musty smell emanating from the area, it’s a good time to investigate. Sometimes, a dishwasher might shift slightly over time, creating a gap where dust and small objects can fall.
A quick check underneath with a flashlight can tell you if any cleaning is actually required. Don’t pull it out unless you see a clear reason to do so.
- Listen for Unusual Noises: If your dishwasher starts making grinding or scraping sounds, especially during operation, something might be caught underneath.
- Check for Leaks: Water pooling at the front or sides of the dishwasher could indicate an issue with the seal, or simply that something has gotten trapped underneath causing a minor blockage.
- Smell for Odors: A persistent musty or damp smell is a strong indicator that moisture has been collecting under the appliance, potentially leading to mold or mildew.
- Visual Inspection: Use a flashlight to look under the dishwasher. If you see significant dust buildup, food debris, or signs of dampness, it’s time for a cleaning.
Steps for Cleaning Under the Dishwasher
Cleaning under a dishwasher usually involves carefully pulling it out slightly. First, ensure the dishwasher is turned off at the breaker to prevent accidental starts. You might need to disconnect the water supply and drain hose, but for a simple cleaning of the underside, this might not be necessary unless you are pulling it out completely.
Often, you can gently pull the dishwasher forward a few inches to access the floor beneath. Use a vacuum with a crevice tool for dust and debris, and a damp cloth with a mild cleaner for any damp spots. Again, always ensure everything is dry before pushing it back.
- Turn Off Power: Locate your home’s electrical panel and switch off the breaker that controls the dishwasher. This is a critical safety step.
- Disconnect Water (Optional): If you need to pull the dishwasher out significantly, you might need to turn off the water supply valve (usually under the sink) and disconnect the water inlet hose. Be prepared for a small amount of residual water.
- Pull Dishwasher Forward: Gently pull the dishwasher out a few inches from its usual spot. You may need to disengage mounting brackets at the top. Avoid pulling it too far if you haven’t disconnected hoses.
- Vacuum Debris: Use a vacuum cleaner with a crevice tool to remove any dust, crumbs, or small objects from the floor under the dishwasher.
- Wipe Down: Use a damp cloth and a mild cleaner to wipe away any damp spots or light grime.
- Dry Thoroughly: Make sure the floor area is completely dry.
- Push Back and Reconnect: Carefully slide the dishwasher back into place. Reconnect any hoses and turn the power back on at the breaker.
Dealing with Moisture and Odors
If you’re dealing with a musty smell, the cause is likely moisture trapped under the dishwasher. After pulling it out and cleaning the floor, ensure the area is thoroughly dry. You can speed up this process by using a fan or placing dry towels down to absorb any remaining dampness.
Check the dishwasher’s seals and hoses for any signs of leaks that might be contributing to the moisture problem. Sometimes, leaving the dishwasher door slightly ajar after a cycle can help prevent excess moisture buildup inside, which can contribute to under-appliance issues.
- Ensure Complete Drying: After cleaning any dampness, use towels and good airflow to make sure the area is completely dry.
- Check Seals and Hoses: Inspect the dishwasher door seals and the hoses for any damage or leaks that could be letting water escape.
- Ventilate the Area: Leave the dishwasher door open for a few hours, or run a fan in the kitchen, to help dry out the space thoroughly.
- Use Odor Absorbers (If Needed): If a slight odor persists, place a bowl of baking soda or activated charcoal under the dishwasher overnight to absorb lingering smells.
How to Clean Under Your Microwave Properly
Microwaves are often placed on countertops or built into cabinets, meaning they don’t usually have a large, accessible space underneath in the same way as floor appliances. However, if your microwave is a countertop model, there’s still a small gap between its base and the counter surface. This area can collect dust, crumbs, and occasional spills.
Cleaning it ensures a more hygienic cooking environment and prevents potential issues with airflow or electrical connections if anything significant were to accumulate. It’s a simple process that can be done quickly.
Accessing and Cleaning the Countertop Space
For countertop microwaves, the process is straightforward. First, ensure the microwave is unplugged for safety. Then, carefully lift the microwave and set it aside on a clean surface.
You can then easily access the countertop beneath it. Use a damp cloth with a mild cleaner to wipe down the counter. Also, take the opportunity to wipe down the underside of the microwave itself, as this area can also collect dust.
Pay attention to any vents on the bottom of the microwave to ensure they are clear. Once both the counter and the underside are clean and dry, simply place the microwave back.
- Unplug the Microwave: Always disconnect the power cord from the wall outlet before attempting to move or clean under your microwave.
- Lift and Relocate: Carefully lift the microwave off the counter and place it on a nearby stable surface.
- Clean the Countertop: Wipe down the countertop area where the microwave sat. Use a general-purpose cleaner or a mild soap and water solution.
- Clean the Underside of the Microwave: Use a damp cloth to wipe the bottom surface of the microwave. Ensure any vents on the bottom are clear of dust or debris.
Dealing with Spills and Stains
If there have been spills or stains on the countertop where the microwave sits, address them when the microwave is moved. For most common kitchen spills, a damp cloth with a bit of dish soap should be sufficient. For tougher stains, you might need a slightly stronger cleaner, but always test it on an inconspicuous area of your countertop first to avoid damage.
Make sure to wipe away any cleaning residue and dry the counter completely before placing the microwave back on it.
Imagine a scenario where you notice a sticky, dried ring on your countertop from something that leaked under the microwave. You can try using a baking soda paste – a simple mix of baking soda and water. Apply it to the stain, let it sit for about 10-15 minutes, then gently scrub with a soft cloth or sponge.
Rinse the area with a clean, damp cloth and dry it thoroughly. This is a gentle yet effective way to tackle many common stains without harsh chemicals.
Frequently Asked Questions
Question: How often should I clean under kitchen appliances?
Answer: For refrigerators, aim to clean under them at least twice a year. For stoves, it’s good to clean the accessible areas monthly or after major spills. Dishwashers and countertop microwaves need less frequent attention, perhaps once or twice a year unless you notice signs of a problem.
Question: What if I can’t pull my refrigerator out easily?
Answer: If your refrigerator is too heavy or difficult to move, focus on cleaning as far under as you can reach with a vacuum and long-handled tools. You can also try placing furniture sliders under the feet of the fridge to make it easier to move next time.
Question: Can I use harsh chemicals under my appliances?
Answer: It’s best to avoid harsh chemicals, especially around food areas. Mild dish soap, water, and baking soda are usually effective. If you must use a stronger cleaner, ensure it’s safe for food-contact surfaces and rinse thoroughly.
Question: What should I do if I find pests under my appliances?
Answer: If you find insects or rodents, thoroughly clean the area to remove their food source. Then, use appropriate pest control methods. Sealing any cracks or entry points around your home can also help prevent them from returning.
Question: Do I need to hire a professional to clean under my appliances?
Answer: For most homeowners, cleaning under kitchen appliances is a manageable DIY task with the right tools and instructions. Professionals are usually only needed if there are significant appliance issues or severe pest infestations.
Summary
Keeping your kitchen clean includes the often-forgotten spots under appliances. A little effort goes a long way to ensure a healthy, safe, and efficient cooking space. Regular cleaning prevents pests, reduces fire risks, and helps your appliances last longer.
You have the tools and steps needed to tackle this task with confidence, making your kitchen sparkle from top to bottom.