
Keeping your stainless steel sink looking its best can be tricky. Many people worry about causing scratches when they clean. It’s a common problem for anyone new to caring for this shiny material.
But don’t worry! We’ve got a super simple, step-by-step plan to help you master How to Clean a Stainless Steel Sink Without Scratches. Get ready to see your sink sparkle like new with just a few easy tricks.
We’ll show you exactly what to do next.
Keeping Your Stainless Steel Sink Shining Brightly
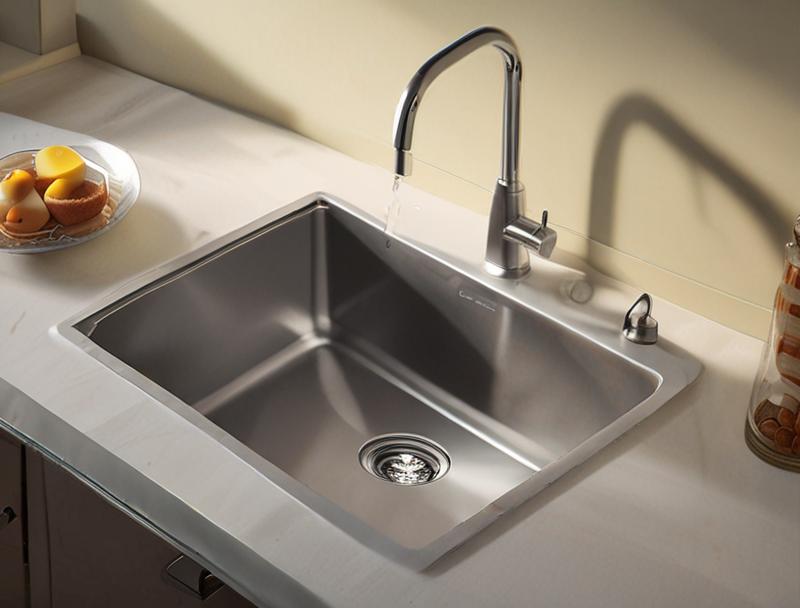
Ensuring your stainless steel sink stays in tip-top shape is a top priority for many homeowners. A clean, scratch-free sink enhances the overall look of your kitchen. This section will guide you through the best practices for maintaining that beautiful gleam without causing any damage. We’ll cover why certain methods work and what to avoid. Think of this as your go-to guide for sink care.
Understanding Stainless Steel Sink Care
Stainless steel is popular because it’s durable and looks great. However, it can show water spots and fingerprints easily. The biggest concern for many is accidentally scratching the surface. Scratches can be hard to remove and take away from the sink’s shine. Knowing how to clean it properly prevents these problems.
Why Simple Cleaning Methods Work Best
When it comes to cleaning stainless steel, less is often more. Harsh chemicals or abrasive scrubbers can do more harm than good. Gentle, everyday items found in most kitchens are usually all you need. This makes cleaning easy and safe for your sink.
- Gentle Scrubbing: Always use soft cloths or sponges. Never use steel wool or stiff brushes.
- Water Spot Prevention: Dry the sink after each use.
- Natural Cleaners: Opt for mild soap or vinegar.
Using a soft cloth or a non-scratch sponge is key. These materials are kind to the stainless steel surface. They pick up dirt and grime effectively without leaving behind any tiny marks.
A stiff brush, on the other hand, has bristles that can easily scrape and mar the metal, creating visible scratches. This gentle approach is fundamental to preserving the sink’s original finish.
Water spots are mineral deposits left behind when water dries. They can make a stainless steel sink look dull and dirty. Wiping down the sink with a soft, dry cloth after you’ve used it is a simple habit that prevents these spots from forming.
This takes just a few seconds but makes a big difference in how clean your sink looks over time.
Harsh chemicals can sometimes react with stainless steel, causing discoloration or damage. Mild dish soap diluted with water is usually enough for daily cleaning. For tougher spots or to give your sink a good shine, white vinegar is a fantastic natural option.
It helps cut through grease and mineral deposits without being too strong.
Common Mistakes to Avoid
Many people make small errors when cleaning their sinks that can lead to damage. Knowing these common pitfalls can save your sink from unnecessary wear and tear.
Abrasive Materials Are a No-Go
Using the wrong cleaning tools is a primary cause of scratched stainless steel sinks. Steel wool pads, abrasive scouring pads, and even the rough side of some sponges can easily scratch the metal.
Steel wool is made of sharp steel fibers that can easily cut into the polished surface of stainless steel. This creates fine lines that catch the light and look like scratches. Even some “heavy-duty” cleaning sponges have abrasive particles that can wear down the protective layer of the steel, making it more prone to damage in the future.
Always check the label on your cleaning tools to ensure they are safe for stainless steel.
Harsh Chemicals Can Cause Damage
Bleach, ammonia, and oven cleaners are too strong for stainless steel sinks. These chemicals can discolor the metal or even cause pitting.
Bleach, especially, can lead to rust spots on stainless steel over time. It’s a powerful disinfectant but can be very corrosive to certain metals. Ammonia can also strip away the protective passivation layer on stainless steel, making it more vulnerable to corrosion.
For these reasons, it’s always best to stick to gentle, natural cleaners or mild dish soap. If you have a very stubborn stain, research specific safe methods for stainless steel rather than reaching for the strongest cleaner you have.
Scrubbing Against the Grain
Stainless steel has a grain, much like wood. Scrubbing across this grain can leave visible marks.
Look closely at your sink; you’ll see faint lines running in one direction. This is the grain. When you scrub your sink, always move your cloth or sponge in the same direction as these lines.
This helps to blend in any minor scuffs and maintain the uniform appearance of the steel. Cleaning with the grain is a simple technique that makes a big difference in how your sink looks after cleaning.
Effective, Scratch-Free Cleaning Methods
Now that we know what to avoid, let’s look at simple, effective ways to clean your stainless steel sink without causing any damage. These methods use common household items and are easy to follow.
Daily Cleaning Routine
A little bit of cleaning each day prevents big messes later. This routine keeps your sink looking great with minimal effort.
Mild Soap and Water Wash
For everyday cleaning, a bit of dish soap and warm water is perfect.
- Apply a few drops of mild dish soap to a damp, soft cloth or sponge.
- Wipe the sink down, always following the direction of the grain.
- Rinse thoroughly with warm water.
- Dry the sink completely with a soft, clean towel.
Mild dish soap is designed to cut through grease and food particles without being harsh on surfaces. When you add just a few drops to a damp cloth, you create a gentle cleaning solution that’s effective for daily grime. This prevents the need for excessive scrubbing and ensures that you’re not applying too much pressure, which could lead to scratches.
The foamy action helps lift dirt away from the surface of the sink.
Once you have the soapy cloth, begin wiping the entire sink. It’s crucial to move your cloth in the same direction as the faint lines you can see on the stainless steel. This is known as cleaning with the grain.
Doing this helps to clean effectively while also helping to maintain the sink’s polished appearance by avoiding cross-grain marks.
After you’ve wiped down the sink with the soap, it’s important to rinse away all the soap residue. Use clean, warm water to thoroughly rinse the basin, sides, and faucet area. Soap left behind can dry and leave a dull film, making the sink look less clean.
A good rinse ensures a clear finish.
This is a critical step for preventing water spots. Use a dry, lint-free towel, like a microfiber cloth or a soft cotton towel, to wipe the entire sink dry. Make sure no water is left behind, especially around the edges and in corners.
This prevents mineral deposits from forming and keeps your sink looking shiny and spotless.
Deep Cleaning for a Sparkling Finish
Sometimes, your sink needs a little more attention. These deeper cleaning methods tackle tougher stains and bring back the shine.
Using Baking Soda for Tough Stains
Baking soda is a mild abrasive that’s safe for stainless steel and great for stubborn spots.
Baking soda is a fantastic cleaning agent because it’s slightly gritty, allowing it to lift away stuck-on food and grease without scratching. It also acts as a natural deodorizer. This makes it perfect for sinks that might have food residue or develop odors.
Its gentle nature means it won’t damage the protective layer of your stainless steel, preserving its shine for longer periods.
- Make a paste of baking soda and water.
- Apply the paste to stained areas and let it sit for 5-10 minutes.
- Gently scrub with a soft cloth or sponge, following the grain.
- Rinse thoroughly and dry completely.
To create this paste, you’ll want to mix baking soda with just enough water to form a thick, spreadable consistency, similar to toothpaste. This paste allows the baking soda to stick to the stained areas of your sink. You can adjust the amount of water to get the perfect texture.
It’s easy to apply and stays where you put it, so it can work on the stain.
Once you have the paste, carefully apply it to any areas with tough stains or build-up. Let it sit for a short while. This allows the baking soda to gently lift and loosen the grime.
You don’t need to let it sit for hours; a few minutes is usually enough to start the cleaning process effectively.
After the paste has had time to work, use a damp, soft cloth or sponge to gently scrub the area. Remember to always move in the direction of the stainless steel’s grain. The slight abrasion from the baking soda, combined with your gentle scrubbing, will help lift away the stains.
Avoid pressing too hard.
Just like with daily cleaning, a thorough rinse is essential to remove all baking soda residue. Follow this by drying the sink completely with a clean, soft towel to prevent any water spots from forming and to restore that beautiful shine.
The Vinegar Shine Boost
White vinegar can revive the shine of your stainless steel sink.
White vinegar is a mild acid that excels at breaking down mineral deposits and soap scum. It also helps to remove fingerprints and smudges, leaving your sink looking much brighter. Its natural properties make it a safe and effective alternative to commercial cleaners that might be too harsh for stainless steel.
Using vinegar regularly can help maintain a clean and shiny appearance.
- Spray white vinegar directly onto the sink surface, or apply with a cloth.
- Let it sit for a few minutes to allow it to work.
- Wipe down with a damp cloth, then rinse and dry.
You can either fill a spray bottle with white vinegar and mist the sink, or you can soak a soft cloth in vinegar and wipe it all over the surface. This ensures even coverage. The vinegar will start to work on any dullness or water spots immediately upon contact.
Allow the vinegar to sit on the sink for about 5 to 10 minutes. This gives the acidic properties of the vinegar time to dissolve any grime, mineral build-up, or streaks. It doesn’t need to sit for too long to be effective.
After the vinegar has had time to sit, wipe the sink down with a damp, soft cloth, again following the grain. Then, rinse the sink thoroughly with clean water and dry it completely with a soft towel to reveal a sparkling, streak-free finish.
Polishing and Protecting Your Sink
Once your sink is clean, you can take extra steps to make it shine and protect it from future marks. These methods add that extra touch of brilliance.
Restoring Shine with Stainless Steel Polish
For an extra dazzling finish, a specialized stainless steel polish can work wonders.
Stainless steel polishes are formulated to enhance the natural shine of the metal. They often contain ingredients that fill in microscopic scratches and create a smooth, reflective surface. Using a polish can not only make your sink look amazing but also help repel fingerprints and water spots, making future cleaning easier.
It’s like giving your sink a protective, shiny coat.
- Ensure the sink is clean and completely dry before applying polish.
- Apply a small amount of stainless steel polish to a soft, clean cloth.
- Rub the polish into the sink, following the direction of the grain.
- Buff the sink with a separate clean, dry cloth to bring out the shine.
Polishing works best on a perfectly clean and dry surface. Any dirt or moisture left behind can get trapped under the polish, leading to an uneven finish or even new marks. Take the time to dry your sink thoroughly after cleaning.
This prepares the surface to best receive the polish.
You only need a little polish to go a long way. Dispense a small amount onto a dedicated soft cloth. Avoid applying polish directly to the sink, as this can lead to using too much product.
The cloth helps you control the amount and spread it evenly.
Gently rub the polish into the stainless steel surface using smooth, even strokes. Always move in the direction of the grain to ensure a uniform shine and to avoid creating new marks. Work in sections if your sink is large.
After applying the polish, use another clean, dry cloth to buff the surface. This step removes any excess polish and brings out the beautiful luster of the stainless steel. The result is a sink that looks professionally cleaned and polished, with a deep, brilliant shine.
Preventing Future Scratches and Marks
Prevention is always better than cure. A few simple habits can help keep your sink looking its best for years to come.
Use a Sink Grid or Mat
A sink grid or mat protects the bottom of your sink from heavy pots and pans.
These grids are typically made of rubber or stainless steel and sit at the bottom of your sink. They create a barrier between your dishes and the sink surface. This significantly reduces the risk of accidental drops or scrapes from pots, pans, and cutlery.
They also help prevent dishes from scratching the stainless steel while they are being rinsed or washed.
Consider this scenario: A heavy cast-iron pan slips from your hands while you’re washing it. Without protection, it could easily hit the sink bottom with enough force to cause a deep scratch. With a sink grid, the pan lands on the grid, absorbing most of the impact and protecting your sink.
This small investment can save you a lot of worry and potential damage.
Avoid Leaving Wet Sponges or Metal Utensils in the Sink
Leaving metal items in a damp sink can lead to rust spots or scratches.
When metal items, especially those with rough edges, sit in a wet environment, they can transfer rust or create surface marks. Even a damp sponge left for a long time can trap moisture against the steel, potentially leading to discoloration. It’s best practice to remove all items from the sink once you are done using them.
Here’s another common situation: You’ve finished washing a pan with a metal handle and leave it sitting in the sink while you clean up other dishes. The residual water from the pan can sit on the stainless steel, and the metal handle itself might leave a faint mark or even a rust stain if left there for a prolonged period. Putting items away immediately is a good habit to form.
Rinse Away Food Debris Promptly
Don’t let food particles sit in the sink for long periods.
Food debris, especially acidic foods like tomatoes or citrus fruits, can sometimes etch or stain stainless steel if left to sit for too long. While stainless steel is resistant, prolonged exposure to certain substances can cause issues. Rinsing away food particles quickly ensures that nothing has the chance to sit and potentially damage the surface.
Advanced Techniques and Considerations
Beyond the basics, there are a few more advanced tips and things to keep in mind for optimal stainless steel sink care. These address specific issues and help you maintain a like-new appearance.
Dealing with Stubborn Rust Spots
Rust spots can appear on stainless steel, especially if you use harsh cleaning pads or leave metal items in the sink.
While stainless steel is resistant to rust, it’s not entirely immune. Rust spots can occur if iron particles from other sources come into contact with the wet surface. Fortunately, these can usually be removed without much difficulty.
The key is to use the right product that targets rust without damaging the underlying steel.
- Use a specialized stainless steel rust remover.
- Alternatively, try a paste of lemon juice and salt.
- For minor spots, Bar Keepers Friend can be effective.
There are commercial products specifically designed to remove rust from stainless steel. These are usually quite effective. Always follow the product’s instructions carefully.
They are formulated to be strong enough to remove rust but gentle enough not to harm the stainless steel.
A natural approach involves making a paste from lemon juice and salt. The acidity of the lemon juice helps break down the rust, while the salt acts as a mild abrasive. Apply the paste to the rust spot, let it sit for a few minutes, then gently scrub with a soft cloth or sponge, following the grain.
Rinse and dry thoroughly.
Bar Keepers Friend is a popular cleaning powder that contains oxalic acid, which is excellent for removing rust, tarnish, and mineral deposits. Make a paste with water and apply it to the rust spot. Gently scrub with a soft cloth or sponge, following the grain, then rinse and dry.
Understanding Different Stainless Steel Finishes
Stainless steel sinks come in various finishes, and some might require slightly different care.
The most common finishes include brushed, polished, and satin. A brushed finish has visible lines and is quite forgiving. A polished finish is highly reflective and shows smudges and scratches more easily.
A satin finish is somewhere in between. While the core principles of gentle cleaning apply to all, highly polished finishes might benefit more from specialized polishes and extra care to maintain their mirror-like shine.
| Finish Type | Characteristics | Care Tips |
|---|---|---|
| Brushed | Has visible lines (grain). Less prone to showing minor scuffs. | Always clean with the grain. Mild soap and water is usually sufficient. |
| Polished | Highly reflective, mirror-like surface. Shows fingerprints and scratches easily. | Use extra care. Specialized polishes work well. Dry immediately to prevent spots. |
| Satin | Smooth, matte appearance. Offers a balance between brushed and polished. | Generally easy to clean. Follow grain direction. Avoid abrasive cleaners. |
The Importance of Water Quality
The hardness of your water can affect how your sink looks.
Hard water contains a high concentration of minerals, such as calcium and magnesium. When this water dries on your stainless steel sink, it leaves behind mineral deposits that appear as white, chalky spots or a cloudy film. This can make even a recently cleaned sink look dull.
Using vinegar regularly can help combat the effects of hard water.
If you live in an area with very hard water, you might find yourself cleaning more often to combat these mineral deposits. Consider using a water softener for your home’s water supply if this is a persistent issue. For sink cleaning, wiping down the sink after each use with a microfiber cloth can significantly reduce the amount of water that dries on the surface, thereby minimizing mineral build-up.
Frequently Asked Questions
Question: Can I use a magic eraser on my stainless steel sink?
Answer: It is generally not recommended to use a magic eraser on stainless steel sinks. While they can be effective for some cleaning tasks, magic erasers are a form of melamine foam that acts as a very fine abrasive. They can potentially dull the finish or even cause fine scratches on stainless steel, especially on polished surfaces.
It’s safer to stick with soft cloths and gentle cleaners.
Question: How often should I deep clean my stainless steel sink?
Answer: For most households, a deep clean once a week is sufficient. This involves using baking soda or vinegar to tackle any tougher spots and restore shine. Daily quick rinses and drying will help keep it looking good between deep cleans.
Question: What is the best way to remove hard water stains?
Answer: The best way to remove hard water stains is by using white vinegar. Apply it to the stains, let it sit for 10-15 minutes, then gently scrub with a soft cloth or sponge, always following the grain. Rinse thoroughly and dry completely.
For very stubborn stains, you might need to repeat the process or try a specialized cleaner for hard water deposits.
Question: Can I use steel wool to remove a scratch?
Answer: Absolutely not. Steel wool is one of the worst things you can use on stainless steel. It is highly abrasive and will create many more scratches, making the original scratch look insignificant.
If you have a scratch, consider using a stainless steel scratch removal kit designed for the purpose, or consult a professional.
Question: Is it okay to use dish soap and a regular sponge?
Answer: Yes, for daily cleaning, mild dish soap and a soft sponge are perfectly fine. The key is to ensure the sponge is not abrasive. Avoid the scrubby side of sponges that are meant for tough grime, and always use the soft, non-scratch side.
Wiping with the grain is also important even with these everyday tools.
Summary
Keeping your stainless steel sink looking pristine without scratches is easily achieved with simple, consistent care. Focus on using soft cloths, mild cleaners like dish soap and vinegar, and always remember to wipe with the grain. Regular drying prevents water spots, and using a sink grid offers physical protection. These steps ensure your sink stays beautiful and functional.