
Sometimes, cleaning your stove burners can feel like a puzzle, especially when tough grease and burnt-on food just won’t budge. If you’ve ever found yourself scrubbing and scrubbing without success, you’re not alone! Many beginners find How to Clean Stove Burners That Won’t Come Clean a really tricky task.
But don’t worry, we’ve got a super simple, step-by-step plan that will make your burners shine like new. We’ll start by looking at what makes them so stubborn and then walk you through easy fixes for even the messiest situations.
Tackling Stubborn Stove Burner Grime
This section focuses on why stove burners get so dirty and the common challenges people face when trying to clean them. We’ll explore the types of messes that stick and the usual frustrations that come with trying to get them spotless. Understanding these issues helps us find the best ways to clean them effectively.
We want to make this cleaning job simple and stress-free.
Why Burners Become Hard to Clean
Stove burners can become very dirty for a few common reasons. When cooking, food spills and splatters are normal. These spills often contain grease, sugar, and other sticky substances.
When these get hot on the burner, they bake on and harden. This makes them tough to remove later.
Over time, these baked-on messes build up. They form a thick layer that regular wiping just can’t handle. This is especially true for older stoves or those used frequently.
The heat from cooking makes these spills even harder to get off.
Many people also run into trouble because they aren’t sure what cleaning products are safe and effective for their stove type. Using the wrong cleaner can sometimes make the problem worse or even damage the burner. This leads to frustration.
The biggest challenge for beginners is often the sheer stubbornness of the grime. It can look impossible to lift. This is where knowing the right methods and materials makes all the difference.
We’ll cover simple, everyday solutions that work well.
Common Frustrations with Dirty Burners
One common frustration is the time it takes. People think cleaning burnt-on food will take hours, so they put it off. This makes the problem worse.
Another issue is not seeing results. You scrub and scrub, but the burnt bits just stay there. It can feel like a lost cause.
Some people worry about scratching their burners. They don’t want to use harsh tools that might damage the finish. They also might be unsure about using strong cleaning chemicals near where they cook food.
Safety is a big concern.
The smell of burnt food can linger even after cooking. This is unpleasant and hard to get rid of. People want their kitchens to smell fresh.
Stubborn grime on burners contributes to these bad smells.
Finally, many people just don’t know where to start. They see the mess and feel overwhelmed. Without a clear plan, it’s easy to give up.
Our goal is to give you that plan so you can get your stove looking great.
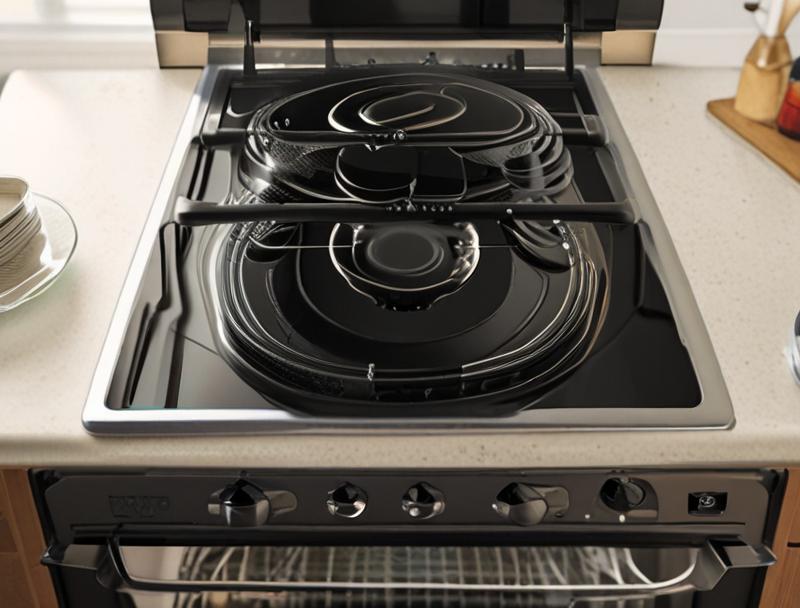
Understanding Stove Burner Types
Stoves come with different kinds of burners. Knowing your type helps you clean it the right way. Electric stoves often have coil burners or smooth glass-ceramic cooktops.
Gas stoves have burners with caps and bases that can be lifted off. Each type needs slightly different care.
Coil burners have heating elements that lift out. These can get food baked onto the coils themselves and the drip pans underneath. Smooth cooktops have a flat surface where spills can spread.
These can be prone to tough, burnt-on stains.
Gas burners have several parts. The burner cap sits on top and distributes the flame. Underneath are the burner bases, which can get clogged with food debris.
The igniter, a small metal piece, can also get dirty.
Cleaning methods vary based on the material. Some burners are made of enamel, others of stainless steel or cast iron. Knowing the material helps you pick the right cleaner.
We’ll focus on common types, so you can likely find a solution that fits your stove.
Effective Cleaning Methods for Stubborn Stove Burners
This section is all about the actual cleaning. We’ll walk through simple, effective ways to get rid of those stubborn, burnt-on messes on your stove burners. We’ll cover different approaches for various types of grime and stove parts.
The aim is to provide clear, easy-to-follow steps that anyone can use to make their burners look clean and new again.
The Power of Baking Soda and Vinegar
Baking soda and vinegar are like magic for cleaning. They are safe and easy to find. They work together to break down tough, greasy messes.
Baking soda is a mild abrasive. It can scrub away grime without scratching surfaces.
Vinegar is an acid. It helps to dissolve grease and lift baked-on food. When you mix them, they create a fizzy reaction.
This reaction helps to loosen stubborn spots. It makes cleaning much easier.
This natural cleaning method is great because it avoids harsh chemicals. This is good for your health and the environment. It’s also very budget-friendly.
You probably already have these items in your kitchen.
Let’s see how to use them. First, sprinkle baking soda over the stained areas. Then, spray or drizzle vinegar onto the baking soda.
You will see it start to fizz. Let this sit for a while. Then, you can gently scrub.
How to Use Baking Soda and Vinegar
To start, make sure your stove is completely cool. Remove any burner grates or caps if possible. For tough spots, make a paste from baking soda and a little water.
Apply this paste directly to the burnt-on areas. Let it sit for at least 15-30 minutes.
After the paste has sat, spray or pour white vinegar over the baking soda paste. It will start to bubble and fizz. This reaction helps lift the grime.
Let it fizz for a few minutes.
Then, use a soft cloth or sponge to gently scrub the area. For very stubborn spots, you might need a soft-bristled brush or an old toothbrush. Wipe away the loosened grime with a damp cloth.
Rinse the cloth and wipe again until all the residue is gone.
Repeat this process if needed for very difficult stains. For areas like drip pans, you can soak them in a mixture of hot water, baking soda, and a bit of dish soap. This helps loosen up the hardened grease.
Cleaning Different Stove Burner Parts
Stoves have several parts that need cleaning. This includes the burner grates, burner caps, and the cooktop surface itself. Each part might require a slightly different approach.
Getting all these parts clean makes your whole stove look much better.
Burner grates are often made of cast iron or have a coated finish. They can get coated in grease and food bits. For these, soaking in hot, soapy water is a good first step.
Then, you can use a scrub brush to remove stuck-on food.
Burner caps, especially on gas stoves, can get very discolored from heat and spills. These can often be cleaned with baking soda paste. You might need to let them soak for a bit longer.
Some can even be cleaned in the dishwasher, but check your manual first.
The cooktop surface needs care too. For electric coil stoves, the drip pans underneath the coils are a common problem area. These can be soaked and scrubbed.
For smooth top stoves, it’s important to use cleaners specifically made for glass cooktops to avoid scratches.
Cleaning Electric Stove Burners (Coil and Smooth Top)
For electric coil burners, the first step is to unplug the stove or turn off the power at the breaker. Then, carefully lift the coils out of their sockets. The drip pans underneath are usually removable.
These pans often collect the worst messes.
You can soak these drip pans in hot, soapy water. For tough stains, a paste of baking soda and water, left to sit, can work wonders. Scrub with a non-abrasive sponge or brush.
Rinse and dry thoroughly before replacing. The coils themselves can be wiped down with a damp cloth, but avoid getting the electrical connection wet.
For smooth glass or ceramic cooktops, always use cleaners designed for this surface. Avoid abrasive scrubbers or steel wool, as they can scratch the glass. After cooking, wipe up spills immediately with a damp cloth.
For burnt-on messes, use a cooktop cleaner and a non-scratch pad.
You can also use the baking soda and vinegar method on smooth tops. Sprinkle baking soda, then spray vinegar, let it fizz, and gently wipe. Always follow up with a clean, damp cloth to remove all residue.
Make sure the surface is completely dry before using the stove again.
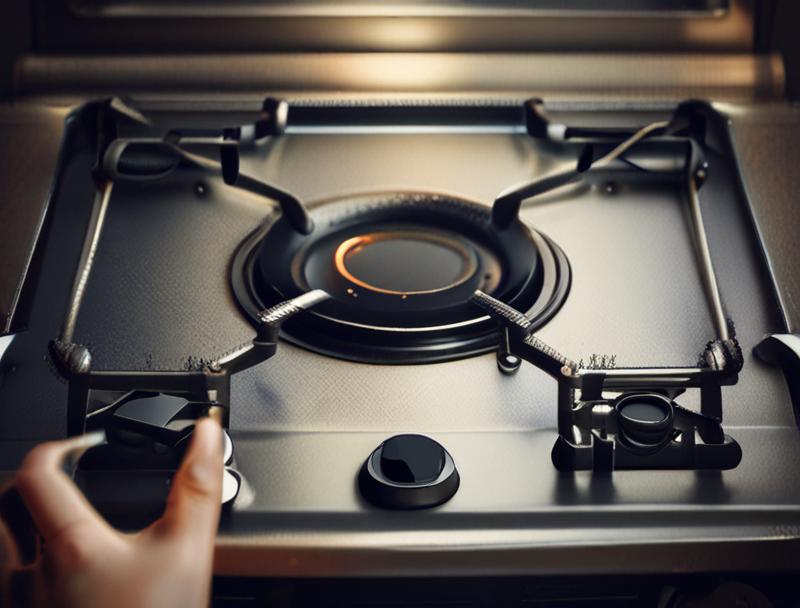
Cleaning Gas Stove Burners (Grates, Caps, and Bases)
Cleaning gas stove burners involves a few more parts. First, ensure the gas is off and the burners are cool. You can usually lift the burner grates off.
These are often heavy cast iron.
Soak the grates in hot, soapy water. A scrub brush can help remove burnt-on food. For really tough spots, try a paste of baking soda and water, let it sit, then scrub.
Rinse well and dry completely before putting them back.
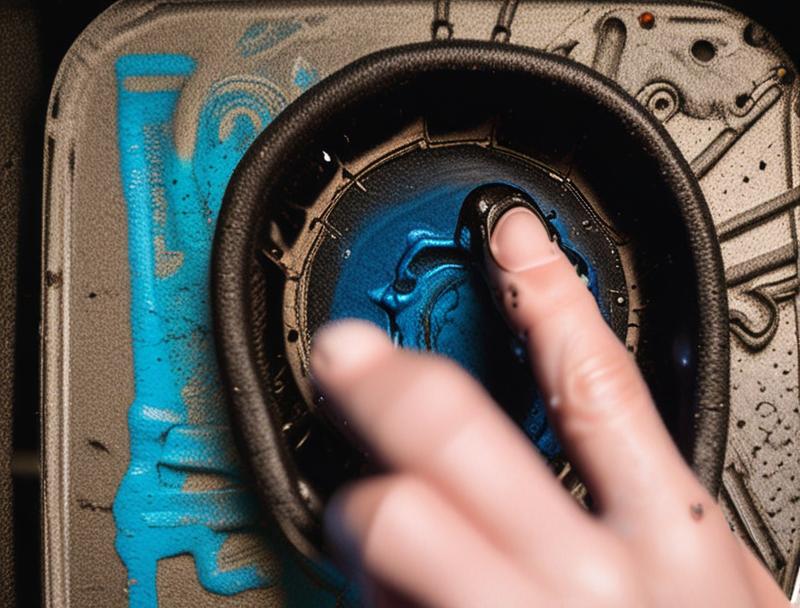
Next, remove the burner caps and burner bases. The caps can be cleaned with baking soda paste. For the burner bases, use a damp cloth to wipe away loose debris.
You can use a toothpick or a straightened paperclip to gently clear any clogged gas holes. Be careful not to enlarge them.
Wipe the entire cooktop area with a damp cloth. For any stuck-on food on the surface, you can use a bit of baking soda paste. Make sure all parts are completely dry before reassembling.
This prevents rust and ensures proper flame.
Dealing with Burnt-On Food and Grease
Burnt-on food is one of the biggest cleaning challenges. It’s hard and sticky. Grease also builds up and becomes sticky over time.
These require a bit more effort than a simple wipe-down.
The key is to soften these tough messes. Heat can help, but only carefully. For electric stoves, you can sometimes run a burner on low for a minute to slightly soften dried spills before cleaning.
For gas stoves, the heat of the burner itself bakes things on.
Using a good degreaser can help. Many dish soaps are excellent degreasers. For very tough jobs, you can try a commercial degreaser, but always check that it’s safe for your stove type.
Baking soda paste is also a fantastic degreaser and mild abrasive.
Patience is important. Sometimes, letting a cleaner sit for a longer time will do the work for you. Don’t rush the process.
Letting a paste or a soaked towel work on the grime can save you a lot of scrubbing.
A good example of this is using a damp cloth soaked in vinegar or hot soapy water. Place this damp cloth over a stubborn burnt spot on a burner or drip pan. Let it sit for 30 minutes or even an hour.
This helps to rehydrate and loosen the hardened food, making it much easier to wipe away.
Example Scenario: Burnt Sugar Spill
Imagine you accidentally boiled over some sugar, and it created a hard, sticky mess on your glass cooktop. The first step is to let the cooktop cool completely. Then, try gently scraping off any loose pieces with a plastic scraper or a razor blade held at a very low angle (be very careful not to scratch).
Next, apply a generous amount of baking soda directly onto the burnt sugar spot. Spray or drizzle white vinegar over the baking soda. Let it fizz and work for about 15-20 minutes.
After waiting, use a soft cloth or a non-scratch scrub pad to gently scrub the area. You should feel the sugar starting to loosen. Wipe away the dissolved sugar and baking soda residue with a damp cloth.
Rinse the cloth and wipe again until the area is clean.
If some stickiness remains, repeat the process. Sometimes, a specialized cooktop cleaner applied after the initial steps can remove the last bits of residue and leave a nice shine. The key is not to give up after the first try.
Safety Precautions During Cleaning
Always remember to put safety first when cleaning your stove. The most important step is to make sure the stove is completely cool. This prevents burns.
Also, if you have an electric stove, turn off the power at the breaker box. This prevents electric shock.
When using cleaning products, even natural ones like vinegar, ensure good ventilation. Open a window or turn on your kitchen fan. This helps clear the air, especially if you’re using stronger cleaners or if fumes are strong.
Wear gloves if you have sensitive skin or if you are using a stronger cleaner. This protects your hands from irritation and chemical exposure. Avoid mixing cleaning products unless you are sure they are safe to combine.
Some mixtures can create dangerous fumes.
For gas stoves, be careful not to clog the gas ports. Use a toothpick or a fine needle to clear them, but do not push anything too far in or enlarge the holes. This could affect the flame and how the burner works.
Preventing Future Stove Burner Messes
Keeping your stove burners clean isn’t just about cleaning; it’s also about preventing messes from building up in the first place. This section will cover simple habits and tips that can help keep your stove looking cleaner for longer, making future cleaning easier. We’ll focus on practical steps you can take during and after cooking.
Wipe Up Spills Immediately
The simplest and most effective way to prevent tough messes is to clean up spills as soon as they happen. Most spills, especially liquids, can be wiped away with a damp cloth while the stove is still warm (but not hot) or after it has cooled down.
This stops food from baking onto the surface. When spills are left to cool and harden, they become much harder to remove later. This is true for both gas and electric stoves.
Taking a moment to wipe up a spill right away saves you a lot of scrubbing later.
For example, if you spill some sauce, grab a paper towel or a damp cloth. Gently wipe the area. If it’s still a bit sticky, a tiny bit of dish soap on the cloth can help.
Make sure to rinse the cloth and wipe again to remove any soap residue.
This habit not only keeps your stove cleaner but also prevents odors from burnt food from lingering in your kitchen. It’s a small effort that makes a big difference over time.
Using Splatter Guards and Lids
Using splatter guards and lids while cooking is a fantastic way to contain messes. Splatter guards are mesh covers that go over pots and pans. They let steam escape but keep grease from spraying out.
This is especially helpful when frying or searing foods.
Using lids on pots and pans when simmering or boiling also helps. It prevents boil-overs, which are a common cause of burnt-on messes. If a liquid does start to boil over, a lid can sometimes contain it enough that it doesn’t spread too far onto the burner.
These tools are simple to use and easy to clean. Splatter guards can usually be washed in the sink or put in the dishwasher. Lids are generally easy to wipe down.
They are a small investment that can save you a lot of cleaning time and effort.
Think about when you’re frying bacon or making a sauce that tends to bubble up. Using a splatter screen over the pan can catch most of the grease splatters. This means less greasy film on your cooktop and surrounding surfaces.
Regular Maintenance Cleaning
Don’t wait until your burners are covered in gunk to clean them. Doing a quick clean-up regularly makes the big cleaning jobs much less frequent and less difficult. This is called maintenance cleaning.
Once a week, or even every few days, take a few minutes to wipe down your cooktop. If you have gas burners, you can quickly lift the grates and caps and wipe under them. For electric stoves, a quick wipe of the surface can prevent small messes from becoming big ones.
This regular upkeep prevents the build-up of grease and small food particles. These small bits are often the start of the really stubborn burnt-on messes. By keeping them at bay, you make your stove much easier to manage.
For instance, after cooking dinner, while the stove is still warm, spray a mild all-purpose cleaner or just use a damp microfiber cloth to wipe down the cooktop. Pay attention to the areas around the burners where spills are common. This simple habit can dramatically reduce the need for deep cleaning.
When to Call a Professional or Replace Parts
While most stove burner cleaning can be done at home, there are times when you might need more help. If your stove has very old, rusted, or damaged parts, it might be time to consider replacements. Trying to clean severely damaged parts can be difficult and might not yield good results.
For example, if your electric burner coils are heavily corroded and falling apart, they might need to be replaced. Similarly, if the enamel coating on your gas burner grates is severely chipped, they might be beyond saving and could rust. Your stove’s manual will often have information on ordering replacement parts.
In some cases, a professional appliance repair person might be able to help. They have specialized tools and knowledge to tackle very stubborn issues or to perform repairs. However, for typical burnt-on food and grease, the DIY methods we’ve discussed are usually sufficient.
If you’ve tried all the cleaning methods and a particular spot still won’t budge, or if you notice any damage to your stove components, it’s worth considering whether replacement parts are needed. This ensures your stove works safely and efficiently.
Here’s a quick look at when replacement might be better than cleaning:
- Severely rusted or pitted burner grates.
- Electric burner coils that are visibly damaged or not heating evenly.
- Drip pans that are so corroded they can’t be cleaned or are falling apart.
- Burner bases on gas stoves where the holes are permanently clogged or damaged.
Replacing these parts can sometimes be more cost-effective than spending hours trying to clean something that’s no longer functional or safe.
Troubleshooting Common Stove Burner Issues
Even with the best cleaning efforts, sometimes specific problems pop up with stove burners. This section will help you troubleshoot common issues you might encounter, especially those related to cleaning. We’ll offer solutions for persistent problems so you can get your stove working and looking its best.
Burners Still Smelling After Cleaning
It can be frustrating if your stove burners still smell bad even after you’ve cleaned them. This often happens when a small amount of burnt residue is left behind in a hard-to-see spot. The heat from the stove can reactivate this residue, causing a smell.
Check all the parts again, including under the burner caps, around the igniter (for gas stoves), and in any crevices on electric stoves. Sometimes, a tiny bit of baked-on food can hide in these areas. A small brush or a toothpick can help dislodge it.
Ensure you have rinsed away all cleaning product residue. Leftover soap or cleaner can also create smells when heated. A good final wipe with a clean, damp cloth is important.
Another cause could be grease buildup in the vent hood or filter above your stove. If this area isn’t cleaned regularly, it can recirculate old cooking smells. Cleaning your range hood and filter might solve the lingering odor problem.
Uneven Flame or Heating on Burners
If your gas burner has an uneven flame or your electric burner isn’t heating evenly, it’s usually due to a blockage or a component issue. For gas burners, uneven flames often mean one or more of the small holes in the burner base are clogged with food debris or grease.
As mentioned before, carefully use a toothpick or a straightened paperclip to gently clear these holes. Do this when the burner is cool and clean. Make sure you don’t push debris further in or enlarge the holes.
A consistent, even flame is important for proper cooking.
For electric stoves, uneven heating might mean the heating element itself is damaged or corroded. If you’ve cleaned it as best you can and it’s still not heating evenly, the element might need to be replaced. Always ensure electric elements are dry before use.
Sometimes, burner grates that are not seated properly can cause uneven heat distribution on gas stoves, as the flame might not be centered under the cookware. Ensure all grates are sitting level and securely.
Stains on Glass or Enamel Surfaces
Glass and enamel surfaces on stoves are prone to showing stains, especially if they are not cleaned regularly. For glass cooktops, burnt-on food can leave white or discolored marks. For enamel surfaces, grease and spills can cause a dull appearance.
For glass cooktops, specialized glass cooktop cleaners are usually best. They are formulated to clean without scratching and often leave a protective shine. Baking soda paste followed by vinegar can also be effective.
Always use a non-abrasive pad.
For enamel surfaces, baking soda paste is a great option. It lifts stains without scratching the enamel. A mixture of vinegar and water can also help remove dullness.
After cleaning, wiping with a soft cloth and drying thoroughly will restore the shine.
If you have extremely stubborn stains on an enamel surface, you might try a cream cleaner specifically designed for enamel. Always test in an inconspicuous spot first. Avoid harsh chemicals that can damage the finish.
Here’s a quick comparison of cleaning agents for different surfaces:
| Surface Type | Recommended Cleaners | Avoid Using |
|---|---|---|
| Glass Cooktop | Glass cooktop cleaner, Baking soda paste, Vinegar | Steel wool, Abrasive sponges, Harsh chemicals |
| Enamel Cooktop/Burner Parts | Baking soda paste, Mild dish soap, Vinegar solution | Steel wool, Abrasive cleaners, Scouring pads |
| Cast Iron Grates | Hot soapy water, Baking soda paste, Stiff brush | Dishwasher (unless specified), Harsh chemicals |
Remember to always check your stove’s manual for specific cleaning recommendations for your model.
Frequently Asked Questions
Question: How often should I clean my stove burners?
Answer: It’s best to wipe up spills right after they happen. A quick wipe-down of the cooktop a few times a week helps prevent major buildup. For a deep clean, doing it every week or two, depending on how much you cook, is a good idea.
Question: Can I use oven cleaner on my stove burners?
Answer: It’s generally not recommended to use oven cleaner on stove burners, especially on gas stove parts or smooth top surfaces. Oven cleaners are very harsh and can damage the finish or clog ports on gas burners. Stick to milder methods like baking soda and vinegar.
Question: My burner caps are discolored. How can I fix this?
Answer: Discoloration on burner caps is usually from heat and grease. You can try cleaning them with a paste of baking soda and water. Let the paste sit for about 30 minutes, then scrub gently with a soft brush.
Rinse and dry thoroughly. For very stubborn discoloration, you might need to repeat the process or consider replacement if they are old.
Question: What if a spill is completely hardened on my glass cooktop?
Answer: For hardened spills on glass cooktops, first try gently scraping away any loose bits with a plastic scraper or razor blade held at a very low angle. Then, apply baking soda paste, spray with vinegar, let it fizz, and scrub gently with a non-scratch pad. Specialized glass cooktop cleaners can also help lift tough stains.
Question: Can I soak my electric stove drip pans overnight?
Answer: Yes, soaking electric stove drip pans overnight can be very effective for loosening tough, baked-on grime. Fill a sink or basin with hot water and a good amount of dish soap, and let the drip pans soak. After soaking, use a scrub brush to remove the softened residue.
Wrap Up
Getting rid of stubborn grime on stove burners is totally doable. By using simple household items like baking soda and vinegar, and by cleaning spills right away, you can keep your stove looking great. Remember to be patient and gentle.
Your kitchen will be cleaner and more pleasant to cook in.