
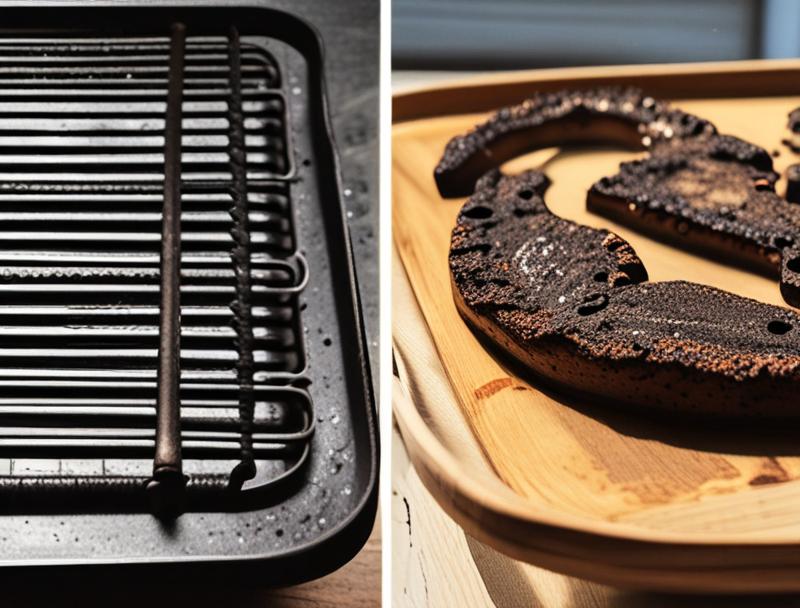
Cleaning burnt grease from oven racks can be a real pain, right? For many folks just starting out with kitchen chores, tackling those stubborn, baked-on messes feels especially tricky. It’s easy to get frustrated when scrubbing doesn’t seem to make a dent.
But don’t worry! This guide is here to make how to remove burnt grease from oven racks simple. We’ll walk through easy ways to get your racks sparkling clean again, and then we’ll explore some helpful tips for keeping them that way.
Getting Your Oven Racks Clean: Simple Methods
Cleaning oven racks is a common kitchen task that many find challenging. The reason it’s tough for beginners is that burnt-on grease becomes very hard. It sticks tight and doesn’t easily wipe away.
Often, people try scrubbing really hard with just soap and water, but this usually doesn’t work. They might not know about the power of baking soda, vinegar, or ammonia. This section will show you easy ways to get those racks looking new without all the hard work.
We’ll cover different approaches so you can pick the best one for your situation. This will help you get your oven ready for your next baking adventure.
The Baking Soda and Vinegar Power Duo
Baking soda and vinegar are kitchen staples that pack a punch when it comes to cleaning. They work together to lift tough grime. Baking soda is a mild abrasive, meaning it can scrub away stuck-on bits without scratching surfaces.
Vinegar is an acid that helps break down grease and neutralize odors. When combined, they create a fizzing reaction that helps loosen burnt food and grease.
- How it works: Baking soda has a slightly gritty texture. This helps it to scrape away burnt residue. Vinegar is acidic. It helps to dissolve the fatty molecules in the grease, making them easier to remove.
- What you’ll need: Baking soda, white vinegar, a spray bottle, a scrubbing brush or sponge, and some warm water.
- The process: First, remove the oven racks from the oven. Lay them on old towels or newspaper to protect your floor. Sprinkle baking soda generously over the entire rack, focusing on the burnt areas. Then, spray white vinegar over the baking soda. You’ll see it start to fizz and bubble. Let this mixture sit for at least 30 minutes, or even a few hours for very tough messes. After it has sat, scrub the racks with your brush or sponge. Most of the burnt grease should come off easily. Rinse the racks thoroughly with warm water and dry them completely.
This method is great because it uses natural ingredients. It’s also budget-friendly. Many households already have these items on hand.
The chemical reaction between baking soda and vinegar helps lift the burnt food particles. This makes scrubbing much easier than if you were just using plain water. You might need to repeat the process for extremely stubborn spots, but it’s generally very effective for most burnt grease problems.
Using Dish Soap and Hot Water Soak
Sometimes, the simplest methods are the most effective. A good soak in hot, soapy water can loosen a surprising amount of burnt-on grease. This is a good first step or a gentle approach for lighter messes.
It requires less scrubbing and fewer special ingredients.
- The main idea: Hot water and a good degreasing dish soap can break down grease molecules. The longer the soak, the more the grease will soften.
- What you’ll need: A bathtub or large sink, a strong degreasing dish soap, very hot water, and old towels.
- The steps: Line your bathtub or a large sink with old towels. This protects the surface from scratches and absorbs excess water. Place the oven racks on top of the towels. Fill the tub or sink with the hottest water you can safely use. Add a generous amount of degreasing dish soap. Make sure the racks are fully submerged in the hot, soapy water. Let them soak for several hours, or even overnight for heavily soiled racks. After soaking, use a scrub brush or sponge to remove the loosened grease. Rinse the racks well and dry them thoroughly before putting them back in the oven.
This soaking method is fantastic for loosening grease. It reduces the need for intense scrubbing, which can save your arms and your patience. The heat from the water helps to melt the grease.
The dish soap helps to lift it away from the rack surface. It’s a good option if you have the time to let the racks soak. It’s also a safer option than using harsh chemicals.
Always ensure good ventilation when working with hot water in a confined space.
Ammonia: A Powerful, But Careful, Option
Ammonia is a very strong cleaner that can be incredibly effective for removing tough, burnt-on grease. However, it’s important to use it with extreme caution. Ammonia fumes are potent and can be harmful if inhaled.
Always ensure you are in a well-ventilated area when using ammonia. This method is best for very stubborn messes when other methods haven’t worked.
- Why ammonia works: Ammonia is an alkaline substance. It effectively breaks down and dissolves grease and baked-on food residues. It’s a more aggressive cleaner than baking soda or dish soap.
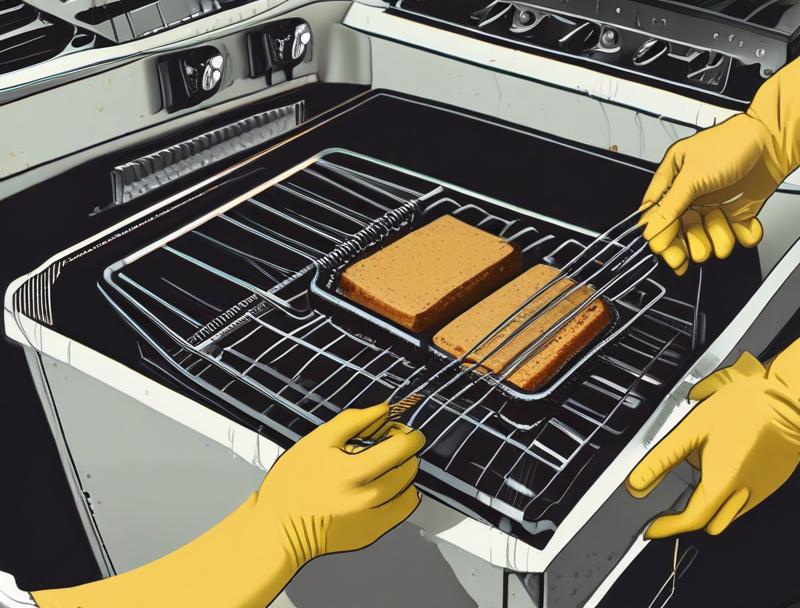
- Safety first: Never mix ammonia with bleach or other cleaning products, as this can create dangerous fumes. Work in a well-ventilated area, like outdoors or with all windows and doors open. Wear rubber gloves and consider wearing a mask to avoid inhaling fumes.
- How to use it: Place each oven rack inside a heavy-duty garbage bag. Pour about half a cup to a full cup of ammonia into the bottom of each bag. Seal the bags tightly. Place the sealed bags outside or in a very well-ventilated area, like a garage, overnight. The ammonia fumes trapped inside the bag will work to break down the grease. The next day, carefully open the bags away from your face. Remove the racks and rinse them thoroughly with water. Most of the burnt grease should wipe away easily with a sponge or cloth.
This ammonia method is often the last resort for very difficult cleaning jobs. The fumes do all the hard work, meaning you’ll do much less scrubbing. It’s crucial to follow the safety precautions carefully to avoid any health risks.
Because of its strength, it’s best to use this method sparingly and only when absolutely necessary. Ensure thorough rinsing to remove all ammonia residue before placing the racks back in the oven.
Dealing with Stubborn Stains and What to Avoid
Sometimes, even with the best cleaning methods, a few stubborn stains might remain. Understanding what causes these and what cleaning products to avoid is key to success. Beginners often make mistakes that can either not clean the racks well or even damage them.
Knowing these pitfalls helps you achieve a better outcome and keeps your oven racks in good shape for longer.
Common Pitfalls for Beginners
Many people trying to clean their oven racks for the first time run into common issues. One of the biggest is not giving the cleaning solutions enough time to work. They scrub and scrub, getting tired and frustrated, without realizing the cleaner needs time to break down the grease.
Another pitfall is using the wrong kind of scrubber.
- Not enough soaking time: Burnt grease is tough. It needs time to soften. Rushing the process means you’ll be doing a lot more scrubbing than necessary. Let baking soda mixtures sit for hours or overnight if needed.
- Using abrasive scrubbers on coated racks: Some oven racks have a special coating. Using steel wool or very harsh scrub pads can scratch this coating, damaging the rack and making it harder to clean in the future.
- Ignoring ventilation: When using strong cleaners like ammonia, not having enough fresh air can lead to headaches and respiratory irritation. Always ensure good airflow.
- Not rinsing thoroughly: Leaving behind cleaning product residue can cause smoke or odd smells when you next use your oven. Always rinse completely.
It’s easy to get discouraged when you don’t see immediate results. The key is patience. Letting the cleaning agents do their job saves you a lot of effort.
Also, being mindful of the materials your racks are made from helps prevent damage. For example, if your racks are chrome-plated or have a non-stick coating, you need to be gentler with your cleaning tools.
When to Call in Professional Help
For most everyday burnt grease situations, the methods described are effective. However, there are times when the mess is so extreme, or the racks are very old and delicate, that professional help might be the best option. This is especially true if you’re worried about damaging the racks or if the grease is so caked on it looks like part of the metal.
- Extremely old or severe build-up: If the grease has been burning and building up for years, it can become almost impossible to remove with home methods. It might even start to pit the metal.
- Delicate or coated racks: If your oven racks have a special finish or are made of a material that requires very careful cleaning, a professional service might have specialized tools and knowledge. They can clean them without causing damage.
- Lack of time or physical ability: Some people simply don’t have the time or the physical strength to tackle heavy-duty oven rack cleaning. In these cases, hiring a service is a practical solution.
- Risk of damage: If you’re concerned about accidentally damaging your oven or the racks with harsh chemicals or aggressive scrubbing, a professional can take that worry away.
Professional oven cleaning services often use high-temperature cleaning ovens or specialized chemical baths. These methods can restore even the most neglected racks. While it costs more than DIY methods, it can be a worthwhile investment if your racks are beyond saving with simple home solutions.
It also saves you the effort and potential frustration of trying to clean them yourself.
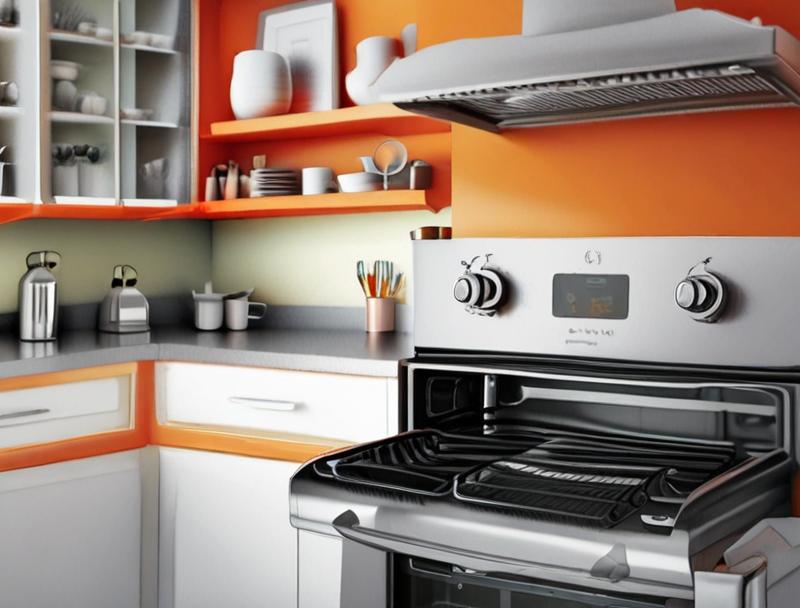
Preventing Future Grease Buildup
Once your oven racks are clean, keeping them that way is much easier than cleaning them later. A little bit of regular care goes a long way in preventing those tough burnt-on messes. Thinking ahead about how you cook and how you clean can save you a lot of work down the line.
It’s all about building good habits in the kitchen.
Regular Cleaning Habits
The best way to avoid the struggle of removing burnt grease is to clean up spills as they happen. This simple habit can save you hours of scrubbing later. It also keeps your oven looking its best and smelling fresher.
- Wipe up spills immediately: If something spills in your oven, try to wipe it up while it’s still warm, but not hot enough to burn you. Use a damp cloth or paper towels.
- Use oven liners: Place oven liners on the bottom rack to catch drips. Make sure they are placed correctly and don’t block the oven’s vents.
- Cover dishes: When cooking foods that might bubble over, like casseroles or pies, cover them with foil or a lid. This helps contain splatters.
- Regular light cleaning: Even a quick wipe-down of the oven interior and racks every few weeks can make a big difference. Use a mild cleaner or a damp cloth.
These small steps are key to maintaining a clean oven. They prevent the small spills from turning into baked-on messes. When grease doesn’t have a chance to burn onto the racks, cleaning becomes a much simpler task.
Think of it as preventative maintenance for your kitchen.
Tips for Greaseless Cooking
The type of cooking you do can also impact how much grease ends up on your oven racks. Some cooking methods are naturally less messy than others. Being mindful of this can help reduce the amount of cleaning you need to do.
- Use parchment paper: For baking items like cookies or roasted vegetables, using parchment paper on your baking sheets can catch drips and make cleanup a breeze.
- Properly preheat your oven: When your oven is at the right temperature before you put food in, it cooks more evenly. This can reduce the chance of splattering or burning as food cooks.
- Avoid overfilling dishes: If you fill baking dishes too high, the contents can bubble over and create a mess. Leave a little space at the top.
- Consider splatter guards: For stovetop cooking that can lead to grease splatters, using a splatter guard can help contain the mess, indirectly reducing what might end up in the oven if you’re using it for warming or finishing.
These techniques focus on minimizing mess during the cooking process. By reducing the amount of grease that gets onto or near your oven racks in the first place, you’re making your future cleaning tasks much easier. It’s about working smarter, not harder, in the kitchen.
Frequently Asked Questions
Question: How long should I let cleaning solutions soak on oven racks?
Answer: For lighter messes, 30 minutes to an hour might be enough. For tough, burnt-on grease, letting cleaning solutions like baking soda and vinegar, or ammonia, soak for several hours or even overnight is best.
Question: Can I use oven cleaner directly on my oven racks?
Answer: Some commercial oven cleaners are safe for racks, but always check the product label first. Many are designed for the oven interior, not necessarily the racks. Using the wrong product could damage the rack coating.
Question: Is it safe to put oven racks in the dishwasher?
Answer: Generally, it’s not recommended. Dishwashers can be too harsh for oven racks. The high heat and strong detergents can strip protective coatings and cause discoloration or rust.
Question: What is the safest way to clean greasy oven racks if I have a sensitive nose or respiratory issues?
Answer: Opt for the baking soda and vinegar method or the hot water and dish soap soak. These are natural and less likely to produce strong fumes. Avoid ammonia entirely.
Question: My oven racks are still a little dull after cleaning. What can I do?
Answer: After cleaning and rinsing, you can try buffing them with a soft cloth and a tiny bit of mineral oil or olive oil. This will help them shine and can also make them slightly more resistant to future sticking.
Final Thoughts
Getting rid of burnt grease from oven racks is totally doable. By using simple methods like baking soda, vinegar, or a good soak, you can make them look great again. Remember to be patient and let the cleaners do the work.
Keeping up with small cleanups will save you big cleaning jobs later.