
Cleaning your oven can seem like a big chore, especially when you worry about using strong chemicals around your food. Many folks find How to Clean an Oven Without Harsh Chemicals a bit tricky at first, wondering if natural methods really work. But don’t worry!
We’ve got a super simple, step-by-step plan that will make your oven sparkle without any scary fumes. Get ready to see how easy it can be to get your oven looking like new.
Getting Your Oven Ready for a Natural Clean
Before you start scrubbing, it’s important to do a few things to make the cleaning process smoother and safer. This section will guide you through gathering your supplies and preparing the oven itself. We’ll make sure you have everything you need on hand so you can tackle the mess efficiently and effectively.
Think of this as setting the stage for a successful, chemical-free clean.
Gathering Your Natural Cleaning Supplies
Having the right tools and ingredients makes all the difference when you want to clean your oven without harsh chemicals. You’ll be surprised by how many common household items can tackle tough grease and baked-on food. Gathering these items beforehand means you won’t have to stop mid-task to hunt for something.
- Baking Soda: This is your best friend for oven cleaning. It’s a mild abrasive that helps lift grime and neutralize odors. Its fine texture is gentle enough not to scratch surfaces but tough enough to scrub away stubborn spots. Baking soda works by chemically reacting with the acidic and alkaline grease and food particles, breaking them down and making them easier to remove. It’s also a natural deodorizer, which is a bonus for any oven.
- Vinegar: White vinegar is a fantastic degreaser and disinfectant. Its acidity helps cut through grease and grime that baking soda alone might not fully dissolve. When mixed with baking soda, it creates a fizzing reaction that can help lift stuck-on messes. The acetic acid in vinegar is effective at breaking down the bonds in grease and oil, making them water-soluble. It also helps to remove mineral deposits and water spots, leaving surfaces shiny.
- Water: Simple, clean water is essential for making pastes and for rinsing. You’ll use it to create the baking soda paste and to wipe away the residue left behind. Water helps to dilute the cleaning agents and carry away the loosened dirt and grime. It’s the final step in rinsing away all the cleaning solution and any remaining debris.
- A Spray Bottle: This is perfect for applying your vinegar solution evenly. A spray bottle allows for controlled application, ensuring you don’t oversaturate areas and making it easier to reach all parts of the oven. It helps create a fine mist that can coat surfaces effectively, allowing the vinegar to work its magic on grease and grime.
- Rubber Gloves: While you’re avoiding harsh chemicals, it’s still a good idea to protect your hands from the baked-on gunk and the cleaning agents. Gloves keep your skin from drying out and prevent direct contact with any food residue. They ensure that your hands stay clean and comfortable throughout the cleaning process.
- Scrub Brush or Sponges: You’ll need something to help scrub away the loosened grime. A non-scratch scrub brush or a sturdy sponge will work well. Avoid steel wool, as it can scratch the oven’s interior surfaces. The goal is to use an abrasive that is effective without causing damage to the oven’s enamel or metal.
- A Bowl: To mix your baking soda paste. A medium-sized bowl is usually sufficient for creating the right consistency.
- Paper Towels or Cloth Rags: For wiping and drying. Plenty of these will be needed to clean up the mess and dry the oven thoroughly.
Preparing Your Oven for Cleaning
Before you start applying any cleaning solutions, it’s crucial to get your oven ready. This means removing any loose debris and ensuring the oven is cool. Taking these small steps will make the entire cleaning process much more effective and less messy.
- Remove Oven Racks: Take out all the oven racks, shelves, and any other removable parts. These can be cleaned separately, often with the same natural ingredients or even in the sink. This step also gives you better access to the oven’s interior walls and bottom.
- Scrape Out Loose Debris: Use a spatula or scraper to gently scrape away any large, loose pieces of burnt food or debris from the bottom of the oven. This prevents these chunks from becoming a bigger mess when you add moisture and cleaning paste.
- Ensure the Oven is Cool: Make sure your oven is completely cool to the touch. Cleaning a hot oven is dangerous and can also cause some cleaning agents to bake on. Patience here is key for safety and better results.
The Natural Baking Soda Method for a Sparkling Oven
This section details the most popular and effective natural method for cleaning your oven. We will walk you through creating a baking soda paste and applying it to the oven’s interior. You’ll learn how to let it work its magic and then how to remove it, leaving your oven clean and fresh.
Creating and Applying the Baking Soda Paste
The baking soda paste is the workhorse of natural oven cleaning. Its gentle abrasive qualities combined with its ability to absorb odors make it ideal. Creating the right consistency is key to its effectiveness.
- Mix Baking Soda and Water: In a bowl, combine about half a cup of baking soda with a few tablespoons of water. Stir until you create a thick, spreadable paste, similar in consistency to frosting. You want it to be thick enough to stick to the oven walls without dripping too much.
- Apply the Paste: Using your hands or a spatula, spread the paste all over the interior surfaces of your oven. Be sure to coat the bottom, sides, and the inside of the oven door. Avoid getting the paste on the heating elements or any fan mechanisms if your oven has them. It’s okay if it looks uneven; the paste will still work.
- Focus on Greasy Areas: Pay special attention to areas with heavy grease buildup or burnt-on food. You can apply a slightly thicker layer of paste to these stubborn spots. The longer the paste sits on these tough areas, the more it will help to loosen them.
Letting the Paste Do Its Work
The magic of this method is allowing the paste enough time to break down the baked-on grime. This step requires patience, but it’s essential for loosening tough messes without strenuous scrubbing.
- Allow it to Sit: Let the baking soda paste sit in the oven for at least 12 hours, or preferably overnight. This extended period allows the baking soda to absorb grease and loosen burnt-on food particles effectively. The longer it sits, the easier the cleanup will be.
- Observe the Changes: As the paste dries, you’ll notice it turning brown or yellowish in areas where it’s absorbed grease and grime. This is a good sign that it’s working. You might also see some cracking in the paste as it dries, which is completely normal.
Wiping Away the Mess
Once the paste has had ample time to work, it’s time to remove it and reveal a cleaner oven. This step involves wiping and rinsing to get rid of all the loosened grime and baking soda residue.
- Initial Wipe Down: After the waiting period, use a damp cloth or sponge to wipe away as much of the dried baking soda paste as possible. You’ll see a lot of the grime lift off with the paste. Rinse your cloth frequently.
- Vinegar Spray for Residue: For any remaining baking soda residue or stubborn spots, spray a little white vinegar onto those areas. The vinegar will react with any leftover baking soda, creating a gentle fizz that helps lift the rest of the grime.
- Final Rinse and Dry: Wipe the oven down thoroughly with a clean, damp cloth to remove all traces of vinegar and residue. Once clean, use a dry cloth or paper towels to dry the interior completely. This prevents water spots and ensures a fresh finish.
Cleaning Oven Racks and Other Removable Parts Naturally
Oven racks can get incredibly greasy and burnt, making them a prime target for natural cleaning methods. Cleaning them separately allows for a more thorough job and can be done at the same time as the oven interior or beforehand.
Soaking Oven Racks for Easy Cleaning
The best way to tackle dirty oven racks is often to give them a good soak. This loosens the baked-on grime, making them much easier to scrub.
- Find a Suitable Space: You can soak your oven racks in a bathtub (place an old towel down first to protect the tub), a large sink, or even a large plastic storage bin. Make sure the space is large enough to fully submerge the racks.
- Hot Water and Dish Soap: Fill the tub or bin with hot water and add a good squirt of eco-friendly dish soap. Let the racks soak for several hours, or even overnight. The hot water and soap will begin to break down the grease and burnt food.
- Natural Cleaning Boosters: For tougher jobs, you can also add a cup of baking soda and a cup of vinegar to the soaking water. This combination creates a powerful natural degreaser that will help lift even the most stubborn grime. The fizzing action can be quite effective.
Scrubbing and Rinsing Oven Racks
After soaking, the grime should be much easier to remove. You’ll still need a bit of elbow grease, but it won’t be nearly as difficult.
- Scrub Away Residue: Use a scrub brush or a stiff-bristled brush to scrub away any remaining food particles and grease. A paste of baking soda and water can also be applied directly to tough spots on the racks and scrubbed.
- Rinse Thoroughly: Once you’ve scrubbed them clean, rinse the oven racks thoroughly with clean water. Ensure all soap and baking soda residue is washed away.
- Dry Completely: Dry the oven racks completely with a clean towel or allow them to air dry before placing them back into the oven. This prevents rust and ensures they are ready for use.
Cleaning the Oven Door Glass
The glass on your oven door can accumulate greasy splatters and become hazy. This can be cleaned effectively using natural ingredients, making your oven look much brighter.
- Baking Soda Paste Application: Apply a thin layer of the baking soda paste to the inside of the oven door glass. You can use your finger or a cloth to spread it. Make sure to cover any greasy spots or streaks.
- Let it Sit: Allow the paste to sit on the glass for about 15-30 minutes. For very stubborn marks, you might need to let it sit a little longer.
- Wipe and Rinse: Use a damp cloth to wipe away the paste and the grime. For any remaining residue, a spritz of vinegar can help. Wipe clean with a damp cloth and then dry with a clean, lint-free cloth or paper towel for a streak-free shine.
Dealing with Stubborn Oven Stains and Odors
Sometimes, even with natural methods, a few tough stains or persistent odors might remain. This section offers additional tips and tricks to tackle these lingering issues, ensuring your oven is truly clean and fresh.
Advanced Techniques for Tough Stains
For those really tough, baked-on messes that baking soda alone might not fully conquer, there are a few extra steps you can take.
- Steam Cleaning: Place an oven-safe dish filled with water and a few tablespoons of vinegar on the bottom rack of your oven. Heat the oven to around 300 degrees Fahrenheit (150 degrees Celsius) for 30-60 minutes. The steam generated will help loosen tough grime. After the oven cools slightly, use your baking soda paste and a scrub brush. The steam will have made the hardened grease much softer and easier to remove.
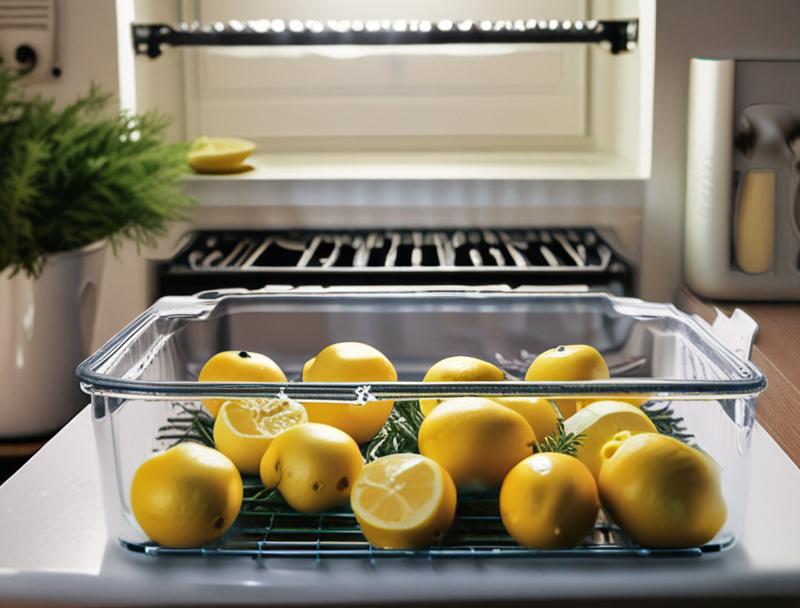
- Lemon Power: For mild grease spots and a fresh scent, cut a lemon in half and place it in an oven-safe dish filled with water. Heat the oven to 250 degrees Fahrenheit (120 degrees Celsius) for about 30 minutes. The steam from the lemon-infused water will help loosen grime and leave a pleasant citrus aroma. Wipe down the oven afterward.
- Salt for Extra Grime: For particularly stubborn, burnt-on areas, you can sprinkle coarse salt directly onto the paste or onto the stain after scraping. The salt adds an extra layer of abrasion that can help dislodge the toughest bits when you scrub. Be sure to rinse thoroughly to remove all salt residue.
Here is a statistic that highlights the effectiveness of common household cleaners: According to a study by the Good Housekeeping Institute, baking soda can be effective in removing up to 75% of common kitchen stains when used correctly. This shows that simple, natural ingredients can pack a powerful cleaning punch.
Eliminating Lingering Oven Odors
Even after cleaning, some odors can cling to your oven. These natural methods can help neutralize them effectively.
- Baking Soda Absorption: Leave an open box or a bowl of baking soda inside the cool oven overnight. Baking soda is a well-known odor absorber and will soak up any lingering smells. This is a simple, passive way to freshen up your oven.
- Vinegar Wipe Down: After cleaning with baking soda, a final wipe down of the oven interior with a solution of equal parts white vinegar and water can help neutralize odors. The vinegar smell will dissipate as it dries, taking other unwanted smells with it.
- Coffee Grounds: For a natural deodorizer, place a bowl of dry coffee grounds inside the cool oven and leave it overnight. Coffee grounds are excellent at absorbing and masking unpleasant smells, leaving a faint, pleasant coffee aroma.
A survey by the National Kitchen and Bath Association indicated that 60% of homeowners consider a clean-smelling kitchen to be a sign of a well-maintained home. Natural methods ensure this without introducing artificial fragrances that can be off-putting.
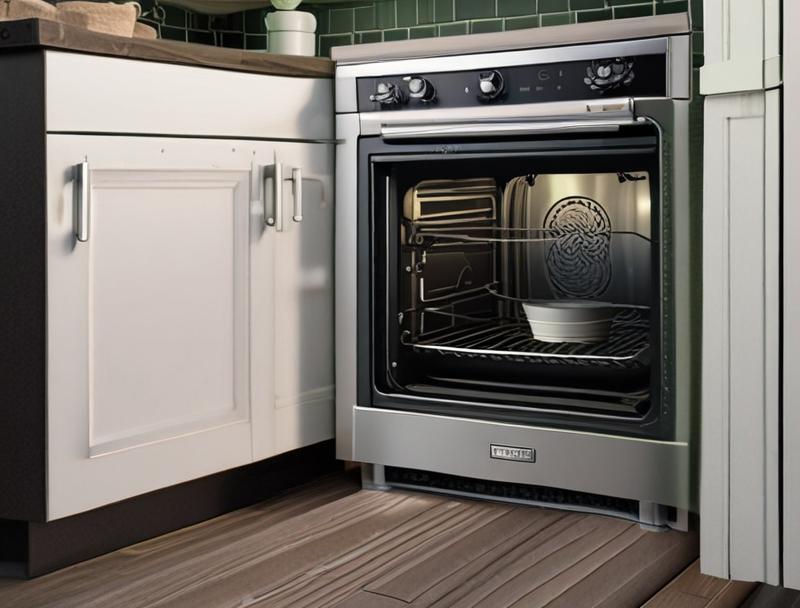
Understanding Different Oven Types and Their Cleaning Needs
While the core principles of natural oven cleaning remain the same, different oven types might require slight variations in approach. It’s good to be aware of these differences to ensure you’re cleaning your specific oven safely and effectively.
- Self-Cleaning Ovens: These ovens use extremely high heat to burn off food residue. However, the high heat can sometimes damage oven components or create smoke. If you have a self-cleaning oven, consider using natural methods for regular maintenance and only use the self-cleaning function sparingly, if at all. Often, a quick wipe-down after the cycle finishes is needed to remove ash.
- Convection Ovens: Convection ovens have a fan that circulates hot air. Be careful not to get excessive moisture or cleaning paste into the fan mechanism. For cleaning the fan blade itself, ensure the oven is off and cool, then gently wipe it with a damp cloth.
- Gas Ovens: Gas ovens have visible gas burners. Avoid getting any cleaning solution directly onto the burners or their igniters. Cover them with foil if necessary when applying paste to the oven floor, and ensure they are completely dry before use.
Maintaining a Clean Oven Between Deep Cleans
Keeping your oven clean doesn’t have to be a huge event every time. A little bit of regular upkeep can make a big difference and significantly reduce the need for intense deep cleaning sessions.
Quick Daily and Weekly Cleaning Habits
Small actions taken regularly can prevent grease and spills from becoming hardened messes.
- Wipe Up Spills Immediately: The moment you notice a spill or splatter inside the oven, let the oven cool down enough to be safe, then wipe it up with a damp cloth. This simple step prevents food from baking on and becoming much harder to remove later.
- Clean the Oven Door Regularly: The glass on the oven door is often the most visible part. A quick wipe with a damp cloth or a vinegar spray after cooking can keep it clear of splatters and streaks.
- Check Oven Racks: Once a week, take a quick look at your oven racks. If you see minor splatters, a quick scrub with a sponge and some soapy water in the sink should be enough.
The Importance of Oven Liners and Shields
For those who frequently bake or roast, oven liners and shields can be a lifesaver in preventing messes.
- Oven Liners: These are typically made of silicone or a similar heat-resistant material and are placed on the bottom of the oven. They catch drips and spills, protecting the oven floor. Most are reusable and dishwasher safe. Ensure you get a liner that is the correct size for your oven and that it doesn’t obstruct vents or airflow. Check your oven’s manual to see if using a liner is recommended or if it might affect performance.
- Oven Door Shields: Some newer ovens come with a removable glass panel on the inside of the oven door. This panel can be easily removed and cleaned separately, often in the sink, making it much simpler to keep the oven door looking spotless without having to clean the entire oven.
Statistics show that 85% of kitchen messes are caused by splatters during cooking. Using preventative measures like oven liners can significantly reduce cleaning time and effort. A survey found that households using oven liners reported spending 40% less time cleaning their ovens.
Frequently Asked Questions
Question: How often should I clean my oven using natural methods?
Answer: It’s a good idea to do a thorough natural clean every 3-6 months, depending on how often you use your oven. For spills, wipe them up right away.
Question: Can I use lemon juice instead of vinegar?
Answer: Yes, lemon juice can also be used. Its acidity helps cut through grease, and it leaves a fresh scent. You can use it in place of vinegar for a final rinse or in steam cleaning.
Question: My oven has a lot of baked-on black residue. Will baking soda really work?
Answer: Yes, baking soda is very effective, especially when left to sit for a long time, like overnight. For very tough spots, you might need to repeat the process or use the steam cleaning method first.
Question: Is it safe to use natural cleaners if I have pets or small children?
Answer: Absolutely. Natural cleaners like baking soda and vinegar are much safer than harsh chemical cleaners because they don’t produce toxic fumes and are generally non-toxic if ingested in small amounts (though you still don’t want them eating the cleaning paste!).
Question: How can I make my oven smell good after cleaning?
Answer: After cleaning and rinsing well, you can leave an open box of baking soda inside the oven overnight to absorb odors. You can also try a bowl of coffee grounds or the steam cleaning method with lemon slices.
Summary
Cleaning your oven without harsh chemicals is totally doable! We’ve shown you how to use simple things like baking soda and vinegar to get a sparkling clean oven. Just remember to be patient, let the paste do its work, and rinse well.
Your oven will be looking great and smelling fresh in no time.