
Cleaning burnt pots and pans can feel like a big chore, especially when you’re just starting out in the kitchen. It’s easy to get discouraged when food sticks fast. But don’t worry!
We’ve got simple, step-by-step tricks that will make this task much easier. Get ready to see your cookware shine again.
Amazing Ways to Handle Stubborn Burn Marks
This section is all about the most effective methods for dealing with food that has really baked onto your pots and pans. We’ll look at different ways to loosen those tough burnt bits so you can scrub them away without too much effort. You’ll learn about common household items that work wonders and some special techniques for extra-tough messes.
The Power of Boiling Water
Sometimes, the simplest things are the best. Boiling water is a fantastic first step for many burnt-on messes. It works by gently softening the burnt food, making it much easier to scrape off later.
This method is gentle on your cookware and doesn’t require any harsh chemicals.
- What it does: Boiling water helps to rehydrate and loosen the stuck-on food particles. The heat and moisture work together to break the bond between the burnt food and the pan’s surface. This is especially useful for sugary or starchy burnt bits that can become very hard.
- How to do it: Fill the burnt pot or pan with enough water to cover the burnt area. Add a tablespoon of dish soap to the water. Put the pot on the stove and bring the water to a boil. Let it simmer for about 10-15 minutes, or until you see the burnt bits start to lift from the bottom.
- What to use next: Once the water has simmered, carefully pour out the hot water. You should see that a lot of the burnt food is now loose. Use a non-abrasive sponge or a soft cloth to gently wipe away the remaining residue. For tougher spots, you might need a plastic scraper.
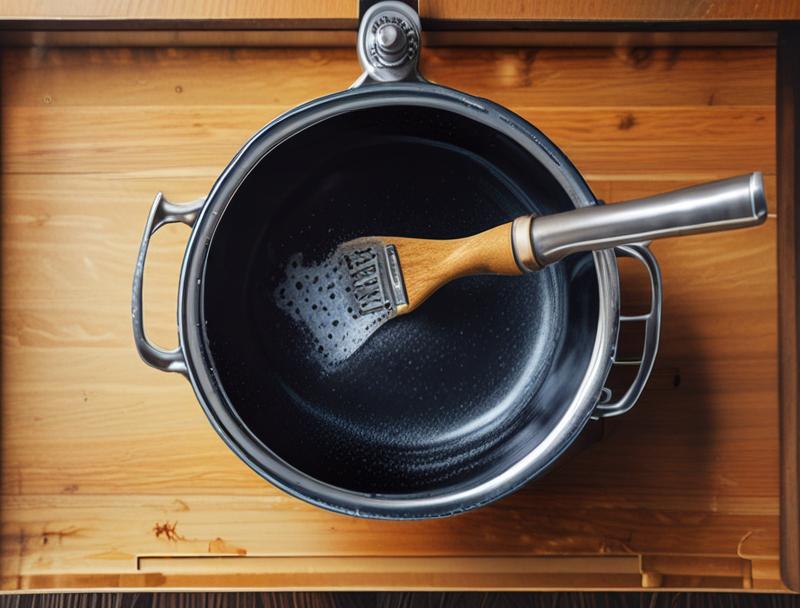
Baking Soda Magic
Baking soda is a kitchen staple that does more than just help your cookies rise. It’s also a mild abrasive and a natural deodorizer, making it perfect for cleaning burnt pans. It works by gently scrubbing away burnt residue without scratching your cookware.
- Why it’s great: Baking soda is a weak alkali. When mixed with water, it creates a paste that helps to break down greasy and burnt-on food. Its fine, granular texture provides gentle scrubbing power. It’s also eco-friendly and safe to use around food.
- Making the paste: To create a cleaning paste, mix baking soda with a small amount of water. You want a consistency similar to toothpaste – thick enough to stick to the burnt areas but not too dry. Spread this paste over the burnt spots.
- Let it sit: For best results, let the baking soda paste sit on the burnt areas for at least 15-30 minutes. For really stubborn burns, you can leave it overnight. This gives the baking soda time to work on softening and lifting the stuck-on food.
- Scrubbing time: After the paste has sat, use a non-scratch sponge or a soft cloth to scrub the burnt areas. The baking soda will help lift the residue. Rinse the pan thoroughly with warm water to remove all the baking soda and loosened food.
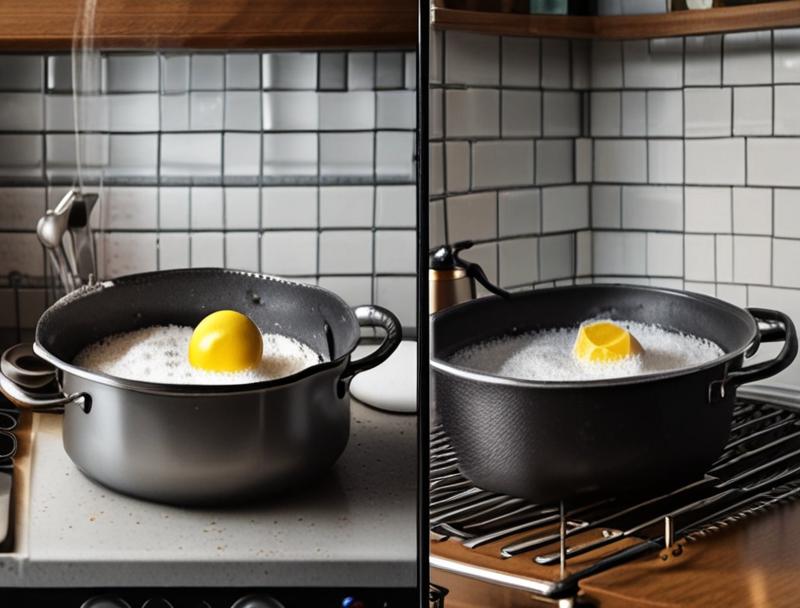
Vinegar’s Cleaning Power
Vinegar, especially white distilled vinegar, is another household hero for tackling burnt pans. Its acidity helps to cut through grease and break down burnt-on food. It’s a safe and effective alternative to harsh chemical cleaners.
- The science behind it: Vinegar contains acetic acid, which is excellent at dissolving mineral deposits and burnt food particles. It can also help to neutralize odors. When heated, its cleaning power is amplified.
- Vinegar soak: Pour equal parts white vinegar and water into the burnt pot or pan. Make sure the burnt area is covered. Bring the mixture to a gentle boil on the stovetop. Let it simmer for about 5-10 minutes.
- Scrape and wash: Carefully pour out the hot vinegar and water mixture. Allow the pan to cool slightly. Use a wooden spoon or a plastic scraper to gently loosen any remaining burnt bits. Wash the pan as usual with dish soap and warm water.
- For extra tough spots: If the burn is very severe, you can try a baking soda and vinegar combination. After soaking with vinegar, sprinkle baking soda into the pan, and it will fizz. This reaction can help lift even more stubborn residue.
Dealing with Different Types of Cookware
Not all pots and pans are made the same, and how you clean them can depend on the material. Using the wrong method on delicate surfaces can cause damage. This section explains how to clean burnt pots and pans easily, keeping the material of your cookware in mind, so you protect your kitchen investments.
Stainless Steel Savvy
Stainless steel is a popular choice for cookware because it’s durable and looks great. However, it can be prone to showing burnt-on food. The good news is that stainless steel is also quite forgiving when it comes to cleaning.
- Gentle scrubbing: For light burnt-on food, a paste of baking soda and water is often enough. Apply the paste, let it sit, and then gently scrub with a soft cloth or sponge. Avoid using steel wool or harsh abrasive pads, as these can scratch the surface.
- The boiling water trick: For more stubborn burns on stainless steel, start by boiling some water in the pan with a bit of dish soap. Let it simmer for a while. This often loosens enough food to be wiped away easily.
- Vinegar for shine: After cleaning, if your stainless steel pan looks dull, you can rub it with a cloth dipped in white vinegar. This helps to remove water spots and restore its shine. Always rinse thoroughly afterwards.
- Tackling tough stains: For extremely tough, stuck-on food, a product like Bar Keepers Friend can be very effective on stainless steel. Follow the product instructions carefully and always rinse well.
Non-Stick Pan Care
Non-stick pans make cooking a breeze, but you have to be careful when cleaning them. The non-stick coating can be damaged by harsh scrubbing or abrasive cleaners, which can make food stick more in the future.
- Avoid abrasives: This is the golden rule for non-stick pans. Never use steel wool, abrasive sponges, or harsh scouring powders. These will ruin the non-stick surface very quickly.
- Gentle washing: For most burnt-on messes on non-stick pans, warm, soapy water and a soft sponge or cloth are all you need. Soak the pan in warm, soapy water for a while to loosen the food.
- Baking soda for mild burns: If food is stuck, you can try a thin paste of baking soda and water. Apply it to the burnt area and let it sit for about 10-15 minutes. Gently wipe away with a soft sponge.
- Boiling with gentle soap: For slightly tougher spots, fill the pan with water and add a few drops of gentle dish soap. Bring the water to a simmer for a few minutes. This can often loosen the burnt bits enough to be wiped away.
Cast Iron Wisdom
Cast iron pans are beloved for their even heating and durability. However, they require special care, especially when dealing with burnt-on food, to maintain their seasoning. The goal is to remove the burnt food without stripping away the protective layer of oil.
- Hot water and scraper: The best first step is usually to rinse the pan with hot water while it’s still a little warm. Use a stiff brush or a pan scraper (not metal) to gently remove stuck-on food.
- Salt scrub: For more stubborn bits, pour a generous amount of coarse salt (like kosher salt) into the pan. Use a paper towel or a sponge to scrub the salt around. The salt acts as a gentle abrasive. Rinse well.
- Avoid soap if possible: Generally, it’s best to avoid soap on cast iron because it can break down the seasoning. If you must use a little soap for a very greasy mess, use it sparingly and rinse very thoroughly.
- Re-seasoning: After cleaning, especially if you had to scrub hard or use a little soap, it’s important to re-season your cast iron pan. Dry it completely by heating it on the stove for a few minutes. Then, apply a very thin layer of cooking oil (like vegetable oil or flaxseed oil) all over the pan, inside and out. Wipe away any excess oil. Place it upside down in a hot oven (around 400°F or 200°C) for an hour, then let it cool.
Copper Cookware Care
Copper pots and pans are beautiful and conduct heat exceptionally well. However, their stunning appearance can be marred by burnt food, and they can also tarnish. Cleaning them requires a gentle touch to preserve both the cooking surface and their shine.
- Gentle cleaning for cooking surface: For the interior cooking surface, treat it much like stainless steel. Start with boiling water and dish soap. If that doesn’t work, a baking soda paste can be used cautiously. Avoid abrasive materials that could scratch the lining.
- Polishing the exterior: For burnt bits or discoloration on the exterior copper, a paste of lemon juice and salt or vinegar and salt works wonders. Apply the paste with a soft cloth and gently rub the affected areas. The acid in the lemon or vinegar helps to lift the burnt food and tarnish.
- Rinse and dry thoroughly: After using any cleaning method, it’s crucial to rinse the copper pan thoroughly with clean water. Immediately dry the pan completely with a soft, clean towel to prevent water spots and further tarnishing.
- Specialized copper cleaners: For deep cleaning or restoring a brilliant shine, there are commercial copper cleaning products available. Always follow the instructions on the product packaging carefully.
Beyond the Basics: Advanced Cleaning Tips
Sometimes, the standard methods aren’t quite enough for those truly tragic burnt-on messes. This section delves into some more powerful techniques and clever solutions that can rescue even the most stubborn cookware. We’ll look at common household items you might not have considered and how to use them for maximum cleaning impact.
The Cream of Tartar Method
Cream of tartar is a common baking ingredient that can be surprisingly effective for cleaning and shining cookware, especially aluminum and stainless steel. It’s an acidic salt that helps to lift tarnish and burnt-on food.
- How it works: Cream of tartar is potassium bitartrate, an acidic compound. Its acidity reacts with metal oxides and burnt food residues, helping to break them down and lift them from the surface. It’s particularly good at removing discoloration.
- Creating the cleaning solution: To clean a burnt pan, mix 2 tablespoons of cream of tartar with 1 cup of water. Stir it into a smooth paste. You can also add this mixture to a pan of water and boil it, similar to the vinegar method.
- Applying the paste: Spread the cream of tartar paste over the burnt areas. Let it sit for about 15-30 minutes. For aluminum pans, this is especially useful for removing greyish discoloration and burnt food.
- Scrubbing and rinsing: After letting the paste sit, use a soft cloth or sponge to gently scrub the burnt spots. Rinse the pan thoroughly with warm water and dry it completely. This method can also bring back the shine to dull cookware.
The Lemon and Salt Combination
Lemons are not just for flavoring food; their citric acid makes them excellent natural cleaners. Combined with salt, they form a powerful duo for tackling burnt messes and restoring shine to various types of cookware.
- Natural degreaser and brightener: The acid in lemon juice cuts through grease and grime, while the salt acts as a gentle abrasive. This combination is effective on many surfaces, including stainless steel and copper exteriors.
- How to use it: Cut a lemon in half. Sprinkle some coarse salt onto the burnt areas of the pan. Use the cut side of the lemon to scrub the salt and burnt food. The lemon juice will mix with the salt to create a cleaning paste.
- For tougher spots: For really stuck-on food, you can squeeze the lemon juice directly onto the burnt area and let it sit for a few minutes before sprinkling with salt and scrubbing. You can also boil lemon slices in water in the pan for a few minutes.
- Rinse and polish: After scrubbing, rinse the pan thoroughly with warm water. For an extra shine on copper or stainless steel, you can rub the exterior with the lemon half again after rinsing and then dry it well.
Specialized Cleaners for Tough Jobs
When everyday household items don’t quite cut it, specialized cleaning products can be a lifesaver. These are designed to tackle very specific and stubborn cleaning challenges, including heavily burnt-on food. It’s important to use them correctly to avoid damaging your cookware.
- Oven cleaner (use with extreme caution): In very rare and extreme cases, some people turn to oven cleaner. This is a very harsh chemical and should be used with extreme caution, only on suitable cookware (like some stainless steel, but NEVER on non-stick, cast iron, or aluminum). Always follow the product’s safety instructions precisely, wear gloves, ensure good ventilation, and rinse the pan numerous times. It is generally best to avoid this method if possible.
- Bar Keepers Friend: This is a popular powder cleaner that is excellent for stainless steel, copper, and porcelain enamel. It contains oxalic acid, which is great at removing rust, tarnish, and burnt-on food without being overly abrasive.
- How to use Bar Keepers Friend: Make a paste with the powder and a little water. Apply it to the burnt area. Let it sit for a minute or two, then gently scrub with a damp sponge. Rinse thoroughly. It’s very effective for bringing back the shine to cookware that has seen better days.
- Other commercial cleaners: Many brands offer specific cleaners for pots and pans, designed to remove burnt food and grease. Always read the label to ensure the cleaner is suitable for your cookware material and follow the instructions.
Preventing Future Burn Disasters
The best way to deal with burnt pots and pans is to prevent them from happening in the first place! A few simple cooking habits and a little bit of attention can save you a lot of scrubbing time and effort down the road. This section focuses on easy ways to avoid those sticky situations.
Temperature Control is Key
One of the most common reasons food burns is cooking at too high a temperature for too long. Understanding how your stove and cookware interact is vital.
- Medium heat is your friend: For most cooking, medium heat is sufficient. High heat is usually only needed for quick searing or boiling water. If your pan is smoking, the heat is too high.
- Preheating correctly: Always preheat your pan before adding oil or food, but do so gradually. Adding oil to a cold pan and then heating it can cause the oil to break down and burn before the food is even added. Adding food to an overheated pan can cause it to stick and burn instantly.
- Watch and stir: Don’t walk away from the stove, especially when cooking delicate items or foods that tend to burn easily, like sugars or dairy. Stirring frequently prevents hot spots and stops food from settling and burning on the bottom.
- Listen to your food: Your food will often tell you if something is wrong. If you hear a frantic sizzling or see smoke, turn down the heat immediately.
Using the Right Amount of Fat
Fat, whether it’s oil or butter, plays a crucial role in preventing food from sticking. Using the correct amount ensures a good cooking surface.
- Don’t be stingy: A thin layer of oil or butter helps create a barrier between the food and the hot pan surface. This prevents direct contact, which is what leads to sticking and burning.
- Choosing the right fat: Different fats have different smoke points. For high-heat cooking, use oils with higher smoke points like canola, grapeseed, or avocado oil. For lower heat or finishing dishes, butter or olive oil can be used, but they burn more easily.
- Hot pan, hot fat: Always add your fat to a preheated pan. If the pan is cold, the fat won’t distribute evenly and can break down. If the pan is too hot, the fat will smoke and burn before you even add your food.
- Coating the pan: Swirl the oil or butter around to coat the bottom and sides of the pan. This ensures an even cooking surface and reduces the chances of food sticking to one spot.
Post-Cooking Habits
What you do right after cooking can also impact how easy your pans are to clean later. Developing good post-cooking habits can make a big difference.
- Don’t let food sit too long: While it’s tempting to leave leftovers in the pan, especially if it’s non-stick, it’s best to transfer food to a serving dish soon after cooking. This prevents food from hardening and sticking to the pan overnight.
- Deglazing: After removing the food, while the pan is still hot, you can add a little liquid (like water, broth, or wine) and scrape up any browned bits stuck to the bottom. These bits are full of flavor and can be used to make a sauce. This also makes cleaning much easier.
- Soaking for tough messes: If you know something might be a bit sticky, fill the warm pan with warm, soapy water as soon as you’ve served your meal. Let it soak while you eat. This will make cleaning much easier later.
- Cleaning promptly: The sooner you wash your pans after use, the easier they will be to clean. Baked-on food becomes much harder to remove once it has completely dried and hardened.
Frequently Asked Questions
Question: What is the easiest way to clean a burnt pot?
Answer: The easiest way usually starts with boiling water in the pot with some dish soap for about 10-15 minutes. This softens the burnt bits. Then, you can usually wipe them away easily with a sponge.
Question: Can I use steel wool on my pans?
Answer: Generally, no. Steel wool is too abrasive for most cookware, especially non-stick, stainless steel, and copper. It can scratch surfaces and damage non-stick coatings.
Use a soft sponge or cloth instead.
Question: How do I clean burnt food from a non-stick pan without ruining it?
Answer: For non-stick pans, use a soft sponge and warm, soapy water. If food is stuck, try a gentle soak or a thin paste of baking soda and water. Avoid abrasive cleaners and scrubbing.
Question: Is vinegar safe for all types of cookware?
Answer: Vinegar is generally safe for stainless steel and enamel, but it can be too acidic for aluminum, cast iron, and some non-stick coatings. Always test a small, inconspicuous area first or use it diluted.
Question: How often should I re-season my cast iron pan?
Answer: You should re-season your cast iron pan after each use, especially if you had to scrub it hard or used a bit of soap. This helps maintain its non-stick properties and prevents rust.
Final Thoughts
Cleaning burnt pots and pans is a common kitchen challenge, but it doesn’t have to be hard. By using simple methods like boiling water, baking soda, or vinegar, you can easily tackle most burnt-on messes. Remember to treat your cookware material with care to keep it looking great and working well for years to come.