
It’s a common sight in many kitchens: that once-white grout between your tiles looking dingy and dark, even black. For beginners, tackling this mess can feel overwhelming. You might wonder if those stubborn stains are permanent or if you’ll need harsh chemicals.
Don’t worry! This guide breaks down How to Clean Kitchen Tile Grout That Turned Black into simple steps. We’ll show you how to get your grout looking fresh again without a lot of fuss.
Ready to make your kitchen sparkle?
Why Your Grout Turns Black
Seeing your kitchen tile grout turn from a clean white or neutral shade to a dark, almost black color is a frequent problem. This happens for a few key reasons that affect most kitchens. It’s not usually a sign of poor cleaning, but rather a natural consequence of daily life in a busy cooking space.
Understanding these causes helps us prevent them and tackle the cleaning process more effectively. We’ll look at what makes this happen and why it’s a common challenge for many homeowners. This section sets the stage for the solutions to come.
Common Causes of Black Grout
The most common reason grout turns black is the absorption of grease, food particles, and dirt from the kitchen environment. Every time you cook, tiny bits of food, splashes of oil, and even the general dust in the air can settle onto the grout lines. Because grout is porous, it readily soaks up these substances.
Over time, this buildup darkens the grout, making it appear black.
Water also plays a significant role. Spills, mopping, and even condensation can keep the grout damp. This moisture can trap dirt and grime, creating an ideal breeding ground for mold and mildew.
Black mold is a common culprit, giving grout a uniformly dark, unsightly appearance. This is especially true in areas prone to moisture, like near the sink or stovetop.
Another factor is the type of grout used. Unsealed grout is much more susceptible to staining and absorption than sealed grout. If your grout was never sealed, or if the sealant has worn away over time, it’s like an open invitation for stains and dirt to seep in.
Without a protective barrier, the grout is constantly exposed to everything that happens on your kitchen floor.
Absorption of Grease and Food Particles
Kitchens are hubs of culinary activity, and this often means spills and splatters. When cooking, oils, sauces, and food particles can fly onto the floor. If you have tile flooring, these tiny bits inevitably land on the grout lines.
Grout, especially when unsealed, is like a sponge. It has tiny pores that allow these organic materials to sink in. Once inside, they begin to break down and can cause discoloration.
Think of it like a white t-shirt getting a drop of soy sauce on it; the stain seeps into the fabric. The same thing happens with grout, but over a much longer period and with a constant influx of new material.
The type of cooking you do can also make a difference. Frying, for instance, releases a lot of grease into the air, which then settles on surfaces, including grout. Darker foods like tomato sauce or coffee can also leave stubborn stains if they spill and aren’t cleaned up immediately.
The sheer amount of activity in a kitchen means that even with regular sweeping, microscopic particles are constantly working their way into the grout.
This absorption isn’t just about appearance. Over time, trapped food particles can even attract pests. While cleaning can remove the visible blackness, the underlying issue of absorbed grime is why professional cleaning or deep cleaning methods are sometimes necessary.
It’s the accumulated effect of countless small absorptions that leads to a visibly black grout line.
Moisture and Mildew Growth
Moisture is a kitchen’s enemy when it comes to grout. Kitchens often have areas that get wet. Think about washing dishes, spills from drinks, or even steam from cooking.
When grout is regularly exposed to water, it stays damp for longer periods. This dampness creates a perfect environment for mold and mildew to grow. These microscopic organisms feed on organic matter, and the porous grout provides them with plenty of food and a cozy home.
Mold and mildew are often dark in color, ranging from green to black. This is why your grout might look black. It’s not just dirt; it’s likely a colony of these organisms thriving in the damp conditions.
If you’ve ever noticed a musty smell in your kitchen, it could be a sign of mildew growth in the grout. This is particularly common around sinks or in areas where water tends to pool or drip.
Preventing this requires ensuring good ventilation and drying up spills promptly. However, once mold and mildew have taken hold, they can be tough to remove. They burrow into the pores of the grout, making them harder to scrub away.
This makes dealing with moisture an ongoing battle for keeping grout clean and bright. It’s a cycle where moisture leads to growth, which leads to discoloration.
Lack of Sealing or Worn Sealant
Grout sealant acts like a protective shield for your grout lines. When grout is installed, it’s often left porous. This means it can easily absorb liquids and stains.
Applying a grout sealant fills in these pores, creating a barrier that repels spills and dirt. Think of it like waxing a car; the wax protects the paint. If grout isn’t sealed, or if the sealant has worn off, it’s completely exposed to everything that happens on your kitchen floor.
This makes it much more likely to absorb grease, food, and moisture, leading to that dreaded blackening effect.
Sealant doesn’t last forever. Over time, with regular cleaning, foot traffic, and exposure to cleaning chemicals, the sealant can break down. It might start to flake, wear thin, or simply lose its effectiveness.
When this happens, the grout underneath becomes vulnerable again. It’s like the protective layer on a shield becoming thin and unable to stop blows. Many people don’t realize their grout needs resealing periodically, and this oversight is a major reason why grout gets so dirty.
The effectiveness of sealant can vary. Some sealants are more durable than others. The type of cleaning products used also matters; harsh chemicals can strip away sealant faster.
If you have older grout or haven’t resealed it in years, it’s highly probable that the lack of an effective sealant is a primary reason for its black appearance. Keeping grout sealed is a key part of maintenance.
Easy Methods for Cleaning Black Grout
Now that we know why grout turns black, let’s talk about how to fix it. You don’t need fancy equipment or expensive products to get your grout looking clean again. We’ll cover simple, effective methods that use common household items.
These techniques are designed to lift out the grime and stains that make your grout look dark. You’ll be surprised at how much difference a little effort can make. Get ready to see your grout transform.
Using Common Household Cleaners
Sometimes, the best solutions are already in your kitchen or bathroom. Many everyday household items can be surprisingly effective at tackling black grout. These methods are budget-friendly and often less harsh than specialized commercial cleaners.
They work by breaking down grease, lifting dirt, and sometimes even having mild bleaching properties to brighten the grout.
The key is to understand what makes these cleaners work. For instance, acidic cleaners can help break down mineral deposits and some types of stains. Alkaline cleaners are great at cutting through grease.
Gentle abrasives can help scrub away surface grime. Combining these properties with a bit of elbow grease often yields fantastic results. We’ll explore a few of these easy methods.
It’s always a good idea to test any cleaner on a small, inconspicuous area first to ensure it doesn’t damage or discolor your tiles. Once you’re confident, you can proceed with cleaning the grout lines. This approach focuses on readily available items to make the cleaning process accessible to everyone.
Baking Soda and Water Paste
Baking soda is a fantastic natural cleaner. It’s a mild abrasive and also helps to neutralize odors. To make a cleaning paste, you simply mix baking soda with a little bit of water.
You want it to be thick enough to stick to the grout lines, like toothpaste. Apply this paste directly to the grout using an old toothbrush or a small brush.
Let the paste sit on the grout for about 10-15 minutes. This gives the baking soda time to work on breaking down the grime and loosening the stains. After it has sat, use your toothbrush to scrub the grout.
The gentle abrasive nature of the baking soda will help lift the dirt without scratching the tiles. Work in small sections.
Once you’ve scrubbed, wipe away the paste with a damp cloth or sponge. Rinse the cloth frequently. You’ll likely see a noticeable difference.
For tougher stains, you might need to repeat the process or let the paste sit for a bit longer. This method is safe for most tile and grout types and is very easy to do.
Vinegar and Water Solution
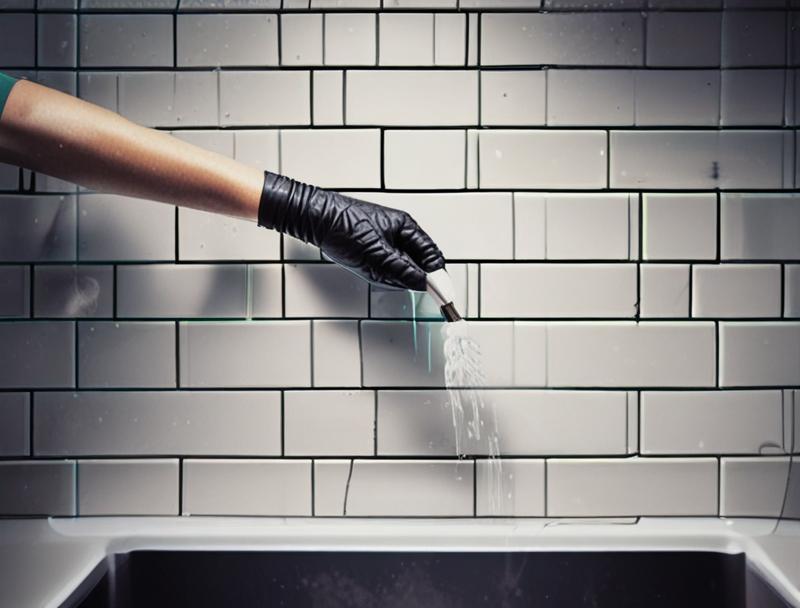
White vinegar is another household staple that’s great for cleaning. Its acidity helps to cut through grease and grime, and it also has mild disinfectant properties. For cleaning grout, mix equal parts white vinegar and water in a spray bottle.
This creates a simple yet effective cleaning solution.
Spray the vinegar solution directly onto the grout lines. Make sure to saturate them. Let it sit for about 5-10 minutes.
You might hear a slight fizzing sound as it works, especially if there are any mineral deposits. After letting it sit, use a stiff brush, like an old toothbrush, to scrub the grout.
The scrubbing action, combined with the vinegar’s cleaning power, will help lift the darkened dirt and mildew. Wipe away the loosened grime with a damp cloth, rinsing the cloth often. For particularly stubborn black spots, you can try applying undiluted white vinegar directly to the grout, letting it sit longer, and then scrubbing.
Be sure to ventilate the area well, as vinegar has a strong smell.
Hydrogen Peroxide (3%)
A 3% solution of hydrogen peroxide, the kind you find in most drugstores, is a mild bleaching agent. It can be very effective at brightening dingy grout and killing mold and mildew. Because it’s a mild bleach, it’s generally safer for colored grout than chlorine bleach, but it’s always wise to test it in a hidden spot first.
You can use hydrogen peroxide in a few ways. One simple method is to pour it into a spray bottle and spray it directly onto the grout lines. Let it sit for about 10-15 minutes.
You should see it start to lift the discoloration. After it has had time to work, scrub the grout with a brush.
Another effective technique is to mix hydrogen peroxide with baking soda to create a paste. This combines the abrasive power of baking soda with the bleaching action of hydrogen peroxide for a powerful cleaning duo. Apply the paste, let it sit, and then scrub.
Always rinse thoroughly with water afterward to remove all traces of the hydrogen peroxide.
Using Specialized Grout Cleaners
While household items can be very effective, sometimes you might need something a bit stronger. Specialized grout cleaners are formulated to tackle tougher stains and deeper grime. These products often contain stronger cleaning agents that can break down grease and mildew more aggressively.
When choosing a cleaner, look for ones specifically designed for grout and tile.
These cleaners can come in various forms, such as liquids, sprays, or gels. Some are designed to be applied and then scrubbed, while others might require a bit of soaking time. Always follow the manufacturer’s instructions carefully, as these products can be more potent and might require specific safety precautions, like wearing gloves or ensuring good ventilation.
Using a specialized cleaner is a good option when DIY methods haven’t quite done the trick, or if you have very stubborn, ingrained stains. They are designed to be effective without damaging the tile or grout, provided they are used as directed. We will explore how to use them and some important considerations.
Choosing the Right Commercial Cleaner
When you head to the store, you’ll find many options for grout cleaners. Look for products labeled for “tile and grout cleaner” or “deep cleaning grout cleaner.” Some are specifically formulated for common problems like mold, mildew, and grease, which are the main culprits behind black grout.
Consider the type of tile you have. Some natural stone tiles can be sensitive to acidic cleaners. If you have delicate tiles, opt for pH-neutral cleaners or those specifically recommended for your tile material.
Most ceramic and porcelain tiles are quite durable and can handle a wider range of cleaners.
Read the ingredients and reviews if possible. If you’re concerned about harsh chemicals, look for eco-friendly or natural-based grout cleaners. Many brands now offer effective options that are gentler on the environment and your home.
The goal is to find a product that is strong enough for the job but safe for your specific kitchen setup.
Application and Scrubbing Techniques
Once you have your chosen cleaner, follow the directions precisely. Most commercial cleaners will instruct you to apply the product directly to the grout lines. You might use a small brush or a cloth for this.
It’s often best to work in small, manageable sections so the cleaner doesn’t dry out before you can scrub it.
After applying the cleaner, let it sit for the recommended dwell time. This allows the chemicals to penetrate the grime and loosen the stains. Then, use a stiff-bristled brush, such as a grout brush or an old toothbrush, to scrub the grout lines vigorously.
Apply steady pressure. You should see the dirt and discoloration lifting away.
After scrubbing, wipe up the excess cleaner and loosened dirt with a damp sponge or cloth. Rinse your sponge or cloth frequently in clean water to avoid spreading the dirty solution back onto the grout. Finally, rinse the entire area thoroughly with clean water and dry it with a clean towel.
Proper rinsing is key to removing all chemical residues.
Steam Cleaning for Deep Cleaning
Steam cleaning is a powerful method for deep cleaning grout. A steam cleaner uses high-temperature steam to penetrate the pores of the grout. This heat is excellent at breaking down grease, killing mold and mildew, and lifting out stubborn dirt.
It’s an effective method because it relies on heat and moisture rather than strong chemicals.
The high heat of steam can loosen even deeply embedded grime. It sanitizes the grout, killing bacteria and mold spores that can contribute to the blackening. Because it uses only water, steam cleaning is an environmentally friendly option and is safe for most types of tiles and grout, including natural stone.
However, it’s still a good idea to test in an inconspicuous area first.
You can rent or buy steam cleaners. Many models come with attachments specifically designed for grout, like a small nozzle or brush head. This allows you to direct the steam precisely onto the grout lines for maximum effectiveness.
The process involves directing the steam and then often wiping or squeegeeing away the loosened dirt.
How a Steam Cleaner Works on Grout
A steam cleaner heats water to temperatures well above boiling point, creating pressurized steam. When this hot steam is applied to the grout, it loosens the bonds between the dirt particles and the grout pores. The intense heat also kills bacteria, mold, and mildew that might be contributing to the black appearance.
Think of it as a powerful, natural solvent that uses heat.
The steam penetrates the porous surface of the grout, breaking down the grease and grime that have accumulated over time. As the steam loosens the dirt, it often turns into a liquid. This dirty water then needs to be removed.
Many steam cleaners have a squeegee or a cloth attachment to wipe away this residue. For grout, a focused nozzle or a small brush attachment is often used.
The process is essentially a deep cleanse. The steam loosens, lifts, and often sanitizes all at once. It’s a non-toxic way to achieve a level of clean that can be difficult with scrubbing alone.
This method is particularly effective for areas where grease and grime have built up significantly.
Using Steam for Kitchen Grout
To use a steam cleaner on your kitchen tile grout, start by sweeping or vacuuming the floor to remove any loose debris. This prevents you from just spreading dirt around with the steam. Then, fill the steam cleaner’s water tank according to the manufacturer’s instructions.
Attach the appropriate nozzle or brush for grout cleaning.
Begin working in small sections. Hold the steam nozzle close to the grout line and move it slowly along the length of the grout. You should see steam lifting the dirt and moisture.
Immediately after steaming a section, use a clean microfiber cloth or a squeegee to wipe away the loosened grime and excess water. It’s important to remove the dirty water so it doesn’t re-deposit.
Continue this process section by section until all the grout lines are cleaned. Once you’re finished, allow the grout to dry completely. This might take a few hours.
Proper ventilation, like opening windows, can help speed up the drying process. The result is typically very clean, bright grout.
Preventing Grout from Turning Black Again
Cleaning your grout is rewarding, but the real goal is to keep it looking clean for as long as possible. Preventing it from turning black again involves a few consistent habits. These steps are simple and don’t require a lot of extra effort.
They focus on sealing, regular cleaning, and managing moisture. Making these practices part of your routine will save you a lot of future scrubbing.
Once you’ve put in the work to get your grout looking like new, you want to protect that shine. Prevention is always easier than cure, and in the case of kitchen grout, a few simple actions can make a big difference. We will cover the essential steps to maintain your clean grout.
Let’s look at the best ways to keep your kitchen grout looking fresh and bright, preventing those dark stains from coming back. These methods are easy to implement and will help your kitchen sparkle longer.
Sealing Your Grout
Sealing your grout is perhaps the single most important step in preventing it from getting dirty and discolored. A grout sealer is a protective coating that fills the pores in the grout. This makes it much harder for liquids, grease, and dirt to penetrate and stain the grout lines.
Think of it as putting an invisible shield over your grout.
Once your grout is clean and completely dry, you can apply a sealer. There are various types of sealers available, including impregnating sealers (which soak into the grout) and topical sealers (which form a protective layer on the surface). Impregnating sealers are generally preferred for grout as they don’t change the appearance or make the surface slippery.
The frequency of sealing depends on the type of sealer used and the amount of traffic and cleaning the grout receives. However, most homeowners need to reseal their grout every 1-2 years to maintain its protective qualities. Neglecting to seal or reseal is a sure way to end up with black, stained grout again.
How to Apply Grout Sealer
Before applying any sealer, ensure your grout is completely clean and bone dry. Any remaining moisture can prevent the sealer from adhering properly or trap dirt underneath. This might mean waiting 24-48 hours after cleaning before sealing.
You can apply grout sealer using a small brush, a foam applicator, or a roller designed for grout. Many sealers come in small bottles with applicator tips. Apply a thin, even coat directly to the grout lines.
Avoid getting too much sealer on the tile surface, especially with topical sealers, as they can leave a film. If you do get some on the tiles, wipe it off immediately with a clean cloth.
Work in small sections. Allow the sealer to penetrate for the time recommended by the manufacturer (usually 10-20 minutes). During this time, some of the sealer will be absorbed.
After the dwell time, wipe away any excess sealer from the tile surface with a clean, dry cloth. Allow the sealer to cure fully, which can take another 24-72 hours, before exposing it to heavy traffic or moisture. During this curing time, the sealant hardens and becomes fully effective.
Frequency of Resealing
The need to reseal grout varies depending on several factors. The type of sealer used is a major one; some penetrate deeper and last longer than others. An impregnating sealer, for example, typically lasts 1-2 years.
Topical sealers might need reapplication more often, perhaps every 6-12 months, as they wear away with foot traffic and cleaning.
The amount of wear and tear your grout experiences also plays a role. Kitchens, being high-traffic areas where spills are common, might require more frequent resealing. If you notice that water no longer beads up on the grout surface but instead soaks in, it’s a sign that the sealant is wearing off and it’s time to reseal.
A good rule of thumb is to visually inspect your grout every few months. If it starts looking dull, or if spills begin to penetrate easily, it’s probably time to apply a fresh coat of sealer. Making resealing a part of your annual or bi-annual deep cleaning routine is an excellent way to stay on top of it.
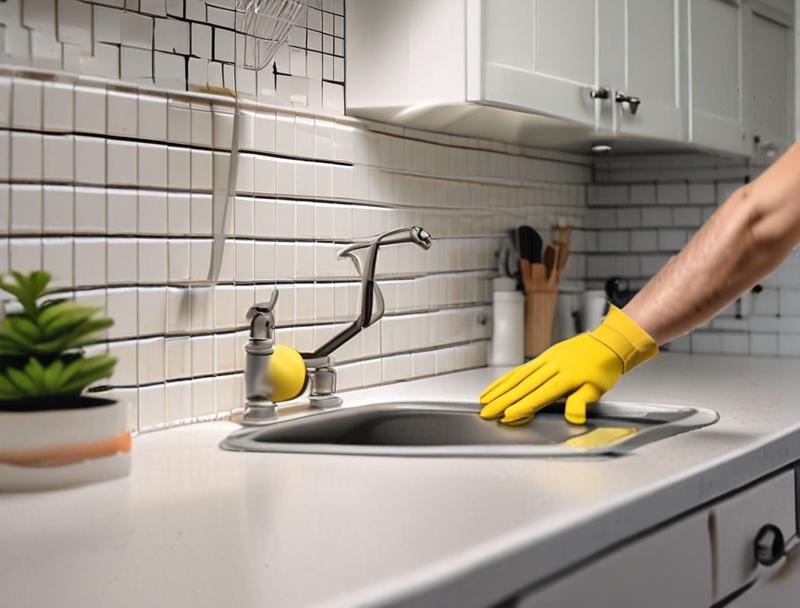
Regular Cleaning Habits
Consistent, regular cleaning is key to preventing grout from turning black. Instead of letting dirt and grime build up for weeks or months, tackling small messes as they happen makes a huge difference. This prevents stains from setting in and reduces the need for harsh cleaning later on.
Regular cleaning also helps remove mildew before it has a chance to grow.
The best approach involves a quick clean-up after cooking and a more thorough mop or wipe-down at least once a week. This might seem like a chore, but it’s much easier than dealing with deeply stained grout. Small efforts now save a lot of hard work in the future.
Let’s look at how to integrate these habits into your routine.
These habits don’t take much time but can significantly prolong the life and appearance of your grout. They are the foundation of keeping your kitchen looking its best without constant struggle.
Daily Wipe-Downs
After preparing meals, take a moment to wipe down your kitchen floor, especially around the cooking areas and sink. Use a damp mop or a cloth to pick up any spills, crumbs, or grease splatters that may have landed on the tiles and in the grout lines. This simple act prevents food particles and grease from setting into the porous grout.
If you notice a spill, don’t wait for the next scheduled cleaning. Grab a paper towel or a damp cloth and wipe it up immediately. This is especially important for dark liquids like coffee, wine, or sauces, which can stain grout quickly.
A quick wipe-down takes less than a minute but can prevent a stain from becoming permanent.
Even just sweeping or vacuuming your kitchen floor daily helps remove dry debris that can eventually work its way into grout. These small, consistent actions stop the accumulation of grime that leads to darkened grout over time. It’s about preventing the problem before it starts.
Weekly Mopping
Once a week, give your kitchen floor a more thorough cleaning. Use a mild floor cleaner or a solution of water and a pH-neutral soap. Mop the floor, paying attention to the grout lines.
You can use a standard mop for large areas and then go over the grout lines with a grout brush or an old toothbrush for a more targeted clean.
If you used a cleaning solution, make sure to rinse the floor afterward with clean water to remove any soap residue. Leftover soap can attract dirt and make the grout appear dull. After mopping and rinsing, dry the floor with a clean towel or allow it to air dry.
Ensuring the floor is dry helps prevent mildew growth.
This weekly routine ensures that dirt doesn’t have a chance to build up. It keeps the overall appearance of your tile and grout looking fresh. By dedicating a small amount of time each week, you significantly reduce the likelihood of your grout turning black and needing deep cleaning interventions.
Managing Moisture and Ventilation
Moisture is a primary enemy of clean grout. In the kitchen, moisture can come from washing dishes, cooking steam, or even condensation. If the grout stays damp for extended periods, it creates an ideal environment for mold and mildew to grow, leading to that black discoloration.
Managing moisture and ensuring good ventilation are crucial for preventing this.
This involves both addressing sources of moisture and improving airflow. Simple habits can make a big difference in keeping your grout dry and healthy. When grout stays dry, it’s much less likely to absorb stains and develop mold.
Let’s explore how to manage moisture effectively.
Creating a drier environment for your grout is a proactive way to prevent future problems. These tips are easy to incorporate and will contribute to a cleaner, healthier kitchen space.
Proper Ventilation
Good ventilation is essential in a kitchen, especially in areas prone to moisture like near the sink or stove. Use your range hood fan every time you cook to draw steam and grease away from surfaces. If you don’t have a range hood, open a window or turn on a kitchen fan while cooking and after to circulate air.
After washing dishes or doing any cleaning that involves a lot of water, ensure the area dries out quickly. Wipe down countertops and the floor around the sink. If possible, leave cabinet doors under the sink slightly ajar to allow air to circulate and dry out any lingering moisture.
In humid climates or during seasons when humidity is high, consider using a dehumidifier in the kitchen. Reducing the overall moisture content in the air will help your grout stay drier, making it less susceptible to mold and mildew growth. Proper airflow prevents dampness from lingering.
Wiping Up Spills Promptly
As mentioned earlier, wiping up spills immediately is critical. This applies to water spills as well as food spills. If water pools on the floor, especially around the sink or dishwasher, don’t let it sit there.
Use a cloth or a paper towel to absorb the moisture. This is especially important if you have tile flooring that isn’t perfectly sealed.
Even small drips from washing hands or rinsing produce can contribute to damp grout if not wiped up. Pay attention to areas where water might drip from faucets or where condensation might form. A quick wipe can make a significant difference in keeping grout lines dry.
By being mindful of moisture and acting quickly to dry any wet areas, you create an environment that is much less hospitable to mold and mildew. This proactive approach is far more effective than trying to clean away the resulting black stains later.
Frequently Asked Questions
Question: How often should I seal my grout?
Answer: You should typically reseal your grout every 1 to 2 years. However, this can vary depending on the type of sealer used, the amount of foot traffic, and how often you clean the area. If you notice water soaking into the grout instead of beading up, it’s time to reseal.
Question: Can I use bleach on my colored grout?
Answer: It’s generally not recommended to use chlorine bleach on colored grout, as it can cause fading or discoloration. Mild cleaners like hydrogen peroxide (diluted) or specialized colored grout cleaners are safer options. Always test any cleaner in an inconspicuous area first.
Question: How long does it take for grout to dry after cleaning?
Answer: After cleaning, grout needs to dry completely before it’s fully protected. This usually takes at least 24 hours, and sometimes up to 72 hours for sealers to cure. Ensure good ventilation to speed up the drying process.
Question: What is the best way to remove mold from grout?
Answer: For mold, a solution of equal parts white vinegar and water, or hydrogen peroxide, can be effective. Scrub with a stiff brush and allow the cleaner to sit before wiping clean. Steam cleaning is also excellent for killing mold and mildew.
Question: Should I seal my grout if I have epoxy grout?
Answer: Epoxy grout is non-porous and highly stain-resistant, so it generally does not need to be sealed. In most cases, regular cleaning is sufficient to keep epoxy grout looking its best.
Summary
Tackling black kitchen tile grout is achievable with simple methods. Understanding that grease, moisture, and lack of sealing cause the problem empowers you to fix it. You can use household items like baking soda, vinegar, or hydrogen peroxide, or opt for specialized cleaners.
Steam cleaning offers a deep, chemical-free solution. Consistent habits, especially sealing your grout and regular cleaning, will keep it looking bright for longer. You’ve got this!