
Dealing with cabinet bottoms warped or softened by heat and steam can feel like a tricky job, especially if you’re new to home repairs. Water and heat love to get into places they shouldn’t, and cabinet bottoms are often right in the line of fire from leaky dishwashers or humid ovens. But don’t worry!
How to Repair Cabinet Bottoms Damaged by Heat and Steam is something most people can tackle with the right steps. We’ll walk you through it simply, making your cabinets look great again. Get ready to learn how to fix this common problem easily.
Understanding Cabinet Bottom Damage
This section is all about figuring out what’s happened to your cabinet bottoms and why it’s happened. When heat and steam get into the wood, it can cause it to swell, warp, or even break down the glue that holds it together. We’ll look at the signs of this damage and the common culprits so you know exactly what you’re dealing with.
Understanding the cause is the first big step to fixing it right.
What Causes Cabinet Bottom Damage?
Several things can lead to your cabinet bottoms getting damaged by heat and steam. These are usually linked to moisture and heat getting into the wood over time. Think about appliances that use water or create steam, like dishwashers, refrigerators with ice makers, or ovens.
Leaks from plumbing under sinks can also be a big problem.
The wood itself, often particleboard or plywood in kitchen cabinets, can soak up moisture. When it gets wet, it swells. Then, when it dries out, it can shrink and warp.
Heat can also weaken the glues and finishes that protect the wood, making it more likely to absorb moisture and get damaged. Over time, this cycle of wetting and drying, combined with heat, can really weaken the cabinet bottom.
Appliance Leaks
Dishwashers are a common source of leaks that can damage cabinet bottoms. If the seals around the door aren’t perfect, or if a hose connection is loose, water can drip out. This water can then seep under the cabinet.
Refrigerators with ice makers or water dispensers can also develop leaks from their water lines.
Even a small, slow leak can cause a lot of damage over weeks or months. The constant moisture can make the wood swell and rot. This weakens the structure of the cabinet bottom, making it sag or even break.
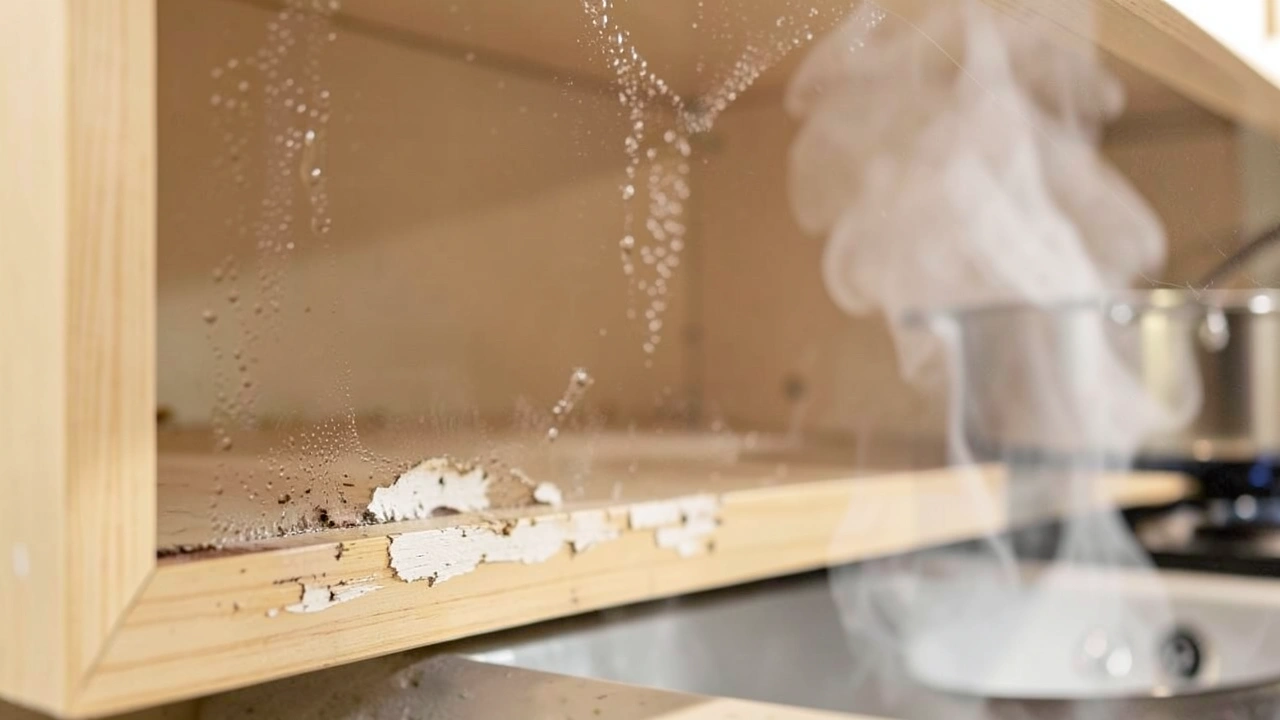
Oven Heat and Steam
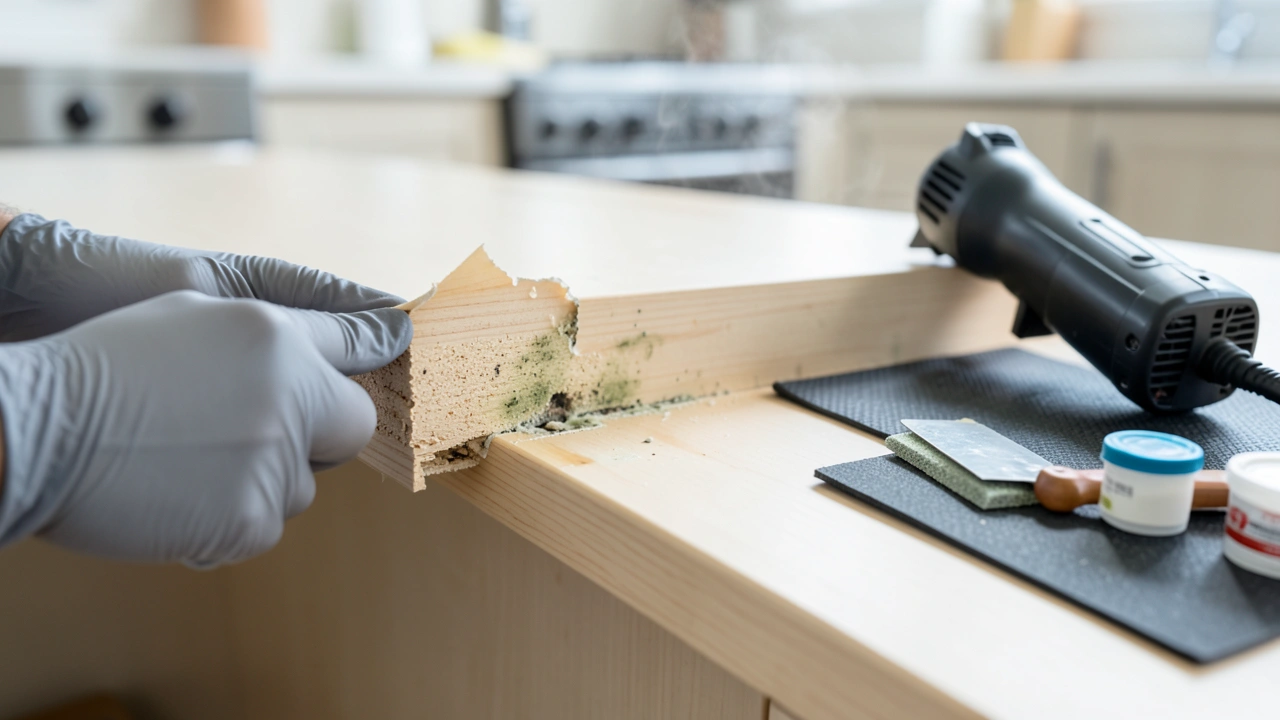
The heat and steam that come from ovens, especially during self-cleaning cycles or when cooking steamy foods, can also affect cabinet bottoms. If there’s a small gap or if the seals around the oven aren’t perfect, this heat and moisture can escape and get into the cabinets nearby. Wood can warp or delaminate when exposed to repeated high heat and steam.
This type of damage might not be as obvious as a water leak. It can be a slow degradation of the material. The heat can break down the glue holding layers of plywood together or cause particleboard to swell and then crumble.
Plumbing Issues
Kitchen sinks are a hub for plumbing, and leaks under the sink are a frequent problem. A dripping pipe, a loose connection, or a faulty seal on the drain can send water directly onto or into the cabinet bottom. This is often a constant source of moisture that can lead to significant damage.
The damage from plumbing leaks can be severe because water can pool and sit there, soaking into the material. This can lead to swelling, rot, and mold growth, making the cabinet bottom unstable and unsafe.
Signs of Damaged Cabinet Bottoms
Recognizing the signs of damage is key to fixing it before it gets worse. Look for changes in the wood itself. Does it feel soft or spongy when you press on it?
Is the surface bumpy or uneven instead of smooth? Are there any visible cracks or peeling layers?
You might also notice discoloration, like dark spots or stains, which often indicate water damage. In more severe cases, the cabinet bottom might be sagging or bowed. Sometimes, you can even smell a musty odor, which suggests mold or mildew growth due to persistent moisture.
- Warping or Sagging: The flat surface of the cabinet bottom might no longer be flat. It could curve downwards, especially in the middle, or twist along its edges. This happens when the wood fibers absorb moisture and swell unevenly, or when the material itself weakens. A warped bottom can make it hard to close the cabinet door properly or may cause items inside to tilt.
- Soft or Spongy Texture: If you press on the cabinet bottom with your finger and it feels soft, gives way easily, or feels damp, it’s a clear sign of damage. This usually means the wood material has absorbed a lot of moisture and its structural integrity is compromised. It might even feel mushy if it’s severely damaged.
- Discoloration and Stains: Water damage often leaves behind marks. You might see dark brown or black stains, or lighter rings where water has been present. These are signs that moisture has seeped into the material and potentially caused changes in the wood or finish.
- Peeling or Delamination: For cabinet bottoms made of plywood, you might see the layers starting to separate or peel apart. This is called delamination, and it happens when the glue holding the layers together fails due to moisture and heat. Particleboard can also start to break apart at the edges.
Preparing for Cabinet Bottom Repair
Before you start fixing anything, you need to get ready. This means gathering your tools and materials and making sure the area is clean and safe. Proper preparation will make the repair process much smoother and help you get the best results.
We’ll go over what you’ll need and how to get the cabinet ready for the repair work.
Gathering Your Tools and Materials
Having all your supplies on hand before you begin is important. This way, you won’t have to stop halfway through to run to the store. You’ll need basic tools that most people have around the house, plus a few specific items for wood repair.
For most repairs, you’ll need a measuring tape, a pencil, safety glasses, and gloves. You might also need a putty knife or scraper, sandpaper (various grits), a screwdriver or drill, and possibly a small saw or utility knife. For filling holes and cracks, wood filler or epoxy putty is essential.
You might also need wood glue, clamps, and a primer and paint or stain to match your cabinets.
- Safety Gear: Always wear safety glasses to protect your eyes from dust and debris. Gloves will keep your hands clean and protect them from splinters or chemicals.
- Measuring and Marking Tools: A tape measure and a pencil are vital for accurate measurements and marking cut lines or repair areas.
- Cleaning Supplies: You’ll need rags, a mild cleaner, and possibly a brush to clean the damaged area thoroughly before you start repairing.
- Filling and Repairing Materials: Wood filler, wood epoxy, or Bondo can fill gaps and cracks. Wood glue is essential for re-adhering loose parts.
- Sanding Tools: Sandpaper in different grits (like 80, 120, and 220) is needed to smooth surfaces. An orbital sander can speed up the process.
- Fasteners and Adhesives: Screws or nails might be needed for structural repairs, along with wood glue.
- Finishing Supplies: Primer, paint, or stain will be used to finish the repaired area so it blends in with the rest of the cabinet.
Cleaning and Drying the Damaged Area
It’s crucial to have a clean and completely dry surface before you begin any repairs. Any dirt, grease, or moisture left behind can prevent the repair materials from sticking properly. This can lead to the repair failing later on.
First, remove everything from inside the cabinet. Then, use a damp cloth and a mild cleaner to wipe down the damaged bottom. If there are any signs of mold or mildew, use a solution of one part bleach to ten parts water.
Make sure to ventilate the area well when using bleach.
Allow the cabinet bottom to air dry completely. You can speed this up by using a fan or a hairdryer on a low setting. Feel the area to ensure it’s bone dry before moving on to the repair steps.
If the damage is due to a leak, make sure that leak is fixed permanently before you start repairs, or you’ll be doing the job all over again.
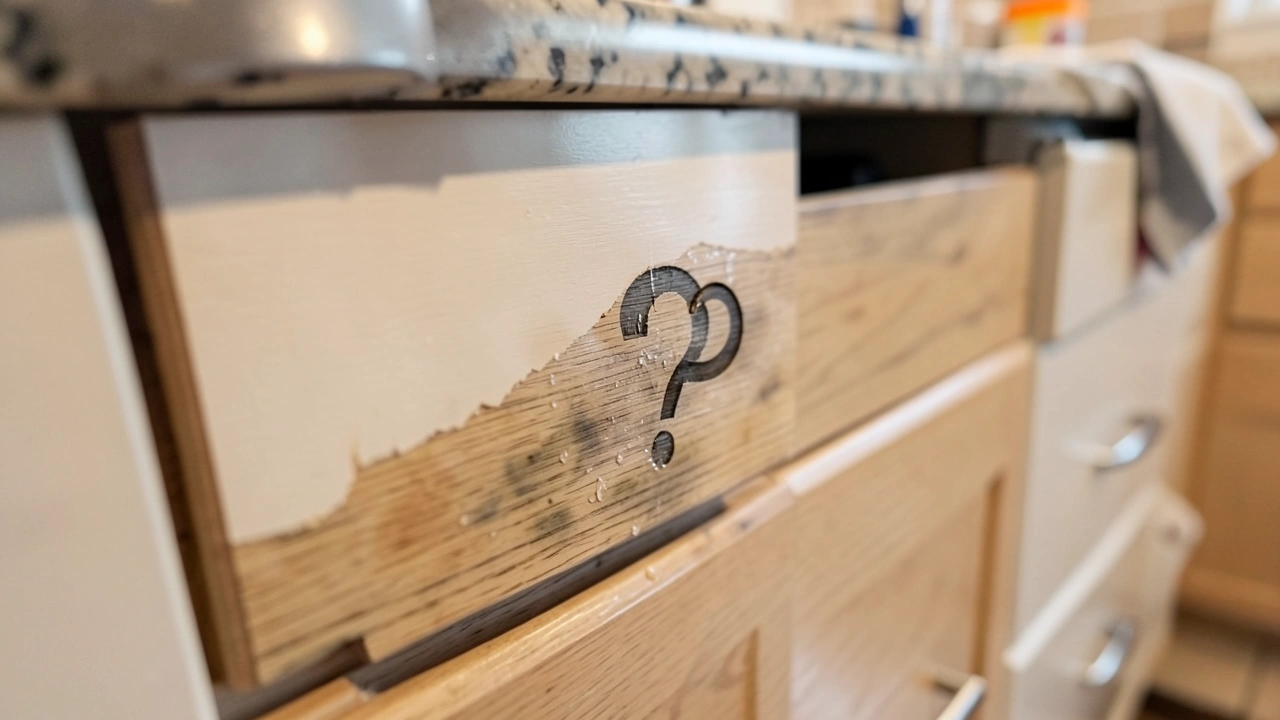
Assessing the Extent of Damage
Before you can fix it, you need to know just how bad the damage is. Is it just a small spot, or is the whole bottom warped and soft? This assessment will help you decide which repair method is best and what materials you’ll need.
Sometimes, a small repair is all that’s needed, but other times, you might need to replace a larger section or even the whole bottom.
Gently press on the damaged area with your finger. If it feels soft or spongy, the material has likely lost its strength. Look for cracks, peeling layers (delamination), or deep gouges.
If the cabinet bottom is bowing significantly, it will need structural support or replacement.
- Surface-Level Issues: Small dents, scratches, or minor water stains can often be repaired with wood filler and sanding. These don’t compromise the cabinet’s structure.
- Structural Weakness: If the bottom feels soft, spongy, or is sagging, the wood material itself is failing. This requires filling with stronger materials like epoxy or reinforcing with new wood.
- Delamination: For plywood, separating layers mean the glue has failed. If it’s just a small area, you might be able to re-glue it. For larger areas, replacement might be better.
- Rot or Mold: If you see signs of rot or mold, you must remove the damaged material and treat the area. Failure to do so can lead to further decay and health issues.
Methods for How to Repair Cabinet Bottoms Damaged by Heat and Steam
Now that you’re prepared, let’s get into the actual fixing. There are a few ways to tackle cabinet bottom damage, depending on how bad it is. We’ll cover simple fixes for minor issues and more involved methods for when the damage is more severe.
The goal is to restore the strength and appearance of your cabinet bottom.
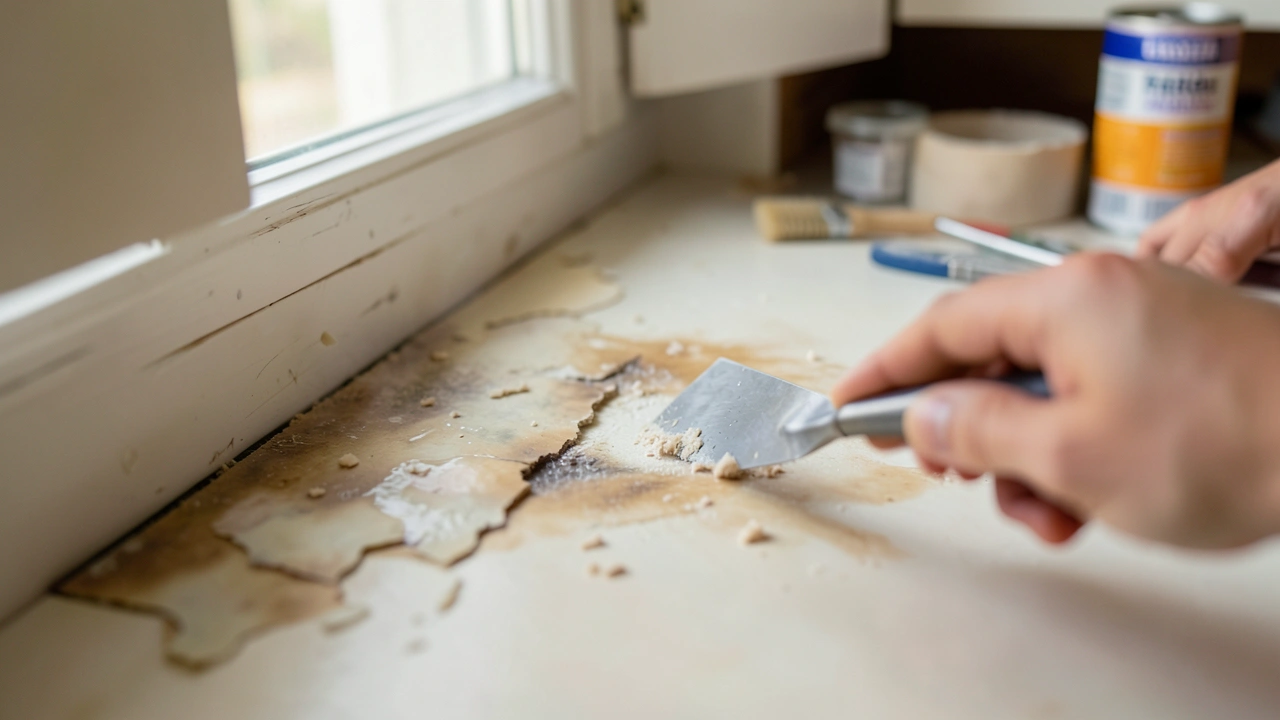
Filling Minor Cracks and Gouges
For small problems like surface cracks or shallow gouges, wood filler is your best friend. It’s like a paste that you can push into the damaged area. Once it dries, you can sand it smooth and then paint or stain it to match the rest of your cabinet.
First, make sure the crack or gouge is clean and dry. Then, use a putty knife to press the wood filler into the defect. Overfill it slightly, so that when it dries, you can sand it down to be perfectly level with the surrounding surface.
Let the filler dry completely according to the product instructions, which is usually a few hours.
Repairing Warped or Sagging Areas
When a cabinet bottom starts to sag, it needs support. If the wood isn’t too far gone, you might be able to fix it without replacing the whole piece. One common method is to use wood glue and clamps to pull it back into shape while it dries.
For more significant sagging, you might need to add a reinforcement strip. This involves attaching a piece of wood, like a thin strip of plywood or a wooden cleat, underneath the damaged area. This adds extra strength and stops the sag from getting worse.
You’ll typically glue and screw this support in place.
Using Wood Glue and Clamps
If the wood is still relatively solid but just bent, wood glue can often help. Apply a generous amount of wood glue to the warped area. Then, use clamps to press the warped section back into its original flat position.
You might need several clamps to apply even pressure across the whole area.
Let the glue dry completely, which can take 24 hours or more. Once dry, remove the clamps. The wood should now be flatter.
You might need to do some light sanding afterward.
Adding a Reinforcement Strip
This is a great method for cabinet bottoms that are starting to sag but aren’t completely broken. You’ll need a piece of wood that’s the same thickness or slightly thinner than your cabinet bottom. Cut it to size to fit underneath the sagging part, extending a little beyond it.
Apply wood glue to the underside of the cabinet bottom where you’ll attach the strip. Then, place the reinforcement strip on top of the glue. Secure it by driving screws up through the strip and into the cabinet bottom.
Make sure the screws are short enough so they don’t poke through the top surface.
Replacing Damaged Sections or the Entire Bottom
Sometimes, the damage is too severe to repair. If the material is crumbling, has large holes, or is completely rotted, you’ll need to replace it. This sounds more difficult, but it’s often the best long-term solution.
You’ll need to carefully measure the original cabinet bottom. Then, you’ll cut a new piece of material, like plywood or a furniture-grade board, to fit. Attach the new bottom securely using glue and screws.
If you’re only replacing a section, cut out the damaged part and fit a new piece in its place, making sure to glue and screw it to the surrounding solid wood.
Measuring and Cutting a Replacement Piece
Accurate measurements are key when replacing a cabinet bottom. Use your tape measure to get the exact dimensions of the original bottom. If you’re replacing a whole piece, measure the length and width.
If you’re only replacing a section, measure the damaged area and any surrounding solid wood you’ll be attaching to.
Transfer these measurements to a new piece of wood. Plywood is a common choice for cabinet bottoms because it’s strong and relatively inexpensive. Furniture-grade plywood or a cabinet-grade board will give you the best results.
Use a saw to carefully cut the new piece to your exact measurements. If you’re not comfortable with power saws, many hardware stores can cut wood for you.
Attaching the New Cabinet Bottom
Once your new piece is cut, it’s time to attach it. Apply a generous amount of wood glue along the edges of the cabinet where the new bottom will sit. Then, carefully place the new piece into position.
To secure it further and provide immediate strength, drive screws through the new bottom and into the cabinet frame or supporting structures. Space the screws evenly, about every 6-8 inches, to ensure a strong bond. Make sure the screws are the right length – they should go through the new bottom and into the cabinet structure without coming out the top.
Finishing Touches for a Seamless Repair
After the main repair is done, it’s time for the finishing touches. This is what makes the repair look like it was never there. It involves sanding, priming, and painting or staining to match your existing cabinets.
Start by sanding the repaired area smooth. If you used wood filler, sand it flush with the surrounding surface. Then, apply a primer to seal the repaired section and provide a good base for your paint or stain.
Once the primer is dry, apply one or two coats of paint or stain that matches your cabinets. For a really smooth finish, you can lightly sand between coats.
- Sanding: Use a medium-grit sandpaper (like 120) to smooth out any rough spots. Follow up with a fine-grit sandpaper (like 220) for a silky-smooth finish.
- Priming: A good quality primer will help cover the repaired area and ensure your paint or stain adheres well. It also helps to seal any old water stains.
- Painting or Staining: Use a brush or a small roller to apply paint or stain. Apply thin, even coats. It’s better to apply multiple thin coats than one thick one.
- Matching Color: Take a small piece of your cabinet door to the paint store to help them match the color perfectly.
Preventing Future Damage
Now that you’ve learned how to repair cabinet bottoms damaged by heat and steam, it’s smart to think about how to stop it from happening again. Prevention is always easier than repair! A few simple habits can keep your cabinets looking good for a long time.
The best way to prevent this kind of damage is to control moisture and heat around your cabinets. This means checking for leaks regularly and ensuring appliances are properly sealed. Keeping up with these simple checks can save you a lot of work down the road and keep your kitchen looking its best.
Tips for Controlling Moisture
Moisture is the biggest enemy of cabinet bottoms. Keeping things dry is the most effective way to prevent damage. Regularly check under your sink for any drips or puddles.
Make sure the dishwasher door seal is in good condition and not leaking water onto the floor or into the cabinet below.
Wipe up any spills immediately. If you have a refrigerator with an ice maker, check its water line for leaks. Using exhaust fans when cooking, especially when steaming foods, also helps reduce humidity in the kitchen, which can be absorbed by the cabinets.
- Regular Leak Checks: Get into the habit of looking under your sink and around appliances that use water. Even a small drip can cause damage over time.
- Wipe Up Spills Promptly: Don’t let water sit on or around your cabinets. A quick wipe-up can prevent serious damage.
- Ventilate Well: Use your range hood fan when cooking, and open windows when possible to let out steam and humidity.
- Appliance Seals: Periodically check the seals on your dishwasher and oven doors. Damaged seals can let out heat and moisture.
Managing Heat Around Cabinets
Excessive heat can also degrade cabinet materials and finishes. While you can’t control the temperature of your oven, you can take steps to protect the cabinets nearby. Ensure that appliances are installed correctly, with proper ventilation.
If your oven or dishwasher seems to be venting a lot of heat directly towards the cabinet base, consider adding some insulation or a heat-resistant barrier. This might involve a thin sheet of metal or a heat-resistant mat placed discreetly. Over time, constant exposure to high heat can weaken the glue and wood fibers.
Appliance Installation and Ventilation
Proper installation of appliances is key to preventing heat damage. Manufacturers design appliances with specific ventilation needs. Ensure that any vents on your dishwasher or oven are not blocked, but also that they are directing air away from cabinet surfaces.
If you notice significant heat radiating from an appliance towards your cabinets, it might be worth consulting the appliance manual or a professional installer. They can advise on the best way to manage airflow and heat dispersal to protect your cabinetry.
Heat-Resistant Barriers
For areas that consistently experience high heat, like next to an oven, a heat-resistant barrier can be a good preventative measure. This could be a thin piece of metal (like aluminum flashing) or a special heat-resistant mat designed for kitchens. It can be installed on the inside of the cabinet or on the cabinet wall facing the heat source.
These barriers work by reflecting or absorbing the heat, preventing it from directly reaching the wood. This helps to keep the cabinet material from drying out, warping, or having its glue bonds weakened over time. The key is to make sure the barrier is discreetly placed so it doesn’t detract from the appearance of your kitchen.
Frequently Asked Questions
Question: How long does it take for wood filler to dry?
Answer: Drying time for wood filler can vary depending on the product and how thick it is applied. Generally, it takes from 2 to 12 hours to dry. Always check the product packaging for specific drying times.
It’s important to let it dry completely before sanding or painting.
Question: Can I repair water-damaged particleboard cabinet bottoms?
Answer: Repairing water-damaged particleboard can be challenging because it swells and crumbles easily. For minor damage, wood filler or epoxy can work. However, if the particleboard is severely swollen or is falling apart, replacement might be the only effective solution.
Question: What kind of screws should I use for reinforcing cabinet bottoms?
Answer: Use wood screws that are the appropriate length. They should be long enough to go through your reinforcement strip and firmly into the cabinet’s structure, but short enough that they don’t poke through the visible top surface of the cabinet bottom. About 1 to 1.5 inches is often a good length.
Question: Do I need to seal the entire cabinet bottom after repair?
Answer: It’s a good idea to seal the repaired area, and often the entire cabinet bottom, for better protection. A good primer and a couple of coats of paint or a waterproof sealant can help prevent future moisture damage. This is especially true for cabinets under sinks.
Question: What if the damage is too extensive and the cabinet is unsafe?
Answer: If the cabinet bottom is severely rotted, sagging dramatically, or crumbling, it might be unsafe to use. In such cases, replacing the entire cabinet or at least the affected section is the best course of action. Safety should always come first.
Summary
You’ve learned how to repair cabinet bottoms damaged by heat and steam. We covered what causes the problem, how to spot it, and simple ways to fix it. You can now confidently tackle minor issues with wood filler or replace a damaged section.
Keeping things dry and managing heat will help prevent future problems. Your cabinets will look great again!

Leave a Reply