
Thinking about giving your kitchen a fresh look by painting the cabinets? Many people wonder How to Repaint Old Kitchen Cabinets Without Sanding Everything. It sounds like a lot of work, right?
Beginners often feel unsure about starting because sanding can feel overwhelming and messy. But it doesn’t have to be that way! We’ll show you a simple way to get great results without all the dust and fuss.
Get ready to see how easy it can be to transform your kitchen.
Refreshing Your Kitchen: Painting Cabinets Without Sanding
This section is all about making your old kitchen cabinets look new again, but with a trick: no heavy sanding! We will guide you through the steps so you can get a smooth, beautiful finish without the tough work of sanding everything down. You’ll learn what supplies you need and how to prepare your cabinets.
This makes the whole painting process much simpler and faster for anyone, especially if you’re new to DIY projects.
Why Skip the Sanding?
Sanding cabinets can feel like a huge chore. It creates a lot of dust that gets everywhere. For many people, especially those new to painting, this step can feel too difficult.
It takes time and can be messy. Skipping it makes the project much more manageable and less intimidating. It’s a way to get a great makeover without the biggest hurdle.
- Less Mess: Sanding creates fine dust that spreads all over your kitchen. Not sanding means you avoid this big clean-up job. This is a major win for most home projects.
Keeping your workspace clean makes the entire project more enjoyable. The less dust, the less time you spend wiping down surfaces that aren’t even being painted yet. This also means less dust can get into your paint finish, helping you achieve a smoother look.
- Save Time: Sanding can take a long time, especially if you have many cabinets. By skipping it, you cut down your project time significantly. This lets you enjoy your newly painted kitchen sooner.
Time is precious, and anything that speeds up a project without hurting the final look is a big plus. Imagine finishing your cabinet makeover in a weekend instead of a whole week! This is one of the biggest reasons people look for ways to avoid sanding.
- Easier for Beginners: For those new to DIY, sanding might seem like a skill they haven’t mastered. Not needing to sand makes the project more accessible. You can achieve professional-looking results with simpler steps.
Feeling confident is key to starting any new project. If sanding feels like too much, it can stop you before you even begin. This method removes that barrier, letting anyone tackle this kitchen update.
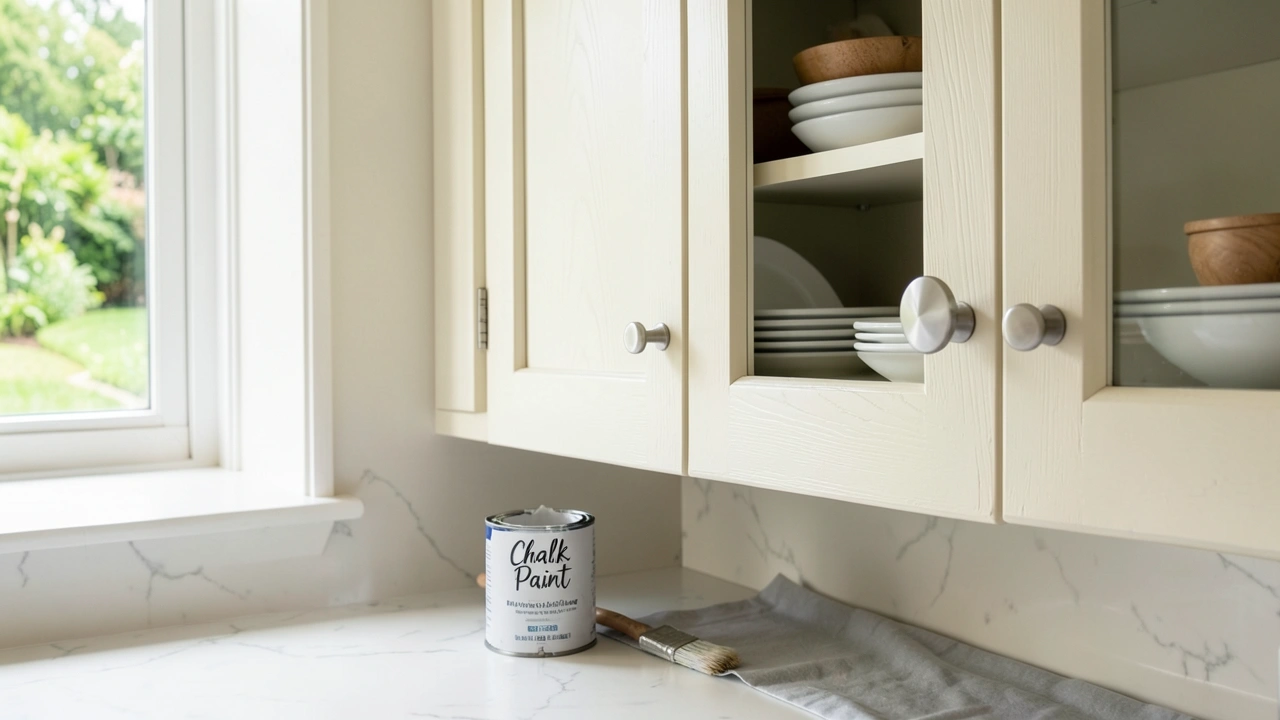
Gathering Your Supplies
Before you start painting, it’s important to have all the right tools and materials. Having everything ready means you can work smoothly without stopping to find things. This makes the whole job go much faster and with fewer frustrations.
Let’s look at what you’ll need.
Cleaning and Degreasing Agents
Cabinets get greasy from cooking and daily use. Any grease or dirt on the cabinets will prevent the new paint from sticking well. So, cleaning them thoroughly is super important, even if you’re not sanding.
You need a good degreaser to break down all that kitchen grime. This prepares the surface so the primer and paint can adhere properly.
- Good quality degreaser: This is the first and most important step. Look for a degreaser specifically designed for kitchen cabinets or a strong all-purpose cleaner that cuts through grease. Some popular options include TSP (Trisodium Phosphate) substitute, Krud Kutter, or even a simple solution of hot water and dish soap if your cabinets aren’t too greasy.
Using a good degreaser ensures that you remove all the oily residue left from cooking and everyday kitchen life. This step is vital because if you don’t get rid of the grease, your new paint might peel or not stick well. It’s the foundation for a lasting finish.
- Clean cloths or sponges: You’ll need plenty of these to apply the cleaner and wipe down the cabinets. Microfiber cloths are great because they absorb well and don’t leave lint behind.
Having a good supply of clean cloths means you can effectively remove the grease and grime without just spreading it around. You’ll want to switch to a clean cloth often to ensure you’re actually lifting the dirt, not just moving it.
Paint and Primer
Choosing the right primer and paint is key when you’re not sanding. You need products that are made to stick to surfaces without a lot of prep. They need to form a strong bond to the cabinet material.
- Bonding Primer: This is your secret weapon. A good bonding primer is formulated to stick to slick surfaces, like laminate or old glossy paint, without the need for sanding. It creates a surface that your topcoat of paint can easily adhere to. Look for primers that specifically mention adhesion to difficult surfaces.
A bonding primer is specially made to grab onto surfaces that might otherwise be too smooth for paint to stick to. It’s like a sticky base layer that makes sure your top coat stays on for years. Without it, your paint might chip easily.
- Cabinet Paint (Enamel or Alkyd Paint): Once your primer is dry, you’ll need a durable paint for the topcoat. Cabinet paints are designed to be tough and withstand frequent cleaning and wear. Alkyd or enamel paints are good choices because they dry hard and resist scratches.
For the final color, you want a paint that is tough. Kitchen cabinets get touched a lot and need to be cleaned often. Alkyd and enamel paints are known for their hard, durable finish.
This means your cabinets will look good for a long time, even with daily use.
Preparing Your Kitchen Cabinets
Even without sanding, proper prep work is essential for a great paint job. This means taking things apart, cleaning, and protecting areas you don’t want painted. Doing this step right will save you a lot of headaches later.
Remove Hardware and Doors
Taking off the cabinet doors and drawer fronts makes painting much easier. You can paint each piece flat, which gives you a smoother finish. It also lets you reach all the edges and corners without awkward angles.
Removing the hardware, like knobs and hinges, ensures you get a clean paint line and don’t accidentally paint over them.
- Take off all doors and drawer fronts: Use a screwdriver to carefully remove the screws holding the doors and drawer fronts in place.
This is a critical first step. When you remove the doors, you can paint them flat on a covered surface. This prevents drips and makes it much easier to get an even coat of paint everywhere.
It’s a small effort that makes a huge difference in the final look.
- Store hardware safely: Keep all screws, hinges, and knobs in a bag or container so you don’t lose them. Labeling them can also help when it’s time to reassemble.
Losing small parts is frustrating. Put all the hardware in a zip-top bag and maybe tape it to the inside of the corresponding cabinet. This way, you know exactly where everything goes when you’re ready to put it all back together.
- Consider numbering doors: If you have many doors, it might be helpful to number each door and its corresponding cabinet opening. This makes reattaching them much simpler.
Some cabinet doors might fit slightly differently than others. Numbering them as you take them off helps you put them back in the exact same spot. This ensures everything lines up perfectly when you’re done painting.
Clean and Degrease Thoroughly
This is the most important step when you’re skipping the sanding. You need to get rid of every bit of grease, grime, and dirt. If you don’t, your primer and paint won’t stick properly, and your finish will fail.
Think of it as cleaning the surface as thoroughly as you would before a major surgery.
- Wipe down all surfaces: Use your degreaser and clean cloths to wipe down every inch of the cabinet doors, drawer fronts, and the cabinet frames.
You might be surprised how much grease builds up, even if your kitchen looks clean. Work in small sections. Use a clean cloth for each section to make sure you are removing the grease, not just pushing it around.
Rinse with a damp cloth afterwards if your degreaser requires it.
- Rinse and dry: After degreasing, wipe everything down with a damp cloth to remove any cleaner residue. Then, let the cabinets dry completely.
After you use a cleaner, it’s good to wipe it down with a damp cloth. This makes sure no cleaner is left behind. Then, let them air dry or use a clean, dry cloth to speed things up.
Dry surfaces are ready for the next step.
Applying Primer for Maximum Adhesion
Primer is crucial when you’re painting cabinets without sanding. It acts as a bridge between the old surface and your new paint. A good primer helps your paint stick better and gives you a more even color.
This is where the magic happens for a smooth, lasting finish.
Choosing the Right Primer
Not all primers are created equal, especially for this no-sand method. You need a special kind of primer that’s designed to grip surfaces tightly. These are often called “bonding primers” or “adhesion primers.” They are formulated to stick to surfaces that might be slick or glossy, which is common on older cabinets.
- Bonding Primer: This type of primer is your best friend for this project. It’s designed to adhere strongly to surfaces like laminate, melamine, or even old oil-based paint. This means you don’t need to roughen up the surface with sandpaper.
A bonding primer is the key to success when you want to avoid sanding. It has special ingredients that help it stick to surfaces that are usually too smooth for paint. It creates a secure base for your new paint color to adhere to, ensuring a durable finish.
- Oil-based or Shellac-based Primers: Some professionals prefer oil-based or shellac-based primers for tough surfaces because they offer excellent adhesion and can block stains. However, they can have strong fumes and take longer to dry. Water-based bonding primers are often easier to use and have lower VOCs.
While oil-based and shellac-based primers can be very effective, they often come with strong smells and require mineral spirits for cleanup. Modern water-based bonding primers are much easier to work with for a DIY project and usually provide excellent results for cabinet painting.
Application Tips for Primer
Applying primer correctly ensures it does its job. You want a thin, even coat that covers the entire surface. This sets the stage for your beautiful new paint color.
- Apply Thin, Even Coats: Use a high-quality synthetic brush for edges and corners, and a foam roller or a small microfiber roller for the larger flat surfaces. This will help you get a smooth, streak-free finish. Avoid applying the primer too thick, as this can lead to drips and an uneven surface.
Think of primer like a base layer. You want it smooth and even, not thick and gloopy. Thin coats are better than one thick coat because they dry more evenly and are less likely to show brush marks or roller lines.
This helps your paint layer look much better.
- Allow Proper Drying Time: Always follow the manufacturer’s instructions for drying times. Rushing this step can cause problems with the paint adhering later on. Most bonding primers need at least a few hours, or even overnight, to fully cure.
Patience is key here. Let the primer dry completely before you even think about putting on the next coat or your paint. This ensures it has formed a strong bond.
Check the can for the recommended drying and recoating times. It’s worth the wait for a lasting finish.
- Inspect for Coverage: Once dry, look over the primed cabinets in good light. If you see any spots that look dull or uneven, or if you missed any areas, apply a second thin coat of primer.
After the primer dries, take a good look. If there are any spots that don’t look quite right, or if you can still see the old color peeking through, a second thin coat is a good idea. This ensures you have a consistent surface for your paint color.
Painting Your Kitchen Cabinets
Now comes the exciting part: applying the color! The way you paint your cabinets will determine how professional they look. Taking your time and using the right techniques will give you a beautiful, durable finish that can transform your kitchen.
Choosing the Right Paint
For kitchen cabinets, you need a paint that’s tough and can stand up to daily use. This means looking for specific types of paint that are designed for high-traffic areas and frequent cleaning. The finish of the paint also plays a role in how well it hides imperfections and how easy it is to clean.
- Cabinet Paint or Enamel Paint: Look for paints specifically labeled for cabinets or use a high-quality enamel paint. These paints are designed to be very durable and resist chips, scratches, and moisture. They often have a harder finish than regular wall paint.
You don’t want just any paint for your cabinets. You need something tough, like cabinet paint or a good enamel. These are made to last and to be wiped down often without the paint coming off.
Think of it as a shield for your cabinets.
- Sheen: A satin or semi-gloss finish is usually recommended for cabinets. These sheens are more durable and easier to clean than a matte finish. They also offer a nice subtle shine that brightens up the kitchen.
A satin or semi-gloss paint is a great choice for kitchen cabinets. It’s easier to wipe clean than a flat paint, and it adds a nice little bit of shine. This can make your kitchen feel brighter and more inviting.
Application Techniques
Just like with primer, how you apply the paint matters a lot. You want smooth, even coats that don’t show brush strokes or roller marks. This is what gives your cabinets that factory-new look.
- Use the Same Tools as for Primer: A high-quality synthetic brush for edges and tight spots, and a small foam roller or microfiber roller for the larger areas. Work in thin, even coats.
The tools you used for priming are usually the best for painting too. A good brush for corners and a smooth roller for the flat parts. Apply the paint in thin coats.
This helps avoid drips and makes the finish look much smoother.
- Paint in Sections: Work on one cabinet door or a small section of the cabinet frame at a time. This helps you maintain a wet edge, which means you can blend each stroke into the next without leaving noticeable lines.
It’s best to work in sections. This way, you can blend the paint as you go. Keeping a “wet edge” means the new paint you are applying meets paint that is still wet.
This helps blend everything together for a seamless look.
- Multiple Thin Coats: It’s better to apply two or three thin coats of paint rather than one thick one. This builds up the color evenly and creates a much more durable finish. Allow each coat to dry completely according to the paint manufacturer’s instructions before applying the next.
Thin coats are your best bet for a smooth, strong finish. Two or three thin coats will look much better and last longer than one thick coat. Make sure each coat is dry before you add another one.
This is very important for durability.
Reattaching Hardware and Doors
Once your cabinets are fully painted and have had enough time to cure (this can take several days to a week for maximum hardness, even if dry to the touch), it’s time to put everything back together. This is the final step to seeing your amazing transformation.
- Reassemble carefully: Once the paint is fully dry and cured, carefully reattach the cabinet doors and drawer fronts. Use the hardware you stored safely earlier.
This is the moment you’ve been waiting for! Put the doors and drawers back on. Make sure you use the right screws in the right places.
This part is like putting the puzzle back together, and it’s very satisfying.
- Check for Alignment: Ensure that doors and drawers are hanging straight and closing properly. You might need to adjust the hinges slightly to get perfect alignment.
As you put the doors back on, check that they all line up. Sometimes hinges need a little adjustment to make sure everything looks straight and closes smoothly. A few small tweaks can make a big difference in the final look.
How to Repaint Old Kitchen Cabinets Without Sanding Everything: Tips for Success
To really nail the How to Repaint Old Kitchen Cabinets Without Sanding Everything project, a few extra tips can make all the difference. These pointers are about making the job go smoother and ensuring your cabinets look fantastic for a long time. They address common issues and offer simple solutions.
- Test your degreaser: Before you start cleaning, especially on older or delicate cabinets, test your degreaser on an inconspicuous spot. This ensures it won’t damage the existing finish or material.
Always test your cleaning products first. You don’t want to accidentally damage your cabinets. Pick a small, hidden area, like the inside of a door, to try out the degreaser.
This way, you can see how it reacts before cleaning the whole cabinet.
- Use painter’s tape: If you have areas you don’t want to paint, like the inside edges of cabinet frames or countertops, use good quality painter’s tape to protect them. Press the edges down firmly to prevent paint from bleeding underneath.
Painter’s tape is a lifesaver for protecting areas you don’t want painted. Make sure you press the edges down really well so paint doesn’t sneak underneath. This gives you nice, crisp lines where the paint stops and the protected area begins.
- Ventilate the area: Painting can release fumes, especially from primers and some paints. Open windows and doors to ensure good air circulation. If needed, use fans to help move the air.
Fresh air is important when painting. Open up your kitchen to let out the paint smells. Good ventilation makes the job safer and more pleasant.
It also helps the paint dry faster.
- Invest in good brushes and rollers: Using cheap tools will show in your finish. Good quality brushes and rollers help you apply paint smoothly and evenly, minimizing streaks and brush marks.
Don’t skimp on your painting tools. Good brushes and rollers are worth the extra money. They help you apply paint more smoothly, which means your cabinets will look much more professional and have a nicer finish.
- Allow adequate curing time: While paint might feel dry to the touch within hours, it can take days or even a week for it to fully harden (cure). Be gentle with your newly painted cabinets during this time. Avoid slamming doors or placing heavy items on them.
Paint needs time to get really hard. Even if it feels dry, it’s still getting stronger for days afterward. Be careful with your cabinets during this time.
Don’t bump them or put things on them too roughly until the paint is fully cured.
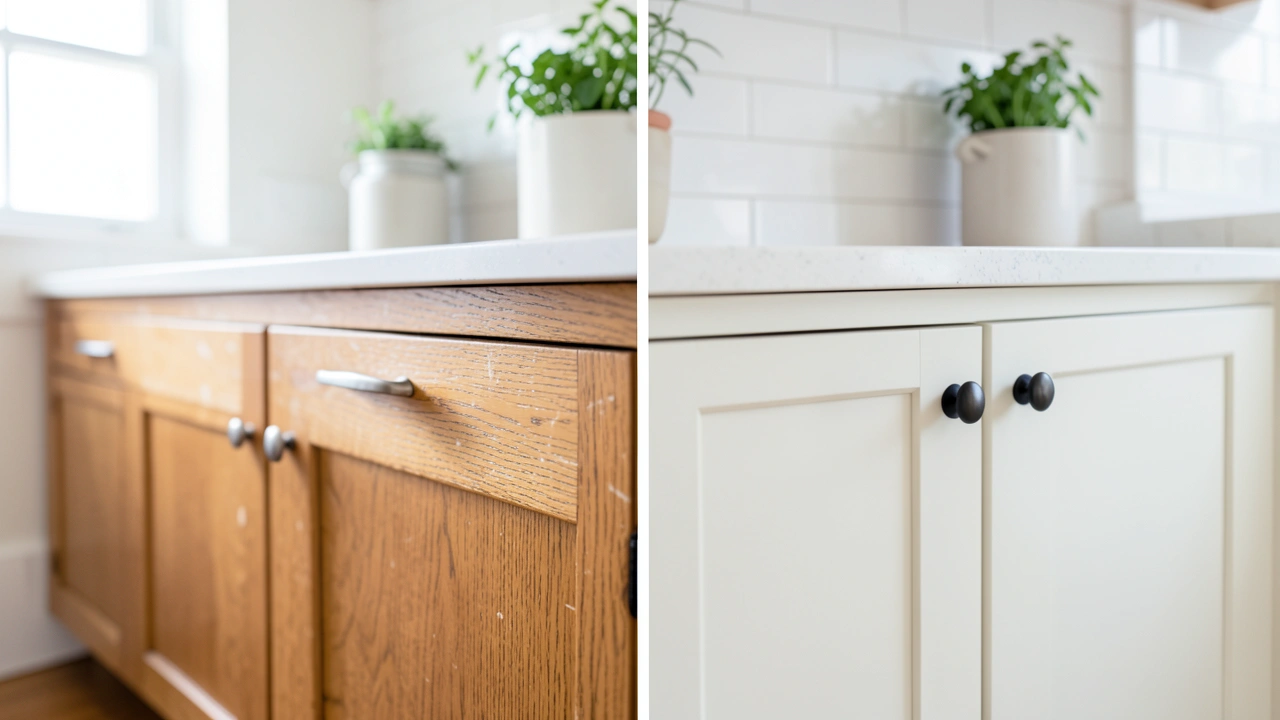
Real-Life Examples and Case Studies
Seeing how others have succeeded can be very encouraging. Here are a few examples that show how painting cabinets without sanding can work wonders. These stories highlight the transformation and the ease of the process when done correctly.
Sarah’s Kitchen Refresh
Sarah had a dated kitchen with dark, laminate cabinets that felt dull. She wanted a brighter look but dreaded the thought of sanding. She found a guide on painting cabinets without sanding and decided to give it a try.
She spent a weekend cleaning her cabinets thoroughly with a strong degreaser. Then, she applied a good quality bonding primer. After the primer dried, she applied two coats of a soft white cabinet paint using a foam roller and a good brush.
She was amazed at how smooth the finish turned out. Her kitchen went from dark and old-fashioned to bright and modern. The whole process took her about three days, and she said the biggest surprise was how little mess there was compared to what she expected.
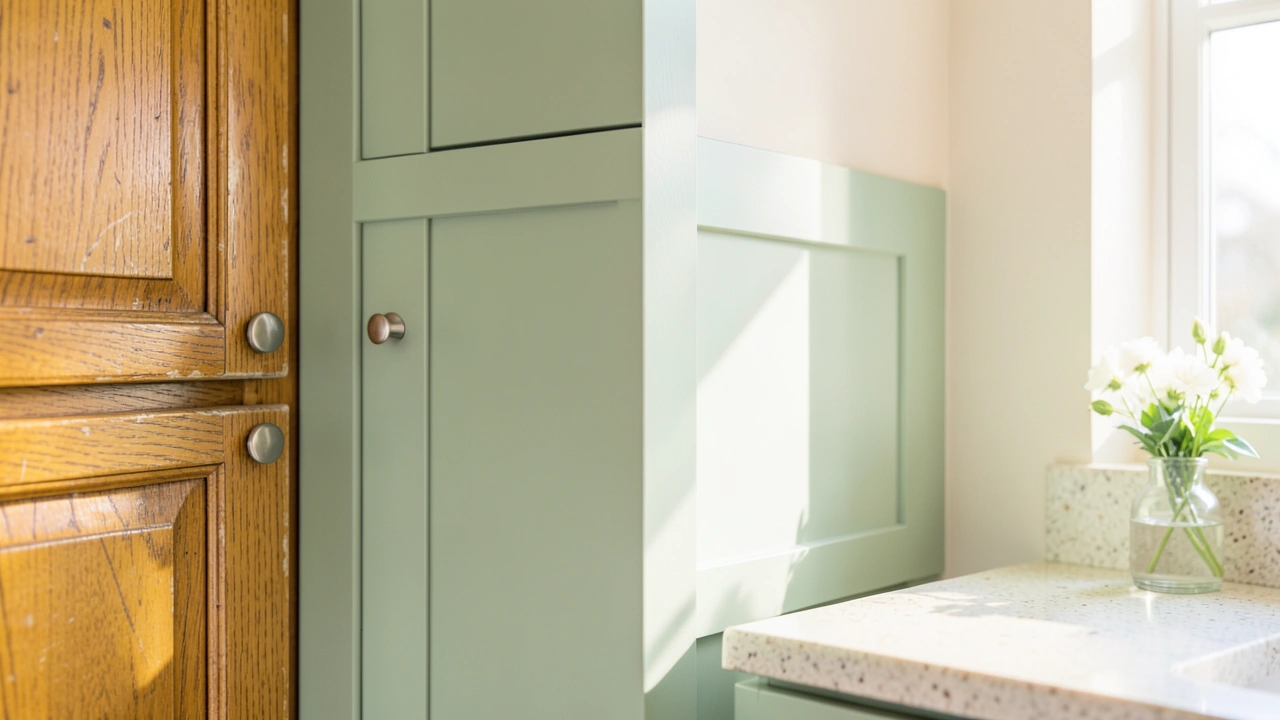
The Miller Family’s Cabinet Makeover
The Miller family wanted to update their rental property’s kitchen before new tenants moved in. They had older, glossy-finish cabinets that were hard to clean. Sanding was out of the question due to time constraints and the need for a quick turnaround.
They used a degreaser and then a high-adhesion primer. They chose a popular cabinet paint in a light gray color. The results were fantastic.
The cabinets looked professionally painted, and the new finish was easy to wipe down. This project cost them less than $200 in materials and was completed in a long weekend. It significantly improved the property’s appeal without a massive renovation budget.
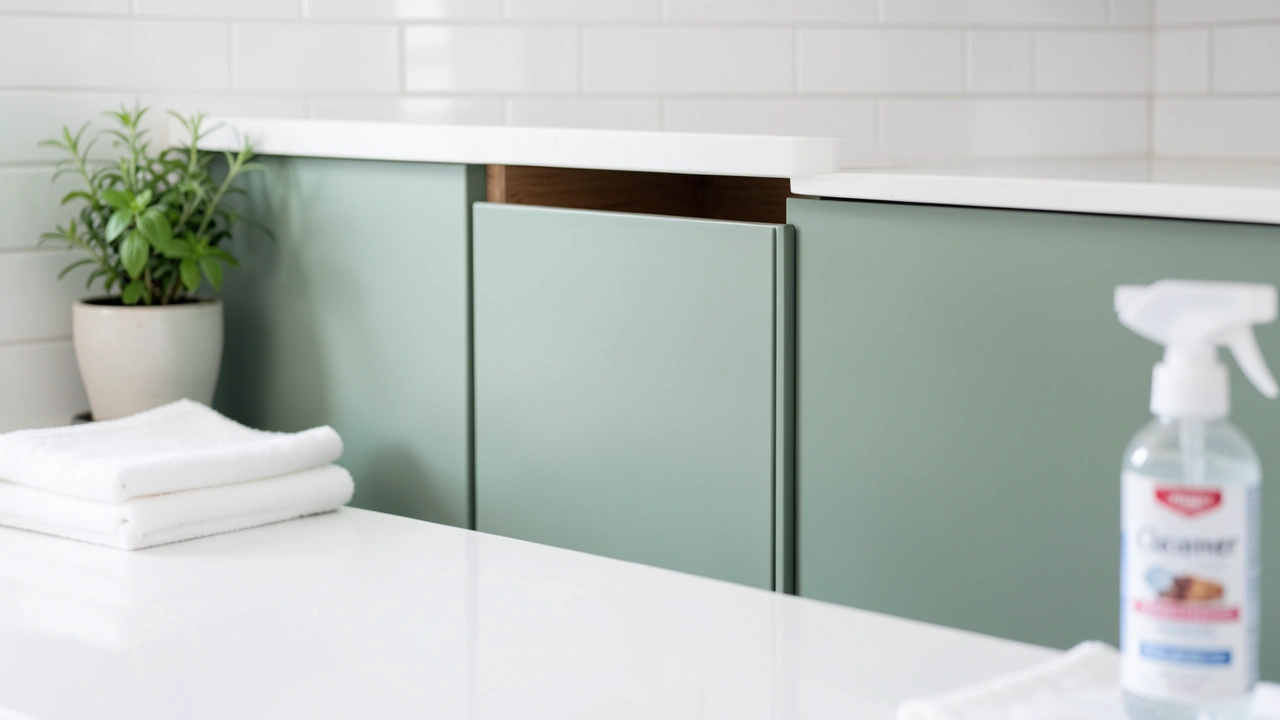
Benefits of Painting Cabinets Without Sanding
Opting to paint your kitchen cabinets without sanding brings several advantages. It makes a big DIY project more accessible and less time-consuming. The focus shifts from heavy labor to careful application, allowing more people to achieve a beautiful, updated kitchen.
- Time Savings: Skipping the sanding step can cut your project time in half, or even more. This means you can enjoy your newly refreshed kitchen sooner, without weeks of disruption.
The biggest perk is saving time. Sanding takes a lot of effort and can drag out a project for days. When you skip it, you can finish painting your cabinets much faster.
This is great if you have a busy schedule or need your kitchen back quickly.
- Reduced Physical Effort: Sanding requires a lot of physical exertion and can be hard on your body. Not sanding means you avoid the back strain and arm fatigue that comes with the job.
If you don’t like hard physical labor, this method is for you. You don’t have to spend hours hunched over, sanding. This makes the project much easier on your body, especially if you have any physical limitations.
- Less Dust and Mess: Sanding creates fine dust that gets into everything. Avoiding this step means a much cleaner workspace and less clean-up afterward.
Dust is a major downside of sanding. It gets everywhere – in your hair, your clothes, your lungs, and all over your kitchen. Not sanding means you deal with much less dust, which makes the whole experience cleaner and more pleasant.
- Cost-Effective: You save money on sandpaper, dust masks, and potentially renting tools. The primary costs are cleaning supplies, primer, paint, and brushes/rollers.
Saving money is always a good thing. You won’t need to buy as many supplies like sandpaper or dust masks. The costs are mainly for the cleaning stuff and the paint itself, which can be much less than other renovation methods.
- Accessibility for Beginners: This method lowers the barrier to entry for DIYers who might feel intimidated by traditional cabinet refinishing techniques. It makes a dramatic transformation achievable for almost anyone.
This way of painting makes it easier for beginners to start. If sanding seems too hard, this method lets you still get great results. It opens up cabinet refinishing to more people who want to update their homes.
Frequently Asked Questions
Question: Can I really paint my cabinets without sanding at all?
Answer: Yes, you absolutely can! The key is using a good quality bonding primer designed to stick to slick surfaces, along with proper cleaning and degreasing. This creates a surface that your paint can adhere to without needing to roughen it up.
Question: What kind of degreaser should I use?
Answer: A strong, heavy-duty degreaser is best. Products like TSP substitute, Krud Kutter, or even a potent dish soap and hot water mixture can work, depending on how greasy your cabinets are. Always test in an inconspicuous spot first.
Question: How many coats of paint do I need?
Answer: It’s usually best to apply two to three thin coats of paint. This ensures even coverage and a durable finish. Make sure each coat dries thoroughly before applying the next.
Question: How long does it take for the paint to fully cure?
Answer: While paint might feel dry to the touch in a few hours, it typically takes several days to a week for the paint to fully cure and reach its maximum hardness. Be gentle with your cabinets during this curing period.
Question: Will the paint chip easily if I don’t sand?
Answer: If you use a good bonding primer and clean your cabinets thoroughly, the paint should be very durable and not chip easily. The primer is what creates the strong bond, making sanding less critical for adhesion.
Summary
Painting your old kitchen cabinets without sanding is totally doable! By focusing on thorough cleaning, using a strong bonding primer, and applying paint in thin, even coats, you can achieve a beautiful, lasting finish. This method saves time, effort, and mess, making a kitchen refresh accessible for everyone.

Leave a Reply