
Taking off just one kitchen cabinet might seem tricky, especially if you’re new to DIY projects. You worry about messing up your walls or causing other damage. But don’t fret!
It’s totally doable with the right steps. This guide will walk you through How to Remove a Single Kitchen Cabinet Without Damaging the Wall, making it simple and clear. Ready to see how easy it can be?
Getting Ready to Remove Your Cabinet
This part is all about being prepared. Before you even touch a tool, you need to know what you’re working with and gather everything you’ll need. Think of it like packing for a trip; the more organized you are upfront, the smoother the journey.
We’ll go over the tools you’ll need and how to safely prepare the cabinet itself. This makes sure the actual removal process is safe and effective.
Gathering Your Tools and Supplies
Having the right tools makes a huge difference. It’s not about having a ton of fancy equipment, but rather the essential items that will help you work safely and efficiently. For instance, a sturdy utility knife is key for breaking seals, and a pry bar is essential for gentle leverage.
Protecting your floor is also super important, so drop cloths or old blankets are a must. Safety gear like gloves and eye protection are non-negotiable for any DIY task.
- Utility Knife: This tool is your best friend for cutting through any caulk or sealant that might be holding the cabinet in place. You want a sharp blade so it slices cleanly without you having to push too hard. This prevents it from slipping and potentially scratching the surrounding wall or countertop. Make sure to have extra blades on hand, as they can dull quickly.
- Pry Bar (Flat Bar): A pry bar gives you leverage to gently separate the cabinet from the wall or other cabinets. It’s important to use a smaller, flat pry bar rather than a heavy-duty one, as it’s less likely to cause damage. You’ll want to protect the surfaces you’re prying against with a thin piece of wood or cardboard to prevent dents and scratches.
- Screwdriver Set: You’ll likely need screwdrivers to remove mounting screws. Most kitchen cabinets are attached with Phillips head screws, but it’s good to have a few different sizes and types, including flathead, just in case. Make sure the screwdriver fits snugly into the screw head to avoid stripping it.
- Putty Knife: Similar to a pry bar, a putty knife can be used for delicate prying tasks where a larger tool might be too aggressive. It’s also useful for scraping away any old adhesive or paint buildup around the cabinet edges. A flexible metal putty knife works best for getting into tight spaces.
- Safety Glasses: Protecting your eyes is paramount. When working with tools, especially when prying or cutting, there’s always a risk of dust, debris, or even small fasteners flying off. Safety glasses create a barrier between your eyes and potential hazards, preventing serious injury.
- Work Gloves: Gloves protect your hands from splinters, sharp edges, and provide a better grip on tools. They can also prevent minor cuts and scrapes that can easily happen when working with cabinets and hardware. Choose gloves that allow for good dexterity so you can still handle tools precisely.
- Drop Cloths or Old Blankets: These are essential for protecting your floors and countertops from dust, scratches, and dropped tools. Lay them down generously around the work area, making sure they are secured so they don’t shift around while you’re working.
- Drill (Optional but helpful): If the cabinet is screwed into wall studs or other cabinets with very tight screws, a drill can make removing them much faster. Use the appropriate bit for the screw type and set the drill to a low torque setting to avoid overtightening or stripping the screws.
Preparing the Cabinet and Workspace
Before you start loosening screws, it’s wise to empty the cabinet completely. This makes it lighter and prevents items from falling out during the process. Next, you’ll want to tape off the area around the cabinet.
Painter’s tape is great for this because it’s gentle on walls and paint. This tape acts as a visual guide and a protective barrier, making it easier to see where you’re working and reducing the chance of accidental scrapes or gouges on the wall surface. Securing the doors and drawers also prevents them from swinging open unexpectedly and causing damage or injury.
- Empty the Cabinet: Remove all contents from the cabinet. This significantly reduces its weight, making it easier and safer to handle during removal. It also prevents items from shifting, falling, or breaking during the process. Consider storing items in nearby boxes or another cabinet temporarily.
- Secure Doors and Drawers: Close all doors and drawers. Use painter’s tape to hold them shut. This stops them from swinging open unexpectedly and potentially hitting you or the surrounding cabinets and walls. Ensure the tape adheres well but can be removed without damaging the finish.
- Protect Surrounding Areas: Place drop cloths or old blankets on the floor and countertops beneath and around the cabinet. This catches any dust, debris, or small hardware that might fall. It also provides a soft surface to rest tools on, preventing scratches.
- Identify Mounting Points: Visually inspect how the cabinet is attached. Look for screws or brackets connecting it to the wall, ceiling, or adjacent cabinets. Knowing these points beforehand helps you plan your approach and ensures you don’t miss any connection points.
Understanding How Cabinets Are Attached
Kitchen cabinets are typically secured in a few main ways. They are often screwed into wall studs, which are the wooden beams behind your drywall. Sometimes, they’re also attached to each other for stability.
There might also be adhesive or caulk used along the edges where cabinets meet walls or countertops. Knowing these connection methods is key because it tells you where to look for screws and how to gently break seals. This foresight is essential for preventing damage.
Wall Mounting Screws
The most common way cabinets are held in place is by screws driven through the back of the cabinet frame directly into wall studs. These studs are vertical wooden beams that provide the structural support for your walls. Cabinet installers locate these studs using a stud finder or by tapping the wall and listening for a solid sound.
The screws are usually long enough to penetrate the drywall and get a solid grip in the wood. If you can’t find studs, cabinets might be attached using heavy-duty drywall anchors, though this is less common for base cabinets.
- Locating Wall Studs: Wall studs are typically spaced 16 or 24 inches apart, center to center. Using a stud finder is the easiest way to locate them. Alternatively, you can tap on the wall; a solid sound usually indicates a stud, while a hollow sound suggests drywall only. Small pilot holes can also reveal stud locations.
- Types of Mounting Screws: Cabinet mounting screws are usually #8 or #10 screws, typically 2.5 to 3 inches long. They are often made of steel and can be either pan-head or washer-head screws, which distribute the pressure over a larger area. Ensure you have the correct size screwdriver bit to avoid stripping the screw heads.
- Screw Placement: Screws are usually placed in the upper rear corners of the cabinet for upper cabinets, and in the lower rear corners for base cabinets. There may be additional screws along the top and bottom edges or near the center, depending on the cabinet’s size and weight.
Inter-Cabinet Connections
Adjacent cabinets are often screwed or clipped together to create a continuous, stable unit across your kitchen. This makes the entire bank of cabinets feel like one solid piece. These connections prevent gaps from forming between cabinets and add to the overall structural integrity.
When you’re removing a single cabinet, you might find screws going horizontally from the side of your target cabinet into the cabinet next to it. You’ll need to find and remove these as well, just like the ones attaching it to the wall.
- Purpose of Inter-Cabinet Connections: These connections ensure that cabinets don’t shift or sag independently. They create a unified front, making the whole row of cabinets look and feel more robust. This is particularly important for supporting heavy items or in kitchens with frequent use.
- Common Fasteners: Cabinets can be joined using wood screws, often about 1.5 inches long, driven through pilot holes from one cabinet face frame into the other. Some manufacturers also use specialized metal clips that fit into routed grooves on the sides of the cabinet boxes.
- Identifying Connections: Look for screws or small metal plates on the inside edges of the cabinet frame, where two cabinets meet. These are typically located near the top and bottom of the cabinet boxes. Gently pulling adjacent cabinets apart by a small amount might reveal the connection points.
Caulking and Adhesive
Sometimes, cabinets are sealed to the wall or countertop with caulk or a bead of adhesive. This is often done to create a clean, finished look by filling any small gaps. It also helps prevent moisture and food particles from getting behind the cabinet.
This seal needs to be broken before you can pry the cabinet away. A utility knife is perfect for slicing through this material. You’ll want to be careful not to cut too deep, so you don’t damage the wall or countertop finish.
- Role of Caulking: Caulking provides a smooth transition between the cabinet and the wall or backsplash. It hides minor imperfections and prevents dust and pests from entering the gap. It also offers a slight seal against moisture, which can be helpful in a kitchen environment.
- Types of Sealants: The most common sealant is latex or silicone caulk. Latex caulk is easier to clean up with water but is less flexible and can crack over time. Silicone caulk is more durable, waterproof, and flexible but can be harder to clean and paint over.
- Breaking the Seal: A sharp utility knife is ideal for cutting through caulk. Make a careful, shallow cut along the entire edge where the cabinet meets the wall or countertop. Go slowly and steadily to ensure a clean break without damaging the surrounding surfaces.
The Step-by-Step Process for Removal
Now that you understand how cabinets are put up, let’s walk through taking one down safely. We’ll break it down into easy steps, starting with carefully cutting any seals, then removing screws, and finally, gently separating the cabinet. Following these steps in order will help you avoid common mistakes and protect your kitchen’s appearance.
This method is designed to be straightforward, even for those who don’t do a lot of home repairs.
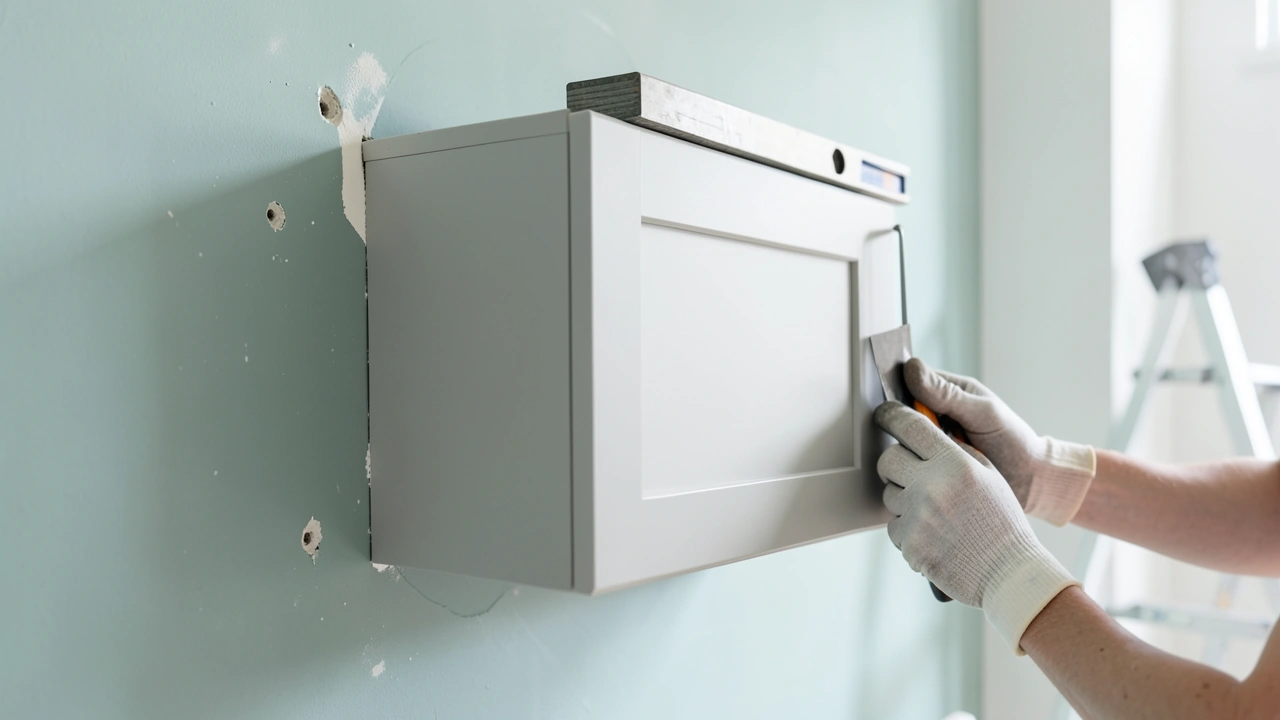
Step 1: Breaking the Seal
Begin by finding where the cabinet meets the wall or any adjoining cabinets. You’ll use your utility knife here. Carefully slide the blade along the seam where the cabinet’s edge meets the wall or countertop.
You’re looking to cut through any caulk or sealant that’s holding it in place. Be gentle and try to keep the knife at a consistent angle. This step is crucial because it removes one of the main things holding the cabinet tight against the wall, making the next steps much easier.
- Cutting Caulk or Sealant: Use a sharp utility knife to carefully cut along the entire length of the seam. Make a shallow cut to avoid damaging the wall or countertop behind the caulk. You want to sever the bond, not gouge the surfaces.
- Checking for Adhesives: In some cases, a stronger adhesive might have been used. If cutting the caulk doesn’t seem to free the cabinet, you may need to work the knife in a bit deeper or use a thin putty knife to gently probe and break any stubborn adhesive bonds.
- Visual Confirmation: After cutting, you should be able to see a clean line where the caulk has been separated. If there are still areas that feel stuck, re-examine those spots and make another careful cut. This ensures the seal is fully broken.
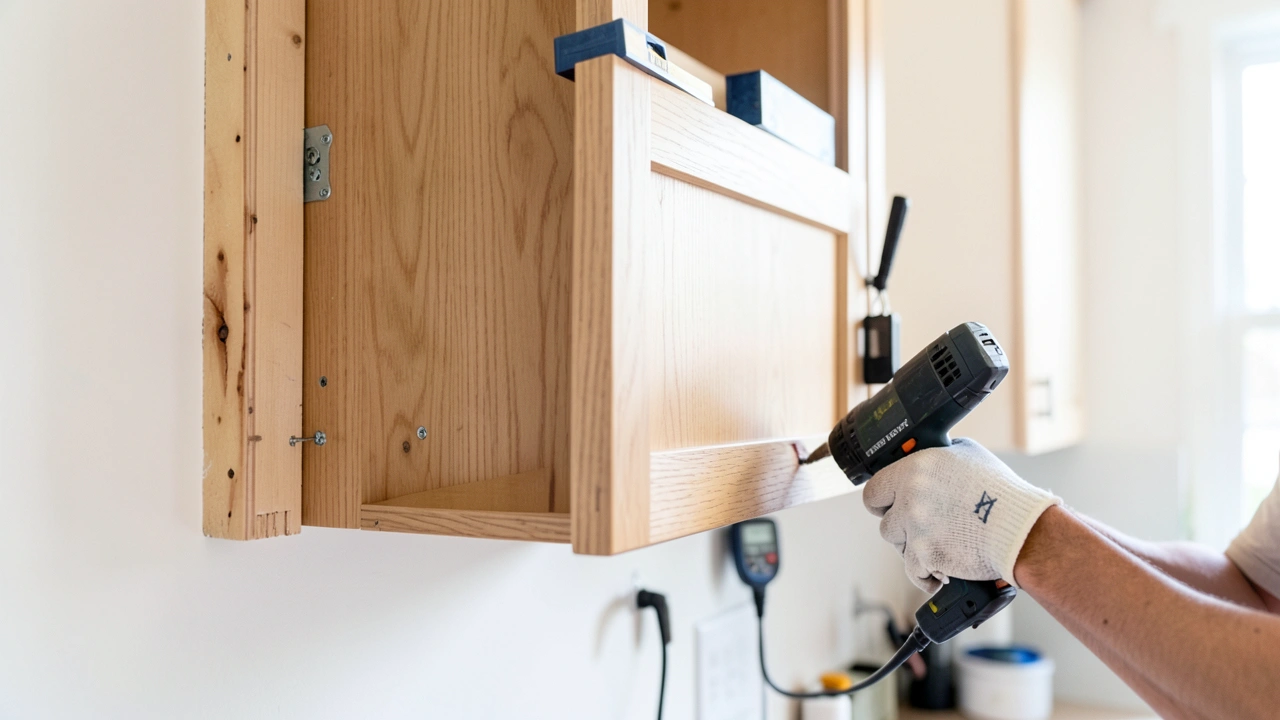
Step 2: Removing Mounting Screws
With the seals broken, your next task is to find and remove all the screws that are holding the cabinet to the wall and any other cabinets. Look inside the cabinet box, usually along the top and bottom edges of the frame. You might also find screws connecting your cabinet to the one next to it, typically on the side edges of the cabinet frame.
Use the correct screwdriver or drill bit for each screw. Turn them counter-clockwise to loosen and remove them. It’s a good idea to put all the screws in a small bag or container so you don’t lose them.
- Locate All Screws: Carefully examine the inside of the cabinet. Look for screws along the top edge, bottom edge, and the sides of the cabinet frame where it meets adjacent cabinets. Sometimes, screws are hidden behind trim pieces, so check those areas too.
- Use the Right Tool: Ensure you have the correct type and size of screwdriver or drill bit for each screw. Using the wrong tool can strip the screw head, making it very difficult to remove.
- Turn Counter-Clockwise: Remember that “righty tighty, lefty loosey.” Turn the screws counter-clockwise to loosen them. If a screw is very tight, apply steady pressure and avoid jerky movements. A bit of penetrating oil applied to the screw threads can sometimes help if a screw is stubborn, but use sparingly.
- Organize Screws: Keep all removed screws in a labeled bag or container. This is important if you plan to reinstall the cabinet or simply want to keep all parts together. It prevents them from getting lost during the process.
Step 3: Gently Detaching the Cabinet
Now for the moment of truth. You’ve cut the seals and removed the screws. The cabinet should feel loose.
Place your pry bar or putty knife between the cabinet and the wall (or adjacent cabinet). Use a thin piece of wood or cardboard as a buffer to protect the wall surface. Apply gentle, steady pressure to slowly pull the cabinet away.
Work your way along the edges, prying a little at a time. Have a helper if possible to support the cabinet as it detaches, preventing it from falling. If it feels stuck, double-check for any missed screws or seals.
- Protecting Surfaces: Before you insert a pry bar, place a thin piece of scrap wood, cardboard, or a plastic shim between the pry bar and the wall or cabinet. This is crucial to prevent dents, scratches, or other damage to your finished surfaces.
- Apply Gentle Leverage: Insert the tip of your pry bar or putty knife into the gap you’ve created. Apply slow, steady pressure to gently pull the cabinet away from the wall. Avoid forceful yanking, which can cause damage.
- Work Around the Edges: Move the pry bar along the different edges of the cabinet, applying pressure at multiple points. This helps to evenly distribute the force and prevents stress on any single point of the cabinet or wall.
- Check for Missed Connections: If the cabinet doesn’t budge easily, stop and re-inspect for any hidden screws, nails, or adhesive that you might have missed. Go back to the previous steps if necessary to ensure everything is disconnected.
- Assistance is Helpful: Having a second person to help support the cabinet as it comes loose is highly recommended. This prevents the cabinet from falling unexpectedly and allows you to focus on carefully detaching it without worrying about it dropping.
Common Pitfalls and How to Avoid Them
Even with clear instructions, mistakes can happen, especially when you’re trying to remove a cabinet without causing damage. The most common issues involve forcing things too much, not using the right tools, or overlooking a hidden screw. These can lead to chipped paint, gouged drywall, or even cracked cabinet components.
By being aware of these potential problems and taking simple precautions, you can make sure your cabinet removal goes smoothly and your kitchen stays looking great. We’ll cover how to prevent these issues.
Forcing the Cabinet
One of the biggest mistakes beginners make is using too much force. When a cabinet feels stuck, the natural instinct might be to pull harder or pry more aggressively. However, this is precisely when damage occurs.
Walls are often not as strong as they look, and cabinets can be brittle. Instead of brute force, always try to figure out why it’s stuck. This usually means double-checking for missed screws, cutting sealant more thoroughly, or using smaller, more precise tools for leverage.
- Recognizing Resistance: If the cabinet doesn’t move with gentle pressure, it’s a sign that something is still holding it. Don’t interpret this resistance as a cue to apply more force. It’s a signal to investigate further.
- The “Why” of Stuck Cabinets: Common reasons a cabinet resists removal include overlooked screws, adhesive bonding, or nails that weren’t visible. Sometimes, the cabinet might be plumbed and leveled with shims that are also attached.
- Gentle and Steady is Key: Always aim for slow, controlled movements. If you’re prying, use a rocking motion rather than a sudden yank. This allows the materials to release gradually and reduces the risk of cracking or tearing.
Damaging the Wall or Surrounding Cabinets
The primary goal is to remove the cabinet without leaving a mark on your walls or adjacent cabinetry. This is where protective measures really shine. Using painter’s tape liberally, placing buffers like wood or cardboard behind your pry bar, and working with a helper who can guide the cabinet away from sensitive areas are all vital.
Even a small slip of a tool can cause a noticeable ding or scratch that will need repair. Patience and careful handling are your best defense against this type of damage.
- Importance of Protective Buffers: Always use a barrier between your tools and the surfaces you are working on. Thin pieces of wood, rigid cardboard, or plastic shims prevent the metal edges of pry bars or screwdrivers from digging into drywall or scratching cabinet finishes.
- Strategic Use of Painter’s Tape: Apply painter’s tape along the edges of the wall where the cabinet meets it, and around any adjacent cabinets. This tape acts as an initial layer of protection and also marks the boundary of your safe working zone, reminding you to be careful.
- Helper’s Role: A second person can act as spotter and guide. As the cabinet begins to detach, they can help control its movement, ensuring it doesn’t swing or fall against the wall or another cabinet. This is especially useful for heavier cabinets.
Missing Hidden Fasteners
Sometimes, screws or nails are hidden from plain sight. They might be placed behind a decorative trim piece, deeper inside the cabinet structure, or painted over. Before you start prying, take a thorough look inside and around the cabinet.
Run your hand along the edges and inside corners. If you’re using a drill, a low-speed setting can sometimes help you feel for resistance from a screw without stripping it. If you encounter unexpected stiffness, always pause and re-inspect for these hidden fasteners.
- Thorough Inspection is Crucial: Before applying any force, spend time inspecting the cabinet from all angles. Look for any slight misalignments, bumps, or areas that look like they might conceal a fastener. Gently probing with a thin tool can help reveal hidden screws.
- Feeling for Resistance: When using a screwdriver or drill, pay attention to how the fastener feels. If it stops turning easily or feels like it’s grinding, it might be hitting something or might not be fully seated. This is a good time to stop and look more closely.
- Dealing with Painted-Over Screws: Sometimes, screws are painted over to match the cabinet. You might need to gently scrape away a small amount of paint around the screw head to get a good grip with your screwdriver or drill bit.
Post-Removal Considerations
Once the cabinet is off the wall, your job isn’t quite finished. You’ll need to deal with the wall where the cabinet used to be. This usually involves filling any screw holes and touching up the paint.
Also, think about what you’re going to do with the cabinet itself. If you plan to reuse it, store it carefully. If not, consider how to dispose of it responsibly.
Preparing for these final steps ensures your project feels complete and tidy.
Repairing the Wall
After the cabinet is gone, you’ll see the marks left behind: screw holes and possibly some scuffs from installation or removal. For screw holes, a small amount of spackling paste or drywall compound is usually enough. You just press it into the hole with a putty knife and smooth it level with the wall.
Let it dry, then sand it lightly until it’s smooth. If there are any scuffs or minor dings on the wall, you can often fix them with a bit of light sanding and then repainting the area to match the rest of the wall. It’s good to have some leftover paint from when the room was originally painted.
- Filling Screw Holes: Use a small amount of spackling paste or lightweight joint compound. Apply it with a putty knife, pressing it into the hole. Smooth the surface so it’s flush with the wall. For deeper holes, you might need a second application after the first dries.
- Sanding for Smoothness: Once the spackle is completely dry (this can take a few hours), gently sand the area with fine-grit sandpaper (around 150-220 grit). You want the patched area to be perfectly smooth and level with the surrounding wall. Wipe away any dust with a damp cloth.
- Repainting: For best results, repaint the patched area. If possible, use the original paint color and finish. For larger patches or if the surrounding paint is faded, you might need to paint a larger section of the wall to ensure the repair blends in seamlessly.
Storing or Disposing of the Cabinet
If you’re keeping the cabinet, find a safe, dry place to store it. Stack other lightweight items on it if needed, but avoid placing heavy objects on top that could cause damage. If you’re getting rid of it, check your local waste disposal guidelines.
Many areas have specific days for bulky item pickup, or you might need to take it to a recycling center or transfer station. If the cabinet is still in good condition, consider donating it to a local charity or Habitat for Humanity ReStore. This is a great way to give it a new life and help others.
- Proper Storage: If you intend to reuse the cabinet, store it in a clean, dry environment away from moisture and extreme temperatures. Place it on a flat surface and avoid stacking heavy items on it that could warp or damage the structure.
- Donating Usable Cabinets: Many organizations accept donations of used building materials and home goods. A cabinet in good condition can be a valuable asset to someone else. Check with local charities or home improvement donation centers.
- Responsible Disposal: For cabinets that are no longer usable, research your local waste management options. Some municipalities offer special pick-up services for large items, while others require you to transport them to a designated facility. Ensure you comply with local regulations for disposal.
Frequently Asked Questions
Question: Can I remove a kitchen cabinet by myself?
Answer: Yes, you can remove a single kitchen cabinet by yourself if you have the right tools and follow the steps carefully. It’s important to be patient and avoid using excessive force.
Question: What is the most common mistake when removing cabinets?
Answer: The most common mistake is using too much force when the cabinet feels stuck. This often leads to damage to the wall or the cabinet itself. It’s better to stop and re-check for hidden screws or seals.
Question: How do I protect my wall from damage?
Answer: You can protect your wall by using painter’s tape around the edges, placing a thin piece of wood or cardboard behind your pry bar, and having a helper to guide the cabinet as it comes loose.
Question: What if I can’t find all the screws?
Answer: Carefully inspect the cabinet again, both inside and out. Look for screws hidden behind trim, painted over, or located in unusual spots. Running your hand along the edges can sometimes help you feel for them.
Question: How much time does it typically take to remove one cabinet?
Answer: For a beginner, removing one cabinet could take anywhere from 30 minutes to an hour, depending on how easily it comes apart and how prepared you are. Someone experienced might do it faster.
Wrap Up
You’ve learned How to Remove a Single Kitchen Cabinet Without Damaging the Wall. By preparing well, understanding how cabinets attach, and following simple steps, you can successfully take one down. Remember to work patiently, use your tools wisely, and protect your surfaces.
You’ve got this!

Leave a Reply