
Fixing up old furniture to become kitchen cabinets might sound tricky, but it’s often simpler than you think! Many beginners feel unsure where to start, worrying about making mistakes. But don’t worry, we’ll walk through this step-by-step.
You can totally do this! We’ll show you how to make your old pieces look amazing in your kitchen. Get ready to transform your space with these easy ideas.
Making Kitchen Cabinets from Old Furniture
This section will guide you through the exciting process of transforming old furniture into functional and stylish kitchen cabinets. It’s a great way to save money and add unique character to your home. We’ll cover how to choose the right pieces, what tools you might need, and the basic steps to get started.
Think of this as your roadmap to a one-of-a-kind kitchen.
Choosing the Right Furniture
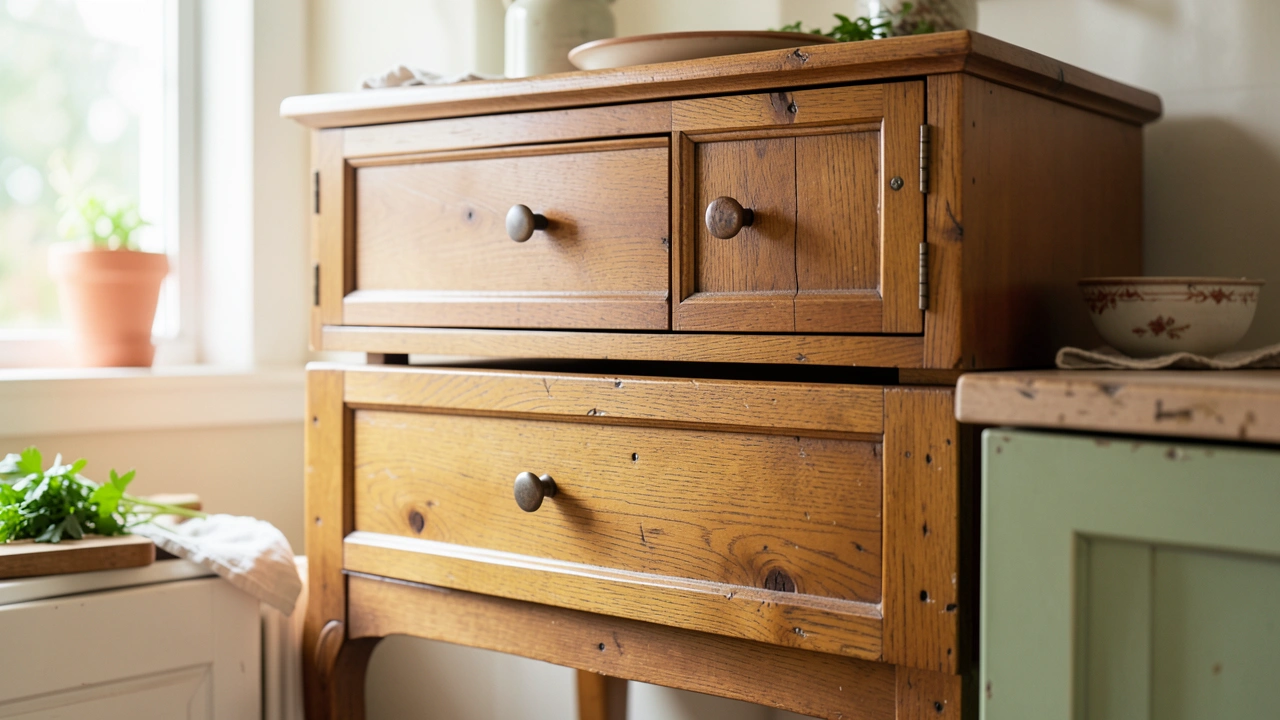
The first big step is picking the best old furniture for your kitchen project. You want pieces that are sturdy and have a good shape for cabinets. Look for solid wood items if possible.
Avoid anything that is too warped or has a lot of damage that’s hard to fix. Think about the size you need for your kitchen space too.
- Sturdy Construction: Look for furniture that feels solid. If you can wiggle it a lot, it might not be the best choice. Cabinets need to hold weight, so strong joints are important. Try to tap on the wood; it should sound firm.
- Good Proportions: Measure your kitchen space carefully. Then, look for furniture that will fit well. A tall dresser could become a pantry cabinet, or a low console table could be a base cabinet. Don’t be afraid to think outside the box!
- Material Matters: Solid wood is usually the best. It’s strong and easier to work with. Plywood can also be good, but avoid particleboard or MDF if it’s already in bad shape. These materials don’t hold up as well to moisture, which can be a problem in kitchens.
Tools and Supplies You’ll Need
To get your furniture ready for the kitchen, you’ll need a few basic tools and supplies. Most of these are common household items or can be found at any hardware store. Having the right tools makes the job much easier and safer.
Let’s list out what will be most helpful for this project.
- Measuring Tape: Essential for taking accurate measurements of your furniture and your kitchen space.
- Screwdriver Set: Needed for taking apart existing hardware and attaching new hinges or drawer slides.
- Drill and Drill Bits: Useful for making holes for screws, hinges, and any new mounting points.
- Sandpaper (various grits): You’ll need this to smooth surfaces before painting or staining. Start with coarser grit and move to finer grit for a smooth finish.
- Paint or Stain: To give your cabinets a fresh new look. Choose something durable for kitchen use.
- Primer: Helps paint stick better, especially to slick surfaces, and gives a more even color.
- Brushes and Rollers: For applying paint or stain evenly.
- Safety Gear: Gloves, safety glasses, and a dust mask are important to protect yourself.
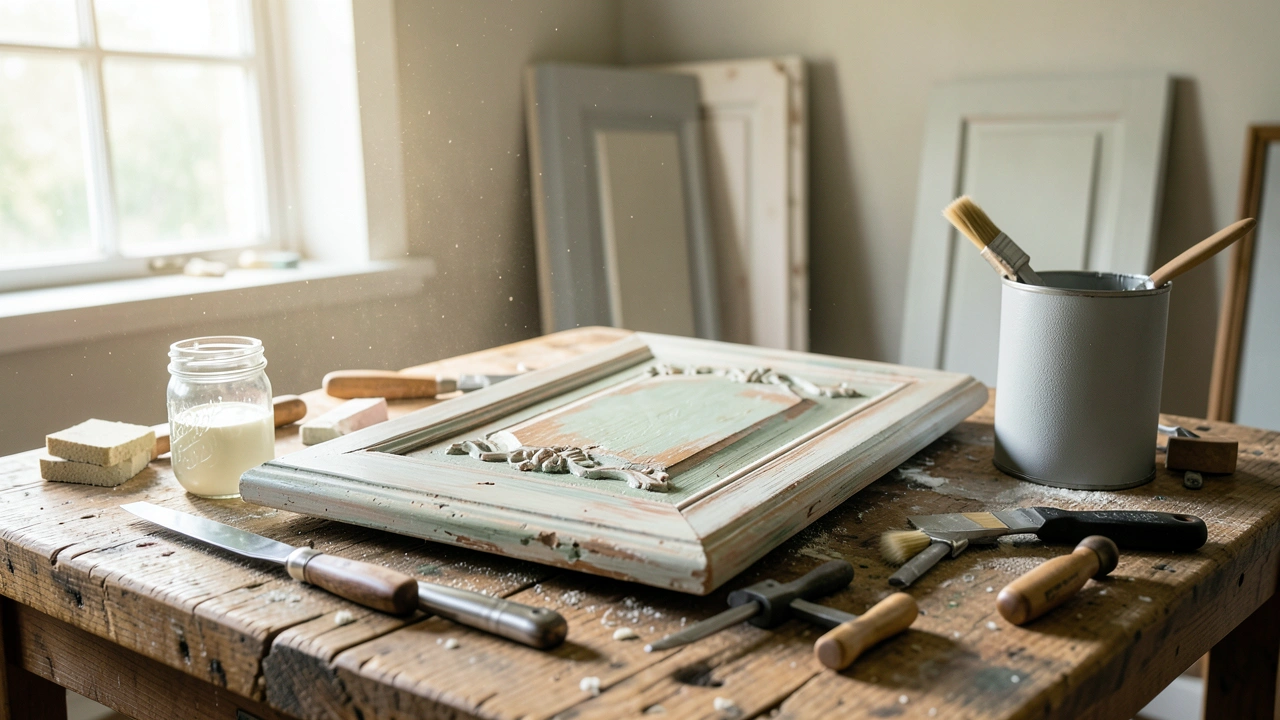
Preparing Your Furniture
Before you can transform your old furniture, you need to get it ready. This usually involves cleaning it thoroughly and maybe doing some minor repairs. It’s like giving the piece a good spa day before its big makeover.
A clean surface helps paint and finishes look much better.
- Cleanliness is Key: Wash down the furniture with a mild soap and water solution. Make sure to get into all the nooks and crannies. Any grease or dirt will prevent paint from sticking.
- Remove Old Hardware: Take off any old knobs, pulls, or hinges. You can often reuse these if they are in good shape, or you can
- Small Repairs: Fix any loose joints by adding a bit of wood glue and a screw if needed. Fill any small holes or dents with wood filler. Let it dry completely before sanding.
How to Fix Kitchen Cabinets Made from Old Furniture
This section focuses specifically on the repair and modification aspects involved in turning old furniture into functional kitchen cabinets. We will discuss common issues that arise with older pieces and provide solutions for them. Fixing up these pieces might seem tough, but with the right approach, you can make them sturdy and beautiful for your kitchen.
Addressing Structural Issues
Old furniture can sometimes have wobbly parts or loose joints. These need to be fixed so your cabinets are strong and safe. If a piece isn’t solid, it won’t work well as a cabinet.
We’ll look at how to make sure everything is firm and stable. This is a key step in making sure your new cabinets last a long time.
- Loose Joints: If cabinet doors or drawer parts feel loose, you can often fix this. Open up the joint slightly and add wood glue. Then, use a clamp to hold it tight while the glue dries. For extra strength, you can add a screw if it won’t be seen.
- Warped Wood: Sometimes drawers or doors can warp over time. If it’s a small warp, you might be able to fix it by clamping it flat while it dries or by using a steam treatment carefully. For bigger warps, you might need to replace the part.
- Sagging Shelves: If shelves in a dresser or cabinet are sagging, you can add extra support. A simple way is to add a thin strip of wood underneath the front and back edges. You could also add a small wooden brace in the center.
Reinforcing for Kitchen Use
Kitchen cabinets deal with more wear and tear than regular furniture. They get opened and closed a lot, and they hold heavy items. So, we need to make sure the old furniture can handle this.
Reinforcing key areas will make your cabinets last much longer and work better in your kitchen.
- Drawer Strength: Drawers are used very often. If the drawer box feels weak, you can add small wooden corner braces inside. You might also want to upgrade the drawer slides to newer, smoother ones. These are inexpensive and make a big difference.
- Door Hinges: Older furniture might not have hinges designed for cabinet doors. You’ll likely need to install new cabinet hinges. This involves drilling pilot holes and screwing the hinges in place securely. Make sure they are aligned so the doors close properly.
- Shelf Stability: If you plan to add shelves or if the existing ones are weak, make sure they are well-supported. You can use sturdy shelf pins that fit into drilled holes. For heavier loads, consider adding a wooden support strip along the back of the shelf.
Example of Reinforcement: Upgrading Drawer Slides
Imagine you’ve found a beautiful old writing desk you want to turn into kitchen base cabinets. The drawers slide okay, but they feel a bit flimsy and don’t open very smoothly.
- First, remove the drawer and clean out the drawer box. Check the joints to make sure they are tight. Add glue and a clamp if needed.
- Then, carefully remove the old drawer runners from both the drawer and the desk frame.
- Measure and mark where the new drawer slides will go. Modern drawer slides usually come with instructions. You’ll typically attach one part to the drawer box and the other to the cabinet frame.
- Drill pilot holes and screw the new slides in place. Ensure they are level and parallel.
- Test the drawer to see how smoothly it opens and closes. These new slides will make a huge difference in the usability of your cabinet.
This simple upgrade makes the drawer much stronger and easier to use, crucial for kitchen cabinets.
Modifying for Kitchen Functionality
Sometimes, old furniture needs a few tweaks to work perfectly as kitchen cabinets. You might need to add shelves, cut openings, or change how drawers work. These changes help make the space inside more useful for storing dishes, pots, and pans.
We’ll focus on practical adjustments that make a real difference.
- Adding Shelving: Many pieces of furniture don’t have the right kind of shelves for kitchens. You can add adjustable shelves by drilling holes and inserting shelf pins. Or, you can install fixed shelves by screwing them into place. Use wood that is strong enough to hold dishes.
- Creating Drawer Dividers: To keep things organized inside drawers, consider adding dividers. You can make simple dividers from thin pieces of wood or plywood. This helps separate utensils and other kitchen tools, making them easy to find.
- Adjusting Door Openings: You might want to remove doors from a hutch to create an open shelving unit, or you might need to adjust the size of door openings. Carefully measure and cut wood if you need to make changes. Always use a straight edge and a sharp saw for clean cuts.
How to Fix Kitchen Cabinets Made from Old Furniture: Finishing Touches
Once the main fixes are done, it’s time to make your cabinets look beautiful. This part is all about painting, staining, and adding hardware to give them a fresh, new look. The right finish can completely change the feel of your furniture and make it fit right into your kitchen decor.
This is where the transformation really shows.
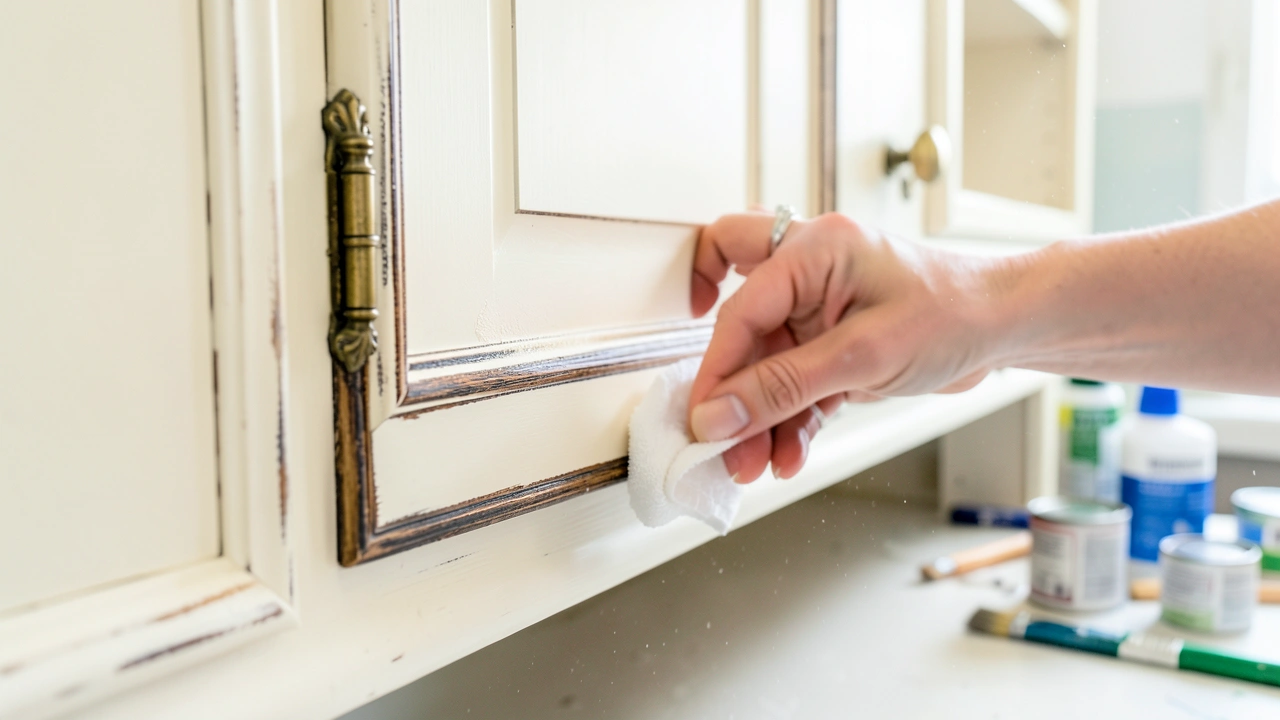
Sanding and Surface Preparation
Before you can paint or stain, the surface needs to be perfectly smooth. Sanding removes old finishes and creates a clean canvas for your new color. This step is super important for a professional-looking result.
Skipping it can lead to a bumpy or uneven finish.
- Start with Coarse Grit: If there’s old paint or a thick varnish, begin with sandpaper that has a coarser grit (like 80 or 100). This will quickly remove the old layer.
- Move to Finer Grits: After the old finish is off, switch to finer grit sandpaper (like 150 or 220). This smooths out any scratches left by the coarser paper. The smoother the surface, the better the paint or stain will look.
- Clean Thoroughly: After sanding, wipe down the entire piece with a tack cloth or a damp rag to remove all the dust. Any dust left behind will show up in your finish.
Painting and Staining Techniques
Choosing between paint and stain depends on the look you want. Paint offers a wide range of colors, while stain brings out the natural beauty of the wood. Whichever you choose, applying it correctly will make a big difference.
- Priming is Important: For painting, always apply a good primer first. It helps the paint adhere better, covers up any stains from the old wood, and makes your final color more vibrant. Let the primer dry completely according to the product instructions.
- Even Coats of Paint: Apply paint in thin, even coats. Use a good quality brush for edges and details, and a roller for larger flat areas. It’s better to apply two or three thin coats than one thick, drippy one. Let each coat dry before applying the next.
- Staining for Natural Beauty: If you choose to stain, apply the stain evenly with a brush or rag. Wipe off the excess stain with a clean cloth after a few minutes, following the direction of the wood grain. This process enhances the wood’s natural patterns.
- Protective Topcoat: After painting or staining and letting it fully cure, apply a clear protective topcoat. A polycrylic or polyurethane finish will protect your cabinets from moisture, stains, and wear. This is especially important for kitchen cabinets.
Case Study: A Dresser to Pantry Cabinet Transformation
Sarah found an old, sturdy oak dresser. She wanted it to serve as a pantry cabinet in her kitchen.
- She first cleaned the dresser thoroughly. Then, she removed the hardware and sanded it down using 120-grit sandpaper, followed by 220-grit for smoothness.
- She applied a wood filler to some small dings and let it dry. After more sanding, she wiped it clean.
- Sarah decided to paint it a soft gray. She applied two coats of primer, letting each dry. Then, she applied three thin coats of furniture paint, allowing ample drying time between coats.
- After the paint cured, she applied two coats of a water-based polyurethane for protection.
- Finally, she installed new, modern drawer pulls. The result was a beautiful and functional pantry cabinet that looked like it belonged in her kitchen.
This transformation saved Sarah money and gave her a unique piece of furniture.
Hardware and Accessories
The final touches can really make your refurbished cabinets shine. New hardware can give them a completely different style. Think about what kind of look you want for your kitchen.
- Knobs and Pulls: This is an easy way to update the look of your cabinets. You can choose from endless styles, from sleek modern designs to rustic farmhouse looks. Make sure to measure the distance between screw holes if you are replacing existing hardware.
- Hinges: If you replaced or added doors, the type of hinges you use can affect how they open and close. Soft-close hinges are a great upgrade for kitchen cabinets, as they prevent doors from slamming shut.
- Drawer Slides: As mentioned before, upgrading drawer slides makes a huge difference in how functional your cabinets are. Smooth-gliding drawers are a joy to use.
DIY Kitchen Cabinet Project Examples
Seeing what others have done can give you great ideas for your own project. These examples show how different types of furniture can be turned into fantastic kitchen cabinets. They prove that with a little creativity, almost anything is possible.
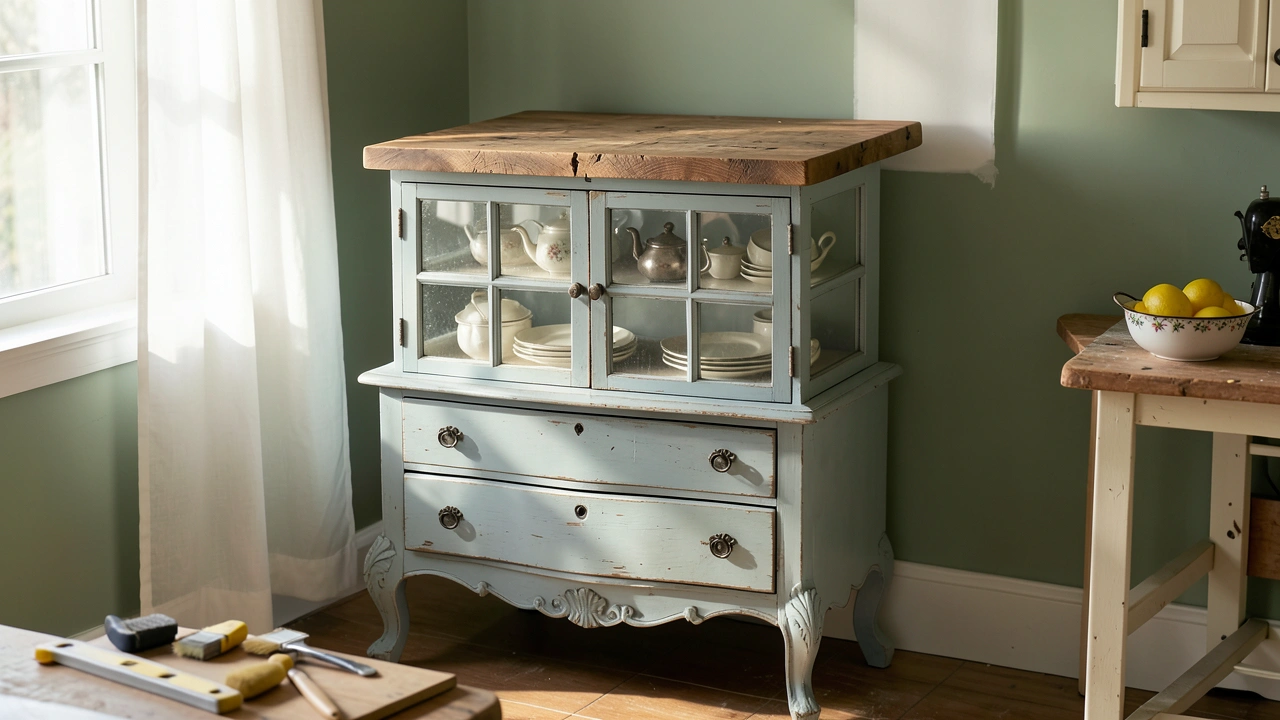
From Old Hutches to Wall Cabinets
A tall china hutch or display cabinet can be perfect for creating upper wall cabinets. The enclosed glass sections are great for displaying dishes or glassware, while the lower solid sections can store less pretty items.
- Adaptation: You might need to remove the legs of the hutch if it’s too tall, or reinforce the back if it’s not sturdy enough for wall mounting.
- Modification: Consider removing some shelves or adding new ones to fit your specific kitchen needs. You might also want to
- Mounting: Securely mounting a hutch to the wall is critical for safety. Use heavy-duty brackets designed for wall cabinets.
Repurposing Sideboards and Buffets
Sideboards and buffets are often the perfect size and shape for base kitchen cabinets. They usually have a good amount of storage space with a mix of drawers and cabinets.
- Functionality: These pieces often come with built-in shelves and drawers that can be easily adapted for kitchen use. You might need to add more shelves or divide larger compartments.
- Durability: Most sideboards and buffets are well-built and can withstand the demands of a kitchen environment after some reinforcement.
- Aesthetic: Their existing style can add a lot of charm to a kitchen, especially if you update the hardware to match your decor.
Scenario: Creating a Beverage Station from a Small Cabinet
You have a small, old accent cabinet with a door and maybe a shelf inside. You want to turn it into a dedicated beverage station.
- Clean and sand the cabinet. Paint or stain it to match your kitchen.
- Install new hinges if needed, and a stylish knob or pull for the door.
- Add a small wine rack insert or some shelf dividers inside to hold bottles or glasses.
- Consider adding a small, built-in shelf for a coffee maker or espresso machine if the cabinet is deep enough.
- Place it in a corner of your kitchen or dining area for easy access to your favorite drinks.
Frequently Asked Questions
Question: Can I use any old furniture for kitchen cabinets?
Answer: It’s best to choose furniture that is made of solid wood or has a strong frame. Pieces that are very wobbly or have significant water damage might be too difficult to fix safely for a kitchen environment.
Question: Do I need to be a carpenter to do this?
Answer: No, you don’t need to be a professional carpenter. Basic DIY skills, like using a screwdriver and a drill, along with following instructions carefully, are usually enough for most projects. Many people learn as they go.
Question: How long does it take to fix up old furniture for kitchen cabinets?
Answer: The time it takes can vary a lot depending on the size of the furniture and how much work it needs. A simple project might take a weekend, while a larger one could take several weeks, especially if you’re doing multiple pieces.
Question: What kind of paint is best for furniture cabinets?
Answer: For kitchen cabinets, you’ll want a durable paint. Cabinet-specific paints, enamel paints, or chalk paint with a strong topcoat are good choices. They hold up well to cleaning and wear.
Question: How do I make sure the cabinets are safe to use?
Answer: Ensure all joints are strong and secure. If you’re mounting cabinets to the wall, use heavy-duty brackets and find studs for secure attachment. For base cabinets, make sure they sit level and are stable.
Summary
Transforming old furniture into kitchen cabinets is a rewarding DIY project. By following simple steps for choosing, preparing, repairing, and finishing, you can create unique, functional, and beautiful kitchen storage. Your new cabinets will add personal style and save you money.

Leave a Reply