
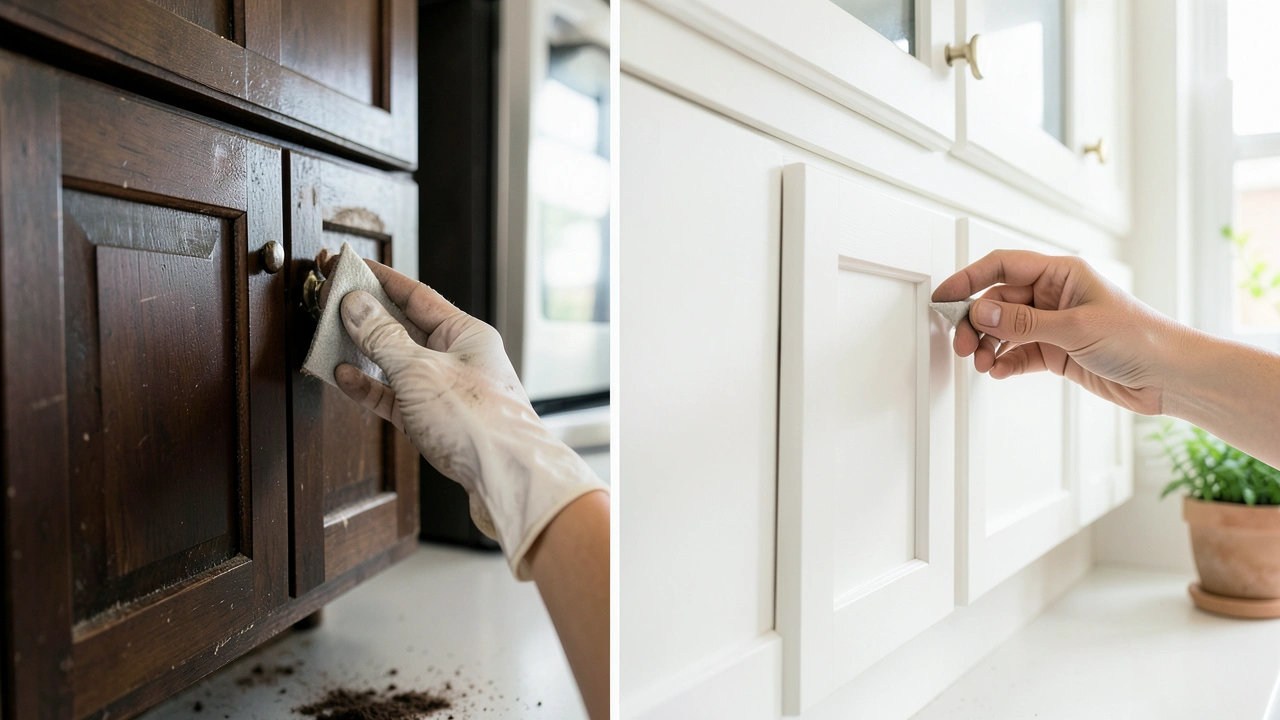
Are you looking to brighten up your kitchen without the worry of paint chipping off later? Many folks wonder How to Change Kitchen Cabinets from Dark to White Without Peeling because it sounds tricky. You might think it’s a big job, especially if you’re new to DIY projects.
But don’t worry! We’ve got a simple, step-by-step way to get that fresh, white look that lasts. Let’s see how you can do it right, avoiding those common peeling problems.
Getting Your Cabinets Ready for a White Makeover
This section focuses on the critical first steps needed to ensure your cabinets will hold paint well and not peel later. It covers cleaning, repairs, and proper sanding, which are the foundation of any successful cabinet painting project. We’ll explore why each of these stages is important for long-lasting results, setting you up for a beautiful, fresh kitchen look.
Deep Cleaning: The First Big Step
Before you even think about paint, your cabinets need a really good clean. Any grease, grime, or dust will stop the new paint from sticking properly. This can lead to peeling down the road.
Think of it like washing your hands before eating; you need to start with a clean surface for good results.
You’ll want to use a degreaser. A common household option is a mix of warm water and a few drops of dish soap. For tougher grease, especially around stoves, you might need something a bit stronger.
Some people use a solution of TSP (trisodium phosphate) substitute or a specialized kitchen degreaser. Always follow the product’s instructions and wear gloves.
Scrub all surfaces well. Pay close attention to areas where you cook the most, as these spots tend to build up grease the fastest. Don’t forget the inside of cabinet doors if you plan to paint them too.
A clean surface is key to preventing peeling, making your hard work last longer.
- Why Cleaning Matters So Much
Imagine trying to stick a sticker onto a greasy window. It wouldn’t hold very well, right? The same idea applies to painting cabinets.
If there’s any oil, food splatter, or even just sticky fingerprints left on the cabinets, the primer and paint won’t have a strong grip. This weak bond is a primary reason why paint peels. A thorough cleaning creates a smooth, neutral surface that allows the new coatings to adhere properly, acting like a strong glue instead of a slippery surface.
- Choosing the Right Cleaner
For most kitchen cabinets, a good quality degreaser is your best friend. Many commercial kitchen cleaners are designed to cut through grease effectively. If you prefer a DIY approach, a solution of one part white vinegar to two parts water can work for light grime.
For more stubborn grease, a stronger degreaser like a TSP substitute is often recommended. It’s important to test any cleaner on a small, hidden area first to ensure it doesn’t damage the cabinet’s finish.
- The Cleaning Process Itself
Start by removing cabinet doors and drawers. This allows you to access all surfaces more easily. Use a soft cloth or sponge to apply your chosen cleaner.
Work in small sections and wipe down thoroughly. Rinse the cabinets with a clean, damp cloth to remove any cleaner residue. It’s important to rinse well, as leftover cleaner can also interfere with paint adhesion.
Allow the cabinets to dry completely before moving to the next step.
Making Minor Repairs
Once your cabinets are clean, take a good look for any small dents, chips, or holes. These little imperfections can show through paint, especially if you’re going for a smooth, white finish. Filling them now makes your cabinets look brand new.
Wood filler is your go-to for most repairs. For small nicks, a dab will do. For deeper holes, you might need to apply it in layers, letting each layer dry.
Once dry, you’ll need to sand it smooth.
Check hinges and drawer slides too. If anything is loose or broken, fix it now. This prevents problems later when you’re trying to reassemble everything.
- Dealing with Dents and Scratches
Small dents and scratches are very common on kitchen cabinets, especially older ones. For minor dings, wood filler is the easiest solution. You can buy it in a tube or a small tub.
For deeper gouges, you might need to press the filler in firmly and perhaps apply a second layer once the first is dry. The key is to overfill slightly, as the filler can shrink a bit as it dries. Once completely dry, you’ll sand it down.
- Filling Holes and Cracks
If you have screw holes from old hardware or small cracks in the wood, wood filler is again the best choice. Apply it with a putty knife, pressing it into the hole or crack. Make sure the filler is flush or slightly raised compared to the cabinet surface.
Let it dry completely according to the product instructions. Sometimes, especially with larger holes, you might need to build up the filler in thin layers to prevent shrinkage.
- Sanding Repaired Areas
After the wood filler has dried, you need to sand the repaired spots until they are perfectly smooth and level with the surrounding cabinet surface. Start with a medium-grit sandpaper (around 120-grit) and then move to a finer grit (like 220-grit) for a super smooth finish. You want to feel for any bumps or unevenness with your fingertips.
Gently sanding these areas ensures that the repairs will be invisible once painted.
Sanding for Optimal Adhesion
This is a really important step for preventing peeling. Even if your cabinets look okay, sanding creates a slightly rough surface that primer and paint can grip onto. It’s like scuffing up a surface before gluing something to it.
You don’t need to sand off the old finish completely. Just a light sanding will do the job. Use medium-grit sandpaper, like 120-grit, to start.
Then, go over it again with finer sandpaper, such as 220-grit, for a super smooth feel.
After sanding, it’s crucial to clean off all the dust. Use a vacuum with a brush attachment, then wipe everything down with a tack cloth. A tack cloth is a sticky cloth that picks up even the tiniest dust particles.
Skipping this dust removal is a fast track to paint problems.
- The Purpose of Sanding
Sanding cabinets before painting isn’t about removing the old paint or finish. It’s about creating microscopic scratches on the surface. These tiny grooves give the primer and paint something to hold onto.
Without this texture, the new paint layers might just sit on top of the smooth, existing finish, making them prone to chipping and peeling. A light scuff sanding ensures a strong bond between the old and new layers of coating.
- Choosing the Right Sandpaper Grit
For this step, you generally want to avoid very coarse sandpaper, as it can leave deep scratches that are hard to sand out. Start with a medium-grit sandpaper, typically in the 100 to 150-grit range. This is enough to create the necessary surface texture without being too aggressive.
After the initial sanding, switch to a finer grit, like 220-grit sandpaper. This smooths out any marks left by the coarser paper and prepares the surface for a flawless finish.
- Sanding Technique for Cabinets
When sanding cabinets, work in the direction of the wood grain if you can see it. For most cabinet surfaces, especially painted or laminated ones, this isn’t as critical as with bare wood. Focus on consistent pressure across the entire surface.
You can use a sanding block or an orbital sander for larger, flat areas, but for detailed areas like doors and drawer fronts, hand sanding might be best. The goal is to dull the sheen of the existing finish everywhere.
- Dust Removal: The Critical Follow-Up
This cannot be stressed enough: dust is the enemy of a good paint job. After sanding, there will be fine dust particles everywhere. First, use a vacuum cleaner with a brush attachment to remove the bulk of the dust from all surfaces.
Then, use a tack cloth. A tack cloth is specially designed to pick up fine dust that vacuums can miss. Wipe down every surface thoroughly with the tack cloth.
You’ll be surprised how much dust it collects. Ensure all dust is gone before applying primer.
Choosing the Right Primer for a Flawless Finish
Primer is your secret weapon for a durable, non-peeling paint job. It acts as a bridge between your old cabinet surface and the new white paint. A good primer seals the surface, blocks stains, and provides a consistent base for the paint to stick to, which is vital for preventing peeling.
We will explore different types of primers and why they are important. We’ll also talk about how to apply primer correctly to ensure it does its job effectively, setting you up for the best possible outcome.
Understanding Primer Types
Not all primers are created equal, especially when you’re trying to cover dark cabinets and prevent peeling. For dark cabinets, a stain-blocking primer is usually the best choice. This is because dark finishes can sometimes “bleed” through lighter paint colors, even after you’ve painted over them.
A good stain-blocking primer stops these colors from showing through.
Oil-based primers are excellent stain blockers and adhere very well, but they can be harder to clean up and have stronger fumes. Water-based (latex) primers are easier to use and clean up, and many modern formulas offer great stain-blocking power and adhesion. For cabinets, a high-quality bonding primer is also a great option, as it’s designed to stick to slick surfaces.
- Why Primer is Essential for Dark to White Transformations
Transitioning from dark to white cabinets presents a unique challenge. Dark pigments can be stubborn and may leach through lighter paint layers, a phenomenon known as “bleeding.” Primer acts as a barrier, preventing this unsightly bleed-through and ensuring your white paint stays pure and bright. Without adequate priming, you might find yourself applying multiple coats of white paint, only to see faint dark undertones appear over time, or worse, experience peeling where the paint couldn’t properly adhere to the dark surface.
- Stain-Blocking Primers Explained
Stain-blocking primers are specifically formulated to contain powerful blocking agents that trap and encapsulate pigments within the underlying surface. This prevents them from migrating into the topcoats of paint. When covering dark cabinets, especially those with reddish or dark brown undertones, a high-quality stain-blocking primer is indispensable.
It ensures that the original dark color remains hidden, providing a clean canvas for your white paint.
- Bonding Primers for Smooth Surfaces
Some cabinet surfaces, particularly those with a glossy or laminate finish, can be quite slick. Standard primers may struggle to adhere to these smooth surfaces. Bonding primers are designed with special additives that promote adhesion to difficult-to-stick-to materials, including glossy paint, laminate, and metal.
Using a bonding primer on such surfaces is crucial for preventing future peeling, as it creates a tenacious bond that paint can rely on.
- Oil-Based vs. Water-Based Primers
Oil-based primers generally offer superior stain blocking and adhesion, especially for tough surfaces. However, they have strong odors, require mineral spirits for cleanup, and dry slower. Water-based (latex or acrylic) primers are easier to clean up with soap and water, have lower VOCs (volatile organic compounds), and dry faster.
For kitchen cabinets, a high-quality water-based bonding and stain-blocking primer is often a good balance of performance and ease of use, minimizing peeling risks.
Applying Primer Correctly
Once you have your chosen primer, applying it correctly is key. Start with a thin, even coat. You don’t want drips or sags, as these will show through your paint and can be a weak spot.
A good quality brush for edges and corners, and a foam roller for the flat surfaces, will give you the best finish.
Let the primer dry completely according to the manufacturer’s instructions. This is usually several hours, sometimes even overnight. Rushing this step is a common mistake that leads to peeling.
A fully cured primer provides the best surface for the paint to bond to.
- Using the Right Tools for Application
For a professional-looking finish, the tools you use are just as important as the primer itself. A high-quality angled paintbrush, typically around 1.5 to 2 inches wide, is perfect for cutting in edges and reaching into corners. For the larger, flat areas of cabinet doors and drawer fronts, a dense foam roller or a short-nap roller is ideal.
These tools help you apply a smooth, even coat without leaving brush strokes or roller marks, which are common causes of paint failure.
- The Importance of Thin, Even Coats
Applying primer in thick, gloppy coats might seem like it covers better, but it often leads to problems. Thick coats can take longer to dry, increasing the risk of drips and sags. They can also create an uneven surface that the topcoat of paint struggles to adhere to, eventually leading to peeling.
Aim for thin, consistent coats. You can always apply a second thin coat if needed after the first has dried. This approach ensures a strong bond and a smooth finish.
- Drying and Curing Times
Manufacturers provide drying and curing times for a reason. “Dry to the touch” means you can lightly touch it without getting paint on your finger, but it doesn’t mean it’s ready for the next step. “Curing” is the process where the paint or primer fully hardens and reaches its maximum adhesion and durability.
For cabinet painting, it’s essential to let the primer fully cure, which can take anywhere from 24 hours to several days, depending on the product and humidity. Rushing this process significantly increases the chance of peeling and damage.
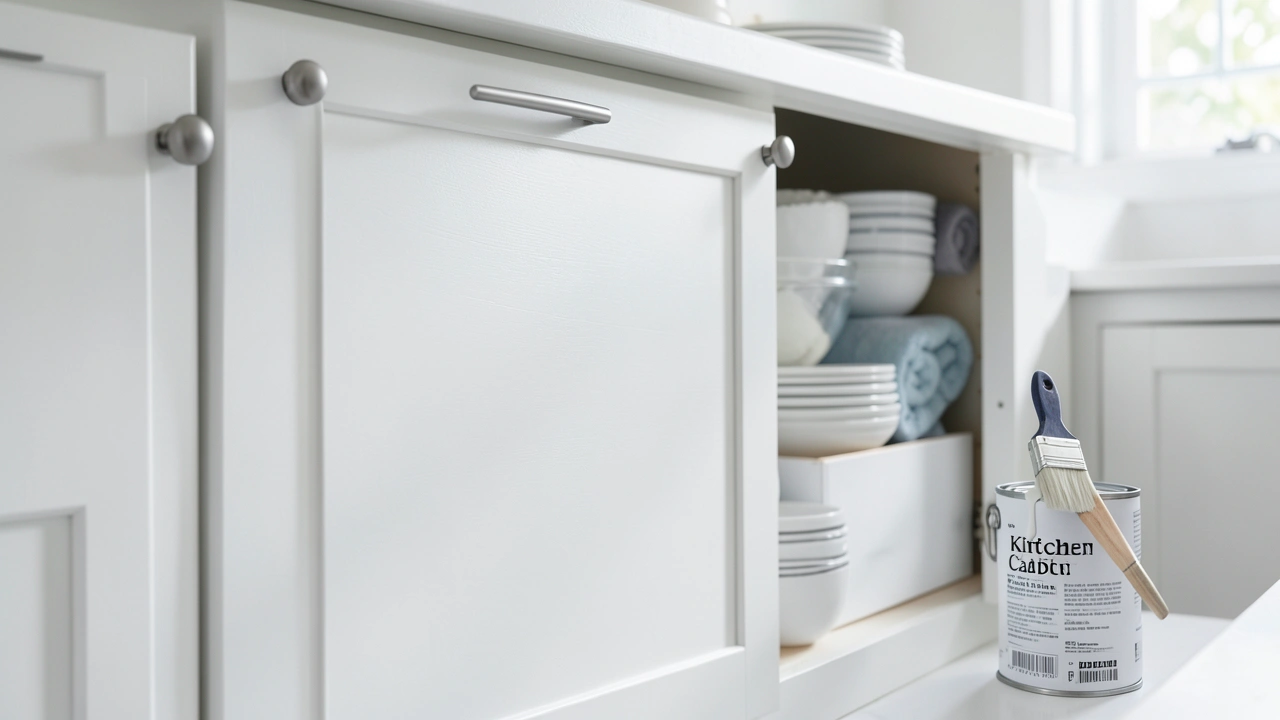
Selecting the Best Paint for a Durable White Finish
Choosing the right white paint is crucial for getting that bright, clean look you want, and more importantly, for making sure it lasts without peeling. You need a paint that’s tough enough for a busy kitchen environment. We’ll talk about the best types of paint and finishes that work well for cabinets.
We’ll also discuss what makes a paint durable and how the finish affects the look and longevity of your cabinet makeover. Getting this right means your white cabinets will stay looking great for years to come.
Paint Types for Kitchen Cabinets
When painting cabinets, especially going from dark to white, you need a paint that is very durable and has excellent adhesion. Latex enamels, particularly acrylic latex enamels, are often recommended. These paints offer good flexibility, which helps prevent cracking, and they adhere well to properly primed surfaces.
Another excellent option is cabinet-specific paint. These paints are formulated to be extremely hard-wearing and provide a smooth, factory-like finish. Some are water-based, making cleanup easier, while others might be oil-based for maximum durability.
For a successful dark-to-white transformation that resists peeling, look for paints labeled as “cabinet coating” or “high-adhesion enamel.”
- The Role of Paint Finish in Durability
The finish of your paint—whether it’s matte, satin, semi-gloss, or high-gloss—plays a big role in its durability and how easy it is to clean. For kitchen cabinets, semi-gloss or satin finishes are generally preferred. They offer a good balance of sheen and cleanability.
High-gloss finishes are the most durable and easiest to wipe down, but they can also highlight imperfections in the cabinet surface. Matte finishes are less durable and can be harder to clean, making them less ideal for high-traffic areas like kitchens, and more prone to showing wear and tear.
- Why Latex Enamels Are Popular Choices
Latex enamels, especially high-quality acrylic latex formulations, are a popular choice for cabinet painting for several reasons. They are water-based, meaning easy cleanup with soap and water. They also have lower VOCs, leading to less odor during application compared to oil-based paints.
Modern acrylic latex enamels offer excellent adhesion, good flexibility (which helps prevent cracking), and good durability when applied over a proper primer. They provide a hard, washable surface suitable for kitchens.
- Specialty Cabinet Paints for Longevity
There are paints specifically designed for cabinets that offer enhanced durability and a smoother finish. These “cabinet coatings” are often a bit thicker and formulated to create a very hard, resistant surface once cured. Some are hybrids, combining the benefits of latex and oil-based paints.
They are engineered for high adhesion and resistance to chips and scratches, which is crucial when going from dark to white and wanting the finish to hold up, preventing peeling and wear.
- Key Qualities to Look For: Adhesion and Hardness
When selecting white paint for your cabinets, prioritize paints that highlight strong adhesion and hardness. Look for terms like “superior adhesion,” “hard-wearing,” or “chip-resistant” on the paint can. These qualities indicate that the paint is formulated to bond well to the surface and withstand the daily wear and tear of a kitchen environment.
A paint that adheres well is less likely to peel, especially when transitioning from a dark color to a lighter one where bleed-through is also a concern.
Applying the White Paint Coats
With primer dry and cured, it’s time for the white paint. Just like with the primer, apply the paint in thin, even coats. Multiple thin coats are always better than one or two thick ones for preventing drips and ensuring a smooth, durable finish.
Use the same tools you used for priming – a good brush for details and a foam roller for the large surfaces. Work in good lighting so you can see where you’ve painted and catch any missed spots or drips immediately.
Allow each coat of paint to dry completely according to the manufacturer’s instructions before applying the next. This drying time is critical for the paint to build up its strength and adhere properly, which is vital for preventing peeling. A typical project might require two to three coats of white paint.
- Technique for Smooth, Streak-Free Coats
Achieving a smooth, streak-free finish on cabinets requires careful application. For cabinet doors and drawer fronts, a high-density foam roller or a micro-fiber roller is excellent. Apply the paint in long, overlapping strokes, working from top to bottom or side to side, depending on the panel’s orientation.
For frames and trim, use a quality angled paintbrush. Maintain a wet edge by overlapping your strokes with the previously painted section. This technique prevents lap marks and ensures a uniform sheen.
- The Importance of Drying Between Coats
This step is non-negotiable for a durable, non-peeling finish. Each coat of paint needs adequate time to dry and harden before the next is applied. Painting over wet or partially dry paint traps moisture, weakens the bond between layers, and can lead to issues like peeling, bubbling, or smudging.
Always check the paint can for recommended drying times between coats, and remember that humidity and temperature can affect drying speed. Patience here pays off immensely.
- How Many Coats Are Typically Needed?
When painting dark cabinets white, you will almost always need multiple coats of paint to achieve full coverage and a consistent, bright white finish. Most projects will require at least two coats of your white topcoat, and often three coats are recommended, especially if the original dark color is very deep or vibrant. Each coat builds upon the last, improving coverage and durability.
Ensuring each coat adheres properly to the one below is crucial for preventing peeling.
- Addressing Drips and Runs Immediately
Even with careful application, drips and runs can happen, especially on vertical surfaces. It’s important to catch these as soon as you see them. While the paint is still wet, use your brush or roller to gently smooth out the drip.
If the paint has started to set, you might need to lightly sand the area down once it’s dry and then reapply a thin coat of paint. Addressing these imperfections promptly prevents them from becoming a permanent flaw and a potential weak spot for peeling.
Sealing Your White Cabinets for Maximum Protection
You’ve come this far – your cabinets are clean, repaired, primed, and painted a beautiful white. Now, it’s time for the final, crucial step to make sure that beautiful finish stays that way and doesn’t start peeling. This is where a protective topcoat or sealer comes in.
It’s the shield that guards your hard work against everyday kitchen life.
We’ll look at why sealing is so important, what kinds of sealers work best, and how to apply them for maximum durability. This final touch is what truly locks in your gorgeous white cabinets.
Why a Topcoat is Non-Negotiable
Kitchen cabinets face a lot of wear and tear. They get touched constantly, splashed with water, and exposed to heat and steam from cooking. A good topcoat adds an extra layer of protection that your paint alone can’t provide.
It shields the paint from scratches, moisture, and grease, all of which can lead to paint failure and peeling over time.
Think of it like putting a clear protective film over a sticker. The sticker might look good on its own, but the film keeps it from getting scuffed up or peeling at the edges. For cabinets, this means your white finish will look fresh for much longer.
- The Protective Barrier Against Wear and Tear
A clear topcoat or sealer acts as the final, durable shield for your newly painted cabinets. Kitchen environments are demanding; cabinets endure constant touching, potential splashes from sinks and cooking, and exposure to humidity and grease. Without a protective layer, the paint itself is more vulnerable to scratches, scuffs, and moisture damage.
These issues can compromise the paint’s integrity, leading to discoloration, wear marks, and eventually, peeling.
- Sealing Out Moisture and Grease
Moisture is a significant enemy of paint. Repeated exposure to water, especially in humid kitchen environments, can weaken the paint’s bond to the cabinet surface. Grease from cooking can also build up and degrade certain types of paint finishes.
A high-quality sealer is impermeable to moisture and grease, preventing them from penetrating the paint layer and causing it to blister or peel. This is especially important for white paint, which can show grime more easily.
- Ensuring Long-Term Adhesion and Preventing Peeling
The final sealing step is critical for long-term adhesion. Even the best paint can eventually fail if not properly protected. The topcoat reinforces the bond between the paint and the primer, creating a more robust system.
This extra adhesion is key to preventing the paint from lifting or peeling away from the cabinet surface, especially in high-moisture areas like around the sink or stovetop. It’s the final insurance policy for your beautiful white cabinets.
Choosing the Right Sealer
For cabinets, you generally want a water-based polyurethane. These are durable, come in different sheens (like satin or semi-gloss), and dry clear without yellowing over time. Avoid oil-based polyurethanes if you want to maintain a pure white color, as they can yellow over time, especially in sunlight.
Look for a water-based polyurethane specifically labeled as durable or for high-traffic areas. Some brands also offer specific cabinet topcoats that are designed for this purpose and provide excellent protection.
- Water-Based Polyurethane: The Top Choice
For most cabinet painting projects, especially when going from dark to white, water-based polyurethane is the preferred choice for a topcoat. It’s known for its durability, resistance to scratching and moisture, and its ability to dry clear without yellowing over time, which is essential for maintaining a bright white finish. Unlike oil-based polyurethanes, it has less odor and easier cleanup with soap and water.
- Sheen Options: Satin vs. Semi-Gloss
Polyurethane sealers come in various sheens. For kitchen cabinets, both satin and semi-gloss are popular and practical. A satin finish offers a soft sheen and is good at hiding minor imperfections, while still being durable and easy to clean.
A semi-gloss finish provides a bit more shine, is very durable, and is exceptionally easy to wipe clean, making it a great choice for high-traffic areas where frequent cleaning is expected. A high-gloss finish is also an option for maximum durability and shine.
- Application Tips for a Seamless Finish
Just like with primer and paint, applying the topcoat thinly and evenly is key. Use a high-quality synthetic brush or a foam applicator for best results. Work in thin coats, allowing each to dry completely before applying the next.
Avoid applying too much product, as this can lead to drips and a gummy finish. Three thin coats are usually better than two thick ones for maximum protection and a smooth, professional look.
Applying the Sealer
Apply the water-based polyurethane in thin, even coats using a synthetic bristle brush or a high-quality foam applicator. Work in the direction of the cabinet’s grain if visible. Avoid over-brushing or over-rolling, as this can create bubbles or an uneven finish.
Let each coat dry thoroughly, typically for several hours, before applying the next.
Most projects will benefit from two to three coats of sealer for maximum protection. Once the final coat is applied and has dried completely, your cabinets are ready to be reassembled. This protective layer is the final step that ensures your white cabinets will resist peeling and wear for a long time.
- First Coat Application
Start with your first coat of water-based polyurethane. Apply it thinly and evenly, using a synthetic brush for edges and a foam applicator for larger surfaces. Work with smooth, long strokes, and try to maintain a consistent flow to avoid drips.
It’s better to apply multiple thin coats than one thick one. If you notice any small imperfections or drips as you go, gently correct them while the finish is still wet.
- Drying and Light Sanding Between Coats
Allow each coat of polyurethane to dry completely. The drying time will be listed on the product label. Once dry, you can opt to do a very light sanding with extra-fine grit sandpaper (like 320 or 400-grit).
This scuffs up the surface slightly, creating a better grip for the next coat and resulting in an even smoother final finish. After sanding, be sure to wipe away all dust with a tack cloth or a slightly damp microfiber cloth.
- Final Coat and Curing
Apply your final coat of polyurethane with the same care as the previous ones. Once this last coat is applied and has dried to the touch, resist the urge to immediately use your cabinets heavily. The polyurethane needs time to fully cure, which is when it reaches its maximum hardness and durability.
This curing process can take several days to a couple of weeks, depending on the product and environmental conditions. During this time, be gentle with your cabinets to avoid any damage.
Frequently Asked Questions
Question: Will painting my dark cabinets white cause them to peel?
Answer: Not if you follow the right steps! Peeling usually happens when the surface isn’t prepared properly, or the wrong products are used. By cleaning, sanding, priming, painting, and sealing correctly, you create a strong bond that prevents peeling.
Question: How long does it take to paint kitchen cabinets white?
Answer: This project takes time because each step needs to dry fully. Expect it to take at least a long weekend, and potentially up to a week or more, depending on how many cabinets you have and the drying times for your specific products.
Question: Can I skip the sanding step?
Answer: Skipping sanding is a common mistake that leads to peeling. Sanding creates a surface texture that allows the primer and paint to stick firmly. Without it, the new finish is likely to peel off.
Question: What is the best white paint for cabinets?
Answer: Look for a high-quality, durable latex enamel or a specialty cabinet paint. Semi-gloss or satin finishes are usually best because they are easy to clean and hold up well in a kitchen. Always use a good primer first.
Question: Do I really need a topcoat for painted cabinets?
Answer: Yes, a topcoat is very important. It adds a tough protective layer that shields your paint from moisture, grease, and daily wear. This layer is essential for preventing peeling and keeping your cabinets looking great for years.
Summary
Transforming dark cabinets to white without peeling is achievable. The key is proper preparation: thorough cleaning, minor repairs, and careful sanding. Using a good stain-blocking primer and a durable white paint, followed by a protective water-based polyurethane topcoat, ensures a lasting, beautiful finish.
Follow these steps for cabinets that look new and stay that way.

Leave a Reply