
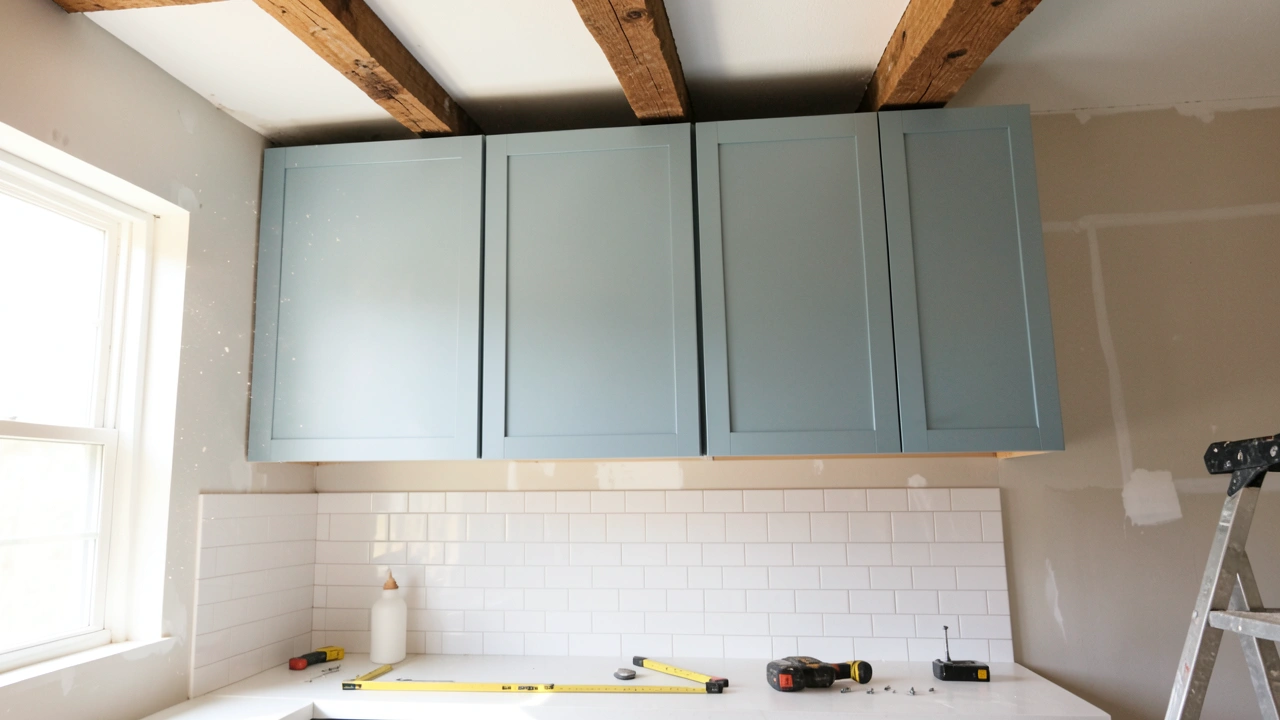
Sometimes, kitchen cabinets can end up hanging a bit too low, making it tough to walk around or reach things. This is a common snag for folks just starting out with home projects. It can feel a little tricky at first, but don’t worry!
We’ll walk you through How to Fix Cabinets Hanging Too Low from the Ceiling with easy steps. Get ready to make your kitchen feel just right!
Understanding Why Cabinets Hang Too Low
It’s a common frustration when kitchen cabinets seem to dip lower than you’d like, almost brushing your head as you pass by. This often happens because of a few simple reasons. Maybe they weren’t hung at the perfect height to begin with, or perhaps the cabinet mounting hardware has shifted over time.
Sometimes, the house itself settles, which can cause things to droop a little. For beginners, spotting the exact cause and knowing how to adjust them can seem like a puzzle. We’ll break down what might be happening so you can get a clear picture of the situation.
When cabinets are too low, it’s not just an eyesore; it can be a real pain in the neck, literally and figuratively. You might bump your head, have trouble using your countertops, or feel like your kitchen is just too cramped. This is why learning how to fix this is so helpful.
We’ll explore the common culprits and how to fix them.
Common Causes for Cabinets Being Too Low
Several things can lead to cabinets hanging lower than they should. The most frequent reason is how they were installed originally. If the installer didn’t use a level or didn’t measure carefully, the cabinets might end up at an awkward height from the start.
Another common issue is related to the fasteners that hold the cabinets to the wall. Over time, screws can loosen, or mounting brackets can sag. This is especially true if the cabinets are holding heavy items.
The weight can gradually pull them down.
Houses also settle. This means the foundation shifts slightly as the building ages. This natural settling can cause parts of the house, including cabinet mounting points, to move.
Even a small shift can make cabinets appear to hang lower.
Finally, changes in flooring can play a role. If you’ve
We’ll look at how to check these things and what to do about them.
The Importance of Proper Cabinet Height
Getting your cabinets at the right height is key for a functional and safe kitchen. The standard height for upper kitchen cabinets is usually about 18 inches from the countertop. This gap gives you enough room to work comfortably on your counters without hitting your head on the cabinets above.
When cabinets hang too low, it can lead to several problems. First, it makes it hard to use your countertops. You might feel cramped while chopping vegetables or prepping food.
It can also create a safety hazard, as people might bump their heads on the cabinet edges, especially children.
Aesthetically, cabinets that are too low can make your kitchen feel smaller and darker. They can block natural light and make the space feel more enclosed. This can detract from the overall look and feel of your kitchen.
When cabinets are at the correct height, it creates a better workflow in the kitchen. It also makes the space feel more open and inviting. It’s about balancing looks and usefulness.
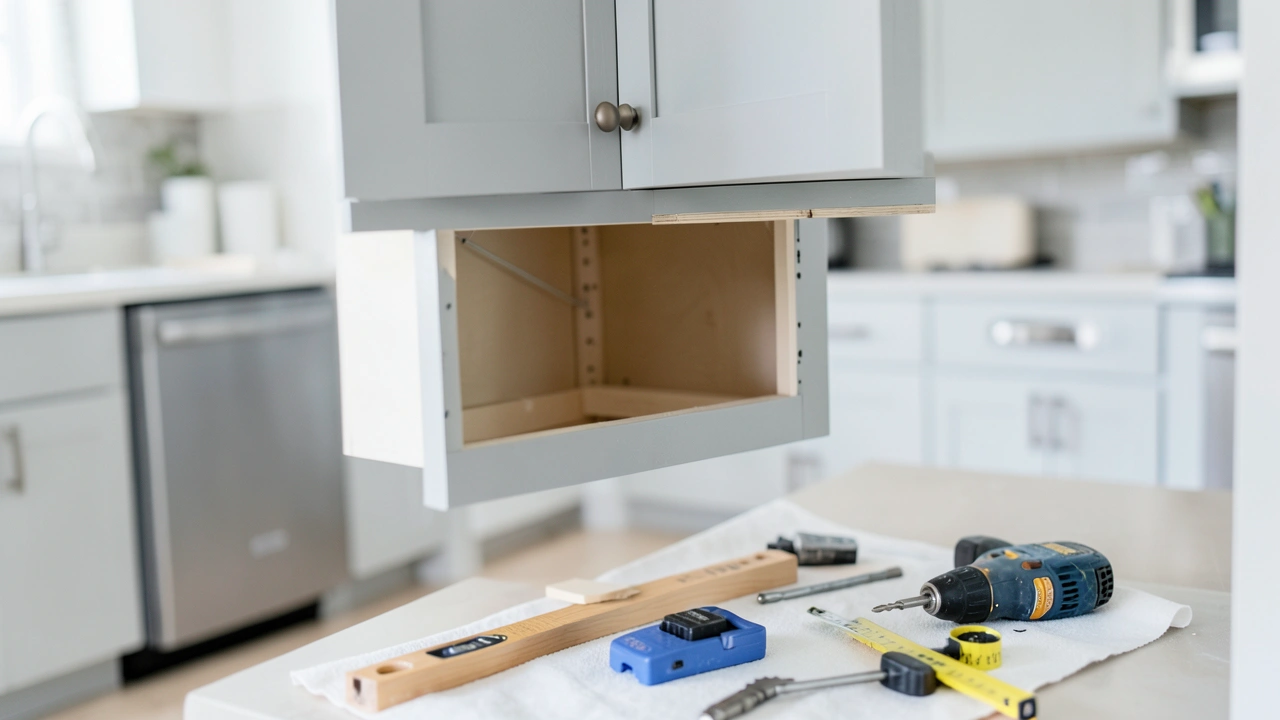
Tools and Materials You Might Need
Before you start fixing cabinets that hang too low, gathering the right tools and materials is important. Having everything ready will make the job go much smoother and faster. You don’t want to stop midway to find a missing item.
- Stud Finder: This tool helps you locate the wooden studs inside your walls. Cabinets need to be secured to these studs for strength.
- Level: A level is crucial for making sure your cabinets are straight and at the right height. You’ll use it often.
- Screwdriver or Drill: You’ll need a screwdriver or a drill with various bits to loosen or tighten screws and install new hardware.
- Measuring Tape: Accurate measurements are key to ensuring your cabinets are positioned correctly.
- Pencil: For marking measurements and locations on the wall and cabinets.
- Safety Glasses: Always wear safety glasses to protect your eyes from dust and debris.
- Cabinet Shims: These are small, thin pieces of wood used to fill small gaps and help level cabinets.
- Longer Screws: Sometimes, you might need longer screws to ensure the cabinets are securely attached to the wall studs.
- Clamps: These can be helpful for holding cabinets in place while you are working on them.
Having these items on hand will prepare you for the task ahead. It’s better to have a few extra things than to find out you’re missing something vital when you’re in the middle of the job.
Steps to Raise Hanging Cabinets
Now that we know why cabinets might hang too low and what tools we need, let’s get to the actual fixing. This part involves carefully adjusting the cabinet’s position. We’ll walk through the process step-by-step, focusing on making the adjustments safely and effectively so your cabinets are at the perfect height.
The goal is to lift the cabinets up. This usually means loosening them slightly, repositioning them higher, and then re-securing them firmly to the wall. It requires patience and precision to make sure they look good and are stable.
Assessing the Current Installation
First, take a good look at how your cabinets are currently attached. You need to understand what’s holding them up. Open the cabinet doors and look inside.
You should see screws or mounting plates connecting the cabinet to the wall. These are often hidden behind the cabinet frame or inside the cabinet box.
Check if the screws are tight. Sometimes, all it takes is a quick tighten with a screwdriver. If they feel loose, this might be why your cabinets have dropped.
Also, look at the mounting hardware. Are there any visible cracks or signs of wear on the brackets?
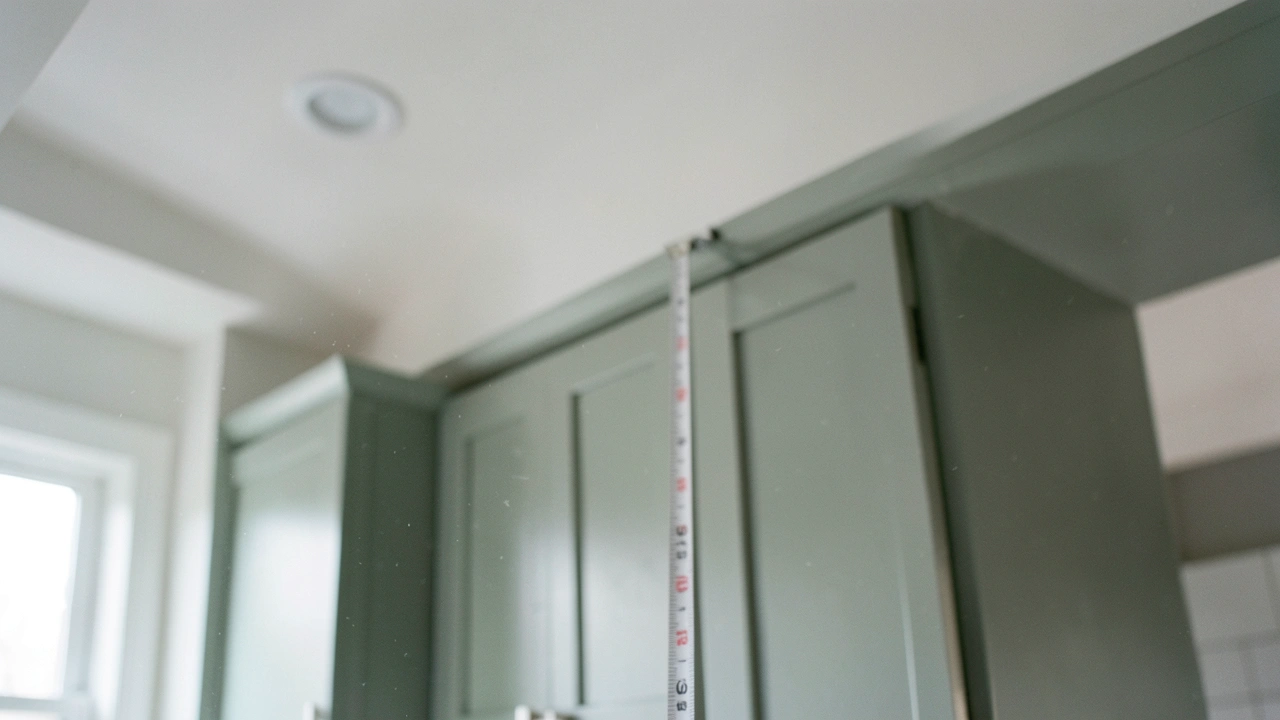
Use your level on the cabinet’s top and bottom edges. See if it’s straight. Check the distance from the countertop to the bottom of the cabinet.
This measurement will tell you exactly how low they are. Knowing these details will help you decide the best way to fix them.
Loosening and Adjusting Cabinet Position
Once you’ve checked the current setup, it’s time to make adjustments. This usually means you’ll need to loosen the screws that hold the cabinet to the wall. Don’t remove them completely, just enough so the cabinet can move up or down.
With the screws loosened, you might need to gently lift the cabinet into its new, higher position. This is where having a helper can be really useful. You’ll want to place shims between the cabinet and the wall if there are any small gaps.
This helps to support the cabinet at its new level.
Use your level again to make sure the cabinet is perfectly straight both horizontally and vertically. Measure the distance from the countertop to the bottom of the cabinet to confirm it’s now at your desired height. It’s all about getting it just right.
This step requires careful attention. If the cabinet isn’t perfectly level, it will look off and could cause problems later.
Securing Cabinets at the New Height
After you’ve lifted the cabinets and they are level at the right height, you need to secure them firmly. This is the most important part for safety and stability. You’ll be putting screws back into the wall studs.
If the old screw holes are too big or stripped, you might need to use slightly longer or thicker screws. Or, you could fill the old holes with wood filler and let it dry, then drill new pilot holes for the screws. Make sure the screws go into the center of the wall studs for the strongest hold.
Use your level one last time after tightening the screws. Check that the cabinet is still straight and hasn’t shifted. Ensure there’s no wobbling.
The cabinet should feel solid and secure against the wall.
This re-securing process guarantees that your cabinets won’t sag again. It’s the final step in making sure they are fixed properly. This often takes a few tries to get all the screws just right.
Using Shims for a Perfect Fit
Shims are small, wedge-shaped pieces of wood that are incredibly useful when installing or fixing cabinets. They help you fill small gaps between the cabinet and the wall. This ensures the cabinet sits flush against the wall and is perfectly level.
When you’re raising a cabinet, there might be a little space left between the back of the cabinet and the wall because the wall isn’t perfectly flat or the cabinet is slightly out of plumb. You can slide shims into these gaps. You can then cut them flush with the cabinet edge.
Shims also help distribute the weight of the cabinet evenly. Instead of just screws holding it, the shims add extra support. This makes the cabinet much more stable and less likely to sag again in the future.
Using shims is a pro trick that makes a big difference in how well your cabinets look and how long they last. They ensure a tight, secure fit every time.
Advanced Tips for Cabinet Height Adjustment
Sometimes, the simple adjustment isn’t enough, or you might want to make sure the fix is as solid as possible. These advanced tips cover situations where things are a bit more involved, or you want to ensure a professional-looking finish. They focus on reinforcing the mounting and making sure the job is done right the first time.
We’ll explore how to deal with walls that aren’t perfectly straight, how to add extra support, and what to do if you need to adjust multiple cabinets. These methods are about making your cabinet fix last and look great.
Dealing with Uneven Walls
Walls are rarely perfectly flat. This can make it tricky to get cabinets perfectly level and flush. If your wall has bumps or dips, the cabinet might not sit straight, even with shims.
This can leave gaps or make the cabinet wobbly.
One way to handle uneven walls is to use more shims strategically. You might need to use them not just at the back but also on the sides of the cabinet. This helps to brace it against the wall evenly.
Another approach is to create a level mounting surface. Some people install a thin strip of plywood, called a ledger board, horizontally on the wall where the bottom of the cabinets will sit. This ledger board is attached securely to the studs and provides a perfectly flat and level surface to rest the cabinets on.
You then attach the cabinets to this ledger board and the studs above it.
This method requires careful measuring and leveling of the ledger board itself, but it ensures a very stable and straight installation, even on imperfect walls.
Reinforcing Cabinet Mounts
For cabinets that hold a lot of weight, or if you simply want extra peace of mind, you can reinforce the mounting system. This means adding more attachment points or using stronger hardware than what was originally installed.
You can add extra screws into the wall studs. If your cabinets only have two screws holding them up, consider adding two more, spaced out evenly. This distributes the weight and stress on the mounting hardware.
Another option is to install cabinet mounting braces. These are metal strips that attach to the wall studs and then the cabinets attach to these braces. They offer very strong support and are often used in professional installations.
You can find them at most hardware stores.
Using longer screws that go deeper into the studs provides a stronger grip. Always make sure the screws you use are designed for structural support and are the appropriate length for your wall material and cabinet thickness.
Reinforcing the mounts ensures your cabinets stay put and can handle the load you put in them. It’s a great way to prevent future sagging.
Adjusting Multiple Cabinets in a Run
If you have a line of cabinets and one is hanging too low, you might need to adjust more than one. When cabinets are installed, they are often connected to each other for stability. If you move one, you might need to adjust its neighbors to keep them aligned.
Start by adjusting the lowest cabinet first. Once you have it at the right height and level, use clamps to hold it in place. Then, unfasten the adjacent cabinet.
You might need to adjust it up or down slightly to match the first cabinet.
Use a long level to ensure the tops and bottoms of all the cabinets in the run are aligned. Connect the cabinets together again once they are all at the correct height and level. This might involve screwing them to each other through their side panels.
It’s important to work your way along the entire line of cabinets. This ensures a seamless look. If you only fix one, it might look out of place next to the others.
Taking the time to align a whole section makes a big difference.
When to Consider Professional Help
While many cabinet adjustments are DIY-friendly, there are times when it’s best to call in a professional. If you’re not comfortable working with tools, or if your cabinets are very old or heavy, a pro can help.
If you’ve tried adjusting them and they still seem unstable, or if you’re worried about damaging your cabinets or your wall, it’s a good idea to get expert advice. Professionals have specialized tools and experience that can make the job easier and safer.
Also, if your cabinets are part of a larger renovation or if you suspect structural issues with your walls, a contractor or handyman can assess the situation more thoroughly. They can ensure the fix is done correctly and safely, preventing potential future problems.
Don’t hesitate to ask for help if the task feels overwhelming. It’s better to get it done right than to risk a costly mistake.
Troubleshooting Common Issues
Even with the best intentions, things don’t always go perfectly. You might run into a few snags when trying to fix cabinets that are hanging too low. This section covers some of the common problems you might face and how to solve them.
It’s about being prepared for the unexpected.
We’ll discuss what to do if screws won’t tighten, if cabinets don’t seem to budge, or if you accidentally make a hole where you didn’t mean to. These tips are for smoothing out the process.
Screws Won’t Tighten
One of the most common issues is when screws no longer grip firmly into the wall stud. This happens when the hole becomes stripped, meaning the wood is too worn for the screw threads to bite into. It’s frustrating when you can’t get the cabinet to feel secure.
If this happens, don’t despair. You have a few options. You can try using a slightly larger screw.
Make sure it’s still the same length or slightly longer and that it’s rated for structural use. The wider threads might catch on the wood better.
Another popular fix is to use wood filler or wooden dowels. You can fill the stripped hole with wood filler, let it dry completely, and then drill a new pilot hole for your screw. Alternatively, you can insert a wooden dowel into the hole, along with some wood glue.
Once the glue dries, you can cut the dowel flush and drill a new pilot hole into the dowel. This provides fresh wood for the screw to grip.
You can also use screw anchors designed for heavy loads, but ensure they are suitable for your wall type and the cabinet’s weight. For cabinets, direct attachment to studs is always preferred.
Cabinets Won’t Budge Upwards
Sometimes, cabinets might feel firmly attached, and you can loosen the screws, but the cabinet just won’t move up. This can be because the cabinet is stuck or wedged in place by something you can’t easily see.
Carefully inspect the area around the cabinet. Is there anything pressing against it, like a piece of trim or another cabinet that’s slightly out of alignment? Gently try to wiggle the cabinet in different directions.
Sometimes, a little rocking motion can help loosen it.
Another possibility is that the cabinet is attached to something other than just the screws you’ve loosened. In some cases, cabinets might be glued or have additional clips holding them. You might need to look for hidden fasteners or small nails.
If you suspect they are truly stuck, double-check that all screws holding the cabinet to the wall are loosened sufficiently. Sometimes, even a single tight screw can hold everything in place. If you’re working with a heavy cabinet, make sure you have adequate support so it doesn’t fall when it finally breaks free.
Accidentally Making New Holes
It’s easy to accidentally put a screw in the wrong spot or make a hole larger than intended. If this happens, it’s not the end of the world. Most minor mistakes can be easily repaired.
For small, unwanted holes, you can use wood filler or spackling paste. Apply it to the hole, let it dry, and then sand it smooth. You can then paint over it to match the wall color.
If you made a larger hole, you might need a small piece of wood to patch it. Cut a piece of wood to fit the hole, glue it in place, and then sand it smooth once dry. Then, you can repaint the area.
If you accidentally made a hole where you needed to screw into a stud, you can often fill that hole and then use your stud finder again to locate the stud and drill a new pilot hole in the correct spot. The key is to be patient and use the right materials to fill and repair the damage.
Cabinet Doors Not Closing Properly After Adjustment
After raising your cabinets, you might find that the cabinet doors aren’t closing quite right. They might rub against each other, the frame, or the countertop. This is a common issue because the slight movement can misalign the doors.
Most cabinet doors have adjustable hinges. These hinges have small screws that allow you to move the door in, out, up, down, and side to side. Look closely at the hinges on your cabinet doors.
You’ll typically find screws that control these different adjustments.
You may need to slightly loosen the hinge screws, adjust the door’s position, and then retighten them. It often takes a bit of trial and error to get the doors to align perfectly. Make small adjustments at a time and check the door’s position after each change.
If the doors are still rubbing, you might need to slightly lift the cabinet again or adjust the hinges more. Sometimes, just a quarter turn of an adjustment screw can make a big difference in how the doors hang and close.
Measuring and Maintaining Cabinet Height
Once your cabinets are at the perfect height, it’s important to know how to measure correctly and keep them that way. This section covers the best practices for ensuring your cabinets are positioned correctly from the start and how to prevent them from sagging again in the future. Good measurement and upkeep are key to a lasting fix.
We’ll talk about the standard measurements for kitchen cabinets and how to do your own checks. We’ll also touch on simple maintenance that can keep your cabinets looking great and functioning well for years to come.
Standard Cabinet Heights Explained
In most kitchens, there’s a standard for how high upper cabinets should be hung. The most common measurement is from the top of your countertop to the bottom of the upper cabinet. This gap is typically around 18 inches.
This height is chosen for a good balance of workspace and cabinet accessibility.
This 18-inch clearance is enough room for most people to comfortably chop food, use small appliances, or mix ingredients on their countertops without constantly bumping their heads. It also allows enough vertical space to make the countertops feel useful and not cramped.
Base cabinets, which sit on the floor, usually have a standard height as well, typically around 34.5 inches from the floor to the top. When installed with a standard 1.5-inch countertop, this brings the total counter height to 36 inches, which is the most common kitchen counter height in North America.
Understanding these standards can help you decide if your cabinets are truly too low or if they were just installed at a non-standard height. For a functional kitchen, sticking close to these measurements is usually best.
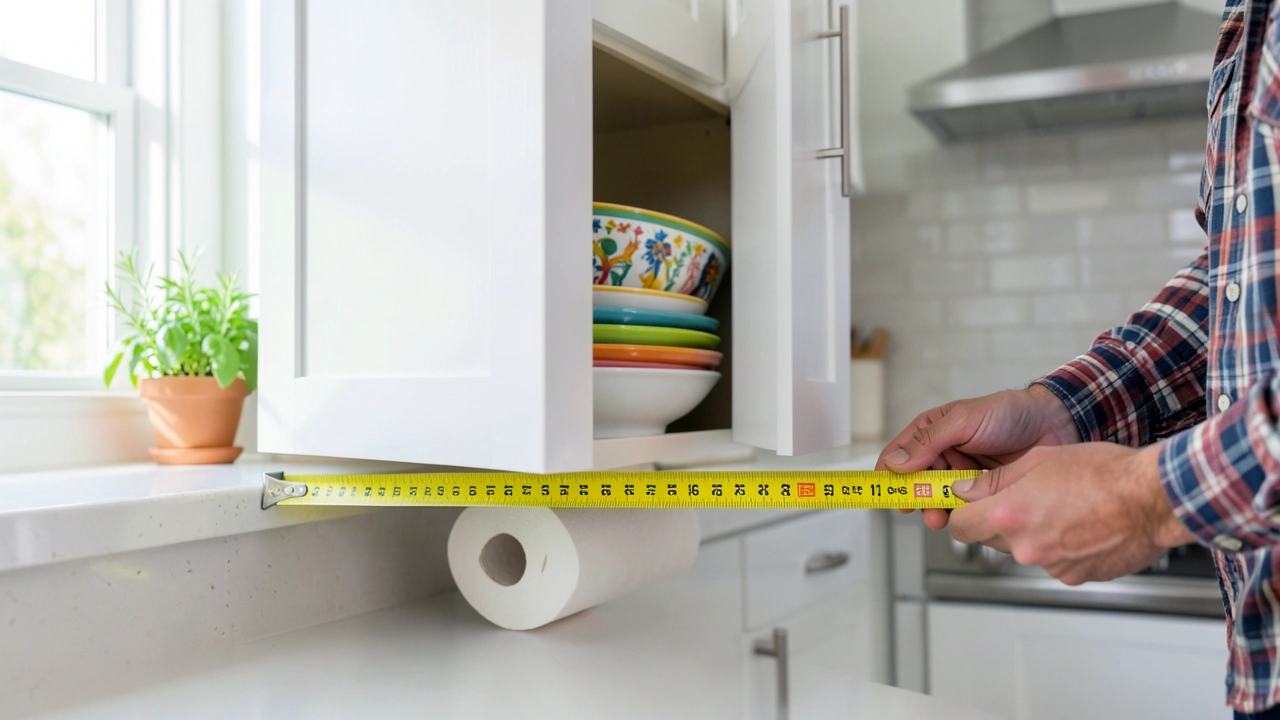
How to Measure for Correct Cabinet Placement
When you’re installing new cabinets or adjusting existing ones, accurate measurement is your best friend. Start by deciding on your desired countertop height. The standard is 36 inches from the floor, but this can be adjusted slightly for your needs.
Once you know your countertop height, measure down from where the top of the countertop will be to the bottom of where you want your upper cabinets to hang. The standard is 18 inches for this space, but you can adjust it. For example, if you have a very tall person in the household, you might want a little more clearance, like 19 or 20 inches.
Mark this desired height on the wall with a pencil. This line will be the bottom edge of your upper cabinets. Use a level to ensure this line is perfectly straight across the entire wall where the cabinets will be installed.
When installing cabinets, you’ll also need to find the wall studs. Use a stud finder and mark their locations. Cabinets must be screwed into studs for safety and stability.
Always double-check your measurements before drilling or screwing anything into the wall.
Regular Maintenance Checks
Preventing cabinets from hanging too low in the first place involves regular checks. It’s much easier to catch a minor issue early than to fix a major problem later.
Periodically, maybe every six months or so, open your upper cabinets and check the screws holding them to the wall. Give them a quick tighten if any feel loose. This simple step can prevent screws from backing out over time.
Also, look for any signs of wear on the mounting hardware or the cabinets themselves. If you notice any cracks, excessive dust around the screws, or if a cabinet feels like it’s leaning even slightly, it’s time for a closer inspection.
Be mindful of how much weight you put in your cabinets. Overloading them can put extra stress on the mounting system. Distribute heavy items evenly.
A quick visual check and a gentle push on each cabinet to feel for wobbling can go a long way in maintaining their proper position. It’s a small effort that pays off in the long run.
Preventing Future Sagging
To stop your cabinets from sagging down again, focus on a few key things during installation and after.
Ensure you are using the correct hardware. Cabinet screws should be long enough to penetrate well into the wall studs. Often, 2.5 to 3-inch screws are recommended for mounting cabinets.
Always install cabinets directly into studs. If you can’t find a stud where you need one, use heavy-duty wall anchors specifically designed for cabinets. However, direct stud mounting is always the strongest and most reliable method.
Consider using cabinet support brackets or a ledger board, especially for long runs of cabinets or if you plan to store heavy items in them. These provide extra support that takes some of the strain off the screws.
Finally, be aware of moisture. Water damage can weaken wood and the connections holding cabinets. Address any leaks or moisture issues promptly.
By taking these preventative steps, you can help ensure your cabinets stay at the ideal height and remain secure for years to come.
Frequently Asked Questions
Question: How far should cabinets hang from the ceiling?
Answer: The distance from the ceiling to the top of upper cabinets can vary based on design preferences and ceiling height. However, there’s no strict rule for this. The more important measurement is usually the space between the countertop and the bottom of the upper cabinets, which is commonly 18 inches.
Question: Can I fix cabinets that have pulled away from the wall?
Answer: Yes, you can often fix cabinets that have pulled away from the wall. This usually involves re-securing them to wall studs. You might need longer screws, wood filler for stripped holes, or even additional mounting hardware to make them stable again.
Question: What if my wall isn’t flat and cabinets don’t sit flush?
Answer: If your wall is uneven, you can use cabinet shims to fill any gaps between the back of the cabinet and the wall. For more significant unevenness, installing a level ledger board on the wall first can create a flat surface to mount the cabinets onto.
Question: How do I know if I’m screwing into a stud?
Answer: Use a stud finder to locate the wooden studs inside your wall. Mark the stud locations with a pencil. When you drill pilot holes or drive screws, aim for the center of these marked areas to ensure a strong connection.
You can also tap the wall; a solid sound usually means you’ve hit a stud.
Question: Should I adjust cabinets myself or hire a handyman?
Answer: If you’re comfortable using basic tools like a drill and level, and the adjustment seems straightforward, you can likely do it yourself. However, if you’re unsure, the cabinets are very heavy, or the wall structure seems questionable, hiring a handyman is a safer bet.
Final Thoughts
Fixing cabinets that hang too low is a manageable project. By understanding the causes and following these steps, you can easily adjust their height. Make sure to measure carefully and secure them well.
Your kitchen will feel better and work more smoothly.