
Have you ever wondered Why Kitchen Cabinets Fail After Installation? It’s a common puzzle for many homeowners starting their first kitchen project. Things can seem simple, but small missteps can lead to big problems later.
Don’t worry if you’re feeling a bit lost; this guide is here to help. We’ll walk through the common reasons cabinets don’t stay put, using easy-to-follow steps. Get ready to learn how to avoid these issues and make sure your kitchen looks great for years to come.
Common Causes of Why Kitchen Cabinets Fail After Installation
This section explores the main reasons why newly installed kitchen cabinets can start to have problems. It’s about looking at the small details that can lead to bigger issues down the line. We’ll cover everything from how the walls are prepared to the actual tools and techniques used.
Understanding these points is key to a solid, long-lasting cabinet installation. We want your kitchen to be beautiful and functional for a long time, and that starts with knowing what can go wrong and how to prevent it.
Wall Preparation is Key
Before cabinets even touch the wall, the wall itself needs to be just right. This means making sure the surface is flat and smooth. Uneven walls can cause cabinets to sit at an angle, putting stress on screws and joints.
It’s like trying to build a house on shaky ground; it just won’t be stable.
Finding and marking wall studs is also super important. Cabinets are heavy, especially when full of dishes and food. They need to be screwed into the solid wood studs behind the drywall.
If you miss the studs, the screws will only hold into the drywall, which can tear out easily. This is a prime example of Why Kitchen Cabinets Fail After Installation if not done correctly.
Sometimes, old paint or wallpaper can make the wall surface bumpy. This needs to be scraped away. You want a clean, solid surface for the cabinet to rest against.
Any loose material can cause the cabinet to shift or loosen over time.
Imagine a picture frame. If the wall behind it is bumpy, the frame won’t sit flat, and the picture might look crooked. Cabinets are much the same, but with much heavier loads.
- Checking for Level and Plumb: Before you start, always check if your walls are level (side to side) and plumb (up and down). A simple long level tool is all you need. If the walls are off, you might need to shim behind the cabinets to make them look straight. This is a very common issue people overlook. Shimming helps create a flat plane for the cabinet to mount to. Without it, the cabinet might warp or put uneven pressure on its joints.
- Locating Studs Accurately: Use a good stud finder. Don’t guess. Once you think you’ve found a stud, test it by gently tapping or pushing a thin nail through the drywall. You should feel resistance when you hit the wood. Marking the edges of the studs clearly helps you line up your cabinet mounting screws perfectly. Missing even one stud can weaken the overall support structure for the cabinet.
- Removing Obstacles: Old nails, screws, or even bumps from previous fixtures need to be removed or flattened. These can prevent the cabinet from sitting flush against the wall. A smooth surface means better contact and a more secure installation. Think of it like putting on a sticker; it sticks best to a clean, smooth surface.
Improper Fastening Techniques
How you attach the cabinets to the wall makes a huge difference. Using the wrong screws or not putting enough of them in can be a big problem. It’s like using small pins to hold up a heavy shelf; it’s just not strong enough for the job.
This is a direct answer to Why Kitchen Cabinets Fail After Installation if you’re not careful.
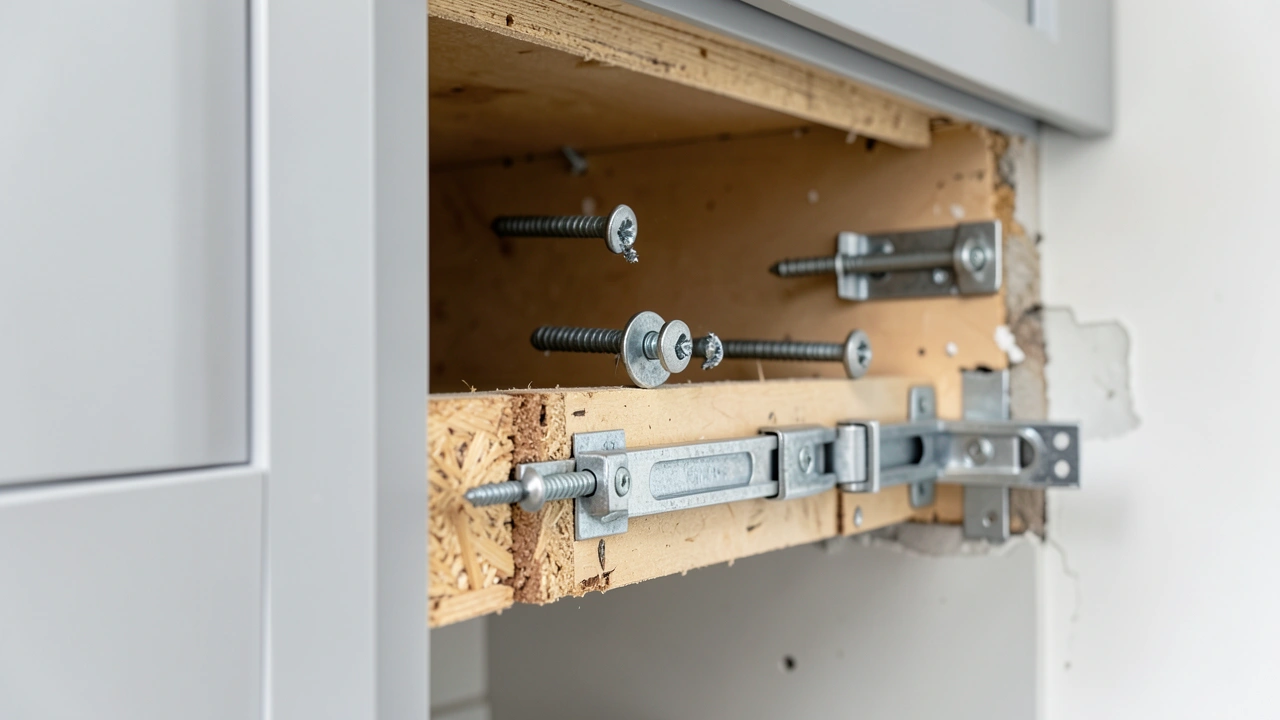
Screws need to go into the wall studs. We talked about this, but it’s worth repeating because it’s that important. The screws should be long enough to go through the cabinet’s hanging rail, through the drywall, and into the stud by at least an inch or so.
Using screws that are too short means they won’t grip the stud properly.
Also, the type of screw matters. You need screws that are designed for wood. They should be strong and not easily breakable.
Using drywall screws is a common mistake because they are brittle and can snap under pressure. Wood screws or cabinet screws are the way to go.
Don’t overtighten screws either. While you want them snug, overtightening can strip the wood in the stud or even crack the cabinet’s mounting rail. This makes the connection weaker, not stronger.
- Choosing the Right Screws: For most cabinet installations, 2.5-inch to 3-inch wood screws are ideal. Ensure they have a strong head that won’t strip easily and a shank that can handle weight. Look for screws that are specifically recommended for cabinetry or framing. Avoid drywall screws, as they are designed for a different purpose and can fail under the load of a cabinet.
- Using a Pilot Hole: Drilling a pilot hole before inserting the screw can help. This is a small hole drilled through the cabinet’s hanging rail and into the stud. It makes it easier for the screw to go in straight and prevents the wood from splitting. The pilot hole should be slightly smaller than the screw’s diameter.
- Screwing into Multiple Studs: Each cabinet should be secured to at least two wall studs whenever possible. If a cabinet spans more than 16 inches horizontally, you’ll likely hit two studs. For longer cabinets, you might hit three. This distributed support is critical for preventing sagging and strain. Ensure the screws are evenly spaced along the cabinet’s hanging points.
Weight Distribution and Overloading
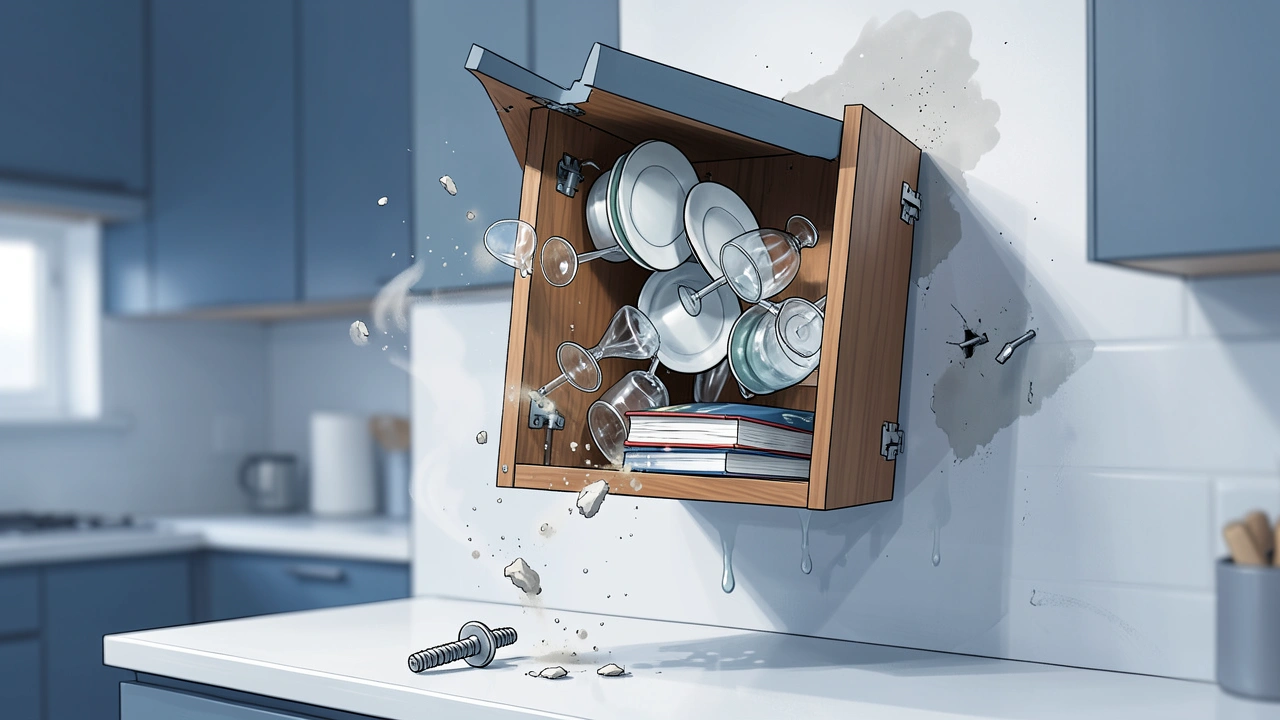
Kitchen cabinets are designed to hold a certain amount of weight, but they aren’t indestructible. If you put too much in them, or if the weight isn’t spread out right, they can start to sag or pull away from the wall. This is another key reason for Why Kitchen Cabinets Fail After Installation.
Think about stacking heavy books on a shelf. If you pile them all in the middle, the shelf might bend. If you spread them out evenly, the shelf stays straighter.
Cabinets work in a similar way.
Heavy items like dinnerware, pots, and pans are the usual suspects. It’s good to place these items closer to the back of the shelf and distribute them across the entire width. Avoid packing too many heavy items onto just one shelf.
Also, consider the shelf material. Cheaper cabinets might have thinner shelves that are more prone to bending. If you have very heavy items, you might want to reinforce the shelves or store them elsewhere.
- Distributing Heavy Items: Always place the heaviest items in lower cabinets or on lower shelves where the structural support is stronger. Spread these items out evenly across the shelf’s length. Don’t stack all your cast iron pans on one end of a single shelf.
- Shelf Sagging: If you notice shelves starting to bend, it’s a sign of overloading. You can sometimes fix this by removing some items or adding shelf supports. Some cabinets have adjustable shelves with pre-drilled holes, which allows for better weight distribution. For fixed shelves, you might need to add wooden supports underneath.
- Moisture and Weight: Be careful with items that can hold moisture, like damp sponges or dish towels, especially in upper cabinets. This can add extra weight and also lead to material damage over time, further weakening the cabinet. Always ensure items stored are dry.
Moisture and Environmental Factors
Water is a cabinet’s enemy. Leaks from sinks, dishwashers, or even high humidity can cause cabinets to swell, warp, or even rot. This is a slow but sure way that cabinets can fail after installation.
When wood gets wet, it expands. If it dries out, it shrinks. This constant change can weaken the joints and connections over time.
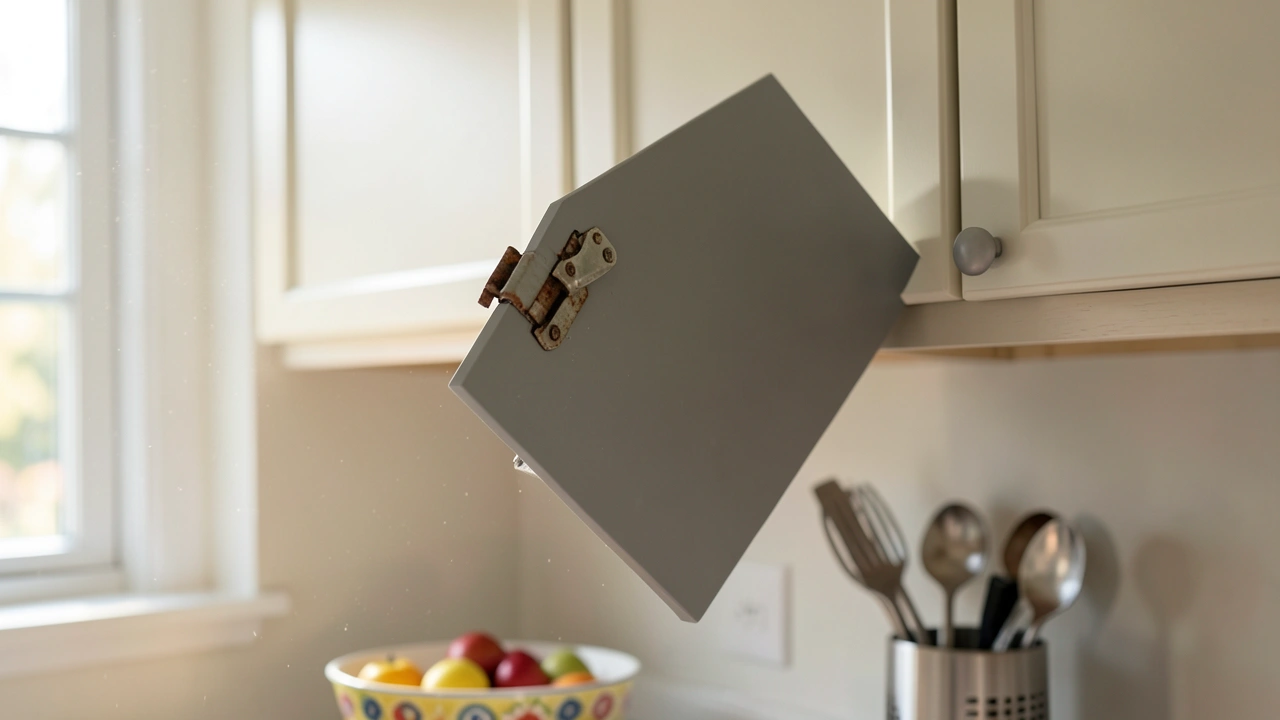
For cabinet doors, this can mean they no longer hang straight or close properly.
Areas around the sink are especially prone to splashes and drips. Even small, consistent leaks under the sink can cause significant damage if not addressed. Checking plumbing regularly is a good habit.
High humidity, like in some climates or poorly ventilated bathrooms used for storage, can also cause wood to absorb moisture and swell. This is why good ventilation in kitchens is important.
- Leaky Plumbing: Regularly inspect all pipes, connections, and appliances that use water in or near the cabinets. Even small drips can create a persistent moisture problem. Addressing leaks promptly is crucial to prevent wood from swelling and weakening. Keep an eye on the area under the sink, as this is a common spot for leaks.
- Ventilation: Ensure your kitchen has good airflow. Using exhaust fans when cooking and opening windows can help reduce overall humidity. This is especially important in kitchens that are often steamy from cooking. Proper ventilation helps wood materials stay dry and stable.
- Material Choice: While not always an option after installation, consider cabinet materials that are more resistant to moisture if your kitchen is prone to dampness. For example, particleboard and MDF can be more susceptible to water damage than solid wood or high-quality plywood.
Shoddy Workmanship or Poor Quality Materials
Sometimes, the problem isn’t with the installation itself, but with the cabinets or hardware that were used. If the cabinets were poorly made or the hinges and drawer slides are low quality, they’re more likely to break or fail over time. This is another aspect of Why Kitchen Cabinets Fail After Installation.
Cheaply made cabinets might use thinner wood, weak glue, or particleboard that isn’t sealed well. Over time, these materials can break down, especially under the normal stress of daily use.
The hardware, like hinges and drawer slides, is also very important. If these are made of thin metal or have poor moving parts, they can bend, break, or become stiff. This can make doors sag or drawers hard to open and close.
When choosing cabinets, it’s good to look for sturdy construction. Check how the corners are joined, the thickness of the shelves, and the quality of the drawer slides.
- Checking Cabinet Construction: Look for solid wood frames and doors. Dovetail joints for drawers are a sign of good quality. Shelves should be at least 1/2 inch thick, preferably 3/4 inch, and ideally made of plywood or solid wood rather than particleboard for better durability.
- Hardware Quality: Pay attention to the hinges and drawer slides. Reputable brands often use metal that is more durable and moves more smoothly. Soft-close hinges and slides are a good indicator of quality, as they are typically built to last longer and withstand more use.
- Warranty Information: When buying cabinets, check if they come with a warranty. A good warranty can be an indicator of the manufacturer’s confidence in their product’s quality and longevity. Understand what the warranty covers.
Understanding Cabinet Materials and Their Weaknesses
The materials used to build kitchen cabinets play a huge role in how well they hold up over time. Different woods and engineered materials have their own strengths and weaknesses. Knowing these can help you avoid problems and understand Why Kitchen Cabinets Fail After Installation due to their very makeup.
Solid wood is often seen as the best, but it’s not without its issues. Things like maple, oak, and cherry are strong and beautiful. However, wood expands and contracts with changes in humidity and temperature.
This can lead to warping, cracking, or doors that don’t align perfectly over time.
Engineered wood products like plywood and particleboard are common alternatives. Plywood, made from thin layers of wood glued together, is generally quite stable and strong. It’s a good choice for cabinet boxes.
Particleboard, made from wood particles mixed with resin and pressed, is the most budget-friendly option. However, it’s also the most susceptible to moisture damage and can crumble if screws are overtightened or pulled out. This is a frequent culprit in cabinet failure.
Solid Wood: Strengths and Vulnerabilities
Solid wood cabinets are often admired for their natural beauty and strength. Woods like maple, cherry, and oak are popular choices. They offer a classic look and feel that many homeowners prefer.
The natural grain patterns add character to any kitchen.
A major advantage of solid wood is its durability when properly cared for. It can withstand a good amount of wear and tear. When a solid wood cabinet is well-made, it can last for many decades.
However, solid wood is a natural material and reacts to its environment. Changes in humidity and temperature cause it to expand and contract. This movement can lead to:
- Warping: Over time, especially if exposed to uneven moisture, doors and drawer fronts can become slightly bent or twisted. This can make them difficult to close or leave visible gaps.
- Cracking: Extreme drying out of the wood can cause small cracks to appear, particularly along the grain lines. This is more common in very dry climates or if cabinets are placed near heat sources.
- Joint Separation: The glue and joinery holding cabinet parts together can weaken if the wood expands and contracts significantly, leading to joints pulling apart.
Proper finishing and regular maintenance, like wiping up spills immediately and avoiding extreme temperature swings, can help minimize these issues.
Plywood: A Stable and Strong Choice
Plywood is made by layering thin sheets of wood veneer. These layers are glued together with the grain of each layer running in a different direction. This cross-graining technique makes plywood very strong and stable.
For cabinet construction, plywood is often used for the cabinet boxes (the carcasses) and sometimes for drawer sides. Its stability means it’s less prone to warping or shrinking compared to solid wood. It also holds screws very well, providing a secure mounting surface.
There are different grades of plywood, and the quality can vary. Higher-grade plywood will have fewer knots and smoother surfaces, making it more attractive and durable. For cabinets, cabinet-grade plywood is typically recommended.
This usually has a finer veneer on the visible surfaces.
The main weakness of plywood, like most wood products, is its reaction to prolonged moisture. While more resistant than particleboard, it can still swell and delaminate (the layers can separate) if it gets soaked.
Example: Many cabinet manufacturers use a 1/2-inch or 3/4-inch plywood for the cabinet boxes. This provides excellent support for shelves and the cabinet’s structure. You can often see the layers of wood when looking at the edge of a plywood panel, which distinguishes it from particleboard.
- Dimensional Stability: Plywood’s cross-grain construction gives it excellent stability. It resists changes in shape caused by humidity better than solid wood. This means cabinet boxes made from plywood are less likely to twist or warp.
- Screw Holding Power: Plywood offers good screw-holding ability, making it reliable for attaching cabinet boxes to walls and for mounting drawer slides and hinges. This is a significant advantage over particleboard.
- Resistance to Delamination: While not immune to water damage, good quality plywood is resistant to delamination. This means the layers are less likely to peel apart when exposed to moisture, provided the moisture exposure isn’t constant or severe.
Particleboard and MDF: Cost-Effective but Prone to Issues
Particleboard and Medium-Density Fiberboard (MDF) are engineered wood products that are often used in budget-friendly cabinetry. They are made by breaking down wood into small particles or fibers and binding them together with resin and heat.
Particleboard is made from larger wood chips and particles. MDF is made from much finer wood fibers, resulting in a denser and smoother product. Both are cheaper to produce than solid wood or plywood.
Their primary advantages are cost and consistency. They provide a smooth surface that is easy to paint or veneer. However, they have significant drawbacks, especially concerning durability and moisture.
Weaknesses of Particleboard and MDF:
- Moisture Sensitivity: This is the biggest problem. Both particleboard and MDF absorb water very easily. When they get wet, they swell significantly, and the material can break down, becoming soft and crumbly. Unlike wood, they often do not return to their original shape or strength after drying. This is a major reason Why Kitchen Cabinets Fail After Installation, especially in areas near sinks or dishwashers.
- Poor Screw Holding: Particleboard, in particular, has very poor screw-holding power. Screws can strip out easily, and if a screw is pulled out, the material around it can crumble, making it impossible to re-secure. MDF is slightly better but still not as strong as plywood or solid wood.
- Durability: They are less durable than solid wood or plywood. They can chip or dent more easily from impact. Over time, the resins binding the particles can also weaken, especially with constant use.
Example: A common scenario is a small leak under the sink. If the cabinet base is made of particleboard, it can quickly become saturated, swell up, and lose its structural integrity, requiring a full cabinet replacement.
Understanding Cabinet Installation Hardware
The hardware used in cabinet installation is often overlooked, but it’s critical for a strong, lasting job. This includes the screws, anchors, brackets, and even the tools used. Poor quality or incorrect hardware is a major contributor to Why Kitchen Cabinets Fail After Installation.
When you’re hanging cabinets, you’re essentially relying on small pieces of metal to hold up heavy loads. If that hardware isn’t up to the task, or if it’s not used correctly, failure is almost inevitable.
We’ve already touched on screws, but it’s worth looking at other components too. Brackets, for instance, can add extra support, especially for heavier cabinets or when mounting onto less-than-ideal wall structures.
Even the tools you use can impact the installation. Using the wrong drill bit size, a worn-out screwdriver head, or an unbalanced drill can lead to stripped screws or improperly seated fasteners.
Screws and Fasteners: The Backbone of Support
Screws are the primary fasteners for cabinets. Their length, diameter, and type are all important. For cabinets, you’re typically looking for wood screws or specialized cabinet screws.
Wood Screws: These are designed for joining pieces of wood. They have a shank that is usually fully threaded or partially threaded, and a sharp point to start easily in wood. For cabinet installation, you want screws that are strong and resistant to shearing (breaking from sideways force).
Cabinet Screws: These are often similar to wood screws but might have features like a washer head or a thicker shank for added strength. They are specifically designed for the stresses involved in hanging cabinets.
Length: As mentioned, screws should be long enough to pass through the cabinet’s mounting rail (often called a cleat or hanger board), through the drywall, and into the wood stud by at least 1 inch. For a standard 1/2-inch drywall, this means a screw of at least 2.5 inches is usually needed.
Diameter: A thicker screw provides more strength. For cabinets, #8 or #10 gauge screws are common. Avoid using very thin screws, as they can snap under load.
Anchors: Wall anchors are generally NOT recommended for hanging cabinets. While they work for lighter items like pictures, they are not designed to support the significant and dynamic weight of loaded cabinets. Relying on anchors is a sure way to experience Why Kitchen Cabinets Fail After Installation.
Always aim to screw directly into studs.
Example: If you try to hang a cabinet with only 1-inch screws, they will only engage a small portion of the drywall. The weight of the cabinet and its contents will easily pull these screws out, causing the cabinet to fall.
| Fastener Type | Pros | Cons | Best Use for Cabinets |
|---|---|---|---|
| Wood Screws (#8 or #10, 2.5″+) | Strong, good holding power in studs, widely available. | Can split wood if pilot hole not used. | Primary fastener for mounting cabinets to studs. |
| Drywall Screws | Inexpensive, easy to drive. | Brittle, can snap under stress, poor shear strength. | NOT recommended for hanging cabinets. |
| Lag Bolts | Very strong, deep thread engagement. | Require pre-drilling a larger hole, can be overkill for standard cabinets. | Sometimes used for very heavy cabinets or critical structural connections. |
| Wall Anchors (e.g., plastic, toggle bolts) | Work in hollow walls where studs are not accessible. | NOT strong enough for cabinet weight, can fail unexpectedly. | NEVER recommended for hanging cabinets. |
Hinges and Drawer Slides: The Moving Parts
The hardware that allows doors to open and drawers to slide is just as important as the fasteners holding the cabinets themselves. Low-quality hinges and drawer slides are common culprits in cabinet failure over time.
Hinges: Cabinet hinges bear the weight of the doors. They are opened and closed many times a day. If the hinge material is thin or the pivot points are loose, the door can start to sag.
This leads to doors not closing properly, rubbing against each other, or even falling off.
Many modern cabinets use concealed (or European-style) hinges. These are typically stronger and more adjustable than older exposed hinges. However, even these can fail if they are cheaply made or improperly installed.
Drawer Slides: Drawer slides are responsible for the smooth operation of drawers. They come in various types, from simple metal channels to ball-bearing systems.
Cheaper drawer slides often use plastic rollers or thin metal. These can wear out quickly, become stiff, or even break. This can make drawers difficult to open and close, and in worst cases, the drawer can jam or fall off its tracks.
Ball-bearing slides, especially those rated for higher weight capacities, are generally more durable and provide smoother operation.
- Hinge Adjustment: Many concealed hinges offer multiple adjustment screws. These allow you to fine-tune the position of the door – up/down, left/right, in/out. If a door is sagging, it’s often a sign that the hinges need adjustment or are failing. Proper adjustment can compensate for minor settling.
- Drawer Slide Capacity: Always check the weight rating for drawer slides, especially for deep drawers or those intended to hold heavy items like pots and pans. Using slides that are not rated for the load can lead to bending, binding, or failure.
- Lubrication: While not always practical for the average homeowner to do regularly, keeping drawer slides clean and occasionally applying a dry lubricant (like graphite) can help them operate smoothly and extend their lifespan.
Tools and Technique
The tools used and the way they are used can significantly impact cabinet installation quality. Using the wrong tool or employing poor technique can lead to damage and weakened connections, contributing to Why Kitchen Cabinets Fail After Installation.
For example, using a drill without a clutch can lead to overtightening screws, stripping the wood or the screw head. A drill with a clutch allows you to set the torque, preventing this.
When cutting materials, dull blades on saws can tear and splinter the wood, creating a rough edge that isn’t ideal for a tight fit. A sharp blade ensures clean cuts for better assembly.
Similarly, how you hold and position cabinets during installation matters. Using cabinet jacks or temporary supports can help you align cabinets perfectly before permanently fastening them. Trying to hold a heavy cabinet in place by yourself while also trying to screw it in is a recipe for error.
- Using a Torque-Clutch Drill: This is essential for driving screws. Setting the clutch prevents overtightening, which can strip screws or crack cabinet wood. It ensures a snug, secure fit without damaging the material.
- Level and Plumb Tools: Always use a quality level and/or a plumb bob to ensure cabinets are installed straight. Misaligned cabinets not only look bad but can also cause doors and drawers to bind.
- Proper Cutting Tools: For any modifications or if building custom elements, use sharp blades on saws. This ensures clean, precise cuts that result in tight-fitting joints. Ragged cuts can lead to gaps and weakened connections.
Real-Life Scenarios and Prevention
Looking at actual situations can help illustrate these points more clearly. Understanding how these problems manifest in real kitchens can help you spot potential issues or avoid them in your own project. These examples highlight common pitfalls related to Why Kitchen Cabinets Fail After Installation.
Consider a scenario where a homeowner decided to install their own cabinets to save money. They skipped marking studs carefully, just guessing where they were. They also used shorter screws than recommended.
A few months later, one of the upper cabinets started to sag visibly. When they tried to fix it, they realized the screws were only holding into the drywall, which had torn.
Another example involves a kitchen remodel in an older home. The walls weren’t perfectly flat. The installer didn’t use enough shims to compensate.
This caused the cabinets to sit at a slight angle. Over time, the doors on these cabinets began to warp and wouldn’t close flush, creating an unsightly gap.
Finally, think about a kitchen with a persistent small leak under the sink. The cabinet base was made of particleboard. The homeowner noticed a slight softening but didn’t address it immediately.
Within a year, the particleboard had swelled so much it crumbled, and the base of the cabinet had to be replaced.
Scenario 1: The Sagging Wall Cabinet
A DIY enthusiast decided to hang a few upper cabinets in their kitchen. They had a new set of cabinets and felt confident they could do it themselves. They used a basic stud finder and marked a few spots on the wall, but they weren’t entirely sure if they hit the center of the studs every time.
They used 1.5-inch screws, thinking that was enough.
Within six months, the cabinet holding their everyday plates began to sag noticeably. The front edge drooped downwards. When they tried to tighten the screws, they just spun freely.
Upon closer inspection, they discovered the screws had only gone into the drywall and had ripped through the paper and gypsum. The cabinet was no longer secured to the wall studs at all. The weight of the dishes had been too much for the drywall anchors.
Prevention: Always use long screws (2.5 inches or more) that are guaranteed to go into the solid wood of the studs. Double-check stud locations, and if unsure, use a thin nail to probe the wall before driving in the main screws. For upper cabinets, reinforcing the mounting with extra screws into studs is wise.
Scenario 2: The Warped Cabinet Door
In a kitchen renovation, the installers worked quickly to get the cabinets up. The kitchen walls in this older house had some unevenness. The installers didn’t use enough shims behind the cabinets to make them sit perfectly flat against the wall.
As a result, some of the cabinet boxes were installed with a slight twist. This put stress on the cabinet doors and drawer fronts. The doors, especially the wider ones, started to warp over the next year.
They no longer closed flush with the cabinet frame.
This made the kitchen look unkempt. Adjusting the hinges helped a little, but the underlying warp in the wood meant the problem persisted.
Prevention: Always use a level to check that each cabinet box is plumb and level both horizontally and vertically. If the wall is uneven, use shims (thin pieces of wood or plastic) between the cabinet and the wall to create a flat surface. This ensures that doors and drawers will operate correctly and stay aligned.
Scenario 3: The Crumbling Particleboard Base
A homeowner had a minor leak under their kitchen sink. They wiped up the visible water but didn’t realize that the particleboard base of the cabinet had absorbed a significant amount of moisture.
Over the next few months, the area under the sink began to feel soft. They initially thought it was just dampness from cooking. However, the particleboard started to swell and break down.
Eventually, the bottom of the cabinet began to sag, and the screws holding the cabinet together started to pull out. The cabinet was no longer structurally sound and had to be replaced.
Prevention: Regularly inspect plumbing for leaks, especially under sinks and behind dishwashers. Address any moisture or dampness immediately. If your cabinets are made of particleboard, be extra vigilant about water exposure.
Consider sealing the inside surfaces of particleboard cabinets with a waterproof sealant for added protection.
Frequently Asked Questions
Question: Can I hang cabinets on drywall alone?
Answer: No, you should never hang kitchen cabinets directly onto drywall alone. Drywall is not strong enough to support the weight of cabinets, especially when they are filled with items. Cabinets must be securely fastened to wall studs or other structural framing.
Question: What is the best type of screw to use for cabinets?
Answer: The best screws for cabinets are strong wood screws or specialized cabinet screws. They should be at least 2.5 inches long and preferably #8 or #10 gauge in diameter. Always ensure they go deep into the wall studs for maximum support.
Question: How do I know if my walls are level for cabinet installation?
Answer: You can use a long spirit level or a laser level to check if your walls are level (side to side) and plumb (up and down). Place the level against the wall at different points to see if there are any significant slopes or curves. You may need to use shims to create a flat surface.
Question: Can moisture damage cabinets even if there are no visible leaks?
Answer: Yes, high humidity or steam from cooking can be absorbed by cabinet materials over time, especially particleboard and MDF. This can lead to swelling, warping, and weakening of the material. Good ventilation in the kitchen helps reduce this risk.
Question: What if I can’t find wall studs?
Answer: It is critical to find wall studs. If you cannot locate studs, you may need to use a different installation method, like mounting cabinets to a continuous ledger board that is itself securely anchored to studs. However, for standard cabinet hanging, finding studs is almost always required and the most reliable method.
Summary
Kitchen cabinets failing after installation often comes down to a few key issues. Improper wall prep, weak fasteners, moisture damage, overloading, and poor material quality are the main culprits. By carefully preparing walls, using the right screws into studs, managing weight, and protecting against water, you can ensure your cabinets stand strong.
Pay attention to details, and your kitchen will look and function well for many years.