
Many people find fixing kitchen cabinets a bit tricky, especially when they’re made of plywood. It’s easy to get confused about why certain problems pop up. This guide will help you understand these Common Issues with Kitchen Cabinets Made from Plywood without making things harder.
We’ll walk through simple steps to sort them out. Get ready to learn how to fix things easily!
Understanding Plywood Cabinetry and Its Nuances
Plywood is a popular choice for kitchen cabinets because it’s strong and often more affordable than solid wood. It’s made by layering thin sheets of wood veneer and gluing them together. This layered construction gives plywood good stability, meaning it’s less likely to warp or crack compared to a single piece of wood.
For cabinet makers, this means they can create sturdy boxes and doors that hold up well over time. However, like any building material, plywood has its own set of characteristics that can lead to specific problems, especially if not handled or maintained correctly. Knowing these can save you a lot of trouble down the road.
This section will cover the basic makeup of plywood used in cabinets. We’ll look at why it’s used and what makes it different. This background knowledge is key to spotting and fixing any issues that might arise.
It’s all about understanding the material so you can work with it better. Let’s start by breaking down what plywood really is.
What is Plywood and How is it Made?
Plywood is essentially a wood product made from thin sheets of wood, called veneers. These veneers are glued together with their grain patterns running in different directions. Think of it like stacking layers of paper, but with wood and strong glue.
This alternating grain direction is super important. It makes the final plywood sheet much stronger and more stable than a single piece of wood of the same thickness.
The process starts with logs being peeled into thin sheets. These sheets are then sorted and graded based on their quality. They are then arranged in alternating grain patterns.
For cabinet-grade plywood, typically four or more plies (layers) are used. The glue used is usually a strong resin that bonds the layers tightly. This creates a panel that resists splitting, shrinking, and swelling much better than solid wood.
The Structure of Plywood
The core of plywood is made up of several layers of wood veneer. The outer layers, known as the face and back, are usually made of higher-quality wood and are smoother. The inner layers are called crossbands.
The grain of each crossband runs at a right angle to the grain of the layer next to it. This cross-graining provides the strength. Imagine trying to bend a single piece of paper versus bending a stack of paper where each sheet is turned the other way.
The stack is much harder to bend.
The number of plies in a sheet of plywood can vary. For kitchen cabinets, you’ll often see 3-ply, 5-ply, or even 7-ply plywood. More plies generally mean a stronger and more stable panel.
The thickness also varies, commonly ranging from 1/4 inch to 3/4 inch. Thicker plywood is used for cabinet boxes and doors, while thinner grades might be used for drawer bottoms or cabinet backs.
Why Plywood is Popular for Kitchen Cabinets
Plywood has become a go-to material for kitchen cabinets for several good reasons. One of the biggest is its durability and stability. Unlike solid wood, which can easily expand and contract with changes in humidity and temperature, plywood is much less prone to warping or cracking.
This is a huge advantage in a kitchen, where steam and moisture are common. Cabinets that stay true to their shape are less likely to have doors that sag or drawers that stick.
Another major factor is cost. Plywood is generally more affordable than solid hardwood. This allows for the creation of beautiful and functional cabinets at a lower price point, making them accessible to more homeowners.
It also means that manufacturers can use it consistently across large production runs. This consistency is important for uniform appearance and performance.
Cost-Effectiveness and Availability
The economic advantage of plywood is significant. Instead of using large, expensive pieces of solid wood, manufacturers can use a material that is engineered for strength and stability. This reduces waste in the manufacturing process as well.
Because plywood is a widely produced material, it’s readily available in various grades and thicknesses. This makes it easy for cabinet makers to source the exact type of plywood they need for different parts of the cabinet, from the main boxes to the drawer fronts.
The ability to mass-produce plywood in consistent sizes and qualities also helps keep manufacturing costs down. This translates to savings for the consumer. For a kitchen renovation on a budget, plywood cabinets often offer the best balance of quality and price.
Many homeowners appreciate getting a durable product without breaking the bank. The market for plywood is large and well-established.
Structural Integrity and Strength
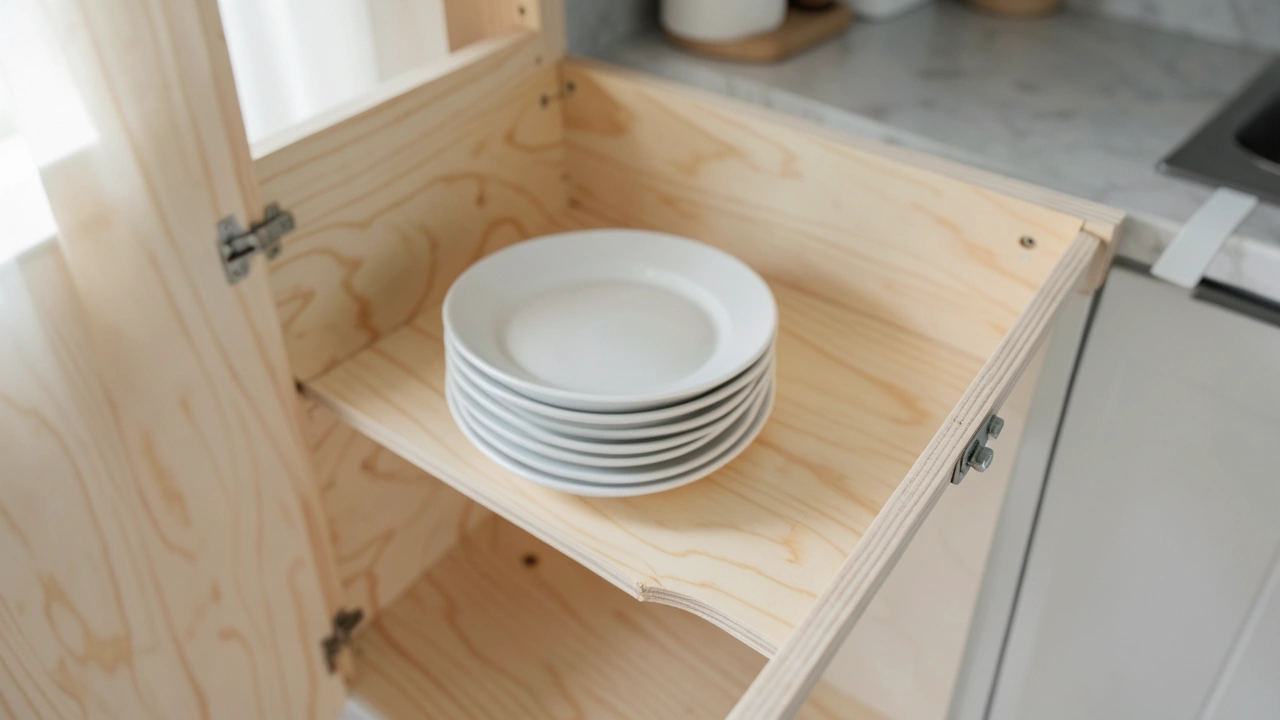
Plywood’s layered structure provides exceptional strength. The cross-grain construction means that the wood resists forces applied in different directions. This makes it ideal for cabinet boxes, which need to bear the weight of dishes, appliances, and other kitchen items.
The side panels, shelves, and back of the cabinet all benefit from this robust construction. It prevents sagging and ensures the cabinet can hold its contents securely for years.
Compared to particleboard or MDF (Medium-Density Fiberboard), which are also used in cabinets, plywood generally offers superior structural integrity, especially when exposed to moisture. While these other materials can swell and disintegrate if they get wet, plywood is more resilient. This makes it a more reliable choice for the demanding environment of a kitchen.
Its strength means you can load up those shelves!
Common Issues with Kitchen Cabinets Made from Plywood
Even though plywood is a great material, it’s not immune to problems. When Common Issues with Kitchen Cabinets Made from Plywood arise, they often stem from how the material interacts with moisture, its edge treatments, or the quality of the plywood itself. Understanding these specific challenges is the first step to fixing them.
Many of these problems are manageable with the right approach. We’ll break down the most frequent culprits you might encounter in your kitchen.
This section is all about identifying the typical trouble spots. We’ll look at what causes them and how they can affect the look and function of your cabinets. Knowing these signs will help you spot issues early.
This means you can tackle them before they become bigger headaches. Let’s explore the common problems that can happen.
Water Damage and Swelling
One of the most significant challenges with plywood, especially at the edges and veneer layers, is its reaction to excessive moisture. When water seeps into the plywood, it can cause the wood fibers to swell. This swelling can be uneven, leading to warped doors, cabinet boxes that are no longer square, or delamination.
Delamination is when the layers of veneer start to separate from each other. This is particularly common in areas near sinks or dishwashers where leaks or spills can occur.
The swelling is not always reversible. Once the wood fibers have absorbed a lot of water and expanded, they may not return to their original shape even after drying. This can cause permanent deformation.
It can also weaken the glue bonds between the layers. Small amounts of moisture over time can also contribute to this problem, even if there isn’t a major spill. It’s a slow but steady attack on the material’s integrity.
Recognizing Signs of Water Damage
Look for tell-tale signs that indicate water has affected your plywood cabinets. Warped cabinet doors are a common symptom; they might no longer close properly or may appear to bow outwards or inwards. You might also see discoloration on the surface of the plywood, such as dark stains or a generally darker hue where the water has penetrated.
The edges of the plywood are particularly vulnerable. You might notice that the edges feel soft or crumbly, which is a sign of significant moisture damage and potential rot.
Another indicator is if the veneer layers begin to peel away. This delamination often starts at the edges. You might see small bubbles or lifting sections on the surface as well.
If you notice any of these symptoms, it’s important to address the source of the moisture immediately. Then, assess the damage to the plywood itself. Sometimes, minor swelling can be managed, but significant damage may require repairs or replacement.
Preventing Moisture-Related Issues
The best defense against water damage is prevention. Always wipe up spills immediately. Ensure your sink area has good drainage and that any leaks from pipes or faucets are fixed promptly.
For areas prone to steam, like near dishwashers or kettles, consider using exhaust fans to vent moisture out of the kitchen. Regular maintenance, such as checking for any signs of wear on cabinet seals or around appliance connections, can catch minor issues before they become major water problems.
You can also apply protective finishes to your cabinets. A good quality sealant or varnish can add a layer of defense against moisture. For the edges of plywood, which are more exposed, applying a wood filler or edge banding can provide extra protection.
Keeping humidity levels in your kitchen controlled is also helpful. Using a dehumidifier during particularly humid periods can make a difference. These proactive steps go a long way in preserving your cabinets.
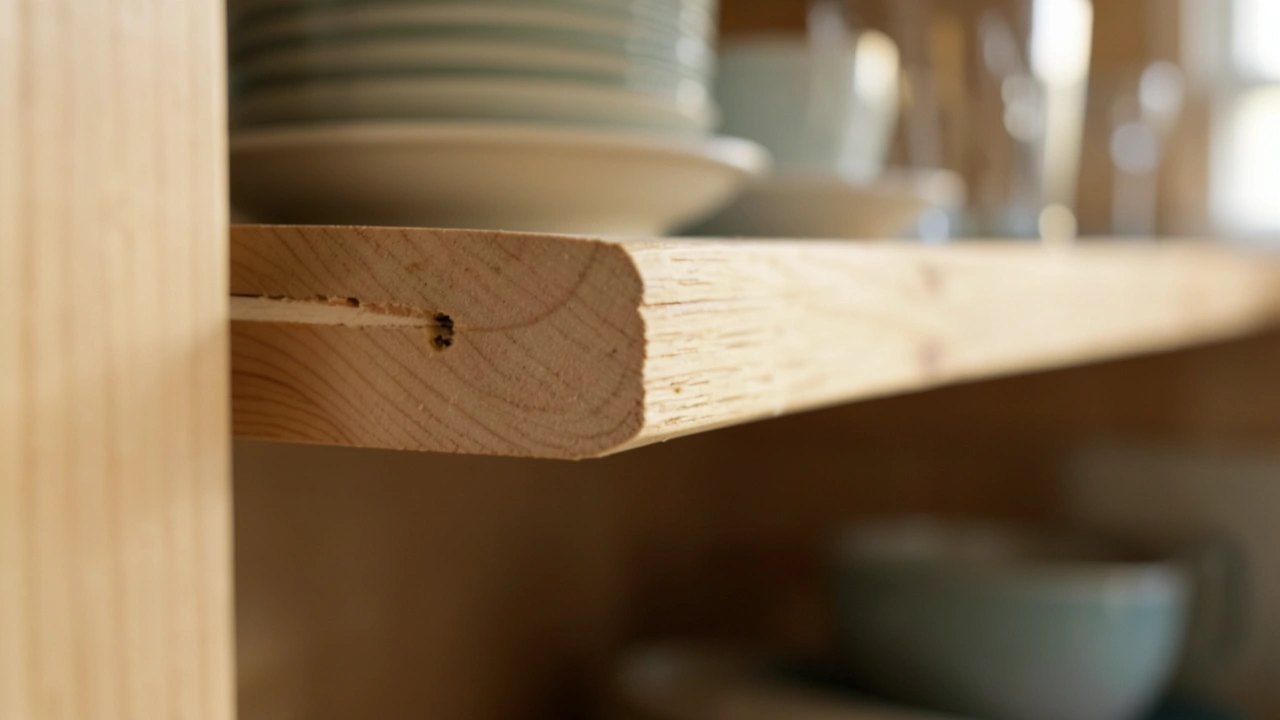
Edge Swelling and Delamination
The edges of plywood are particularly susceptible to swelling and delamination. This is because the edge grain is exposed, and there are no face veneers to hold the inner layers together as strongly as on the flat surfaces. When these edges get wet, the individual plies can swell independently.
This can cause the layers to separate, a problem known as delamination. It’s like a book where the pages start to come apart from the spine.
This issue can be unsightly, creating rough, uneven edges that can catch on things or just look bad. More importantly, delamination weakens the structural integrity of the plywood. If the edges of your cabinet shelves or doors start to come apart, they are much less likely to hold up to normal use.
It’s a common area for wear and tear to show up first, especially if the cabinets have seen a lot of moisture exposure over the years.
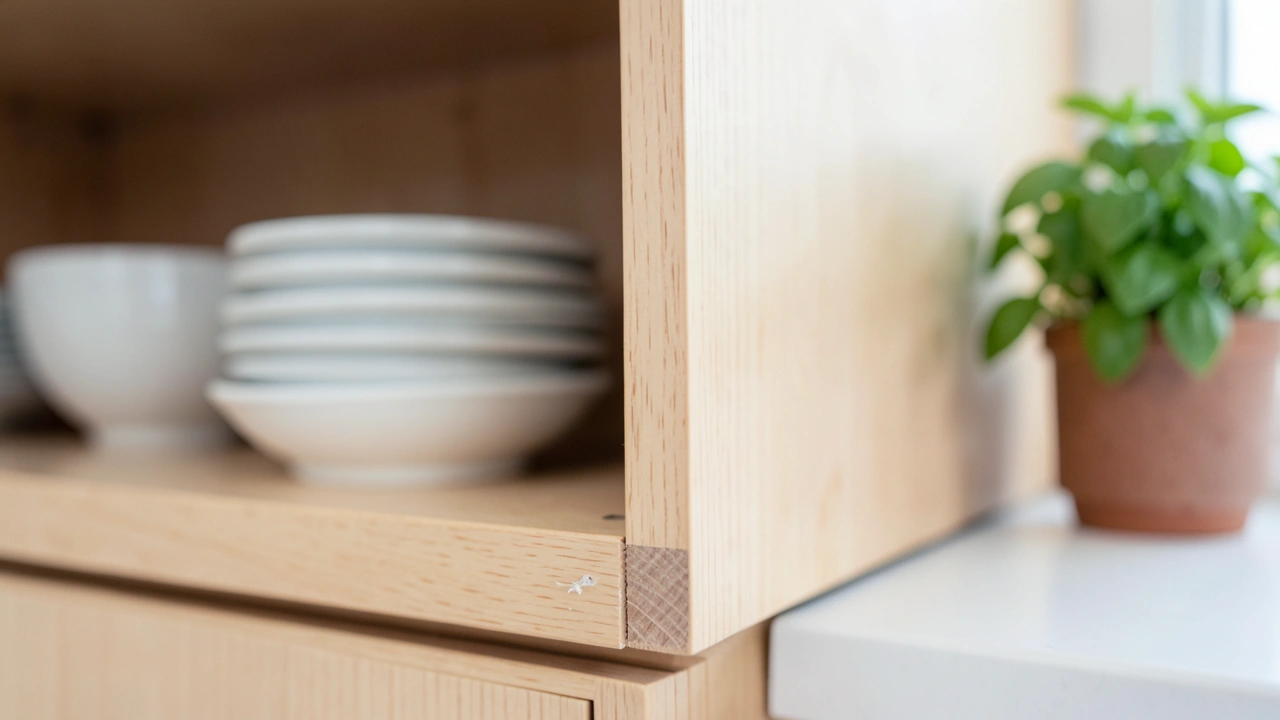
The Role of Edge Treatment
How the edges of plywood cabinets are treated plays a big role in preventing delamination and swelling. If the edges are left unfinished, they are much more vulnerable. Many cabinet manufacturers use edge banding, which is a thin strip of wood veneer or laminate that is glued onto the exposed plywood edge.
This seals the edge and provides a smoother, more durable surface. It also helps to protect the underlying plywood from moisture and impact.
Another common treatment is to use a solid wood “edge profile” or “face frame” around the cabinet box. This essentially covers the exposed plywood edges with solid wood, offering excellent protection. However, even with these treatments, if the glue that holds the veneer layers together is of poor quality, or if the edge banding isn’t properly applied, delamination can still occur.
The quality of the manufacturing process matters a lot.
Repairing Delaminated Edges
Repairing delaminated edges can be tricky but is often possible. For minor delamination where the layers are just starting to separate, you might be able to inject wood glue into the gap using a thin applicator. Then, clamp the edges together firmly until the glue dries completely.
It’s important to use a strong wood glue and to clamp it tightly to ensure the layers bond back together. You can use scrap wood or thin plywood pieces to protect the cabinet surface while clamping.
For more severe delamination, you might need to remove the loose veneer pieces, clean the area, and then re-glue and clamp. In some cases, you might need to use a wood filler to fill any gaps or damaged areas. If the delamination is extensive, especially on cabinet doors, it might be more practical to
Soft Spots and Pitting
Sometimes, plywood cabinets can develop soft spots or small pits on their surface. These can be caused by a few things. One common cause is physical impact.
Small dents or chips can occur over time from bumping into the cabinets with objects, or from the wood itself being less dense in certain areas.
Another reason for soft spots is related to the quality of the plywood and its construction. If there are voids or air pockets within the layers of veneer, these areas can be weaker. When moisture is present, these weaker spots can break down more easily, leading to softness or pitting.
Even minor surface damage can sometimes lead to these softer areas if not properly sealed or repaired. They can make the surface feel rough to the touch.
Causes of Surface Imperfections
Surface imperfections like pitting and soft spots can arise from the manufacturing process. For instance, if the glue doesn’t spread evenly between veneer layers, some areas might be weaker and more prone to damage. Also, the natural variations in wood can mean that some parts of the veneer are softer than others.
This is particularly true if lower-grade plywood is used. The top veneer layer, called the face veneer, is critical for the cabinet’s appearance and durability.
Everyday wear and tear is also a big contributor. Kitchens are busy places. Pots, pans, and even utensils can accidentally scratch or dent cabinet surfaces.
Over time, these small abrasions can accumulate, especially on edges or corners. If the protective finish on the cabinets is thin or has worn away in certain spots, the underlying plywood becomes more vulnerable to these kinds of surface issues. A well-maintained finish is your first line of defense.
Addressing Surface Damage
Small pits and soft spots on the surface of plywood cabinets can often be repaired. For minor pitting, you can use a wood filler or a patching compound designed for wood. Apply the filler to the affected area, let it dry completely, and then sand it smooth.
You’ll want to match the color as closely as possible, or be prepared to repaint or refinish the entire door or cabinet face.
If you have larger soft spots that feel compressible, it might indicate some degradation of the wood fibers. You can try to firm these up with a wood hardener, which is a liquid that penetrates the wood and strengthens it. After it dries, you would then apply wood filler and sand smooth.
For more significant damage, especially if it affects the structural integrity, it might be necessary to replace the affected panel. Careful sanding is key to making repairs blend in well.
Peeling Veneer and Bubbling
Peeling veneer and bubbling are common cosmetic issues that can affect plywood cabinets. This happens when the thin top layer of wood veneer starts to lift away from the layers underneath. It’s often caused by moisture getting trapped between the veneer and the core, or by a failure of the adhesive bond.
Think of it like wallpaper that starts to peel away from the wall.
Bubbling is essentially the early stage of peeling. You might notice a small raised area on the surface. If left unaddressed, this bubble can grow larger and eventually peel away completely.
This not only looks bad but can also expose the raw plywood underneath, making it more susceptible to further damage from moisture and wear. It’s a visual sign that the bond between the layers is weakening.
Why Veneers Peel
The primary reason veneers peel is adhesive failure. The glue used to bond the layers of plywood can weaken over time due to heat, moisture, or age. In kitchens, constant exposure to steam from cooking and dishwashing can accelerate this process.
If the adhesive bond weakens, moisture can seep into the gap, causing the veneer to swell and lift. This creates the characteristic bubbles and then peeling.
Another cause can be physical damage. If the veneer is scraped or nicked, it can create an entry point for moisture. Also, if the original manufacturing process had issues, such as insufficient glue application or improper pressing, the veneer might be prone to peeling from the start.
The quality of the veneer itself also plays a role; thinner or lower-quality veneers are sometimes more prone to lifting.
Fixing Peeling Veneer and Bubbles
For minor peeling or small bubbles, you can often fix them yourself. For bubbles, carefully try to inject wood glue under the lifted veneer using a thin spatula or a syringe. Then, press the veneer down firmly and cover the area with a piece of cloth or thin plywood.
Place a heavy object on top to hold it in place while the glue dries. This might take several hours or overnight.
If the veneer is already peeling significantly, you may need to gently peel back the loose pieces. Clean any old glue or debris from both the veneer and the surface underneath. Then, apply a good quality wood glue to both surfaces and press the veneer back into place.
Clamp it firmly until the glue is fully cured. If the peeled section is too small or damaged to reattach, you might need to carefully cut it away and then use wood filler to create a smooth surface. Finally, you’ll need to touch up the color with matching paint or stain.
Edge Banding Issues
Edge banding, the material applied to the exposed edges of plywood to give them a finished look and protect them, can also develop problems. Over time, the adhesive holding the edge banding can weaken, causing it to lift or peel away from the cabinet. This is especially common on the bottom edges of base cabinets or the front edges of shelves where they experience the most contact and wear.
Besides peeling, the edge banding itself can get damaged. It might get chipped, scratched, or nicked from impact. If the edge banding is made of laminate, it can also start to delaminate if exposed to moisture.
These issues not only look bad but also compromise the protection the edge banding offers to the plywood underneath. It’s like a shield that’s starting to crack.
Common Problems with Edge Banding
The most frequent problem is the adhesive failure. The glue used to attach the edge banding can break down due to heat, humidity, or simply age. This allows the banding to start lifting, creating a gap.
This gap can collect dirt and grime, making it harder to clean and more prone to further damage. The lifting edge can also snag on clothing or towels, accelerating the peeling process.
Another issue is damage to the edge banding material itself. If it’s made of plastic or laminate, it can be scratched or gouged. This is more of a cosmetic problem, but it can also weaken the protective layer.
If the underlying plywood edge gets exposed, it becomes vulnerable to moisture and swelling, leading to more significant problems down the line. It’s important to address this before it escalates.
Repairing or Replacing Edge Banding
For edge banding that is lifting slightly, you can often re-adhere it. Clean the lifted area thoroughly. Then, apply a suitable adhesive, such as a strong wood glue or a contact cement, to both the underside of the edge banding and the cabinet edge.
Carefully press the banding back into place and use clamps or a roller to ensure good contact. Let it cure fully according to the adhesive manufacturer’s instructions.
If the edge banding is significantly damaged or peeling, you might need to remove it completely. You can usually do this carefully with a putty knife or a heat gun to soften the adhesive. Once removed, clean the edge thoroughly.
Then, you can apply new edge banding. This can be purchased in rolls and applied with a special edge banding machine or by hand using contact cement and careful pressing. You can also choose to
Solutions and Preventative Measures for Plywood Cabinets
Dealing with Common Issues with Kitchen Cabinets Made from Plywood doesn’t have to be difficult. The good news is that many problems are preventable with a little care and attention. Even when issues do arise, there are practical solutions to fix them and restore your cabinets.
This section will focus on how to keep your plywood cabinets in great shape and how to tackle common problems effectively.
We will explore simple maintenance tips, protective treatments, and common repair techniques. The goal is to give you the tools and knowledge to keep your kitchen looking its best. It’s about making your cabinets last longer and look better.
Let’s look at how to achieve this.
Regular Cleaning and Maintenance
Consistent cleaning is the most effective way to prevent many problems with plywood cabinets. Dust them regularly with a soft, dry cloth. This prevents the build-up of grime that can be hard to remove later.
For everyday cleaning, use a soft cloth dampened with water and a mild, pH-neutral soap. Avoid harsh chemicals, abrasive cleaners, or excessive water, as these can damage the finish and the plywood itself.
Wipe up spills immediately, especially water or acidic liquids like lemon juice or vinegar. Pay close attention to areas around the sink, stovetop, and dishwasher, as these are most prone to moisture. After cleaning with a damp cloth, always dry the cabinets thoroughly with a clean, soft towel.
This step is crucial for preventing water damage and swelling.
Best Cleaning Products and Techniques
For routine cleaning, a simple solution of a few drops of mild dish soap in a bucket of warm water is usually sufficient. Use a soft microfiber cloth for cleaning and another dry one for drying. For tougher spots, like grease buildup around the stovetop, you can use a dedicated kitchen cabinet cleaner, but always choose one that is specifically formulated for wood or laminate finishes and test it on an inconspicuous area first.
Never use all-purpose cleaners or solvents, as they can strip the finish.
When cleaning, work in small sections, wiping and then drying immediately. This prevents water from sitting on the surface for too long. For deep cleaning or to remove wax buildup from polishes, you might need a specialized cabinet cleaner or a solution of mineral spirits, but use these sparingly and with good ventilation.
Always follow the product instructions carefully.
When to Call a Professional
While many minor repairs can be done yourself, sometimes it’s best to call in a professional. If you have extensive water damage, severe delamination, or structural issues with your cabinets, a professional cabinet restorer or carpenter can assess the damage and provide the best solution. They have the specialized tools and experience to handle complex repairs and can often achieve results that are difficult to replicate at home.
If your cabinets are high-end or have a special finish, you might also want to consult a professional to avoid damaging them. They can also help with things like refacing cabinets or matching finishes if you’ve had to replace a damaged section. Don’t hesitate to get a quote from a professional if you’re unsure about tackling a repair yourself.
It could save you time and money in the long run.
Protective Finishes and Sealants
Applying protective finishes and sealants is a proactive way to guard your plywood cabinets against common issues. These finishes create a barrier that repels moisture, resists stains, and helps prevent scratches. The type of finish you use will depend on the current finish of your cabinets and the look you want to achieve.
A good quality varnish, polyurethane, or lacquer can significantly extend the life and appearance of your cabinets. These finishes add a durable layer that is much harder to penetrate than the raw wood. Regular reapplication or touch-ups can maintain this protective shield.
Types of Protective Coatings
There are several types of protective coatings for wood cabinets. Polyurethane is very popular because it’s durable, water-resistant, and easy to clean. It comes in different sheens, from matte to high gloss.
Lacquer dries quickly and provides a hard finish, but it can be more prone to chipping. Varnishes are also a good option, offering good protection against moisture and wear. For a more natural look, you might consider a natural oil finish, but these typically require more frequent reapplication and offer less protection against water.
When choosing a finish, consider the environment of your kitchen. If it’s a high-moisture area, a water-based polyurethane or a marine-grade varnish would be excellent choices. Always ensure the product is compatible with any existing finish on your cabinets.
If you’re unsure, it’s best to completely strip the old finish before applying a new one.
How to Apply Finishes
Applying a new finish usually involves preparing the cabinet surface. This means thoroughly cleaning it and often sanding it down to create a smooth surface for the new coating to adhere to. For a light refresh, you might just need to clean and then apply a new coat.
For a full refinish, you’ll need to strip the old finish, sand, and then apply multiple thin coats of your chosen finish. Always follow the manufacturer’s instructions for application, drying times, and recommended number of coats. Good ventilation is essential when working with finishes.
Use high-quality brushes or rollers for application. Apply thin, even coats. Don’t try to rush the process.
Allow each coat to dry completely before applying the next. Lightly sanding between coats with very fine-grit sandpaper can help create a smoother final finish. This process can be time-consuming, but the result is a revitalized and well-protected cabinet that will last much longer.
DIY Repair Techniques
Many common issues with plywood cabinets can be successfully tackled with DIY repair techniques. This can save you money and give you a sense of accomplishment. The key is to have the right tools and materials, and to work patiently and precisely.
From filling small holes to re-gluing loose veneer, there are many fixes you can do at home. We’ll explore some of the most common and effective methods. These techniques are designed to be straightforward and accessible for most homeowners.
It’s about giving your cabinets a new lease on life.
Filling Small Holes and Scratches
For small dents, scratches, or screw holes, wood filler is your best friend. Choose a wood filler that matches the color of your cabinets, or one that can be stained or painted. Apply the filler with a putty knife, pressing it firmly into the hole or scratch.
Smooth the surface so it’s flush with the surrounding wood. Let it dry completely, which usually takes a few hours.
Once dry, sand the filled area smooth with fine-grit sandpaper. Start with a grit around 120 and finish with 220. Wipe away any dust with a damp cloth.
If the filler color doesn’t match perfectly, you can touch it up with a matching stain or paint. For very shallow scratches, sometimes a furniture repair crayon or marker can be enough to disguise them.
Re-gluing Loose Veneer and Edges
As we discussed earlier, loose veneer and edges can often be repaired with wood glue. For lifting veneer, try to gently lift the edge as much as possible without causing further damage. Use a thin applicator, like a toothpick or a small paintbrush, to apply a generous amount of wood glue under the veneer.
Then, press the veneer back down firmly. Clean up any excess glue immediately with a damp cloth.
To ensure a strong bond, you need to clamp the area securely while the glue dries. You can use painter’s tape to hold small sections in place, or use clamps with scrap wood pieces underneath to distribute the pressure and protect the veneer surface. For edges, inject glue into the gap and then clamp the edge tightly.
Allow the glue to cure completely, usually for at least 24 hours, before removing clamps.
Case Studies of Plywood Cabinet Issues and Solutions
Seeing how others have tackled Common Issues with Kitchen Cabinets Made from Plywood can be very helpful. Real-life examples show what works and what challenges might come up. These stories offer practical insights that go beyond general advice.
They highlight how different problems were identified and solved.
We will look at a couple of scenarios where homeowners faced typical plywood cabinet problems. We’ll see what steps they took and the results they achieved. This will give you a clearer picture of how to apply the knowledge you’ve gained.
Case Study 1: Water Damage Under the Sink
Sarah noticed that the plywood base of her sink cabinet was starting to feel soft and looked a bit discolored. It turned out there had been a slow leak from the plumbing under the sink that had gone unnoticed for some time. The bottom panel of the cabinet had begun to swell, and the edge banding was starting to peel away.
First, Sarah and her partner fixed the leaky pipe. Then, they assessed the damage. The swelling had caused the cabinet base to warp slightly.
They carefully removed the peeling edge banding. They then used a wood hardener on the soft areas to strengthen the wood. After it dried, they applied wood filler to smooth out the warped areas and any visible damage.
Once the filler was sanded smooth, they applied a new coat of water-resistant sealant to the entire cabinet base and installed new edge banding. The result was a functional and protected cabinet base that looked almost as good as new.
Case Study 2: Delamination on Cabinet Doors
Mark had a set of older plywood kitchen cabinets where the veneer on some of the cabinet doors had started to bubble and peel, especially near the handles. This was mostly an aesthetic problem, but he was worried it would get worse. The kitchen often got steamy from cooking.
Mark decided to try repairing the delaminated areas himself. He carefully used a craft knife to lift the peeling veneer on the affected doors. He then used a syringe to inject wood glue into the gaps.
He pressed the veneer back down and used painter’s tape to hold it in place while the glue dried. For areas where the veneer was too damaged to reattach, he carefully cut away the loose pieces, sanded the area smooth, and then used a matching wood filler. After the filler dried and was sanded, he reapplied a thin coat of clear sealant to the repaired areas and the entire door to provide extra protection.
The doors now look much better, and he feels confident they will hold up better against moisture.
Frequently Asked Questions
Question: Will my plywood kitchen cabinets rot if they get wet?
Answer: Plywood can be damaged by water. If it gets very wet and stays wet for a long time, the wood fibers can swell and the glue holding the layers together can weaken. This can lead to the plywood softening, swelling, and even breaking down over time.
Promptly drying any wet areas is key to preventing long-term damage and rot.
Question: Is it better to buy solid wood or plywood kitchen cabinets?
Answer: Both have pros and cons. Solid wood can be beautiful and is very durable, but it can warp and is usually more expensive. Plywood is very stable, less prone to warping, strong, and often more affordable.
For most kitchens, plywood offers a great balance of durability and value, especially if it’s good quality plywood.
Question: How long do plywood kitchen cabinets typically last?
Answer: With good care and maintenance, plywood kitchen cabinets can last for many years, often 15 to 20 years or even longer. Their lifespan depends on the quality of the plywood used, the construction, the finish, and how well they are maintained. Regular cleaning and prompt attention to any moisture issues will help them last.
Question: Can I paint over peeling veneer on my plywood cabinets?
Answer: It’s not recommended to paint directly over peeling veneer. The peeling veneer will likely continue to lift and the paint will peel with it, making the problem worse. You should first repair the peeling veneer by re-gluing it or filling the damaged areas.
Once the surface is smooth and stable, you can then prime and paint the cabinets.
Question: What is the difference between plywood and particleboard for cabinets?
Answer: Plywood is made from thin layers of wood veneer glued together with alternating grain directions, making it very strong and stable. Particleboard is made from wood chips and sawdust mixed with glue and pressed into panels. Particleboard is generally less strong, less moisture-resistant, and more prone to swelling and breaking down than plywood.
Final Thoughts
You’ve learned about the Common Issues with Kitchen Cabinets Made from Plywood and how to fix them. Plywood is a strong material, but moisture and wear can cause problems like swelling, delamination, and peeling veneer. By cleaning regularly, protecting the finish, and making simple repairs, you can keep your cabinets looking great and working well for years.
Don’t be afraid to tackle these fixes yourself!