
Wondering about Are Pallet Wood Kitchen Cabinets Safe for Indoor Use? It can feel a bit tricky to figure out if using pallet wood for your kitchen cabinets is a good idea, especially if you’re new to DIY projects. You might worry about what’s in the wood or how to make it look nice and safe.
Don’t fret! We’re going to walk through this step-by-step, making it super easy to understand. We’ll cover everything you need to know to make your own beautiful and safe pallet wood kitchen cabinets.
Investigating Pallet Wood for Kitchen Cabinets
This part looks at why people consider using pallet wood for their kitchens and what makes it a popular choice for DIYers. It’s a way to get a unique look for less money. We’ll cover the appeal of upcycling and the potential cost savings.
This section will also touch on the common questions beginners have when they first think about using pallet wood.
Why Pallet Wood is an Attractive Option
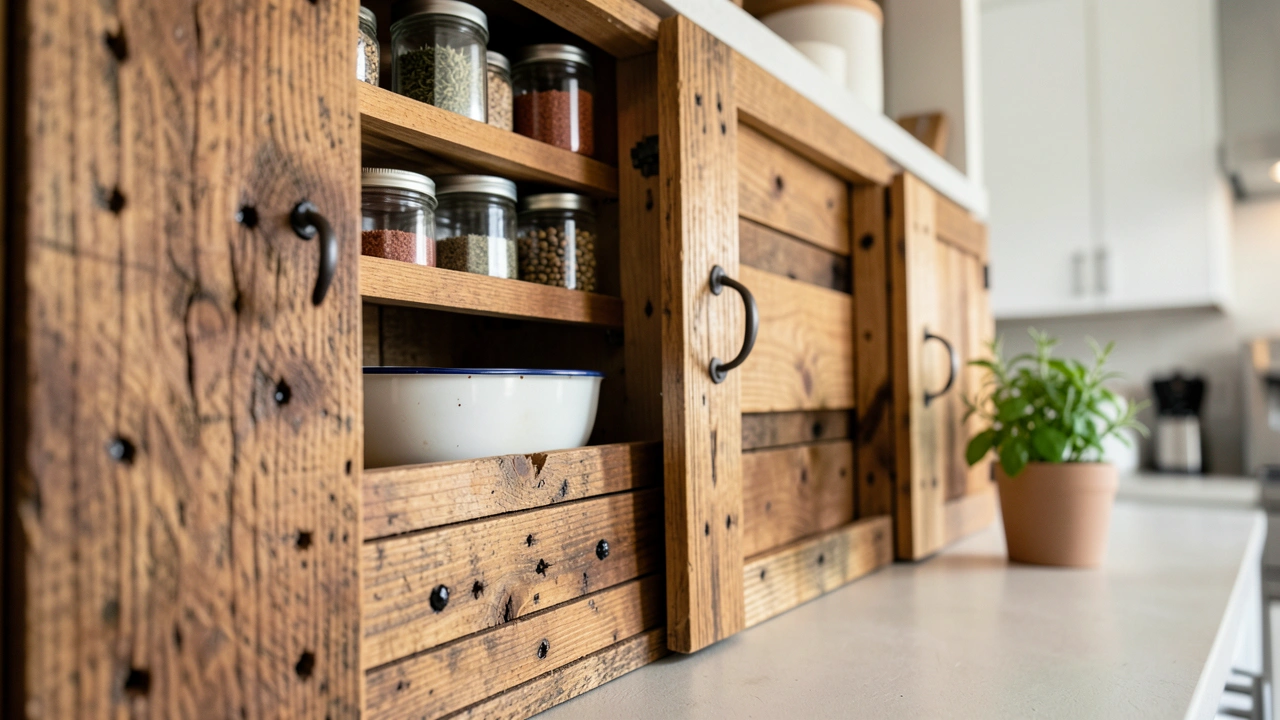
Pallet wood offers a rustic and charming aesthetic that many homeowners desire. It’s often seen as a sustainable choice because it gives new life to materials that might otherwise be discarded. This can significantly reduce the cost of a kitchen renovation compared to buying brand-new cabinets.
Many find the challenge of transforming rough wood into beautiful furniture quite rewarding.
-
Cost Savings: One of the biggest draws of pallet wood is its affordability. Often, pallets can be obtained for free or at a very low cost from local businesses. This dramatically cuts down on material expenses for your cabinet project, making a kitchen remodel more accessible.
-
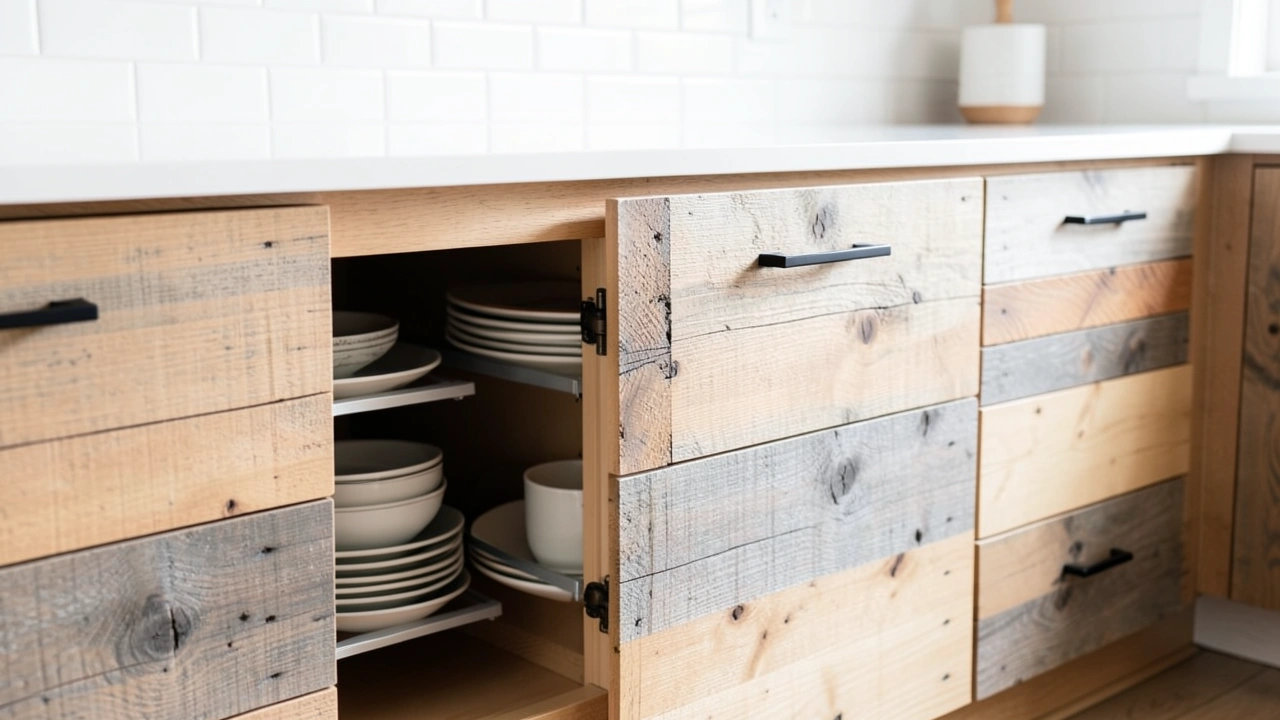
Unique Aesthetic: Pallet wood carries a natural character. The grain, knots, and sometimes even marks from its previous use add a unique charm. This can create kitchen cabinets with a distinct look that mass-produced cabinets can’t replicate, giving your kitchen a personalized feel.
-
Environmental Friendliness: Using pallet wood is a form of upcycling. Instead of adding to landfills, you’re giving the wood a second life. This can be a significant factor for those looking to create a more eco-conscious home.
Common Beginner Concerns About Pallet Wood
Newcomers often worry about the condition of pallet wood. Questions about splinters, chemicals, and durability are very common. People want to know if the wood is clean enough and if it will hold up to the daily use a kitchen demands.
Addressing these fears upfront is key to a successful project.
-
Wood Condition: Pallets are used to transport goods, so they can be dirty, damp, or even damaged. Beginners might worry about the amount of work needed to clean and prepare the wood, fearing it might be too time-consuming or difficult.
-
Chemical Treatments: Some pallets are treated with chemicals for pest control or to prevent mold. This is a major concern for indoor use, especially in a place where food is prepared. Identifying safe pallets is crucial.
-
Durability and Strength: Kitchen cabinets need to be strong. Beginners might question if pallet wood, which can be of varying quality and age, will be sturdy enough to support the weight of dishes and the constant opening and closing of doors.
Identifying Safe Pallet Wood Sources
Finding the right pallet wood is essential for safety and success. Not all pallets are created equal, and some can contain harmful substances. This section will guide you on how to spot the good ones and avoid the bad.
We’ll look at markings, common treatments, and where to find pallets that are safer for your home.
Understanding Pallet Markings: The HT Stamp
The most important thing to look for on a pallet is its stamp. The “HT” stamp is a good sign. It means the wood was heat-treated, which is a safe method for pest control.
This process uses high temperatures to kill bugs without harsh chemicals. Pallets marked with “MB” for methyl bromide treatment should be avoided for indoor use.
-
Heat Treatment (HT): This is the gold standard for DIY projects. The HT stamp indicates the pallet has undergone a heat treatment process. The wood is heated in a kiln to a core temperature of at least 56°C (133°F) for a minimum of 30 minutes.
This effectively kills insects and their eggs, making the wood safer for use indoors.
-
Methyl Bromide (MB): Pallets marked with MB have been treated with methyl bromide, a fumigant that is toxic to humans and the environment. These should be strictly avoided for any indoor projects, especially those that will be in contact with food or living spaces.
-
Untreated Pallets: Some pallets have no stamp at all. While seemingly harmless, these could have been exposed to various substances during shipping or storage. It’s generally safer to stick with clearly marked HT pallets or to source wood from known, reputable suppliers.
Where to Find Pallets
You can find pallets in many places. Local businesses, especially those receiving shipments regularly, are often happy to give away excess pallets. Construction sites, warehouses, and even some larger retail stores are good places to check.
Always ask permission before taking any pallets.
-
Local Businesses: Many small businesses, like garden centers, hardware stores, or small factories, receive goods on pallets. They often have stacks of used pallets they don’t need and are willing to let you take them for free. A friendly conversation can go a long way.
-
Construction Sites: Builders often get materials delivered on pallets. While you must always get permission from the site manager, you might find usable wood here. Be aware that wood from construction sites could be rougher and might have nails or screws still in it.
-
Online Marketplaces: Websites like Craigslist, Facebook Marketplace, or local buy/sell groups often have people giving away or selling pallets. This can be a convenient way to find a source close to home.
Pallets to Avoid
Steer clear of pallets that look heavily stained, have unusual odors, or are marked with MB. Pallets that have transported chemicals, oils, or food waste are also best left untouched for kitchen use. The visual and olfactory cues are important indicators of potential contamination.
-
Chemical Stains or Odors: If a pallet has dark stains that don’t look like natural wood discoloration, or if it emits a strong chemical smell, it’s a red flag. These could be signs of spills or treatments you don’t want in your home.
-
Food or Waste Residue: Pallets that have been used to transport raw meat, produce that has spoiled, or other food waste should be avoided. Even with cleaning, it’s difficult to be sure all contaminants are removed, posing a health risk.
-
The MB Stamp: As mentioned before, any pallet stamped with MB indicates treatment with methyl bromide. This is a dangerous chemical and should never be used for furniture or any item that will be inside your home.
Preparing Pallet Wood for Kitchen Cabinets
Once you’ve sourced safe pallet wood, the next step is to prepare it. This involves cleaning, disassembling, and sanding. Proper preparation is key to making the wood look good and ensuring it’s safe and ready for your cabinets.
This section will detail each of these important steps.
Cleaning and Disassembly
Start by giving the pallets a good scrub. Use soap and water, and perhaps a stiff brush, to remove dirt and grime. After cleaning, you’ll need to carefully take the pallets apart to get usable planks.
This can be the most challenging part, as nails can be stubborn. Using a pry bar and hammer is often effective, but be patient to avoid splitting the wood.
-
Scrubbing Down: A thorough cleaning is the first line of defense. Use a stiff brush and a mixture of water and mild detergent to remove any surface dirt, dust, or debris. For tougher spots, a bit of diluted bleach can help, but ensure you rinse thoroughly afterward.
-
Prying Apart: Carefully use a pry bar to loosen the planks from the pallet frame. Work slowly and deliberately to minimize damage to the wood. You might need to use a hammer to gently tap the pry bar into place.
Removing nails can be done with pliers or a claw hammer.
-
Nail Removal: Once the planks are free, go back and remove all nails. Hammering them through from the other side can sometimes be easier than pulling them out. Ensure no metal fragments remain, as these can damage tools and be a safety hazard.
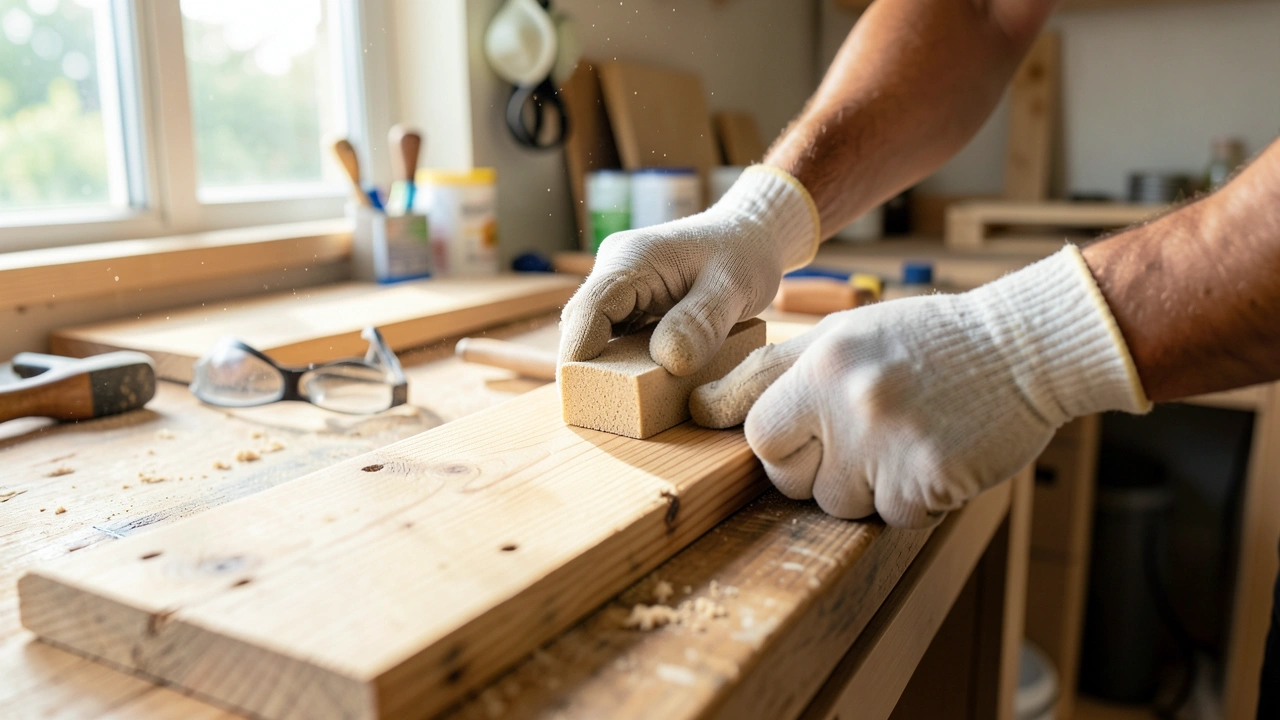
Sanding for a Smooth Finish
Sanding is crucial for a smooth, splinter-free surface. Start with a coarser grit sandpaper (like 80-grit) to remove rough spots and any remaining splinters. Then, move to finer grits (120-grit, then 220-grit) to achieve a smooth finish.
A power sander will make this job much faster, but it can also be done by hand.
-
Rough Sanding: Begin with a coarser grit sandpaper, around 80-grit. This will remove the most uneven surfaces, deep scratches, and any lingering splinters. If using a power sander, move it steadily across the wood.
-
Medium Sanding: Progress to a medium grit, such as 120-grit. This refines the surface further, smoothing out the marks left by the coarser grit and preparing the wood for a finer finish.
-
Fine Sanding: Finish with a fine grit, like 220-grit. This creates a silky-smooth surface that is pleasant to touch and ready for sealing or painting. The smoother the wood, the better your finish will look and the safer it will be.
Considering Wood Treatments and Sealants
After sanding, it’s wise to treat the wood. A food-safe sealant is highly recommended for kitchen cabinets to protect them from moisture, stains, and bacteria. There are many options available, including natural oils like mineral oil or tung oil, or water-based polyurethane sealants that are low in VOCs (volatile organic compounds).
-
Food-Safe Sealants: For kitchen use, using a food-safe sealant is paramount. These sealants create a barrier that protects the wood from spills and makes it easier to clean. They also prevent moisture from damaging the wood over time.
-
Natural Oils: Options like mineral oil or pure tung oil are excellent choices. They penetrate the wood, offering a natural finish and protection. These are generally safe for food contact and easy to reapply if needed.
-
Water-Based Polyurethanes: If you prefer a more durable finish, look for water-based polyurethane varnishes. Choose those that are certified as low-VOC and safe for kitchen surfaces. They provide a strong protective layer against wear and tear.
Designing and Building Your Pallet Wood Cabinets
Now for the fun part: turning your prepared wood into actual kitchen cabinets! This involves planning your design, cutting the wood to size, and assembling the cabinets. Even for beginners, a simple design can yield impressive results.
We’ll cover basic design ideas and the assembly process.
Simple Cabinet Designs for Beginners
For your first pallet wood project, keeping the design simple is best. You could create basic cabinet boxes with doors, or perhaps open shelving units. Measure your space carefully and sketch out a plan.
Standard cabinet box construction involves making a rectangular frame and attaching doors.
-
Basic Box Construction: The foundation of most cabinets is a simple box. You’ll create a sturdy frame using the prepared pallet wood planks. These can be joined together using wood glue and screws for maximum strength.
-
Adding Doors: Once the boxes are built, you can attach simple doors. These can be made from single planks or a few joined together. Hinges are readily available at hardware stores and are easy to install.
-
Open Shelving: An even simpler option is to build open shelves. These require fewer components and can be very stylish, especially when displaying nice dishware or decorative items. Ensure they are securely mounted to the wall.
Cutting and Assembling the Cabinet Structure
Measure twice, cut once! Use your plans to cut the pallet wood planks into the correct sizes for your cabinet frames, shelves, and doors. Then, use wood glue and screws to assemble the pieces.
Pre-drilling holes can prevent the wood from splitting, especially with older pallet wood.
-
Accurate Cutting: A tape measure and a good saw (a circular saw or jigsaw works well) are your best friends here. Carefully mark your measurements and make clean cuts. Ensure all pieces for a specific cabinet are cut to the same dimensions.
-
Joining Pieces: Apply a generous amount of wood glue to the edges where pieces will join. Then, secure them with screws. For added strength, especially on load-bearing joints, consider using corner braces.
-
Pre-drilling Holes: Before driving screws, especially near the ends of planks, drill pilot holes slightly smaller than the screw diameter. This prevents the wood from cracking, which is common with drier, older wood.
Adding Hardware and Finishing Touches
Once the main structure is built, add hinges, handles, and any shelving supports. You can paint, stain, or leave the wood with its natural finish. Remember to reapply a food-safe sealant for added protection.
The final touches make a big difference in the look and functionality of your cabinets.
-
Hardware Installation: Attach hinges for doors and drawer slides if you’re building drawers. Handles or knobs can be added to doors and drawers. Choose hardware that complements the rustic style of the pallet wood.
-
Painting or Staining: You can paint your cabinets a bright color, stain them to bring out the wood grain, or leave them unfinished for a truly rustic look. If painting or staining, ensure you use low-VOC products for a healthier indoor environment.
-
Final Sealing: After all other steps, apply another coat of your chosen food-safe sealant. This protects the finished cabinets and makes them easy to wipe clean, ensuring they remain safe and beautiful for years to come.
Maintaining Your Pallet Wood Kitchen Cabinets
Keeping your pallet wood cabinets in good shape is important. Regular cleaning and occasional touch-ups will ensure they look great and remain safe for use. This section will cover simple maintenance tips to help your cabinets last.
Daily Cleaning and Care
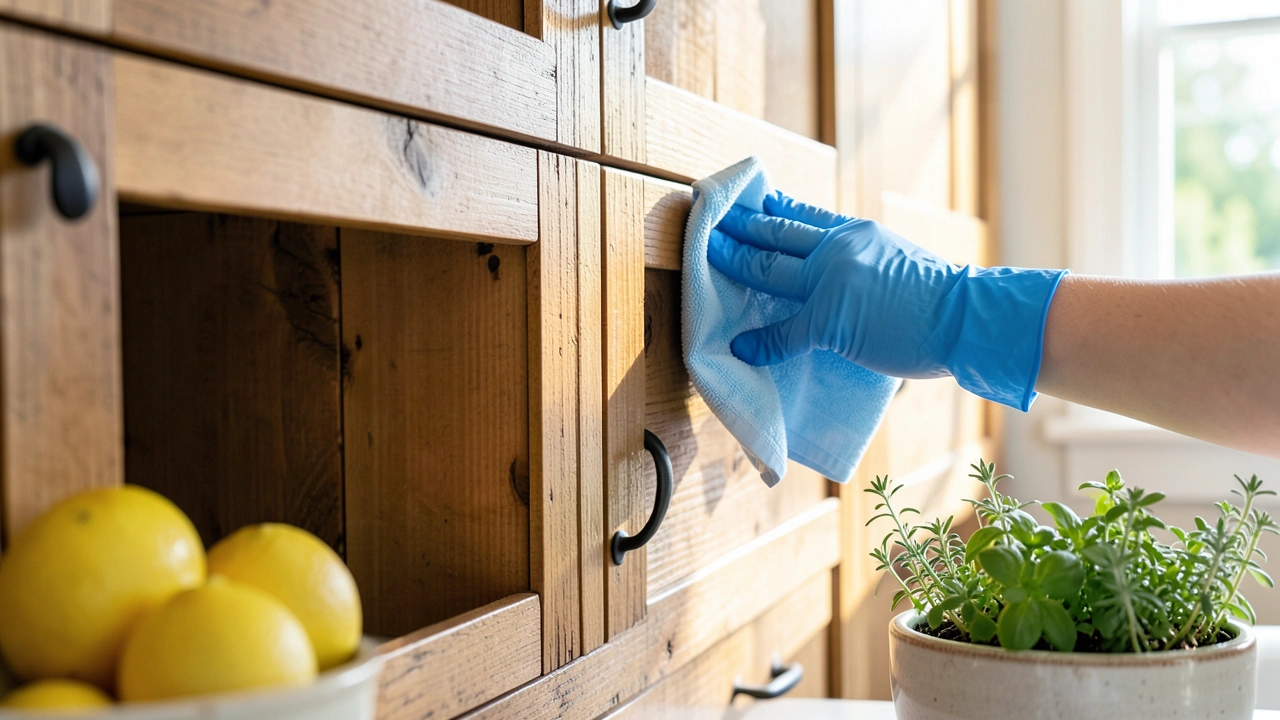
For daily cleaning, a damp cloth is usually enough. Wipe down surfaces to remove crumbs and light spills. Avoid harsh chemical cleaners, as they can damage the sealant or the wood itself.
For tougher spots, use a mild soap and water solution and dry thoroughly.
-
Wipe Down Regularly: Get into the habit of wiping down your cabinets after cooking or meal preparation. This prevents food particles and grease from building up.
-
Mild Soap and Water: If a surface needs more than a damp cloth, use a small amount of mild dish soap mixed with warm water. Avoid abrasive cleaners or scrubbing pads that can scratch the finish.
-
Thorough Drying: Always dry the cabinets thoroughly after cleaning. This is especially important for pallet wood, which can be more susceptible to moisture damage than hardwoods.
Periodic Maintenance and Protection
Every few months, check your cabinets for any signs of wear. You might need to reapply sealant, especially in high-moisture areas like around the sink. Inspect for loose screws or hinges and tighten them as needed.
Touch up any scratches or wear marks with a bit of sealant or matching stain.
-
Reapply Sealant: Depending on use, you might need to reapply a food-safe sealant every 6-12 months. This reinforces the protective layer against moisture and stains.
-
Check for Loose Hardware: Over time, hinges and handles can loosen. Periodically check and tighten all hardware to ensure the cabinets function smoothly and safely.
-
Repair Minor Damage: Small scratches or dings can be easily repaired. You can use a touch-up pen or a small amount of the sealant or stain you used during the finishing process.
Frequently Asked Questions
Question: What are the biggest risks of using pallet wood in the kitchen?
Answer: The main risks involve chemical treatments (like methyl bromide) that might be on the wood, making it unsafe for contact with food. There’s also the risk of splinters or bacteria if the wood isn’t properly cleaned and sealed. Always choose HT-stamped pallets and use food-safe sealants.
Question: How can I tell if pallet wood is safe?
Answer: Look for the “HT” stamp, which means it was heat-treated and is generally safe. Avoid pallets marked “MB” (methyl bromide) or those that have transported chemicals, oils, or waste. If in doubt, it’s better not to use it for your kitchen.
Question: Do I need to seal pallet wood for kitchen cabinets?
Answer: Yes, absolutely. Sealing is very important. It protects the wood from moisture, stains, and makes it easier to clean.
For kitchen use, always use a food-safe sealant to ensure everything stays hygienic.
Question: Can I paint pallet wood kitchen cabinets?
Answer: Yes, you can paint them! Make sure the wood is clean, sanded, and sealed first. Use low-VOC paints for a healthier indoor environment.
A primer might also be helpful for a smoother finish.
Question: How long will pallet wood kitchen cabinets last?
Answer: With proper preparation, sealing, and regular maintenance, pallet wood kitchen cabinets can last for many years, similar to cabinets made from other types of wood. The durability depends on the quality of the wood, how well it’s sealed, and how you care for them.
Wrap Up
Making pallet wood kitchen cabinets safe for indoor use is achievable. By choosing HT-stamped wood, cleaning it thoroughly, and applying food-safe sealants, you create a healthy and beautiful kitchen. Enjoy your unique, upcycled cabinets!