
Grease on kitchen surfaces can be a real sticky problem, especially for those just starting out in the kitchen. It seems to show up everywhere, making things messy and tough to handle. Many people wonder about How to Clean Kitchen Grease the Right Way because it feels like a constant battle.
Don’t worry, this guide will make it super simple. We’ll walk through easy steps to get your kitchen sparkling clean again, showing you what to do next.
Understanding Kitchen Grease Buildup
Kitchen grease is that sticky, sometimes oily film that coats surfaces in your kitchen. It comes from cooking foods like bacon, fried chicken, or even just simmering sauces. Over time, this grease mixes with dust and dirt in the air, creating a tough layer that’s hard to wipe away with just water.
This buildup can make your kitchen look dingy and can even become a fire hazard if it accumulates on stovetops or near heat sources. It’s a common issue in any home where cooking happens regularly.
What is Kitchen Grease?
Kitchen grease is essentially rendered fat from cooking. When food, especially meats and fatty items, is heated, the fat melts. This melted fat then becomes airborne in tiny droplets, settling on every surface around your stovetop, walls, cabinets, and even your ceiling.
It’s not just the visible oil; it’s a compound that bonds to surfaces. This bonding makes it stickier and more difficult to remove than simple spills or water spots. Different types of cooking produce different kinds of grease.
For example, deep-frying creates a lighter, more volatile grease, while roasting meats might produce a thicker, more stubborn residue.
Why Grease Accumulates
Grease accumulates because it’s a natural byproduct of cooking. Most cooking methods, especially those involving heat and fat, release grease particles into the air. These particles are too fine to see easily, but they are there.
When they land on your kitchen surfaces, they cool and solidify, forming that sticky film. Without regular cleaning, this film gets thicker and harder to remove. Think of it like painting; each layer adds to the overall thickness.
The constant cycle of cooking means a constant supply of grease to your kitchen environment.
- Airborne Particles: When food cooks, especially at high temperatures, fat melts and turns into tiny airborne droplets. These droplets float through the air and settle on anything they touch.
- Surface Adhesion: Once these droplets land, they cool and become sticky. They cling to surfaces like a magnet, making them hard to wipe off.
- Heat and Sticking: Kitchens are warm places. This warmth can sometimes help grease stick even better to surfaces. It’s like warm butter on toast – it spreads and sticks.
The Impact of Uncleaned Grease
Leaving grease to build up has several negative consequences for your kitchen. Visually, it makes your kitchen look dirty and uninviting. It can dull the shine of your countertops and cabinets.
More importantly, grease is flammable. A thick layer of grease on your stovetop or near a heat source can be a serious fire risk. It can also attract pests like ants and roaches, as they are drawn to food residues.
Furthermore, over time, grease can become rancid, leading to unpleasant odors in your kitchen.
Effective Methods for Grease Removal
Getting rid of kitchen grease doesn’t have to be a chore. There are several effective methods and cleaning agents you can use, depending on the surface and how stubborn the grease is. Simple, everyday items can often do the trick, saving you money and avoiding harsh chemicals.
The key is to use the right approach for the right situation.
Using Common Household Cleaners
Many standard household cleaning products are designed to cut through grease. Dish soap, for instance, is formulated to break down food grease on dishes, and it works just as well on kitchen surfaces. A simple solution of dish soap and warm water can tackle light grease buildup.
For tougher jobs, you might need something a bit stronger, like a dedicated kitchen degreaser spray. Always test any cleaner on an inconspicuous spot first to make sure it doesn’t damage the surface.
Dish Soap Solution
This is your first line of defense against kitchen grease. Dish soap contains surfactants, which are special ingredients that help lift and separate grease from surfaces. When you mix dish soap with warm water, it creates suds that trap the grease particles.
You can then easily wipe them away. This method is safe for most kitchen surfaces, including countertops, stovetops, and sinks. It’s also environmentally friendly and cost-effective.
- What you need: A bottle of liquid dish soap, warm water, and a soft cloth or sponge.
- How to do it: Add a few drops of dish soap to a basin of warm water. Dip your cloth or sponge into the soapy water and wring it out so it’s damp, not dripping. Wipe down the greasy surfaces. For stubborn spots, let the soapy water sit for a few minutes before wiping. Rinse the cloth or sponge often.
- Why it works: Dish soap breaks down the oil in the grease, allowing it to be lifted and washed away. Warm water helps to melt the grease slightly, making it easier to remove.
All-Purpose Cleaners
All-purpose cleaners are great for general kitchen cleaning and can handle light to moderate grease. They are designed to be safe for a variety of surfaces. When choosing an all-purpose cleaner for grease, look for one that specifically mentions “grease-cutting” or “degreasing” on the label.
These cleaners often contain a blend of solvents and detergents that are effective against oily residues.
- Application: Spray the cleaner directly onto the greasy surface.
- Soaking time: Allow the cleaner to sit for a minute or two, especially if the grease is thick. This gives the chemicals time to break down the grease.
- Wiping: Wipe the surface clean with a damp cloth or sponge.
- Rinsing: Some cleaners require a rinse with clean water to remove residue. Always check the product label for instructions.
Natural Cleaning Solutions
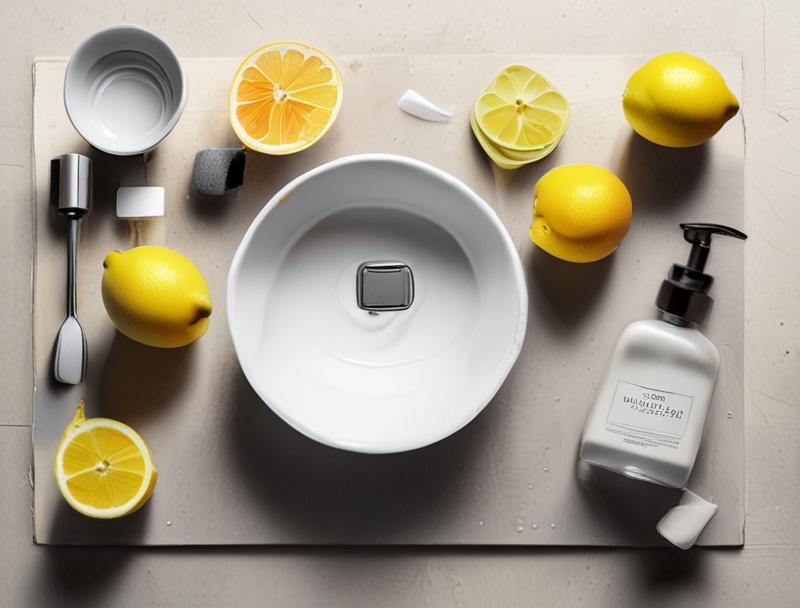
For those who prefer to avoid harsh chemicals, natural cleaning solutions are excellent alternatives. Vinegar, baking soda, and lemon juice are powerful degreasers. They are also safe for most kitchen surfaces and are readily available in most homes.
These natural options are not only effective but also better for your health and the environment.
Vinegar Power
White vinegar is a fantastic natural degreaser. Its acidity helps to break down grease and grime. You can use it in a spray bottle, often diluted with water, to tackle greasy stovetops, backsplashes, and even cabinet doors.
The smell of vinegar might be strong at first, but it dissipates quickly as it dries, leaving your kitchen smelling fresh.
- Mix it up: Combine equal parts white vinegar and water in a spray bottle.
- Spray and wait: Spray the solution generously onto the greasy areas. Let it sit for about five minutes.
- Wipe it clean: Wipe the surface with a clean, damp cloth. You might need to scrub a bit for tougher spots.
- Rinse: For surfaces that might be sensitive to acid, or if you want to remove any vinegar smell, wipe again with a cloth dampened with plain water.
Baking Soda Paste
Baking soda is a mild abrasive and a natural deodorizer. When made into a paste with water, it can gently scrub away stubborn grease without scratching surfaces. This is particularly useful for baked-on grease or grime on stovetops and oven interiors.
The paste’s texture helps lift the grease, while its alkaline nature helps break it down.
- Make the paste: Mix baking soda with a small amount of water until you have a thick paste.
- Apply: Spread the paste over the greasy areas.
- Let it work: Allow the paste to sit on the grease for 10-15 minutes.
- Scrub and wipe: Use a damp sponge or cloth to gently scrub the paste and the loosened grease. Wipe clean with a damp cloth, rinsing it frequently.
Lemon Juice Magic
The citric acid in lemon juice also acts as a natural degreaser. It can cut through grease and leave a pleasant, fresh scent. You can use fresh lemon juice or bottled lemon juice.
For tougher grease, you can even rub a cut lemon directly onto the greasy surface, let it sit, and then wipe it away.
- Use fresh: Cut a lemon in half.
- Rub and wait: Rub the cut side of the lemon over the greasy spots. Let the juice sit for 5-10 minutes.
- Wipe away: Wipe the area with a damp cloth. The acid in the lemon helps dissolve the grease.
- Rinse if needed: For some surfaces, you may want to wipe with a cloth dampened with water afterward.
Specialized Degreasers
Sometimes, the grease is just too tough for simple solutions. This is where specialized degreasers come in handy. These are cleaning products formulated specifically to break down heavy grease and grime.
They are often more potent than general-purpose cleaners and are designed for high-grease areas like kitchen hoods, backsplashes, and stovetops.
When to Use Them
Specialized degreasers are best for situations where you have a thick, caked-on layer of grease that has been building up for a while. This might be on the exhaust hood above your stove, the backsplash behind your cooking area, or even inside your oven if it has a self-cleaning function that didn’t quite get everything. If your regular dish soap and water or natural cleaners aren’t cutting it, it’s time to bring out the heavy-duty stuff.
- Heavy buildup: Ideal for grease that’s hardened and appears dark or sticky.
- High-heat areas: Effective on surfaces near the stove where grease has been exposed to high temperatures, making it bake on.
- Tough grime: Works well on grease mixed with carbonized food particles, which are common in cooking environments.
How to Use Safely
Because specialized degreasers are more powerful, it’s important to use them carefully. Always read and follow the instructions on the product label. Wear gloves to protect your skin, and ensure the area is well-ventilated by opening windows or turning on an exhaust fan.
Some degreasers can damage certain surfaces, so always test a small, hidden area first. Never mix different cleaning products, as this can create dangerous fumes.
- Ventilation: Always ensure good airflow.
- Gloves: Wear rubber gloves to protect your hands.
- Patch test: Apply to a small, out-of-sight area first.
- Avoid mixing: Never combine degreasers with other cleaners.
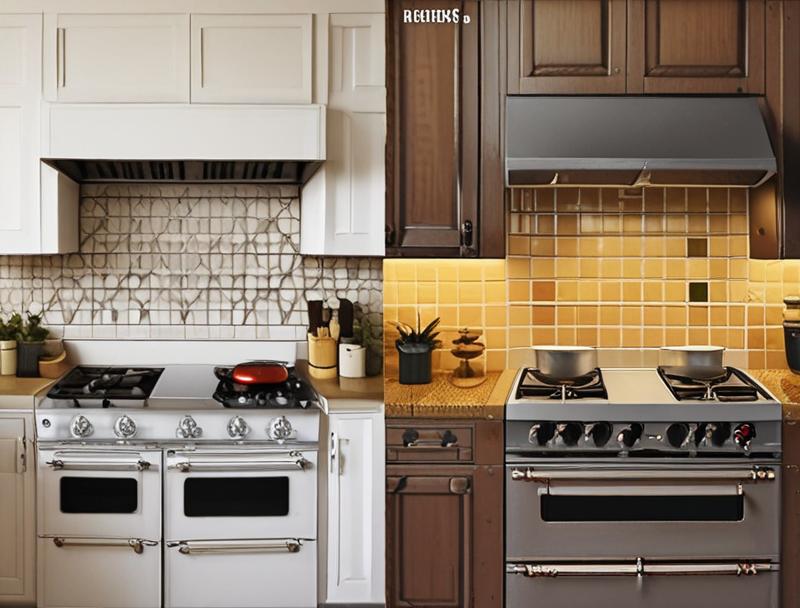
Cleaning Specific Kitchen Surfaces
Different materials in your kitchen require different cleaning approaches. What works for stainless steel might not be ideal for granite or wood. Understanding the surface you’re cleaning is key to avoiding damage and achieving the best results.
Stainless Steel Appliances
Stainless steel is popular for appliances because it’s durable and looks good, but it can show grease and smudges easily. To clean stainless steel, use a cleaner specifically designed for it or a mild dish soap solution. Always wipe in the direction of the grain of the steel to avoid scratches and streaks.
A final polish with a soft cloth can restore its shine.
- Grain direction: Always wipe along the lines (grain) of the stainless steel.
- Specialized cleaners: Stainless steel cleaners often contain polishing agents.
- Avoid abrasives: Steel wool or abrasive pads can scratch the surface.
- Microfiber cloths: These are great for polishing without leaving lint.
For example, imagine a stainless steel refrigerator door covered in fingerprints and a few splatters from cooking. A quick spray of a stainless steel cleaner, followed by wiping with a microfiber cloth in the direction of the grain, will make it look brand new. This is a common scenario in many kitchens.
Granite Countertops
Granite countertops are beautiful and sturdy, but they can be porous and susceptible to staining if not properly sealed. For everyday cleaning, a mild dish soap and warm water solution is best. Avoid acidic cleaners like lemon juice or vinegar, as they can etch the granite and dull its shine.
Always wipe up spills immediately to prevent them from soaking into the stone.
- Mild soap is key: Use a pH-neutral cleaner or mild dish soap.
- Seal your granite: Regularly check and reapply sealant as needed.
- Wipe spills quickly: Don’t let liquids sit on the surface.
- Avoid harsh chemicals: Ammonia, bleach, and acidic cleaners can damage granite.
A common situation is a greasy spill from cooking oil on a granite countertop. Instead of grabbing a strong chemical cleaner, a simple wipe with a cloth dampened with warm water and a drop of dish soap is often all that’s needed. This preserves the granite’s natural beauty and protective sealant.
Laminate and Wood Cabinets
Cabinets can accumulate grease from cooking vapors over time. For laminate cabinets, a damp cloth with mild dish soap is usually sufficient. For real wood cabinets, use a cleaner specifically made for wood, or a very mild soap solution.
Be careful not to oversaturate wood with water, as it can cause warping or damage the finish. Always dry wooden surfaces thoroughly after cleaning.
- Laminate: Gentle cleaning with soap and water.
- Wood: Use wood-specific cleaners; avoid excess water.
- Dry thoroughly: Crucial for preserving wood finishes.
- Test first: Always test cleaners on an inconspicuous spot.
Backsplashes and Walls
The area behind your stove and countertops, known as the backsplash, often bears the brunt of cooking splatters and grease. The best cleaning method depends on the material of your backsplash (tile, glass, stainless steel). For most tiled backsplashes, a spray of all-purpose cleaner or a vinegar-water solution works well.
For grout, a baking soda paste can help lift stains. For walls, a gentle all-purpose cleaner is usually effective.
- Tile: Use all-purpose cleaner or vinegar solution; baking soda for grout.
- Glass: Window cleaner or vinegar solution works best.
- Painted walls: Use a mild soap and water solution; avoid scrubbing too hard.
Deep Cleaning Techniques for Stubborn Grease
Sometimes, the grease has been sitting for so long it feels like it’s part of the surface. For these situations, a deep cleaning approach is necessary. This involves using stronger cleaning agents, longer contact times, and a bit more elbow grease.
It’s about systematically breaking down and removing even the most hardened grease.
Oven Cleaning
Oven interiors are notorious for grease buildup, especially from baked-on spills. Many modern ovens have a self-cleaning function, which uses high heat to burn off residue. However, this function isn’t always perfect and can leave behind ash that needs wiping.
For ovens without this feature, or for stubborn spots, a heavy-duty oven cleaner is often required. Always ensure excellent ventilation and wear protective gear when using these products. A natural alternative is a baking soda paste, applied overnight, followed by scrubbing and wiping.
- Self-cleaning cycle: Use if available; wipe ash afterward.
- Heavy-duty cleaners: For non-self-cleaning ovens; use with caution and ventilation.
- Baking soda paste: A natural option; requires time and scrubbing.
- Avoid heating elements: Do not spray cleaners directly onto oven heating elements.
Consider a scenario where a cake overflowed in the oven, leaving a thick, caramelized layer on the oven floor. Using a commercial oven cleaner, applied according to instructions and allowed to sit for several hours, can dissolve this tough residue. The next step is to wipe it all away, leaving a clean oven ready for use.
Range Hood and Vent Cleaning
The range hood above your stove is designed to capture grease and smoke. Over time, grease accumulates in the filters and on the hood’s surfaces. The filters themselves often need regular cleaning or replacement.
Many metal range hood filters are dishwasher safe, which makes cleaning them much easier. For the hood itself, a strong degreaser is usually necessary. You might need to remove the hood cover to get to all the greasy parts.
- Clean filters regularly: Check your range hood manual for cleaning instructions.
- Dishwasher safe filters: Many can be cleaned in the dishwasher.
- Degreaser for hood surfaces: Use a strong cleaner for the exterior and interior.
- Inspect internal components: Some hoods have parts that can be cleaned separately.
Imagine a range hood that looks greasy and dull. Removing the metal mesh filters and washing them in hot, soapy water or running them through the dishwasher can make a huge difference. Then, a good spray of degreaser on the hood’s exterior, followed by wiping, restores its shine.
This is a task many homeowners put off, but it significantly improves kitchen air quality and appearance.
Grease on Walls and Ceilings
Grease doesn’t just stick to surfaces near the stove; it can travel. Airborne grease particles settle on walls and even ceilings, especially in kitchens that are used frequently. For painted walls, a mild solution of dish soap and water is often effective.
For tougher spots, a diluted vinegar solution might be needed, but always test in an inconspicuous area first. For ceilings, it’s often best to use a mop with a long handle and a gentle cleaning solution, being careful not to oversaturate.
- Gentle approach: Use mild cleaners for painted surfaces.
- Test first: Always test on a hidden spot before tackling a large area.
- Long-handled mop: Useful for reaching ceilings and high walls.
- Avoid harsh scrubbing: This can damage paint finishes.
Picture the area of the wall above a busy stovetop. It might have a thin film of grease that makes it look dull. Spraying this area with an all-purpose cleaner and wiping it down with a soft cloth can quickly brighten it up.
This simple act makes the entire kitchen look cleaner.
Preventing Future Grease Buildup
The best way to deal with grease is to prevent it from building up in the first place. Consistent, small cleaning efforts can save you a lot of time and effort in the long run. Making cleaning a part of your routine will keep your kitchen looking its best with minimal fuss.
Regular Wiping
The most effective way to prevent grease buildup is to wipe down surfaces regularly. After each cooking session, take a few minutes to wipe down your stovetop, backsplash, and countertops. This prevents grease from hardening and becoming difficult to remove.
A damp cloth with a little dish soap is usually all you need for daily cleanups.
- After cooking: Make it a habit to clean up immediately.
- Stovetop and backsplash: These areas catch the most grease.
- Countertops: Wipe them down to catch any stray splatters.
- Quick and easy: This takes only a few minutes.
Using Your Range Hood
Always use your range hood when cooking, especially when frying or sautéing. This fan system captures airborne grease particles before they can settle on your kitchen surfaces. Make sure your range hood filters are clean, as dirty filters are less effective at trapping grease.
- Turn it on: Always activate your range hood before you start cooking.
- Capture grease: It pulls greasy air away from your kitchen.
- Clean filters: Dirty filters reduce effectiveness.
- Reduce buildup: This is one of the best ways to prevent grease accumulation.
Covering Foods
Using lids on pots and pans while cooking can significantly reduce splattering. This not only keeps your stovetop cleaner but also minimizes the amount of grease that becomes airborne and settles on other surfaces. It’s a simple step that makes a big difference.
- Lids are your friends: Use them whenever possible.
- Reduces splatters: Keeps your cooking area much cleaner.
- Less airborne grease: Minimizes the spread of grease particles.
Dealing with Grease Traps
For sinks and drains, especially in commercial kitchens but also relevant in some homes, grease traps are important. These devices catch grease and food scraps before they enter the main sewer system, preventing clogs. Regular cleaning and maintenance of grease traps are essential to keep your plumbing clear and prevent odors.
In a home kitchen, this means being mindful of what goes down the drain.
- Avoid pouring grease down the drain: Let it cool and dispose of it in the trash.
- Use drain strainers: These catch food particles.
- Regular flushing: Occasionally flush drains with hot water.
Frequently Asked Questions
Question: How often should I clean kitchen grease?
Answer: It’s best to wipe down your stovetop and countertops daily after cooking. A more thorough cleaning of cabinets and backsplashes can be done weekly or as needed, depending on your cooking habits.
Question: Can I use the same cleaner on all kitchen surfaces?
Answer: No, it’s important to use cleaners appropriate for each surface. For example, acidic cleaners can damage granite, and abrasive cleaners can scratch stainless steel. Always check the product label and test in a small area.
Question: What is the best natural degreaser?
Answer: White vinegar and baking soda are two of the most effective natural degreasers. Vinegar’s acidity cuts through grease, while baking soda acts as a gentle abrasive and absorbent. Lemon juice is also good for lighter grease.
Question: How do I clean grease from a painted wall?
Answer: Use a mild solution of dish soap and warm water. Dampen a soft cloth, wring it out well, and gently wipe the greasy area. For tougher spots, a diluted vinegar solution can be used, but always test it on a hidden area first to avoid damaging the paint.
Question: My range hood filters are very greasy. What should I do?
Answer: Many metal range hood filters are dishwasher safe. If yours are, run them through a hot cycle. Alternatively, soak them in hot, soapy water with a degreaser, then scrub them with a brush and rinse thoroughly.
Make sure they are completely dry before putting them back.
Summary
Keeping your kitchen free from grease is totally doable. By using simple cleaners like dish soap, vinegar, or baking soda, and cleaning regularly after cooking, you can keep surfaces looking great. Remember to use the right method for each material and to always clean your range hood.
A little effort keeps your kitchen sparkling and safe.